AWS Certificate Manager makes it possible to request and manage SSL certificates without manually handling certificate files. When the certificate is attached to an Application Load Balancer, traffic can reach an EC2-hosted application over HTTPS.
In this guide, I create the load balancer security group, update the EC2 instance security group, request an ACM certificate, create a target group, configure an Application Load Balancer, redirect HTTP traffic to HTTPS, and verify DNS records.
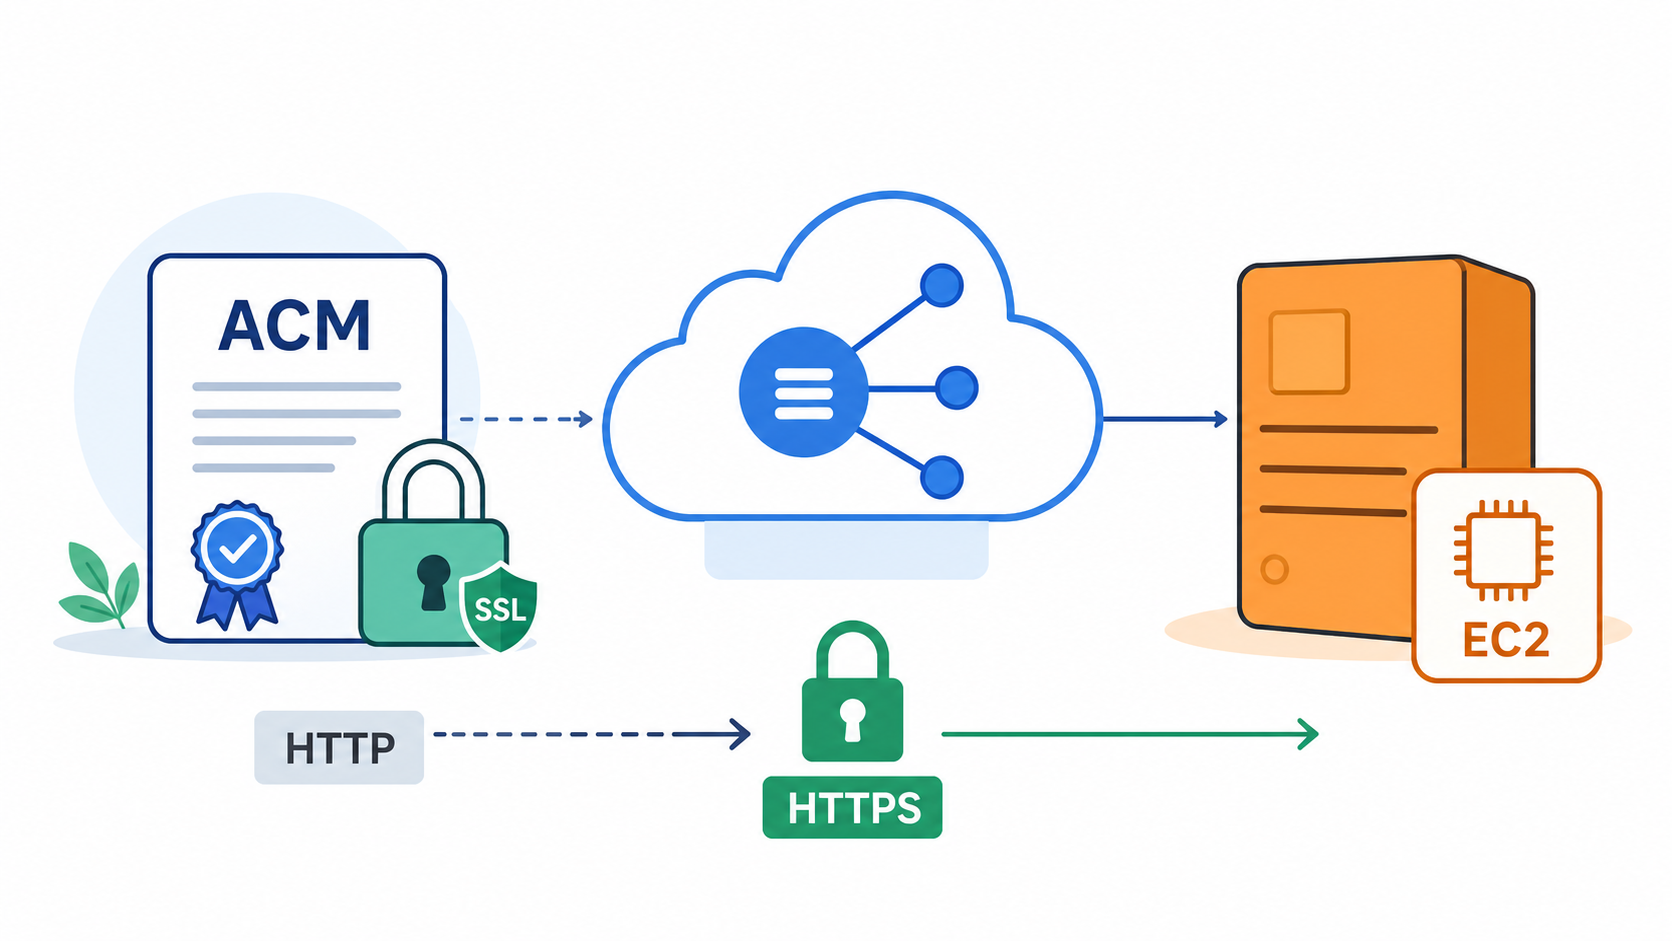
Table of contents
Open Table of contents
Creating a Security Group for the Load Balancer
The load balancer needs a security group that allows public web traffic. For a typical public site, allow HTTP on port 80 and HTTPS on port 443. Outbound traffic can remain open unless your environment has stricter networking rules.
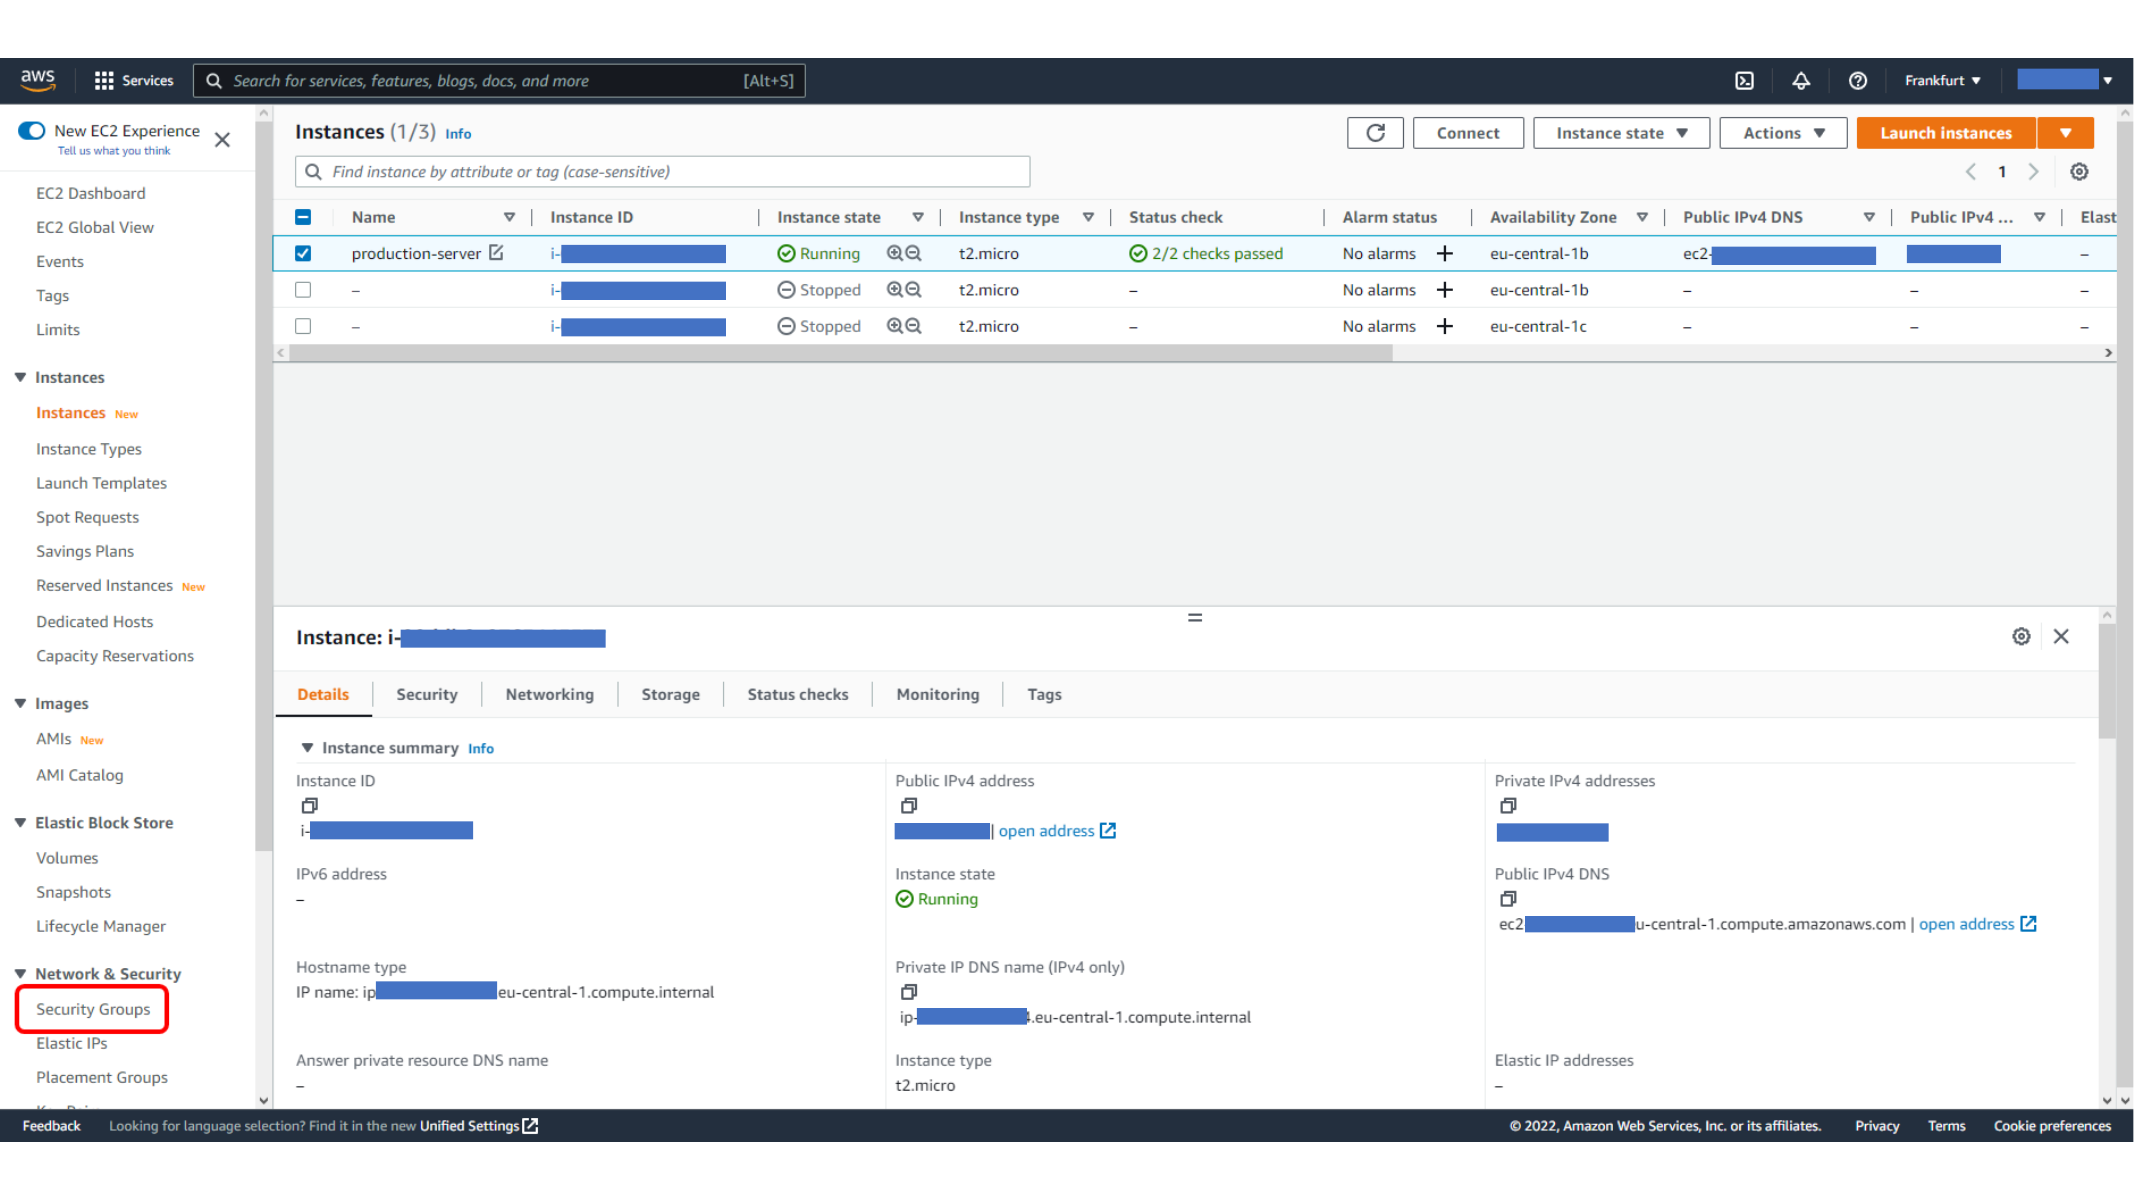
This screen shows Naming the load balancer security group.
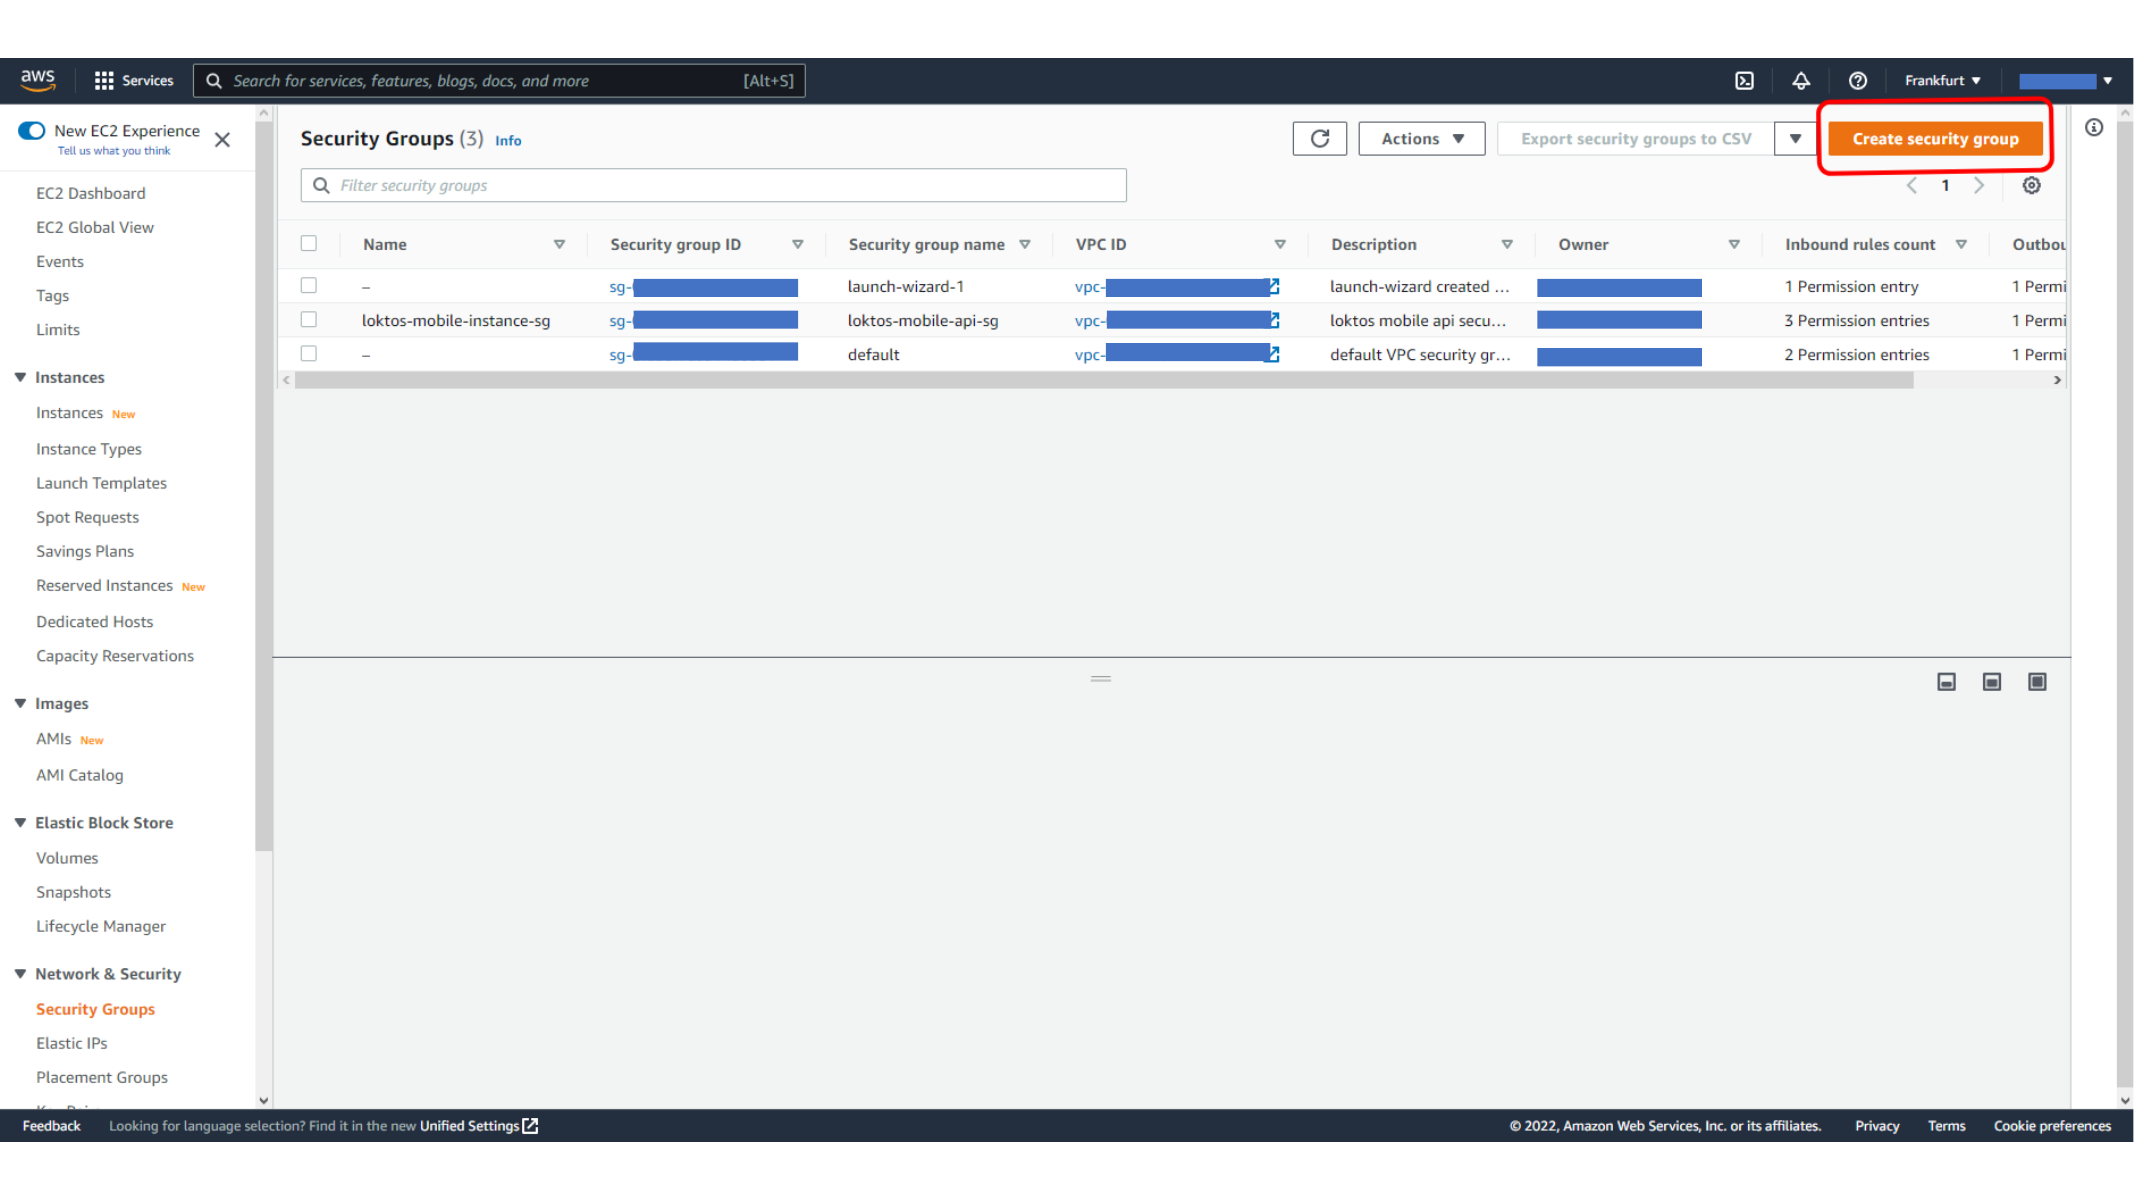
Here, we add HTTP and HTTPS inbound rules for the load balancer.
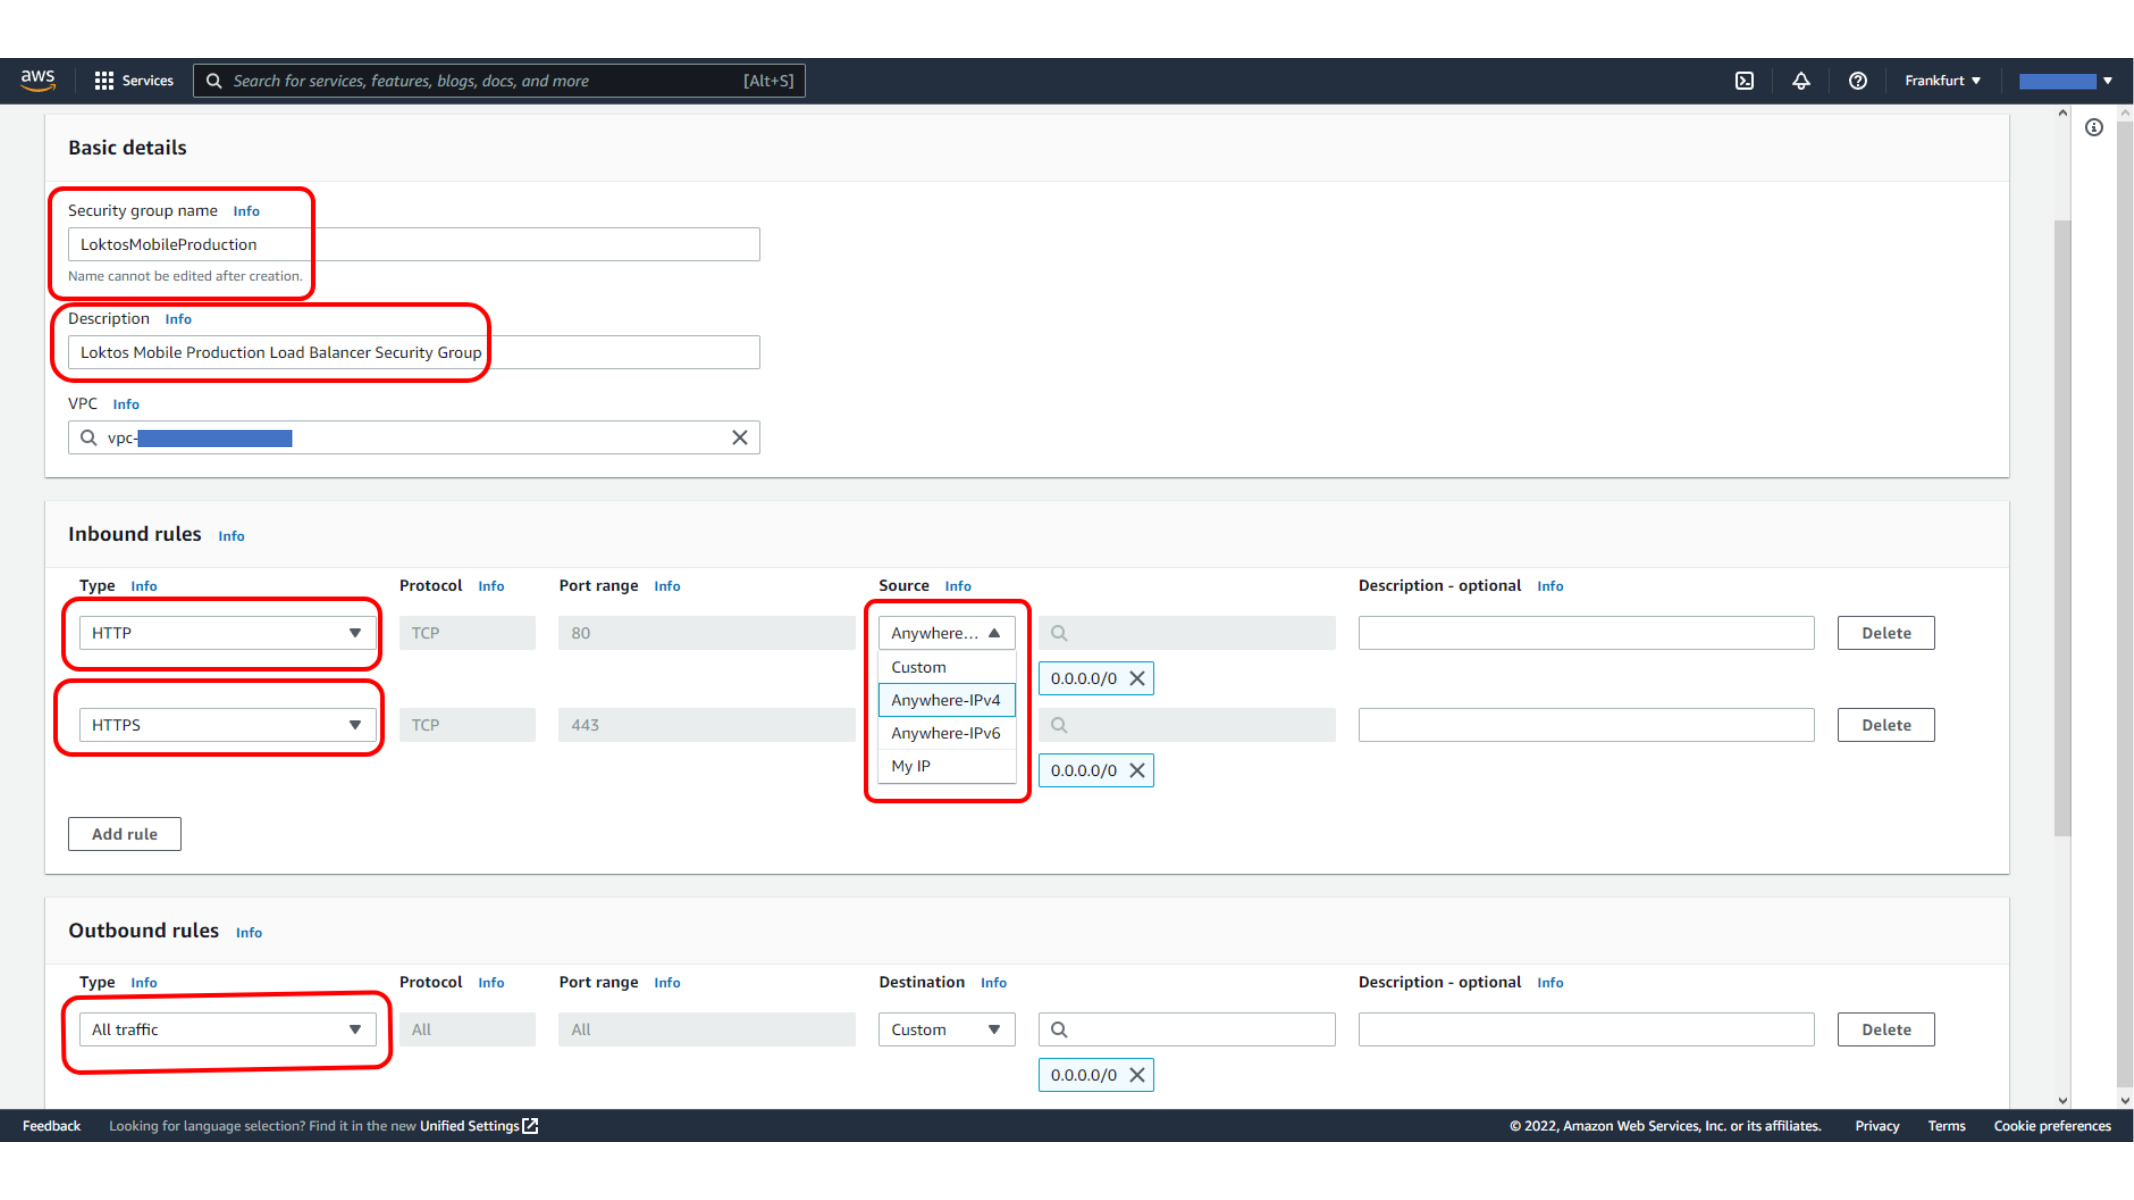
Here, we review load balancer security group rules.
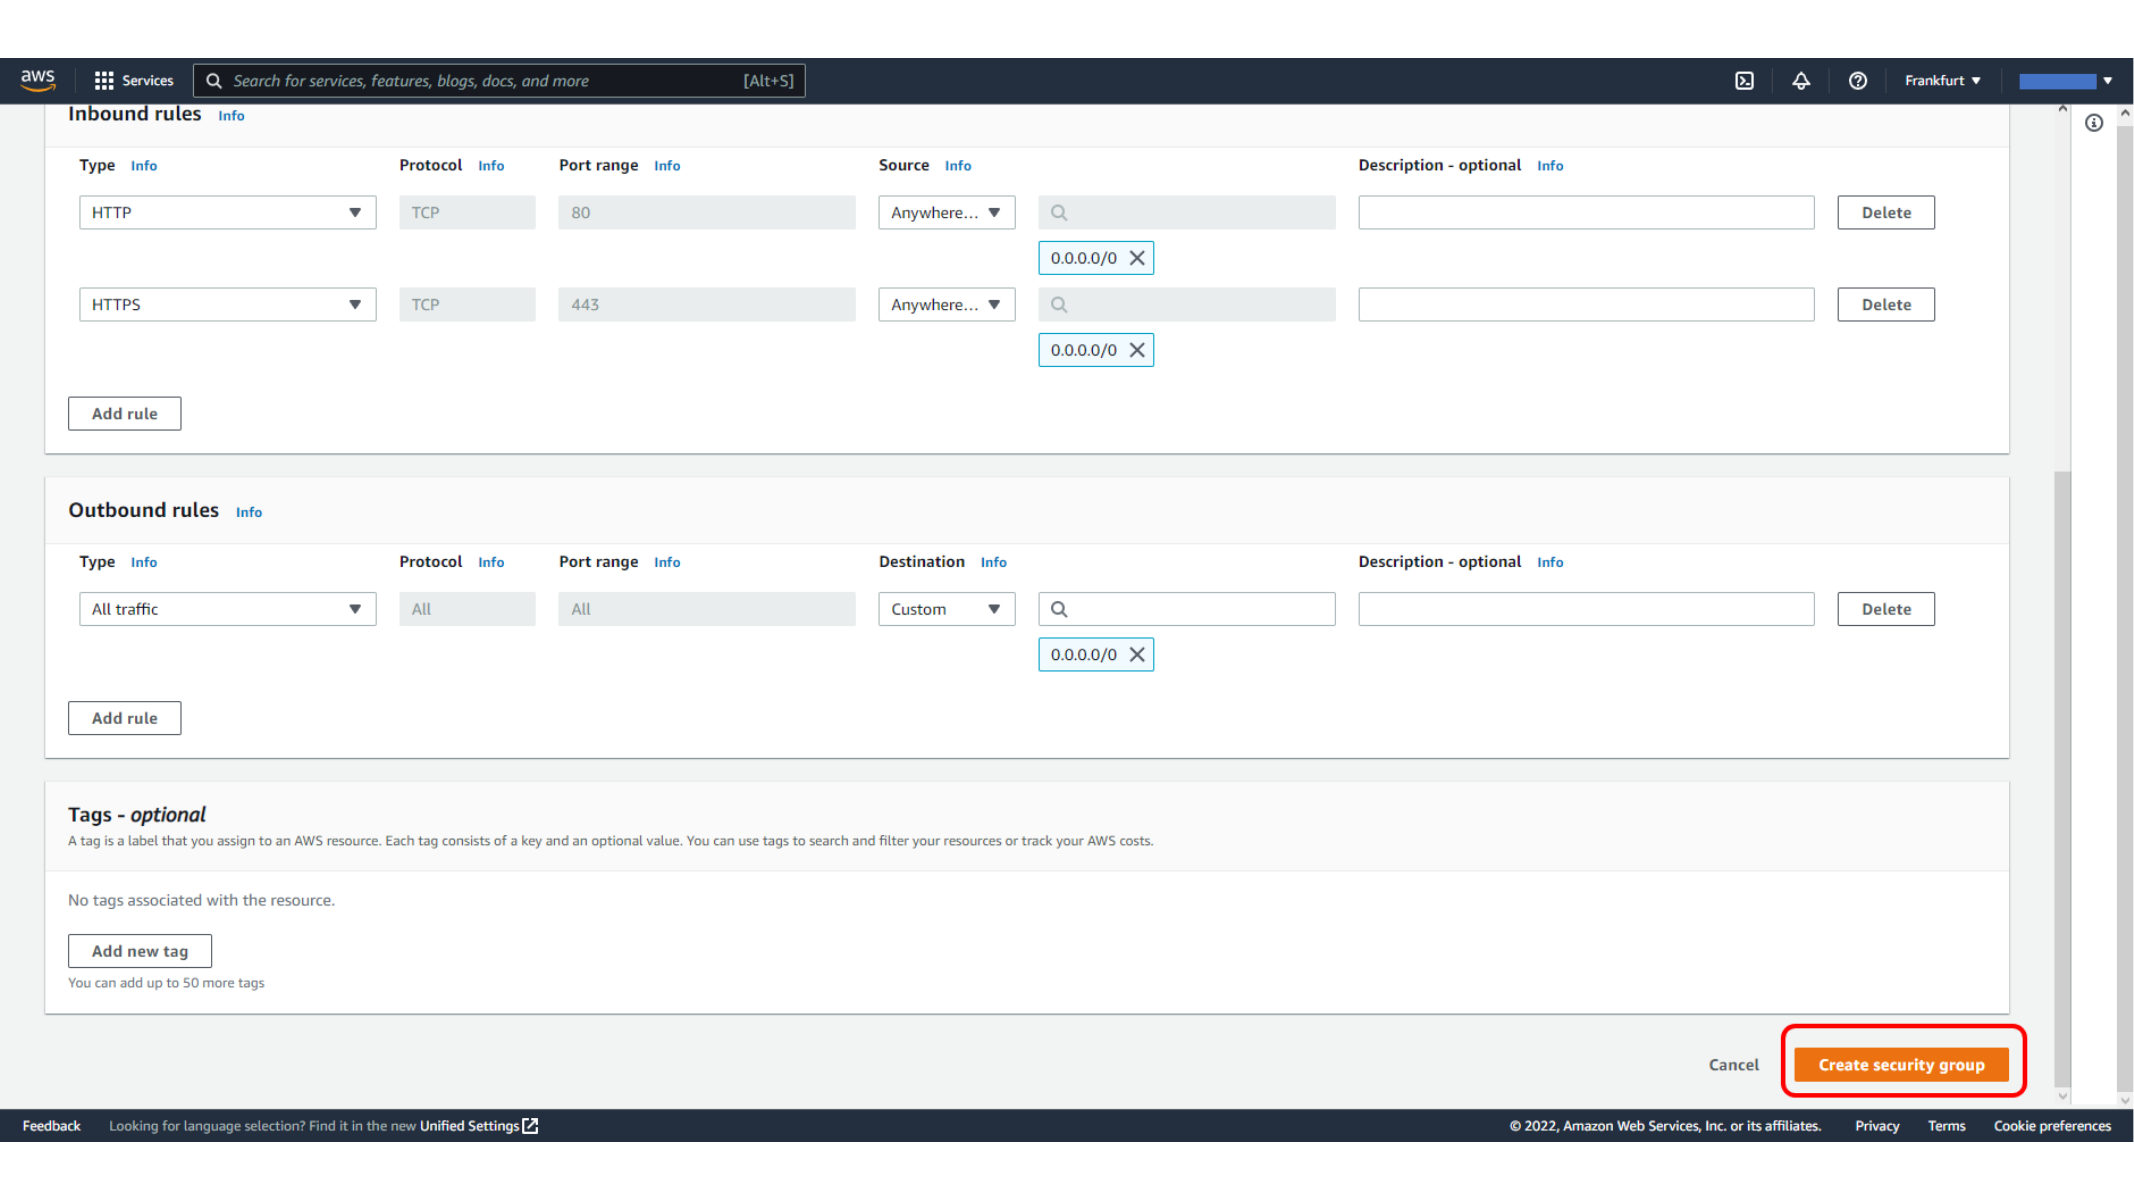
This screen shows Created security group for the Application Load Balancer.
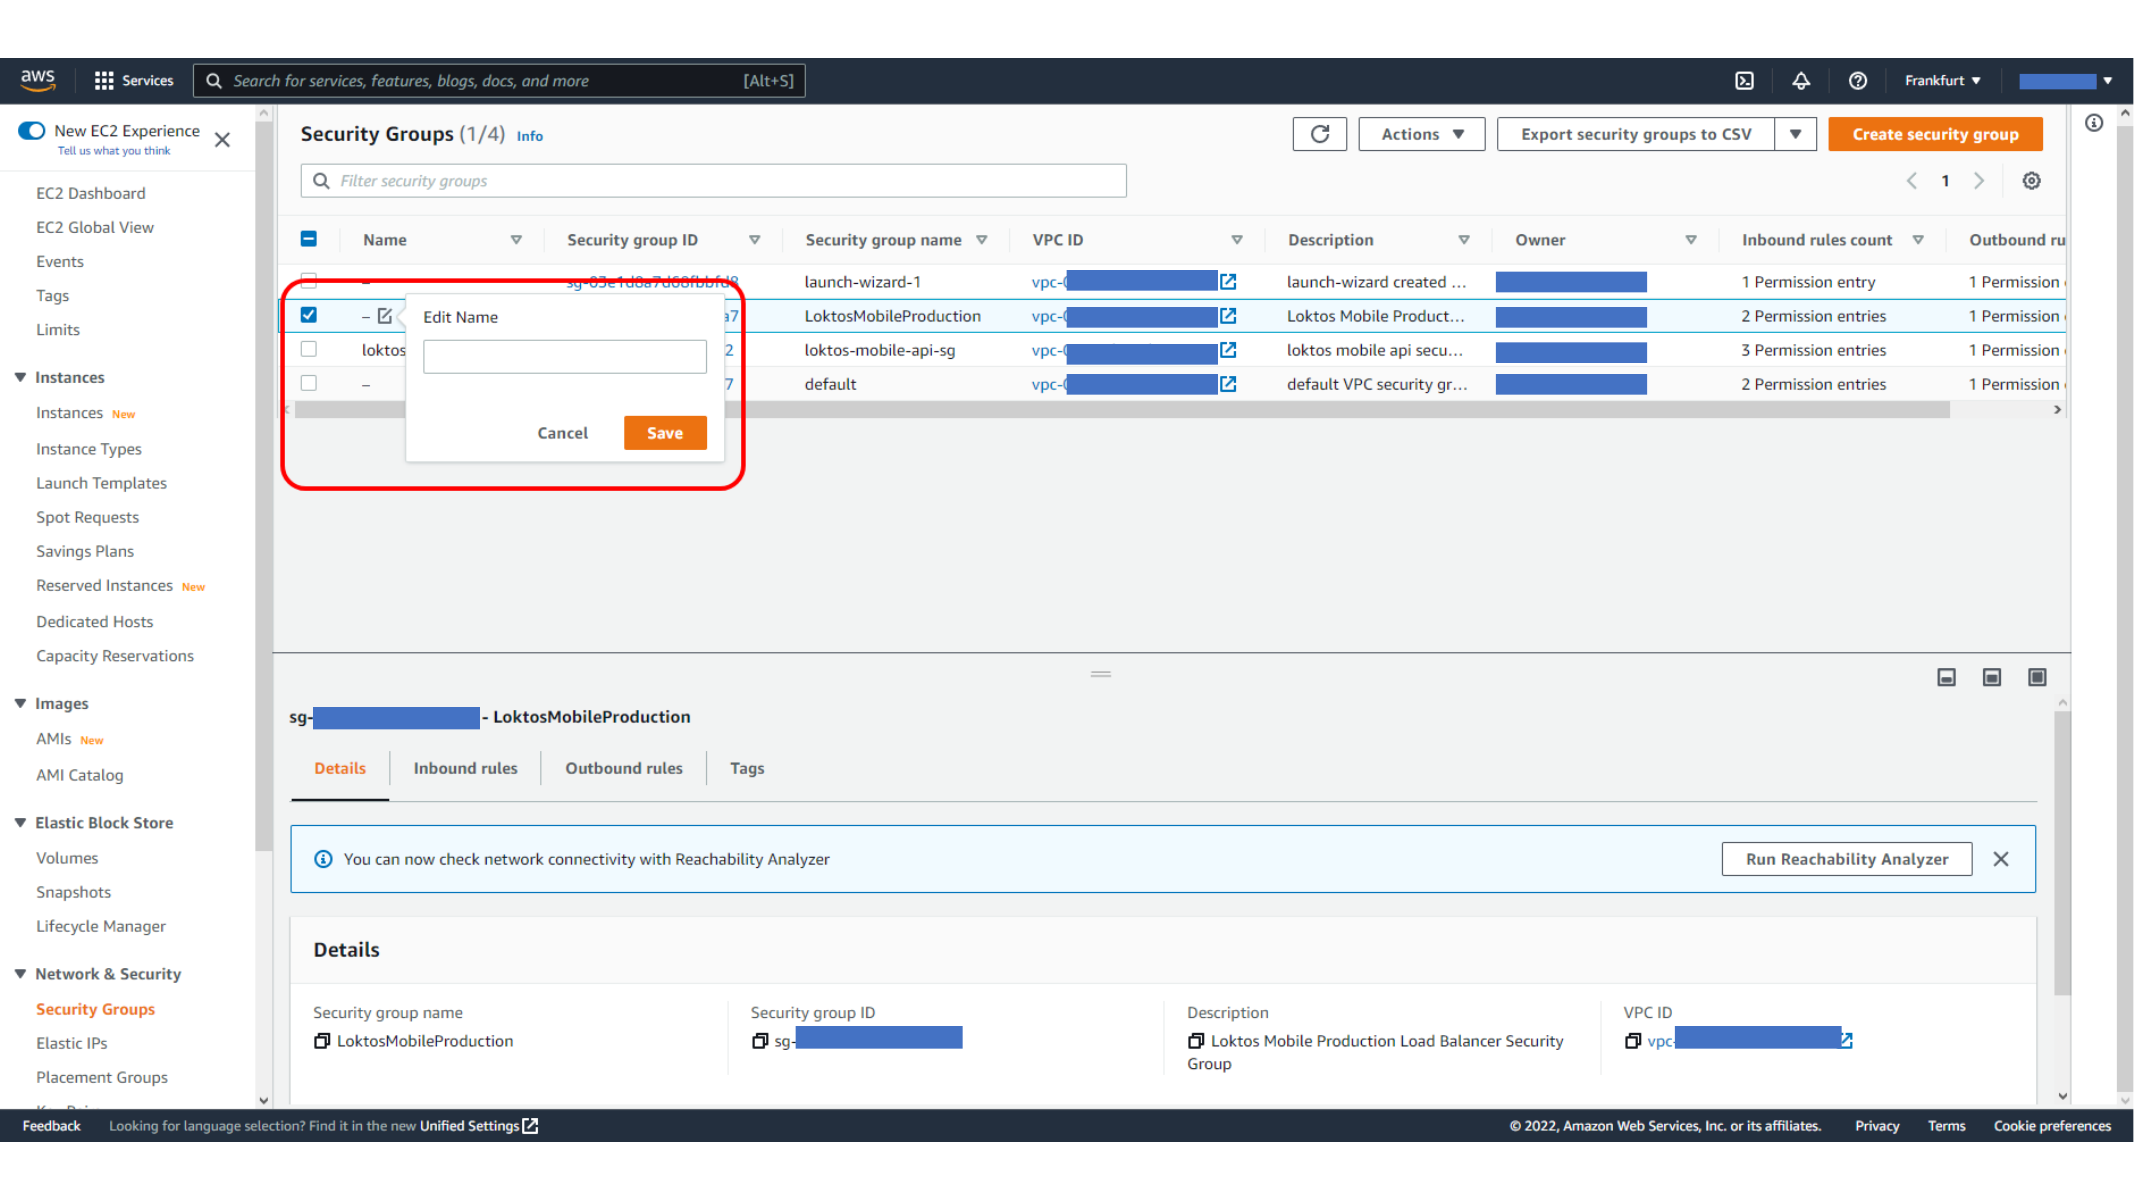
Updating the EC2 Instance Security Group
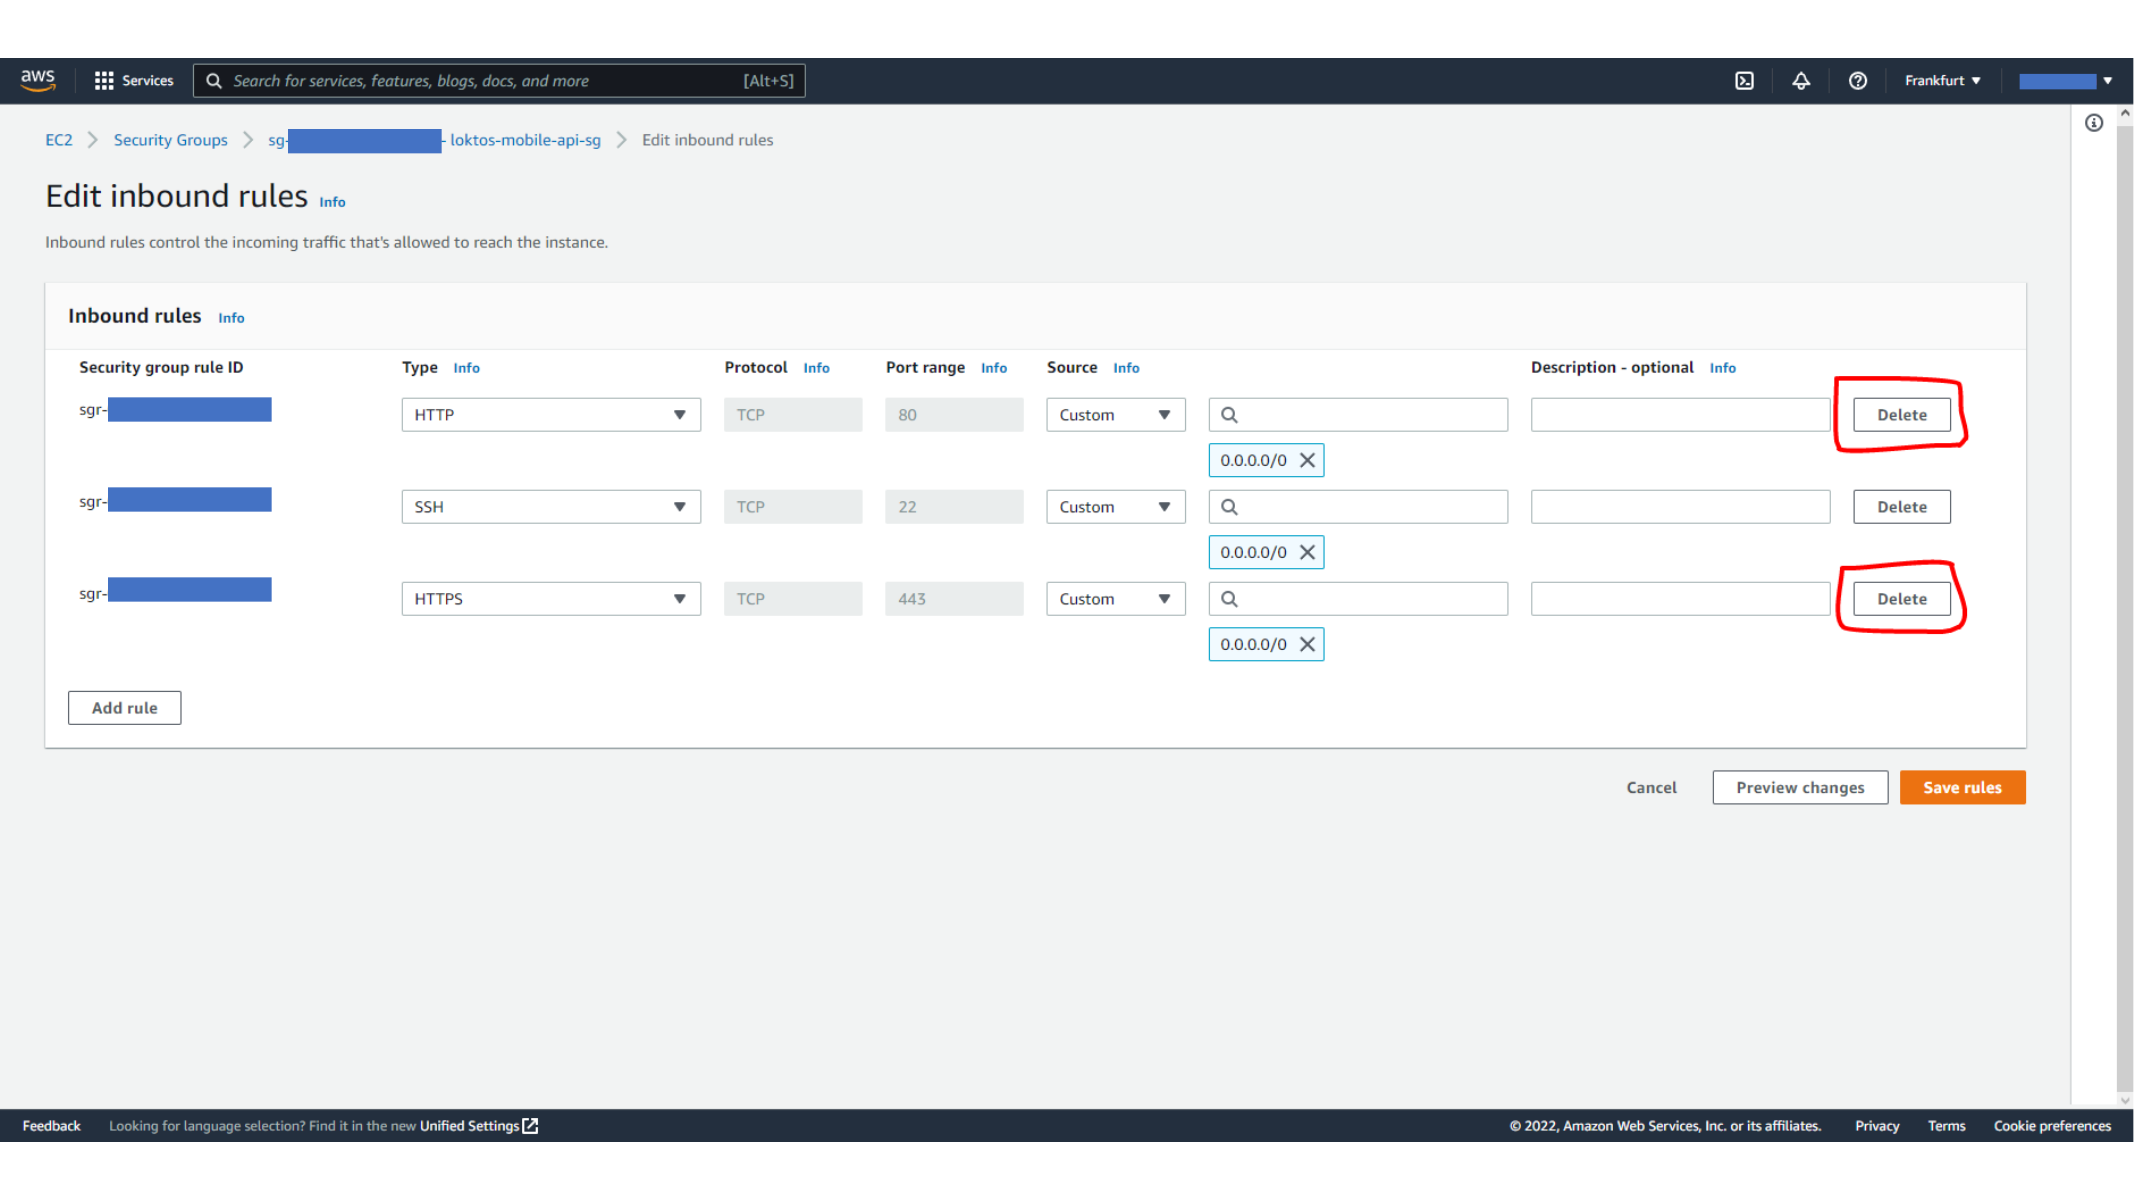
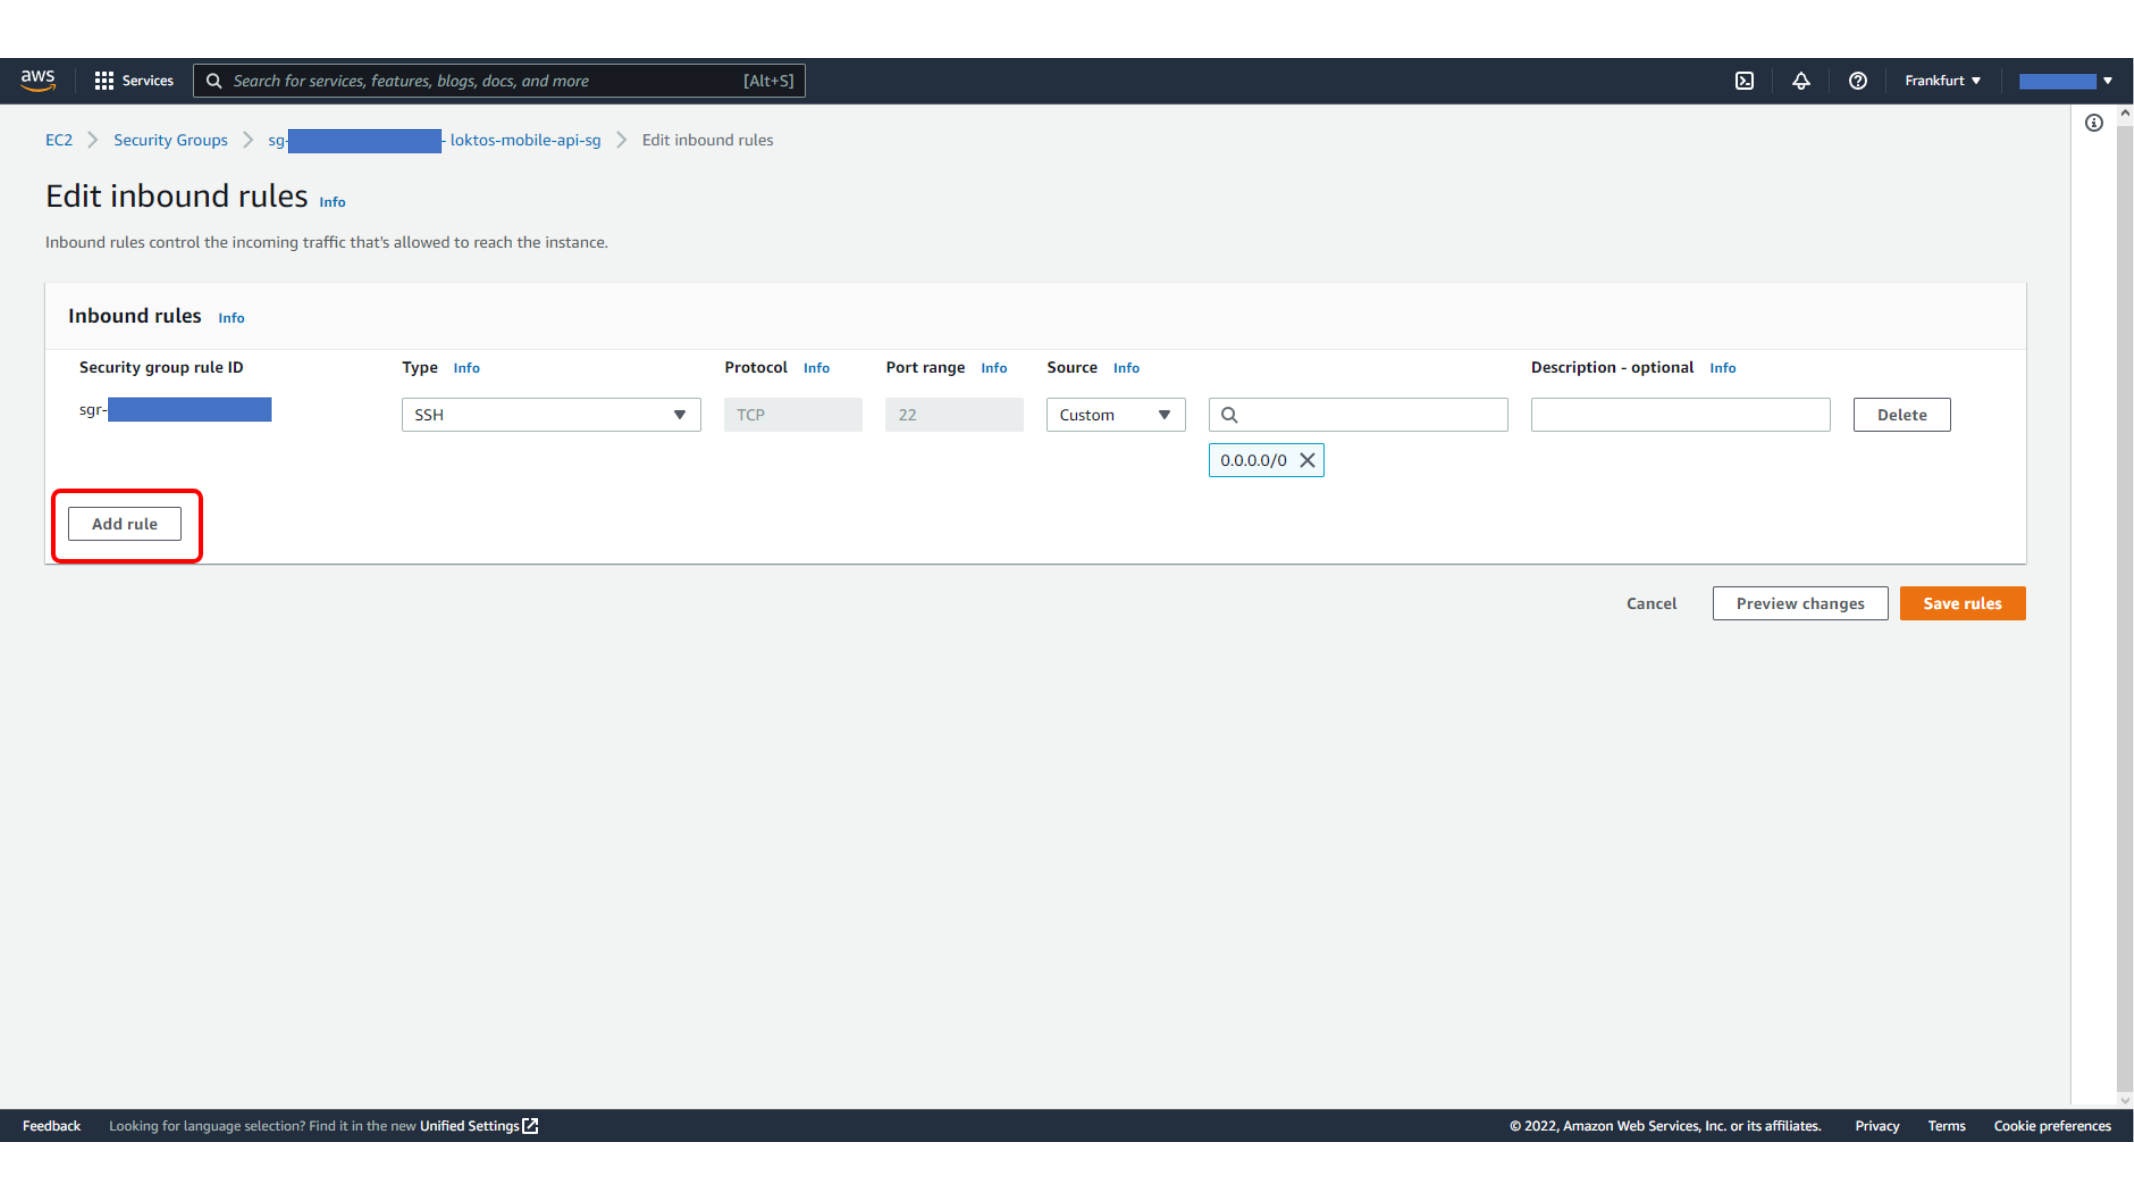
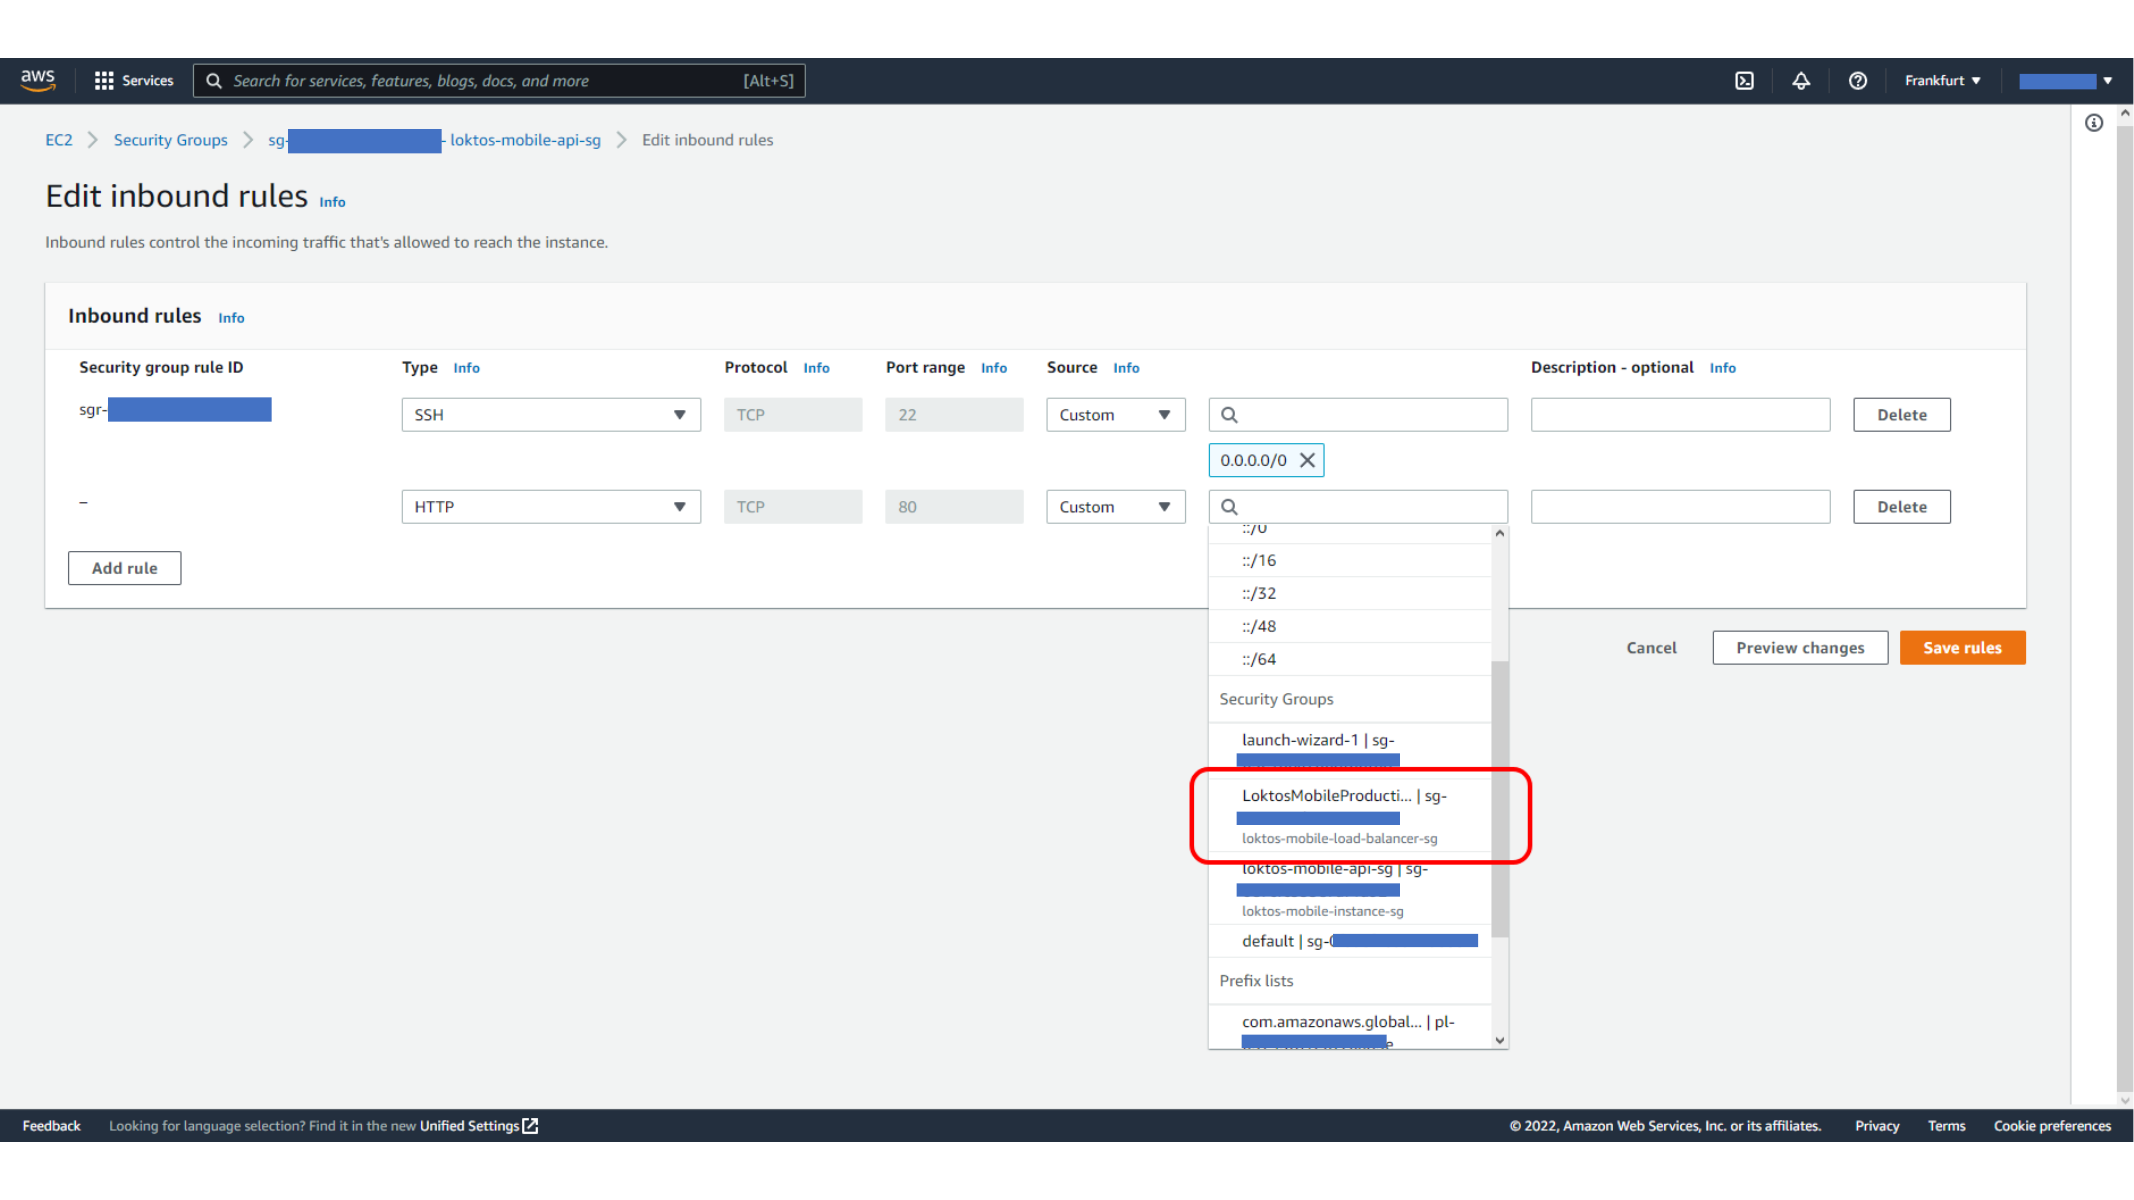
The EC2 instance should not need to accept public HTTP traffic directly if the load balancer is in front of it. A cleaner approach is to allow the application port from the load balancer security group as the source. SSH can remain limited to your own trusted IP address.
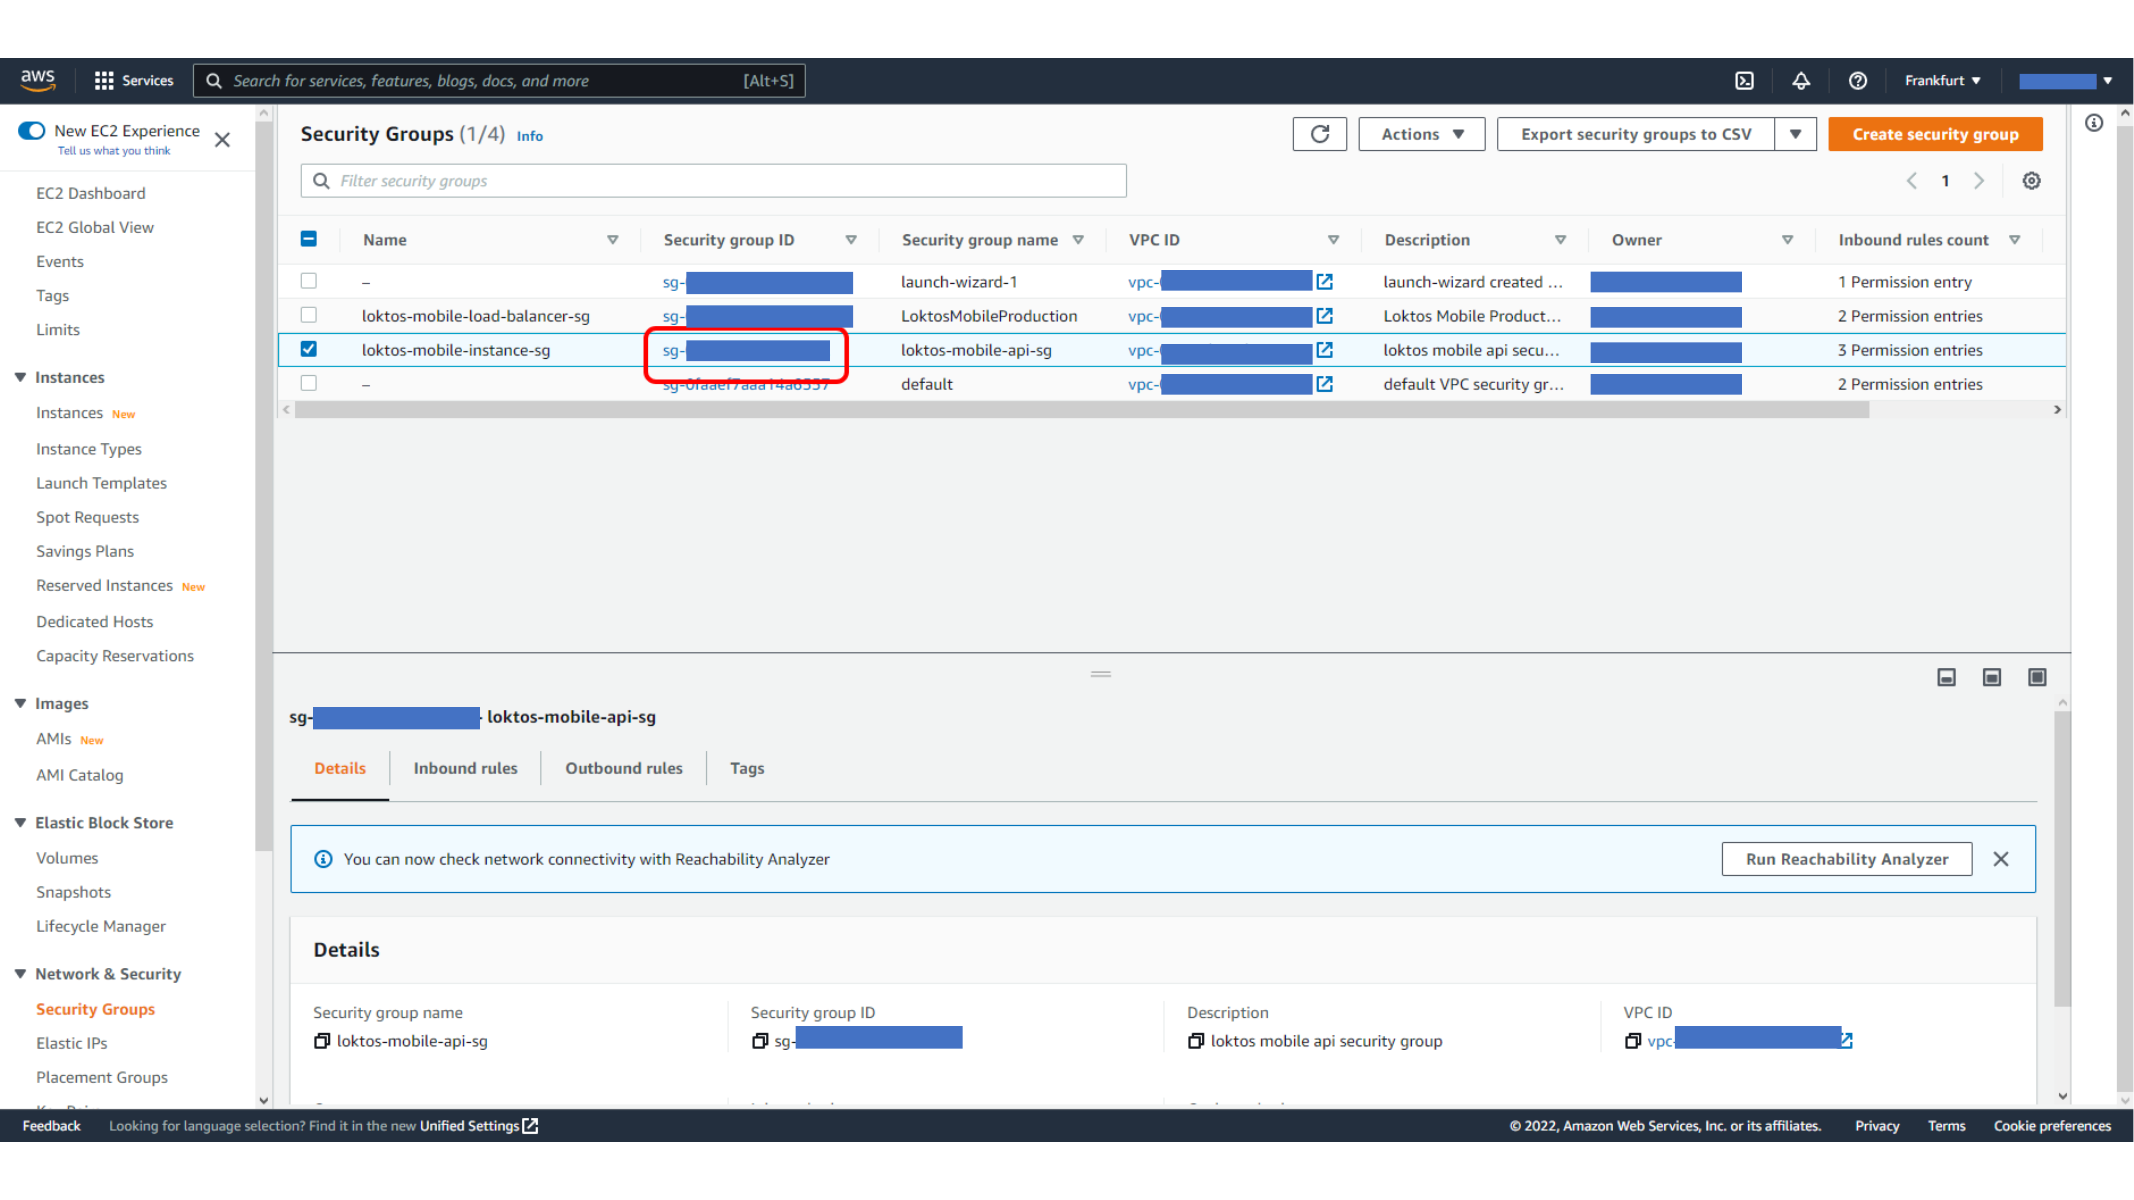
Here, we edit inbound rules for the EC2 instance security group.
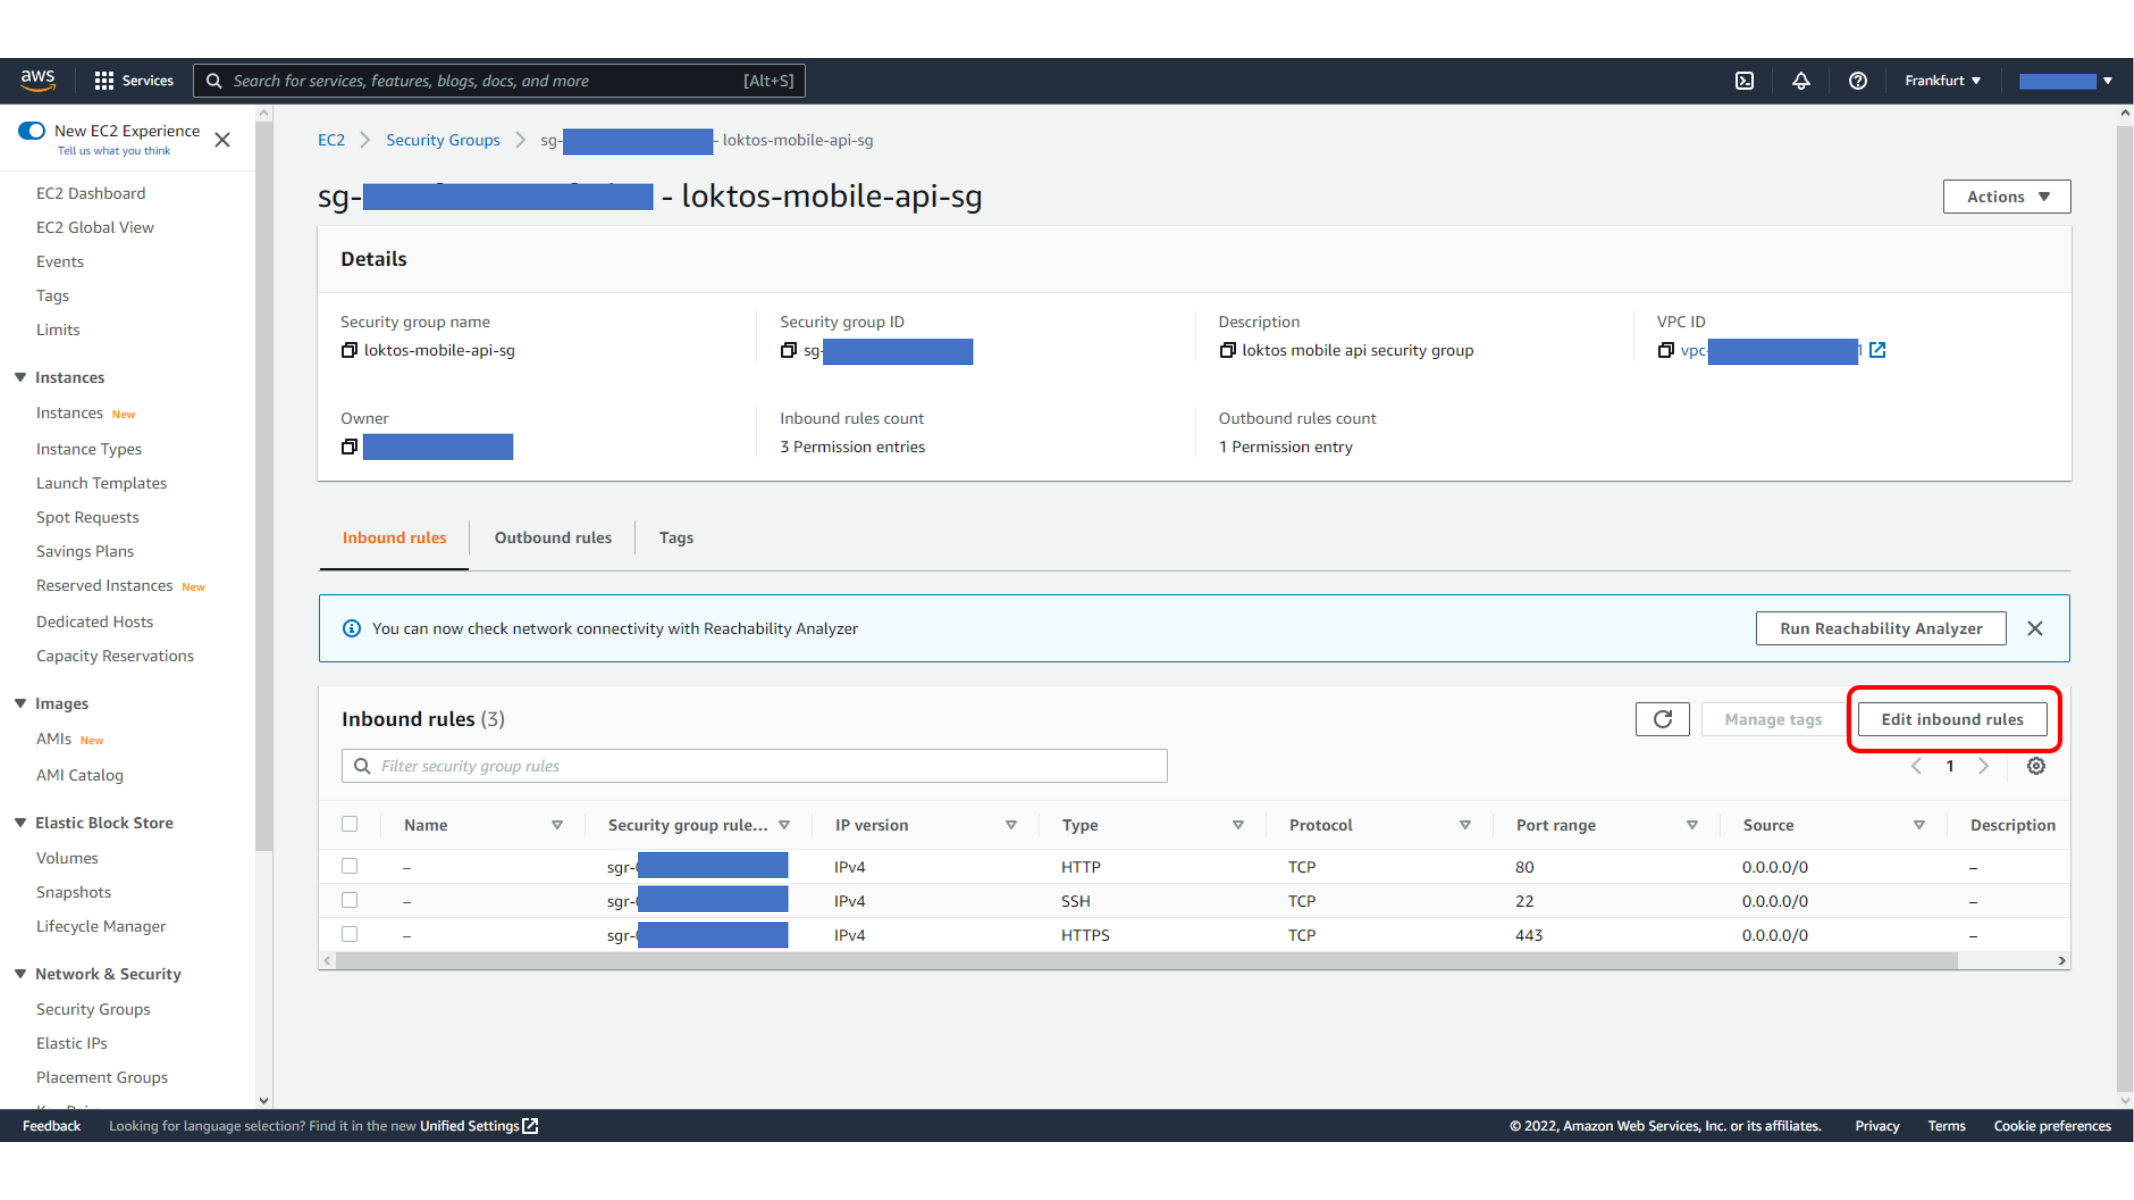
This screen shows Removing unnecessary public inbound rules.
This screen shows Allowing HTTP traffic from the load balancer security group.
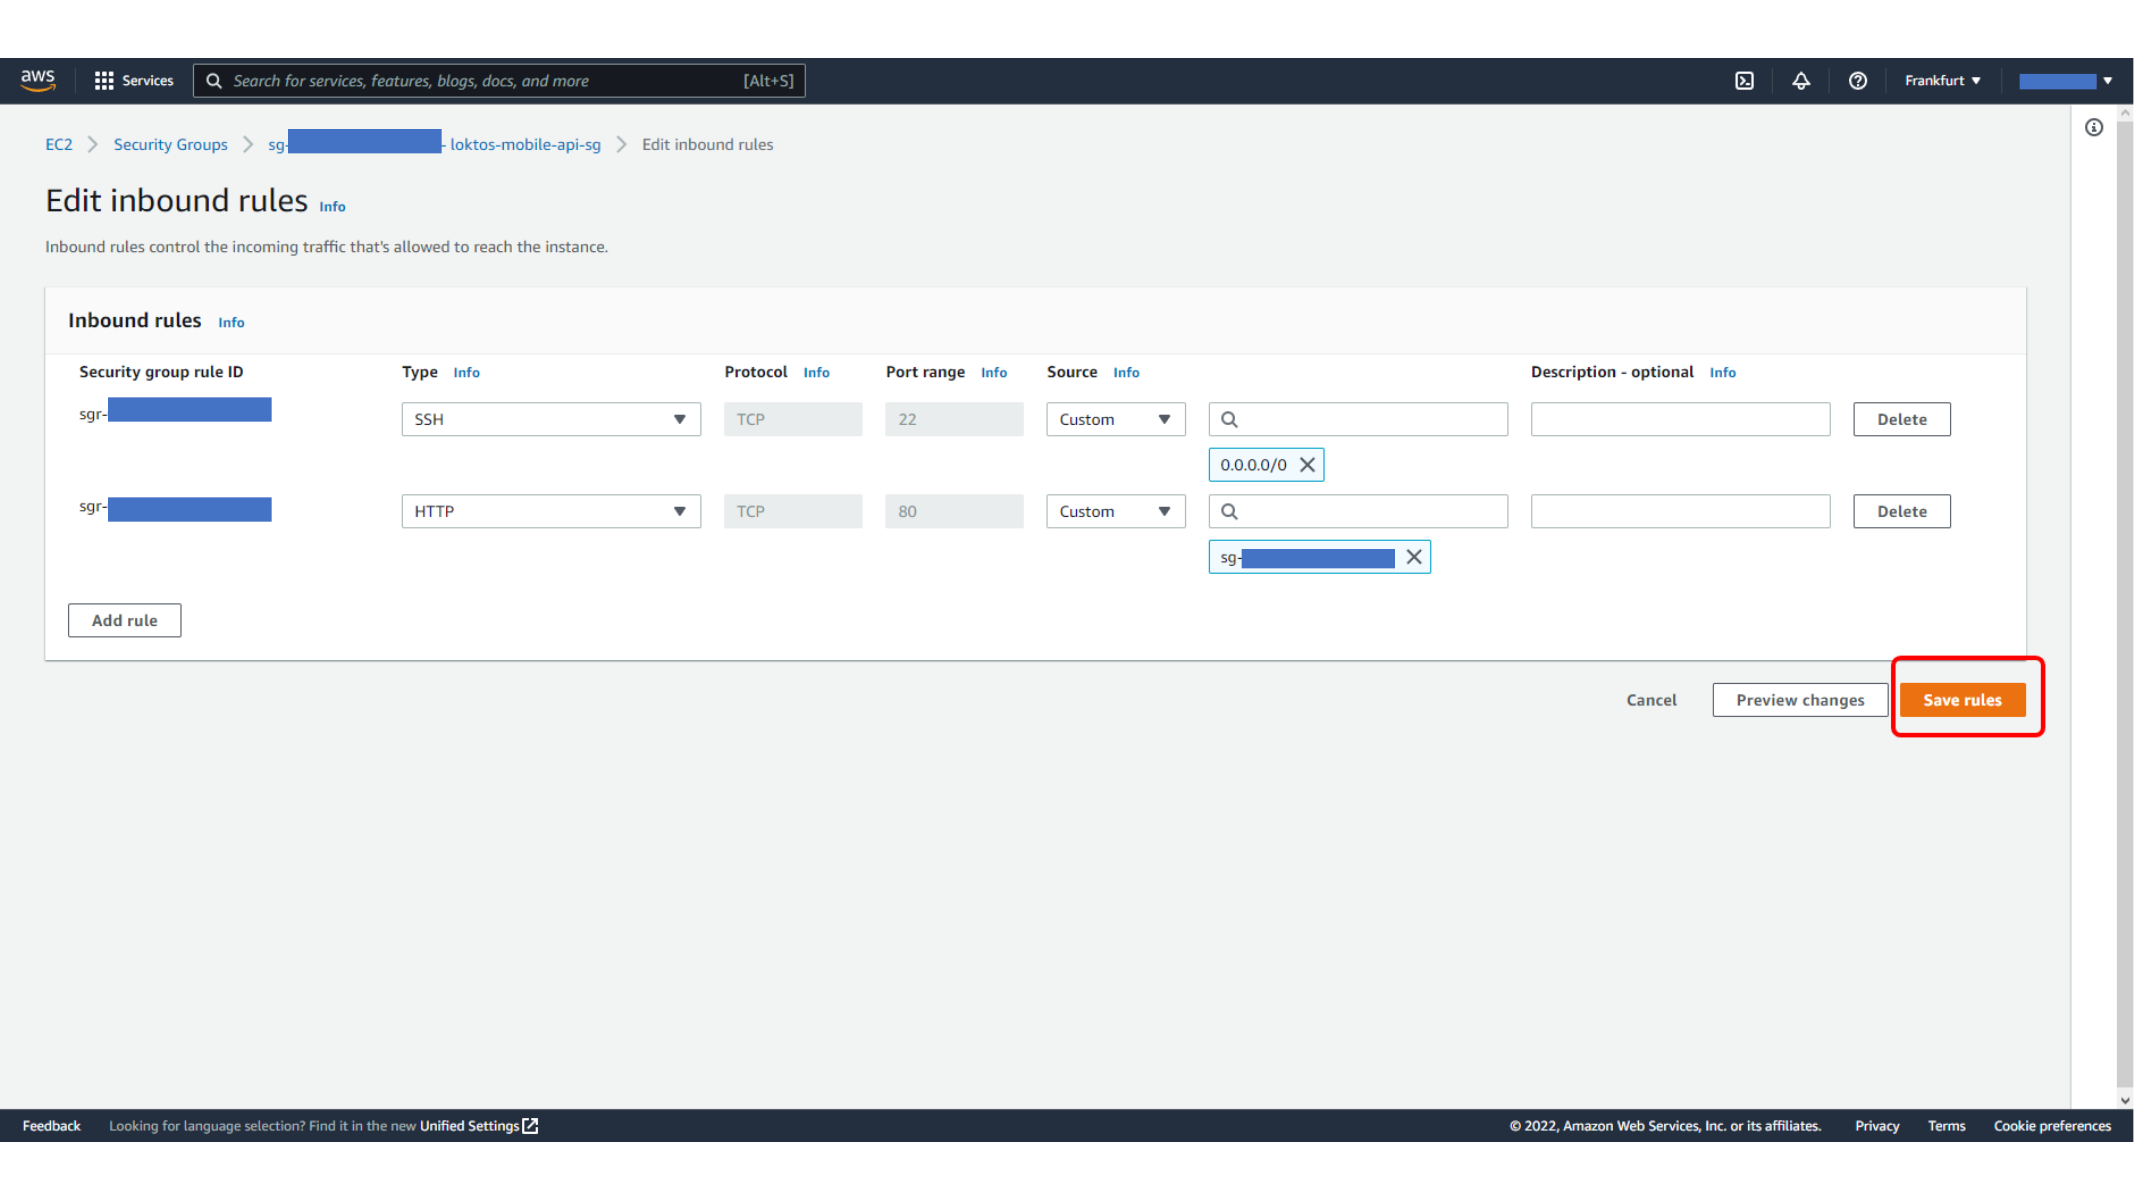
Here, we save the EC2 security group inbound rule changes.
This screen shows Updated EC2 security group rules.
Requesting an SSL Certificate with ACM
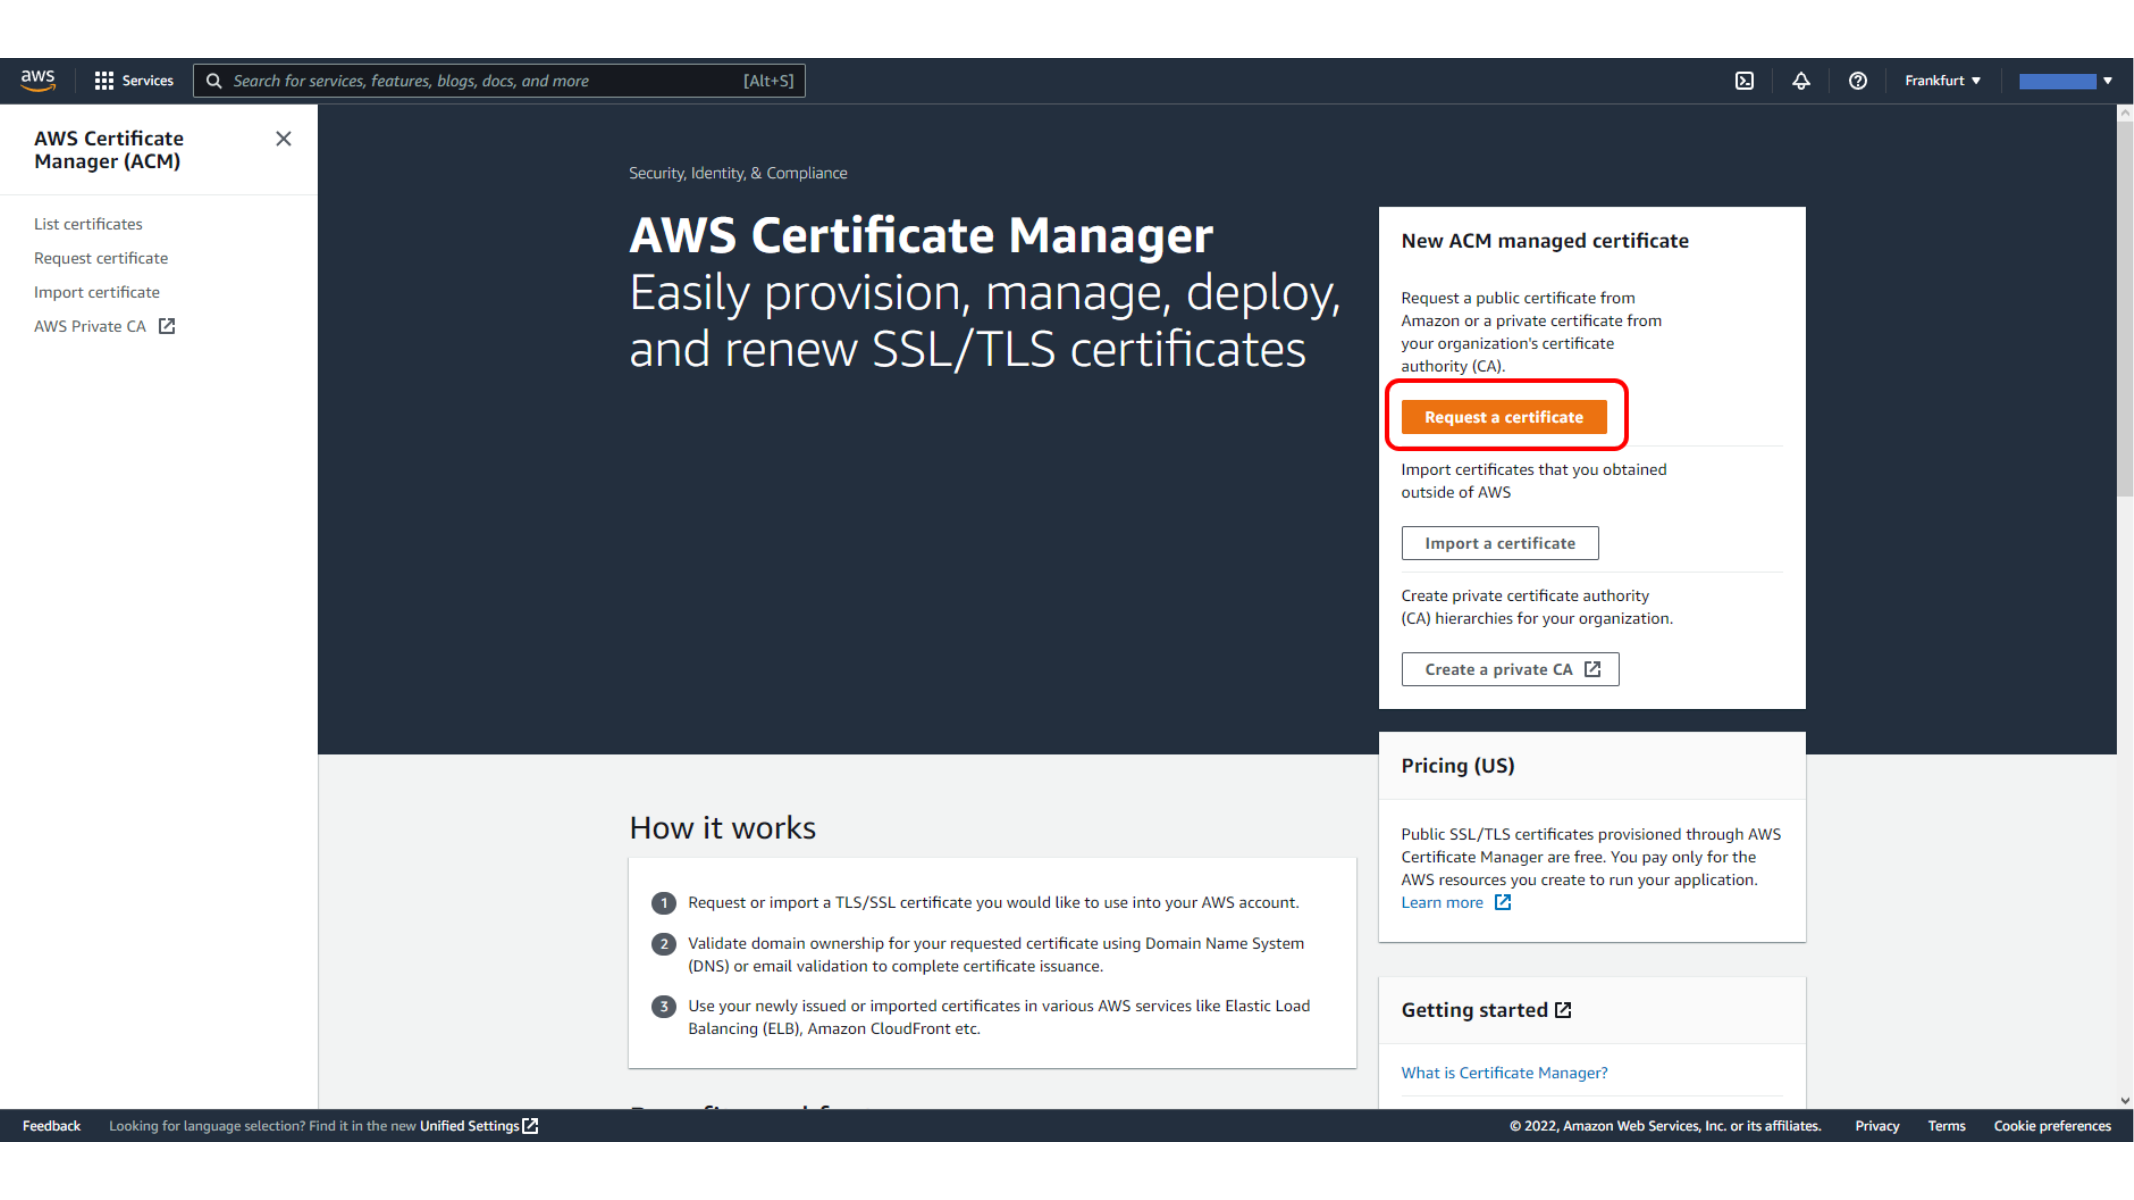
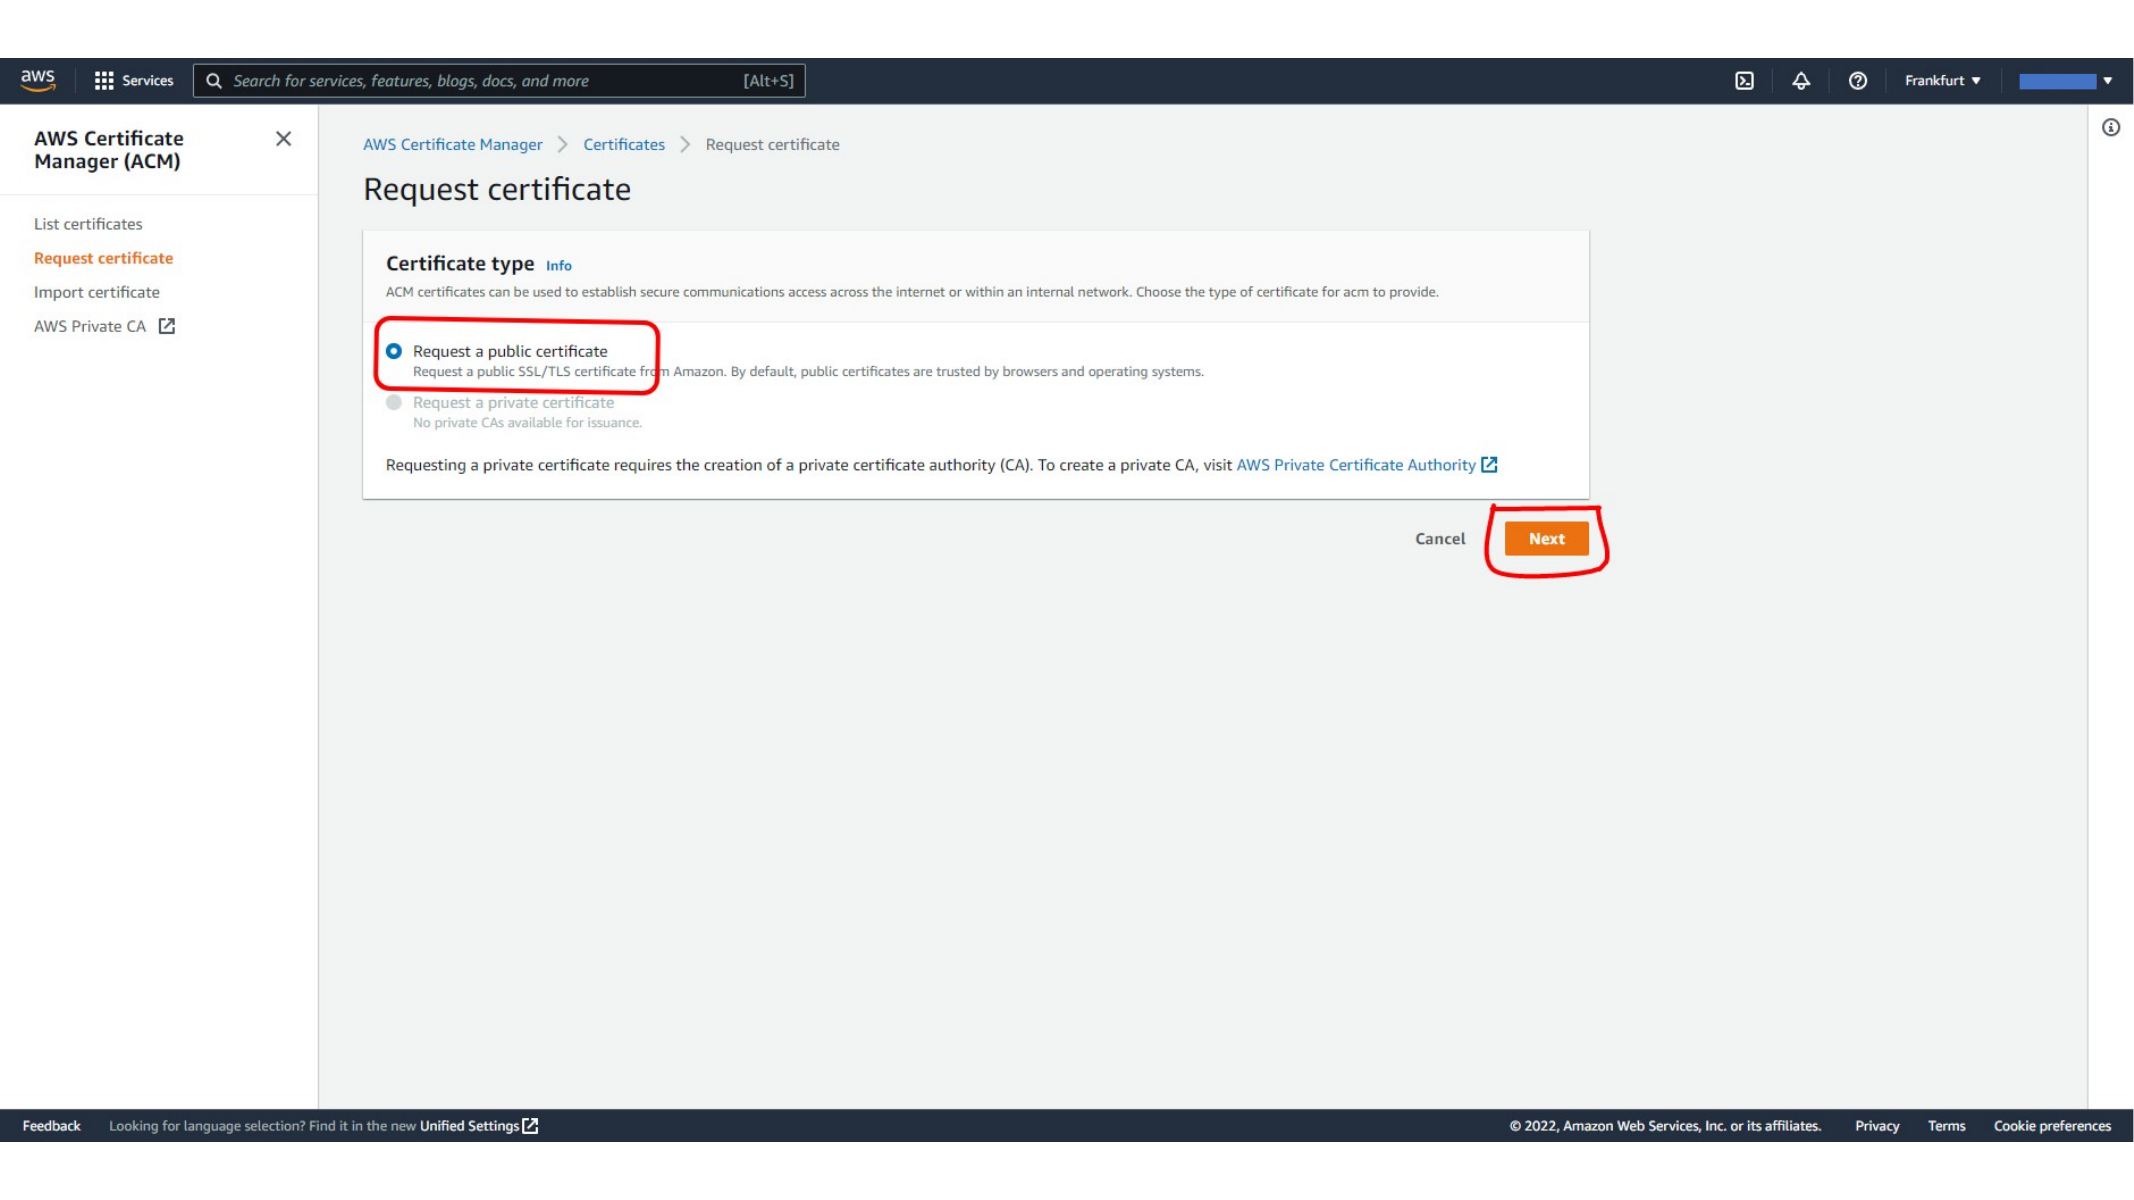
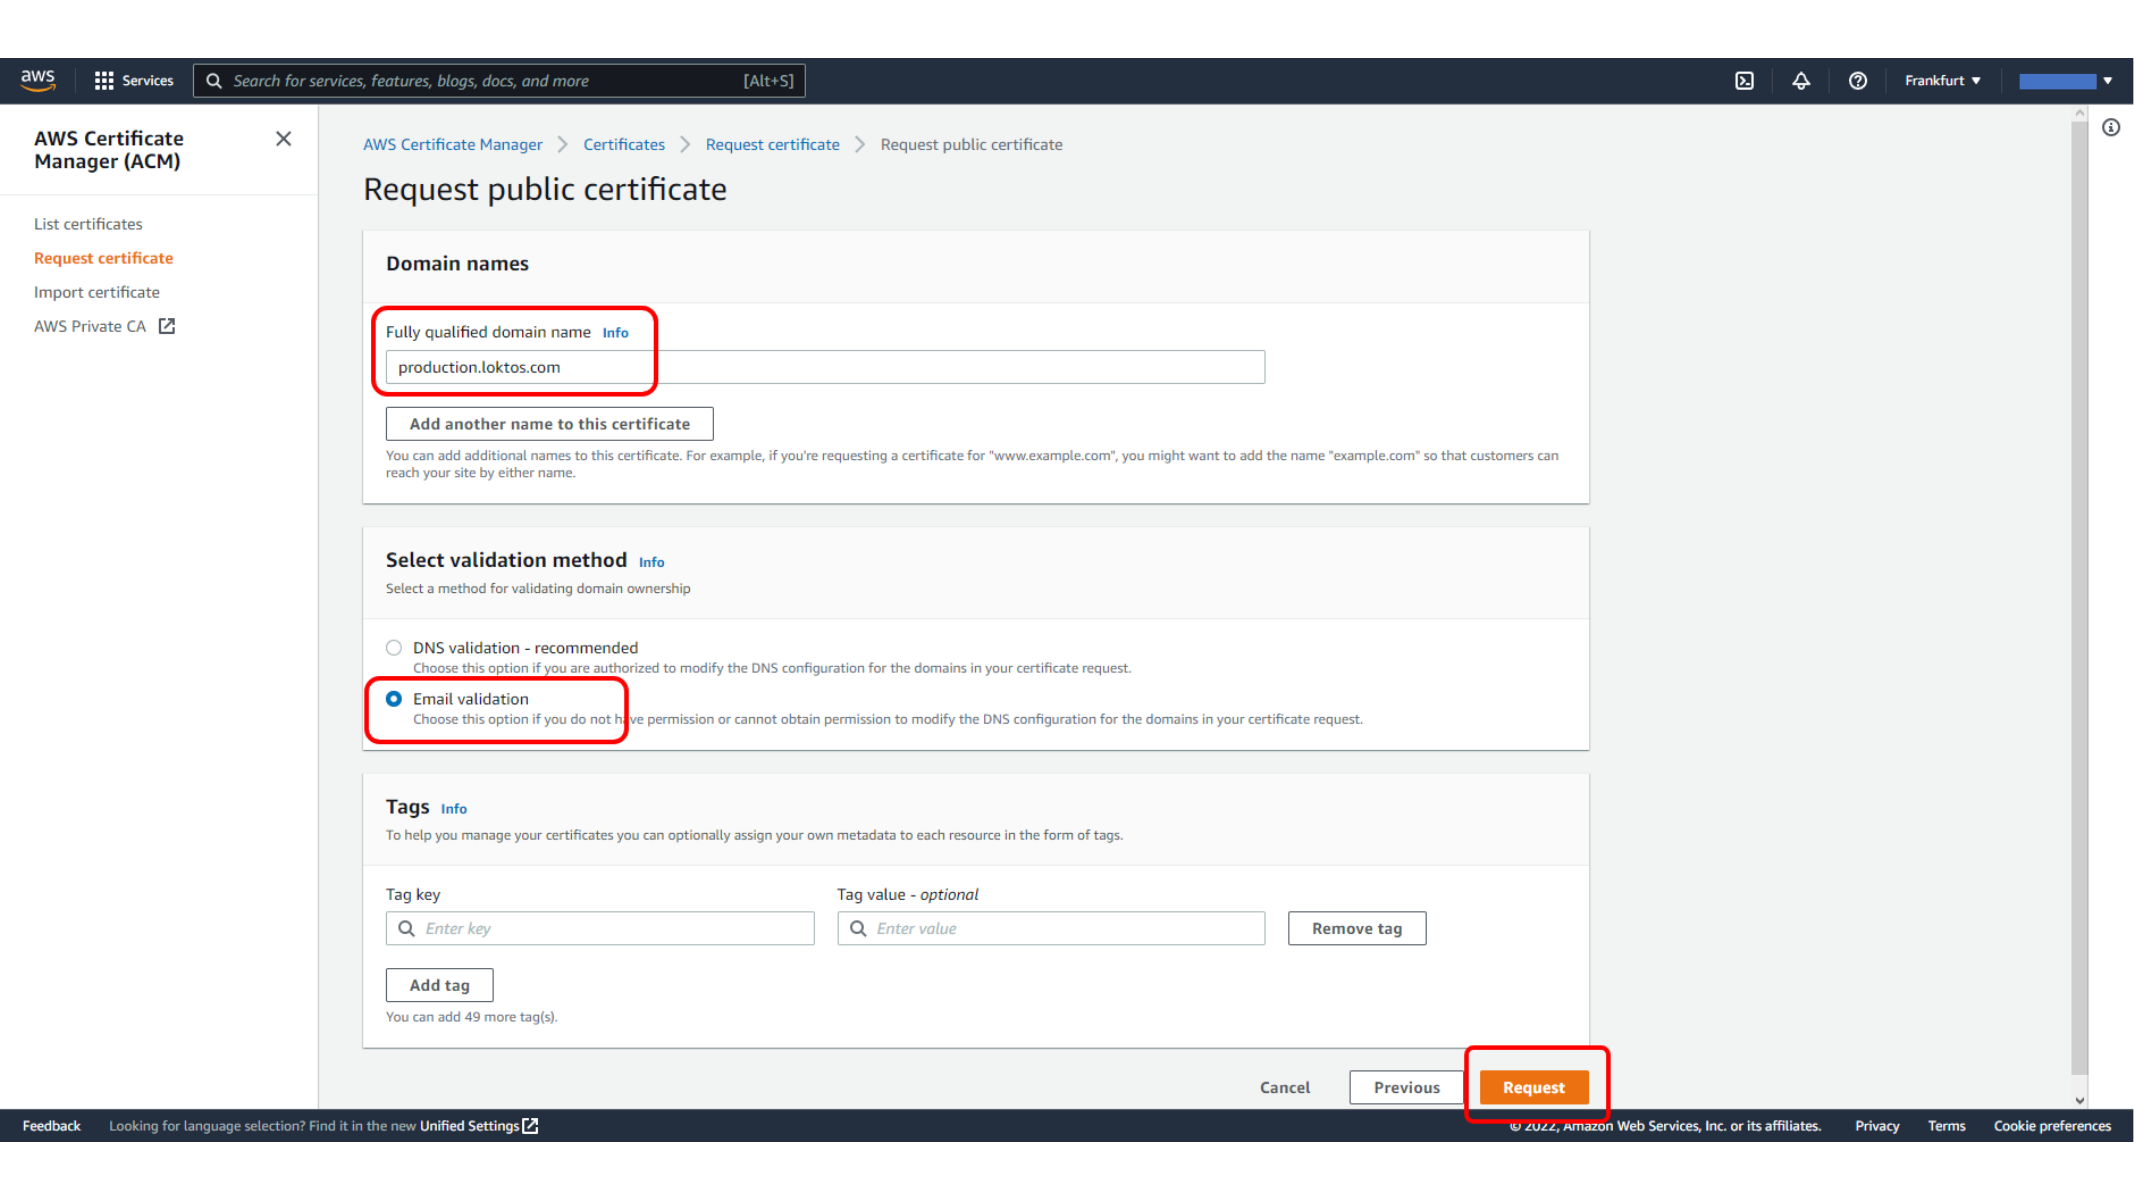
Open AWS Certificate Manager and request a public certificate for your domain. DNS validation is usually the easiest option because ACM provides a DNS record that proves domain ownership.
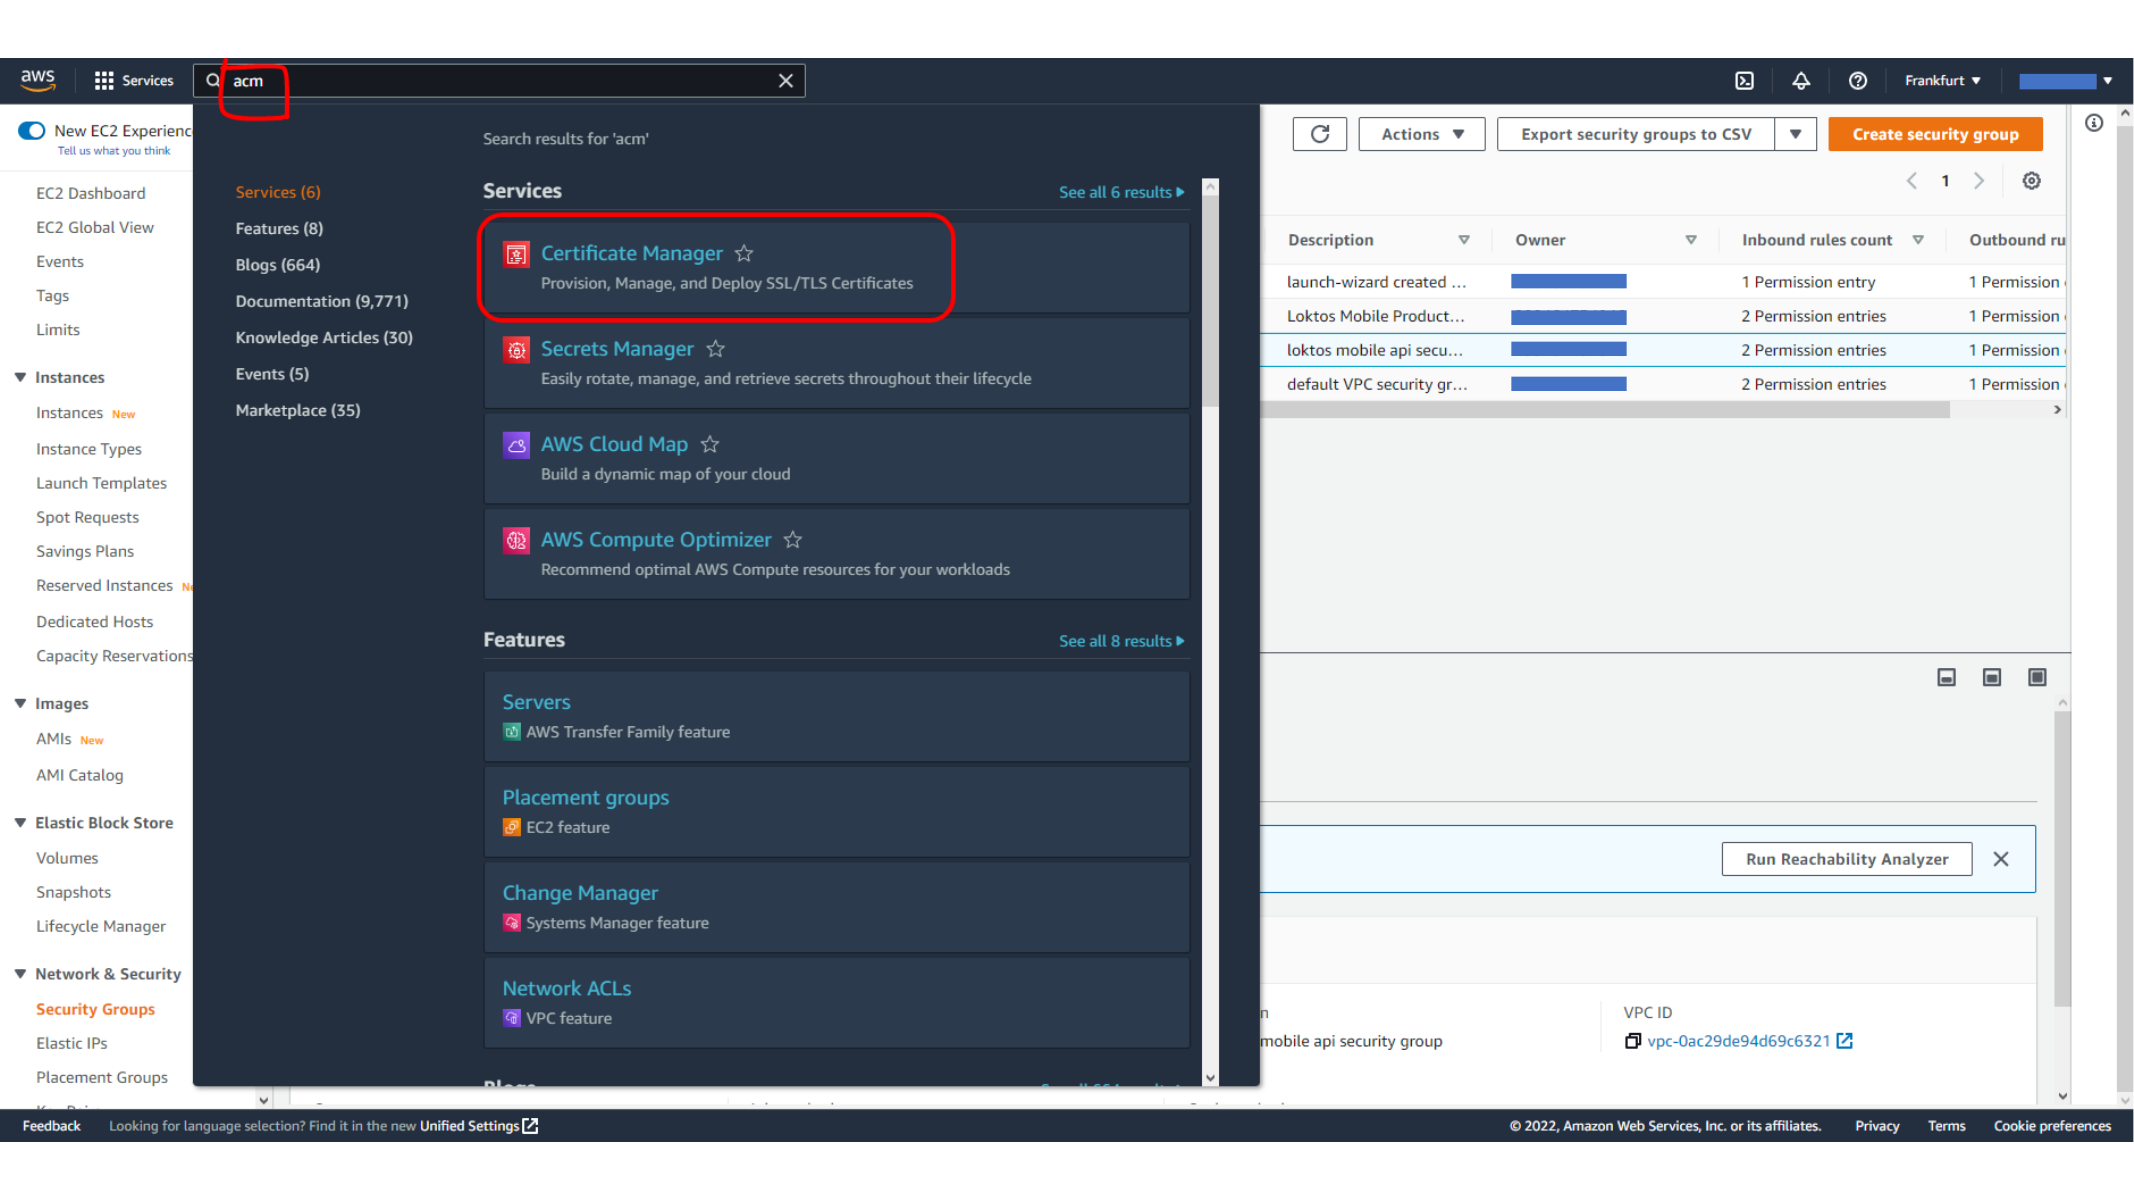
This screen shows Requesting a public certificate in ACM.
Here, we enter the domain name for the ACM certificate.
Here, we choose DNS validation for the ACM certificate.
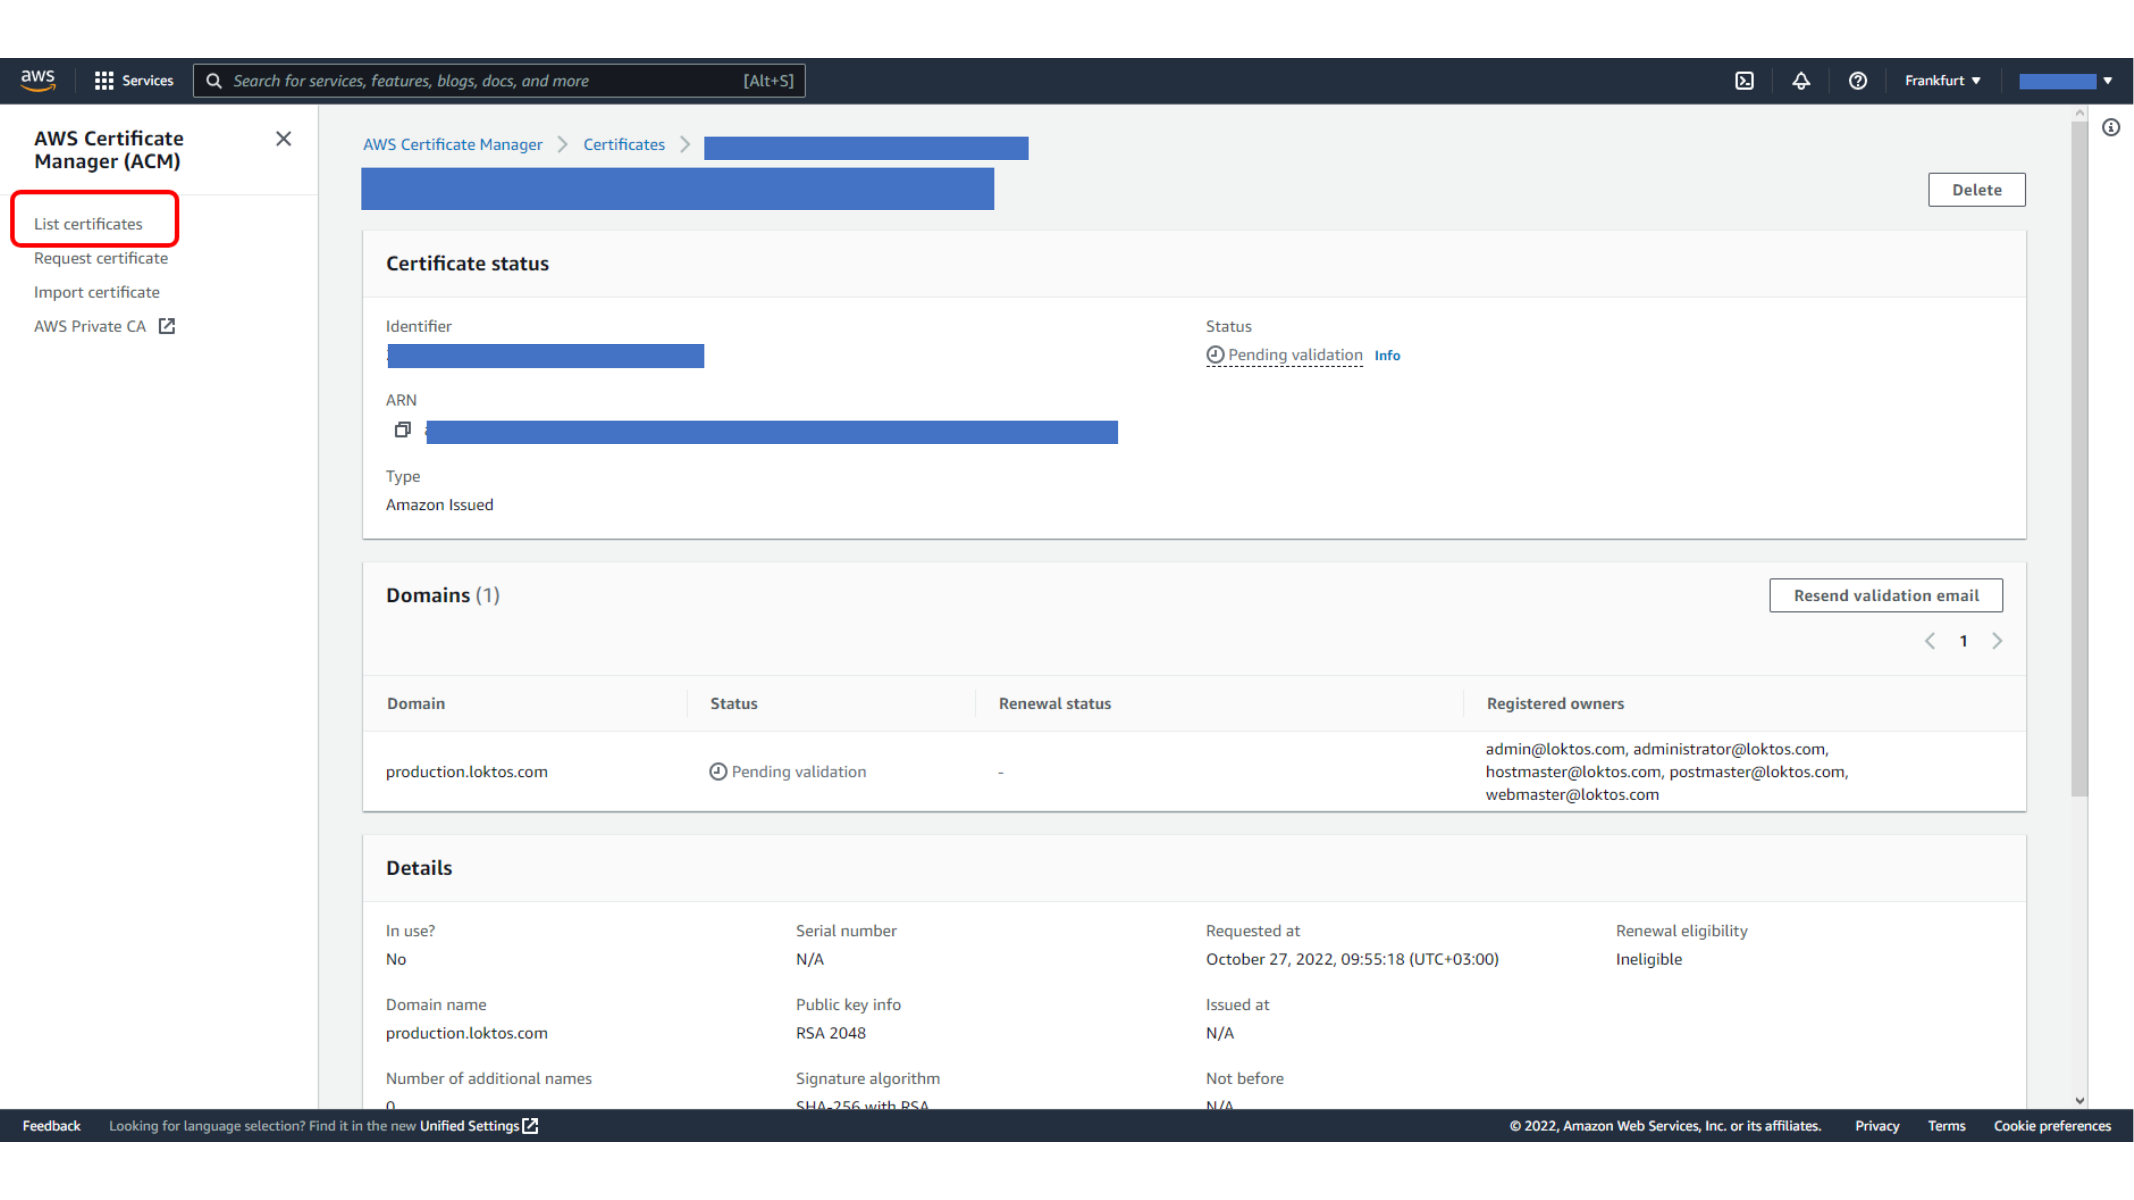
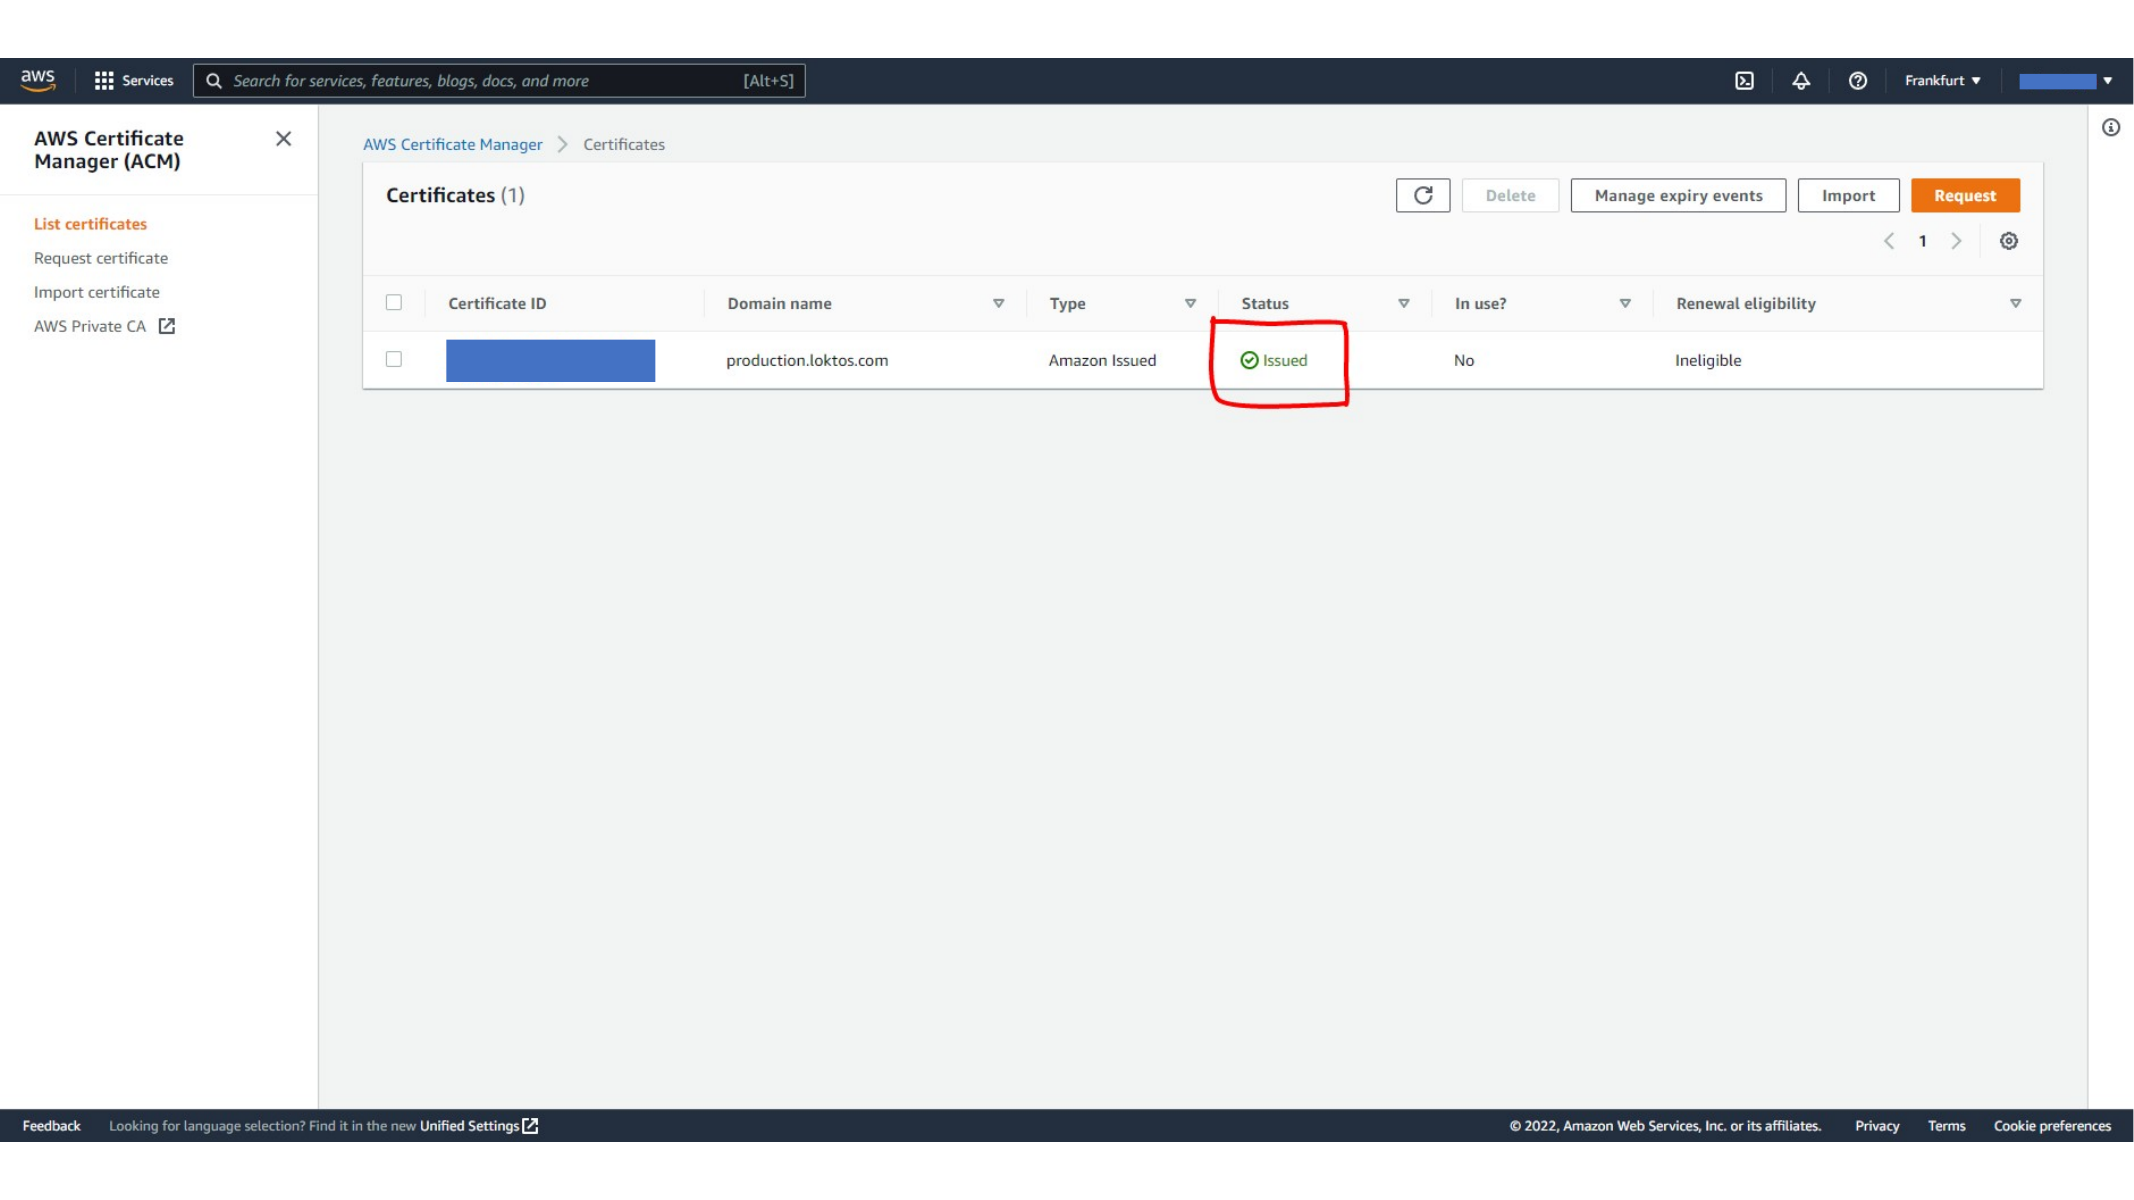
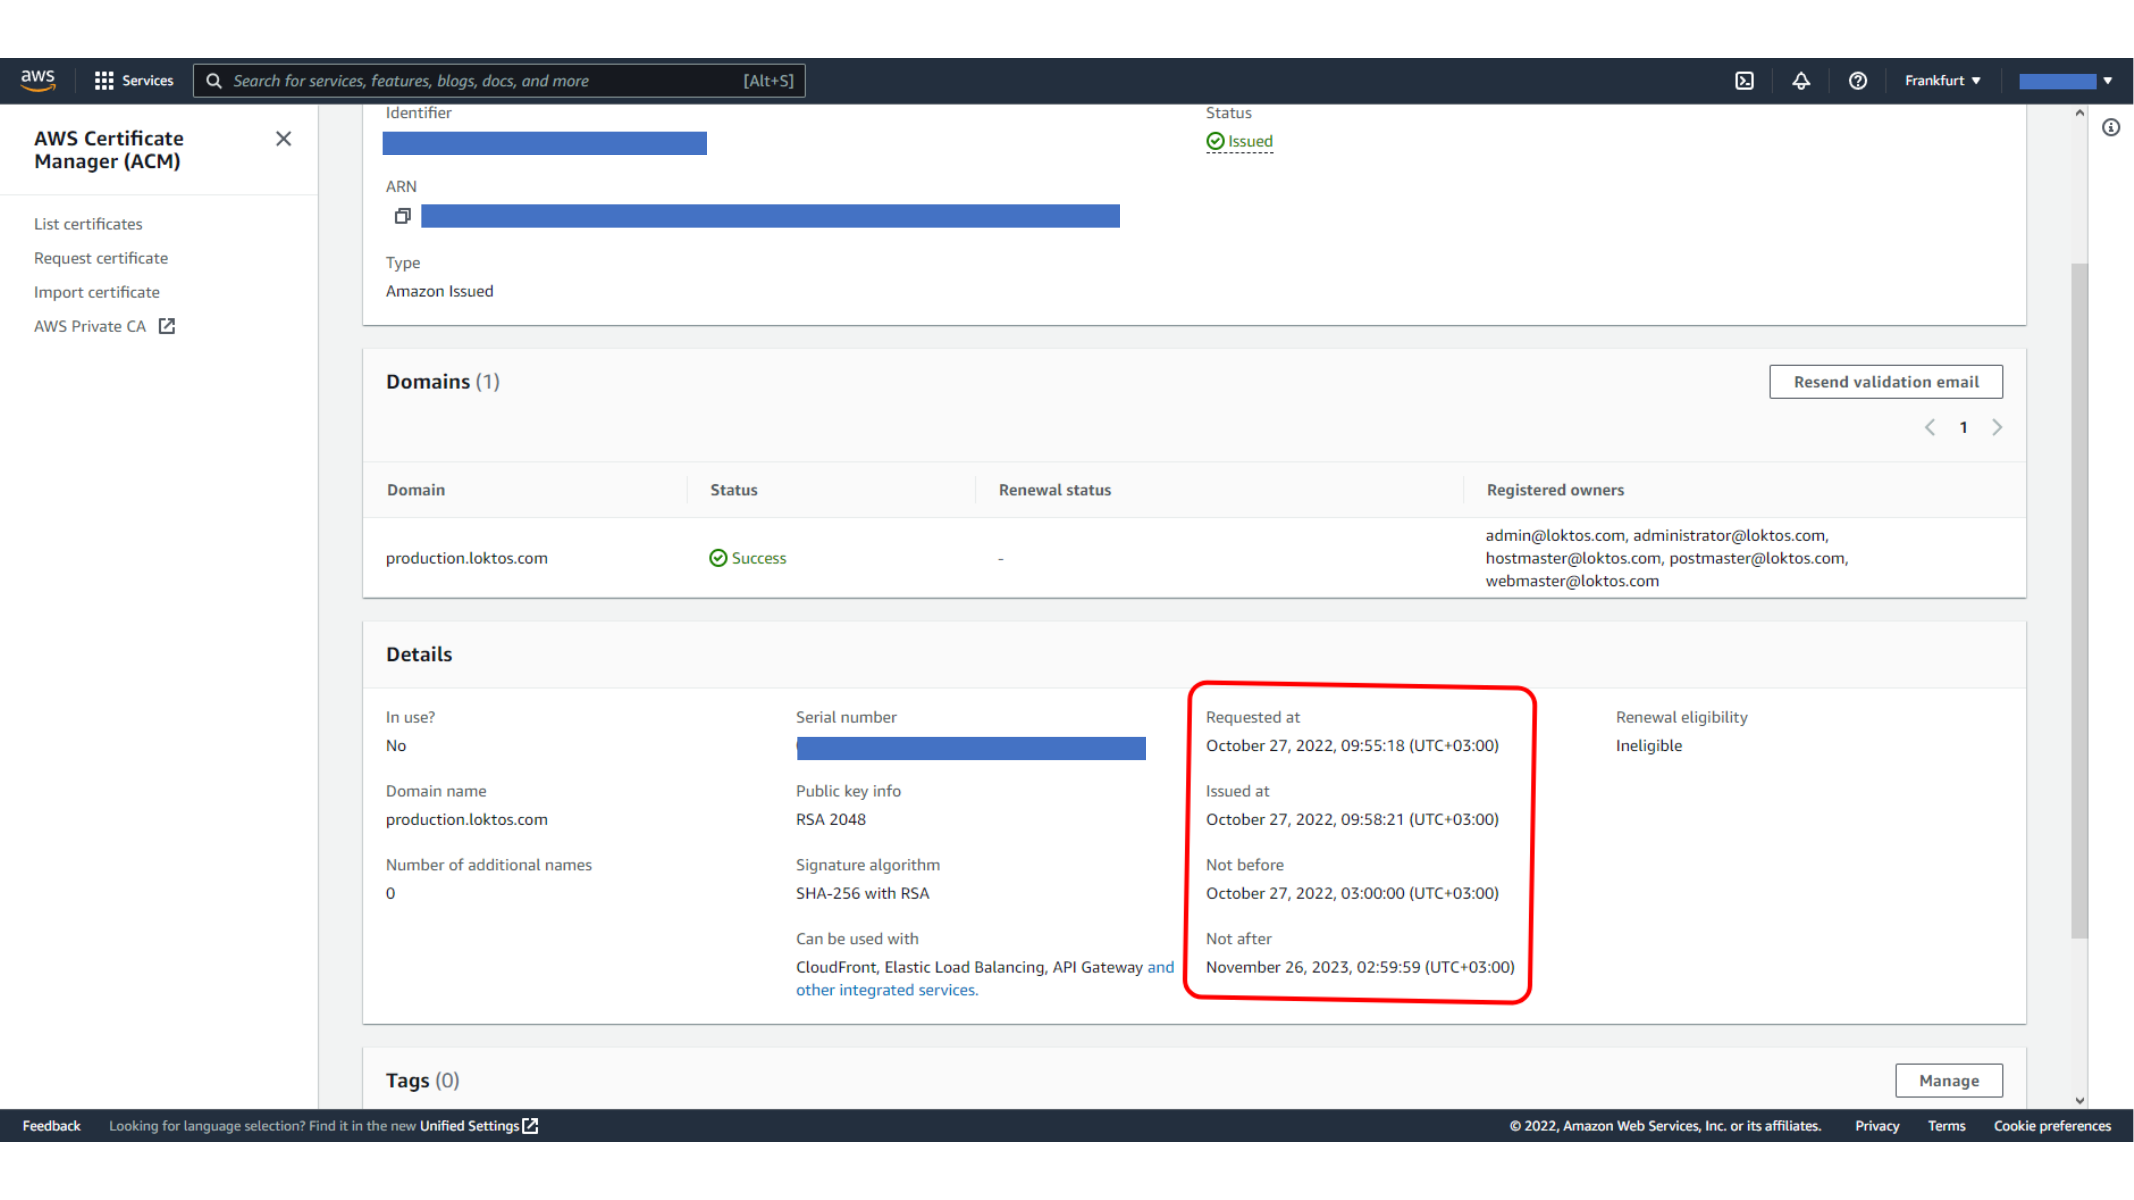
After the certificate request is created, ACM shows validation records. Add the required DNS record in your DNS provider. When DNS validation is complete, the certificate status changes from pending validation to issued.
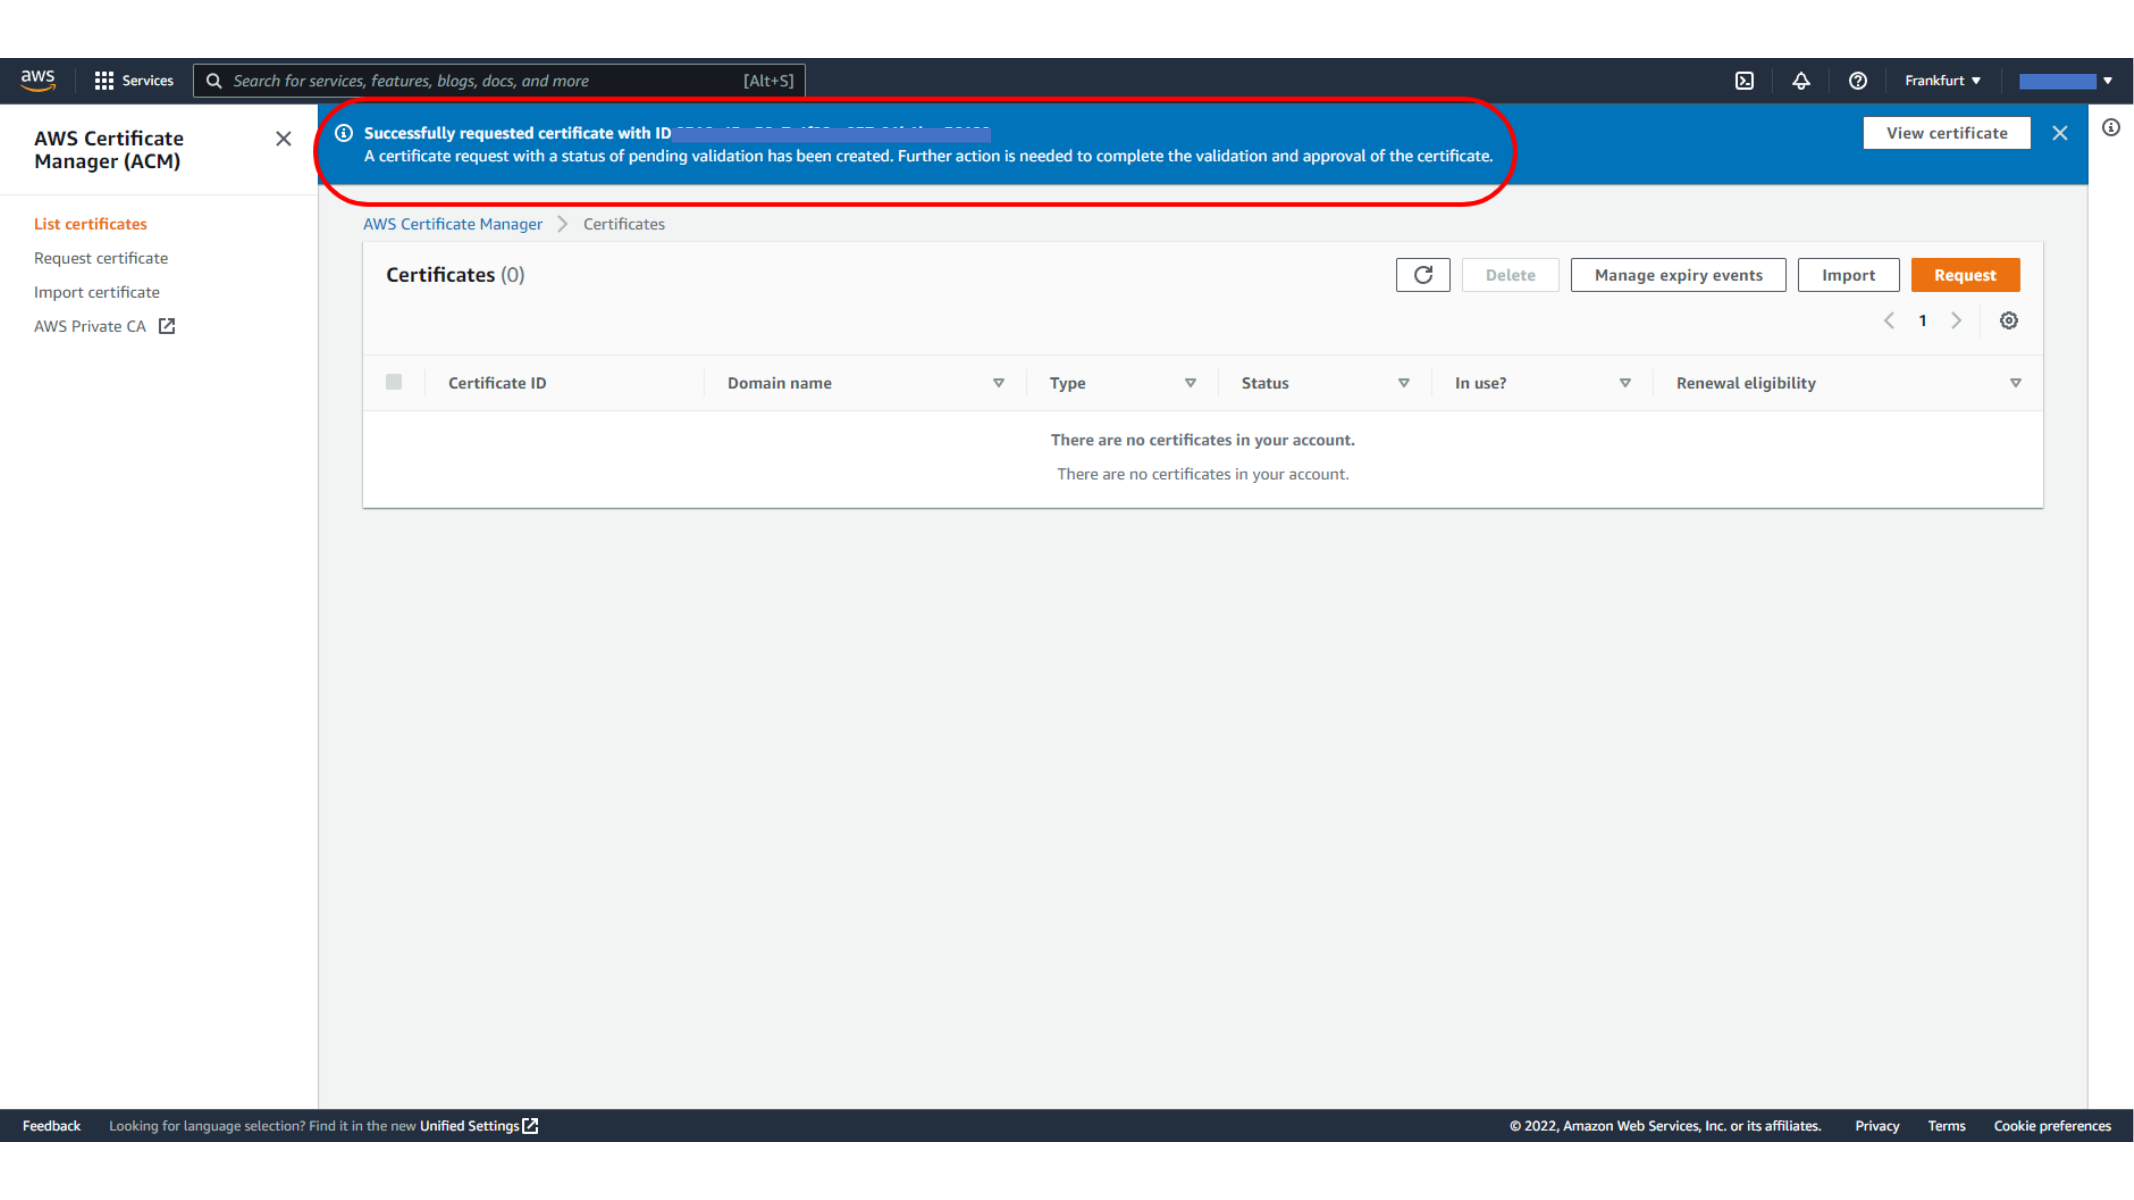
Here, we view DNS validation details for the ACM certificate.
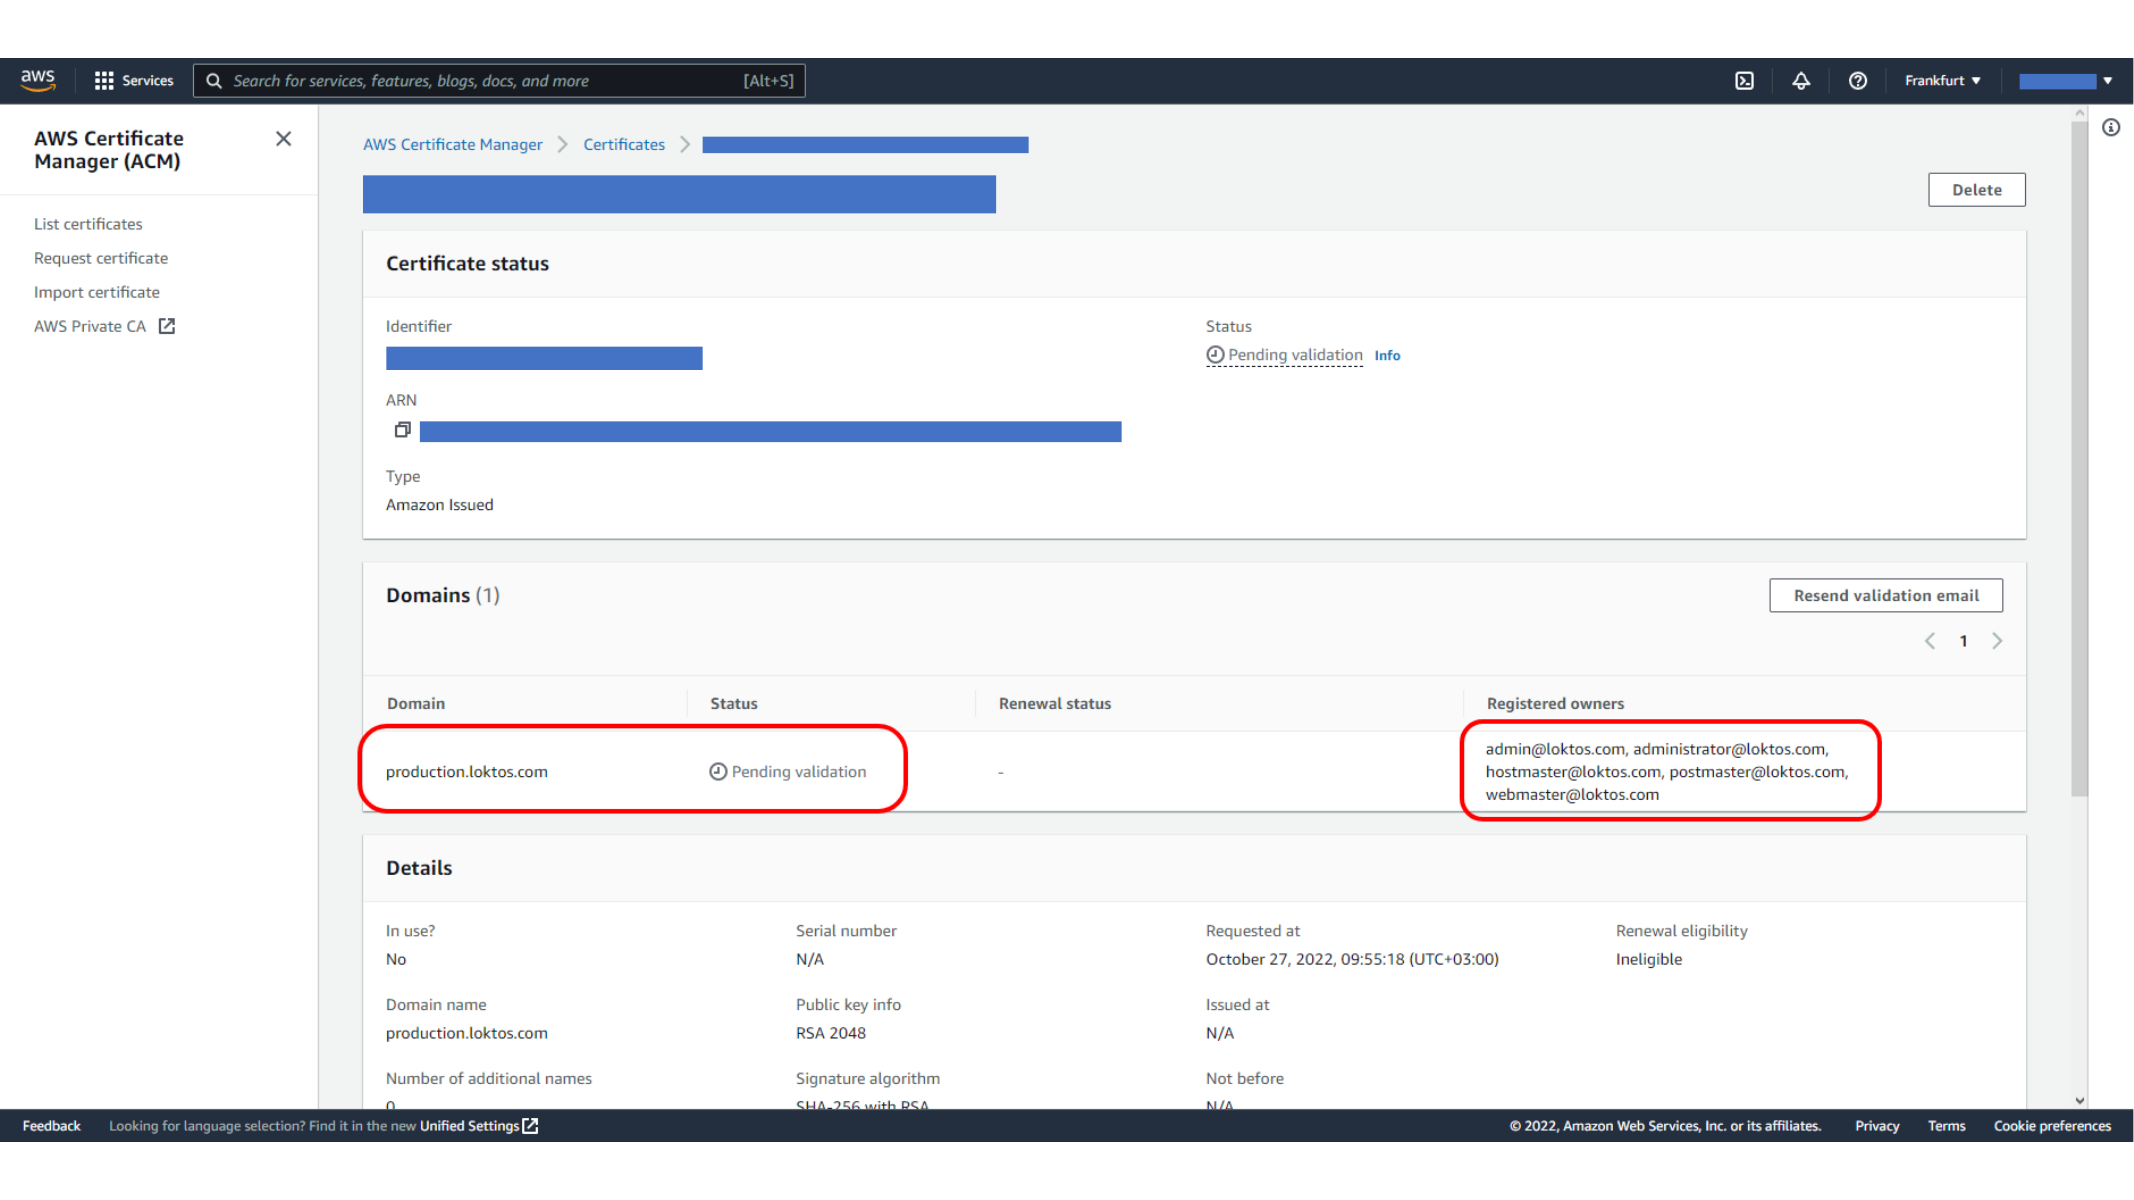
Here, we add ACM DNS validation record.
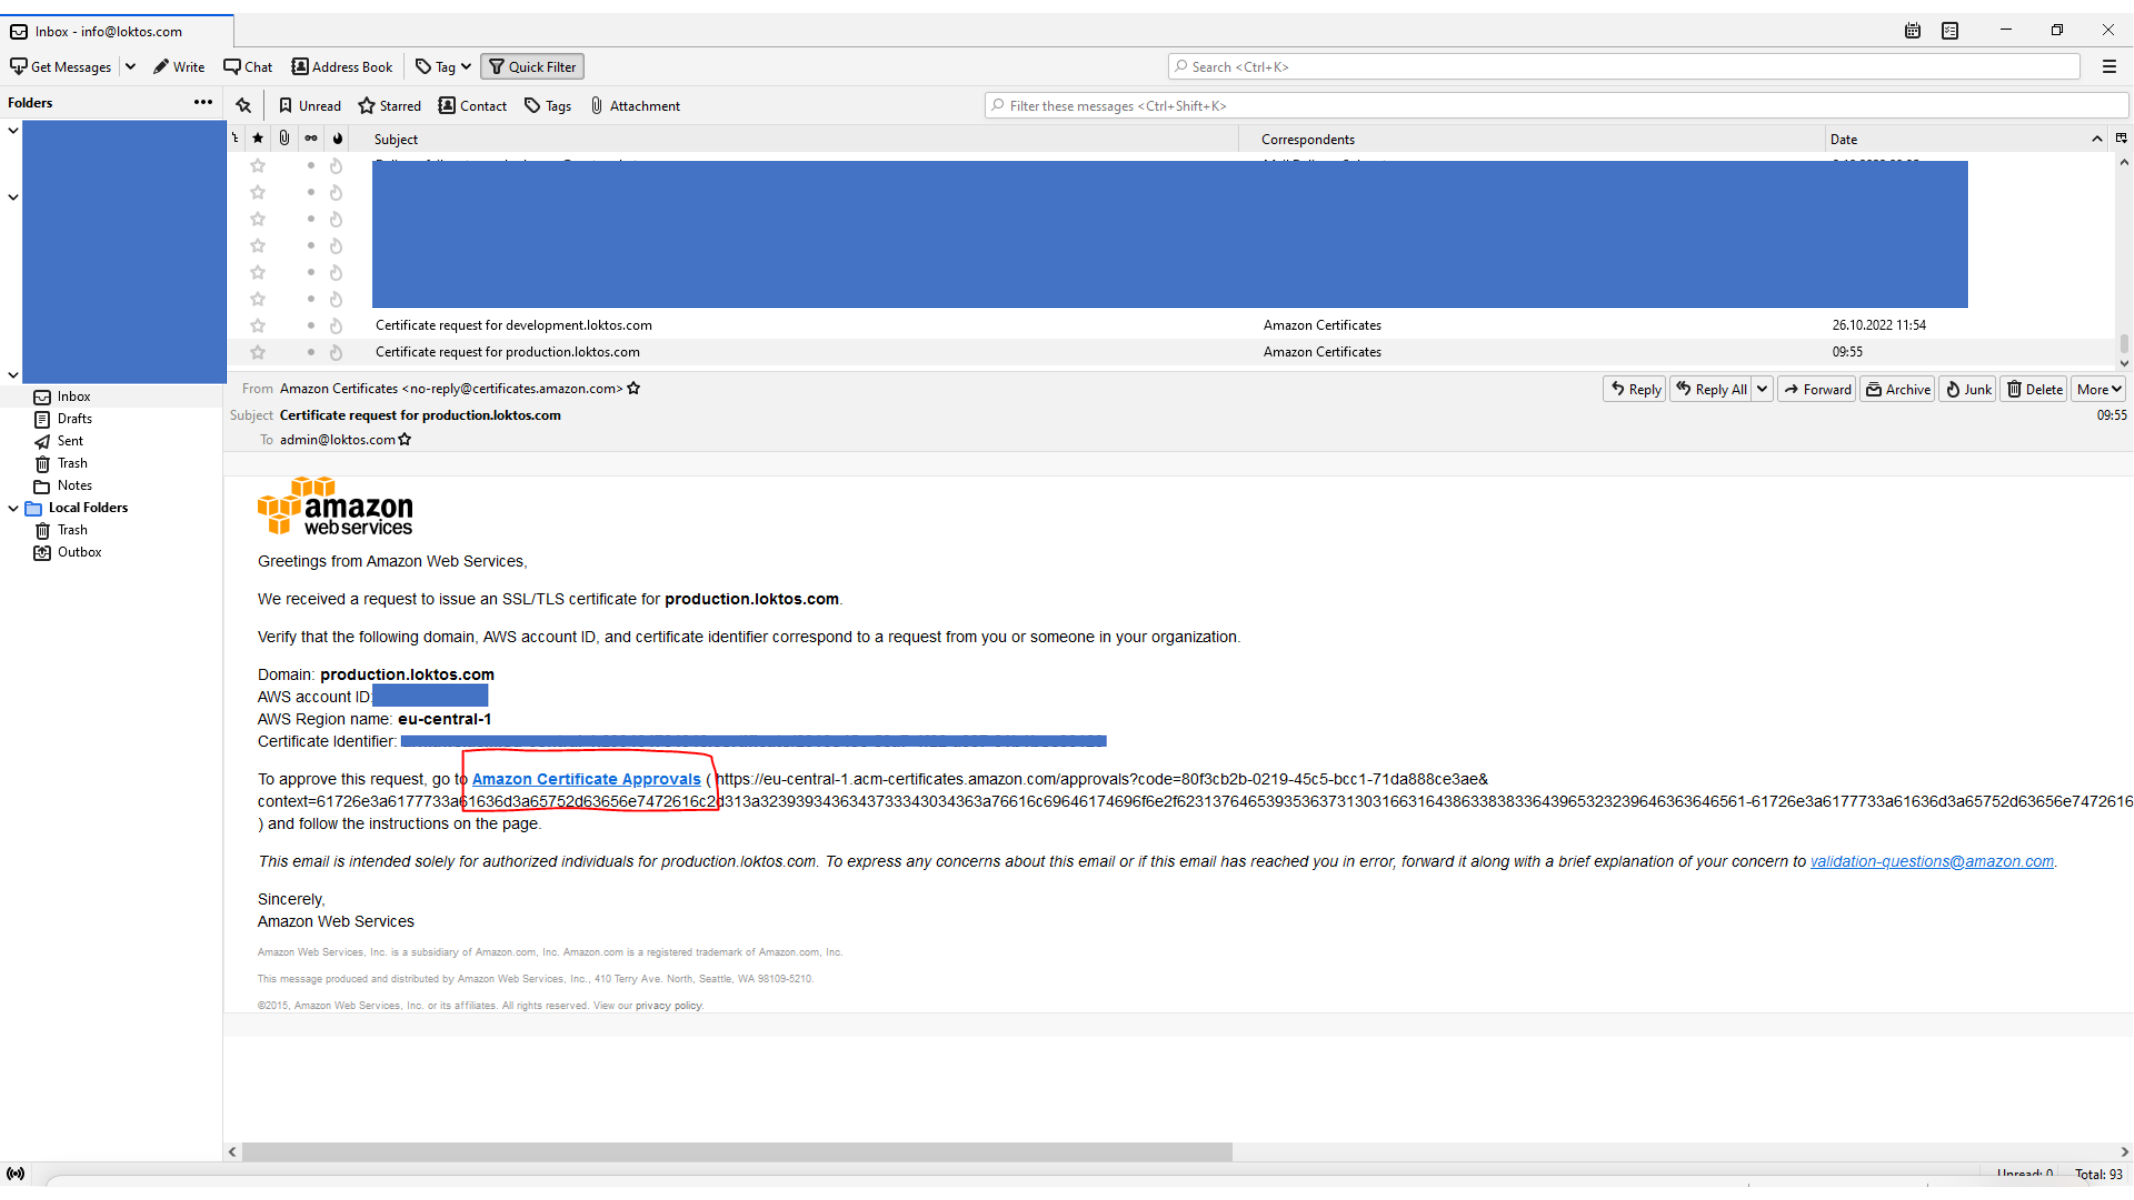
This screen shows ACM certificate pending validation.
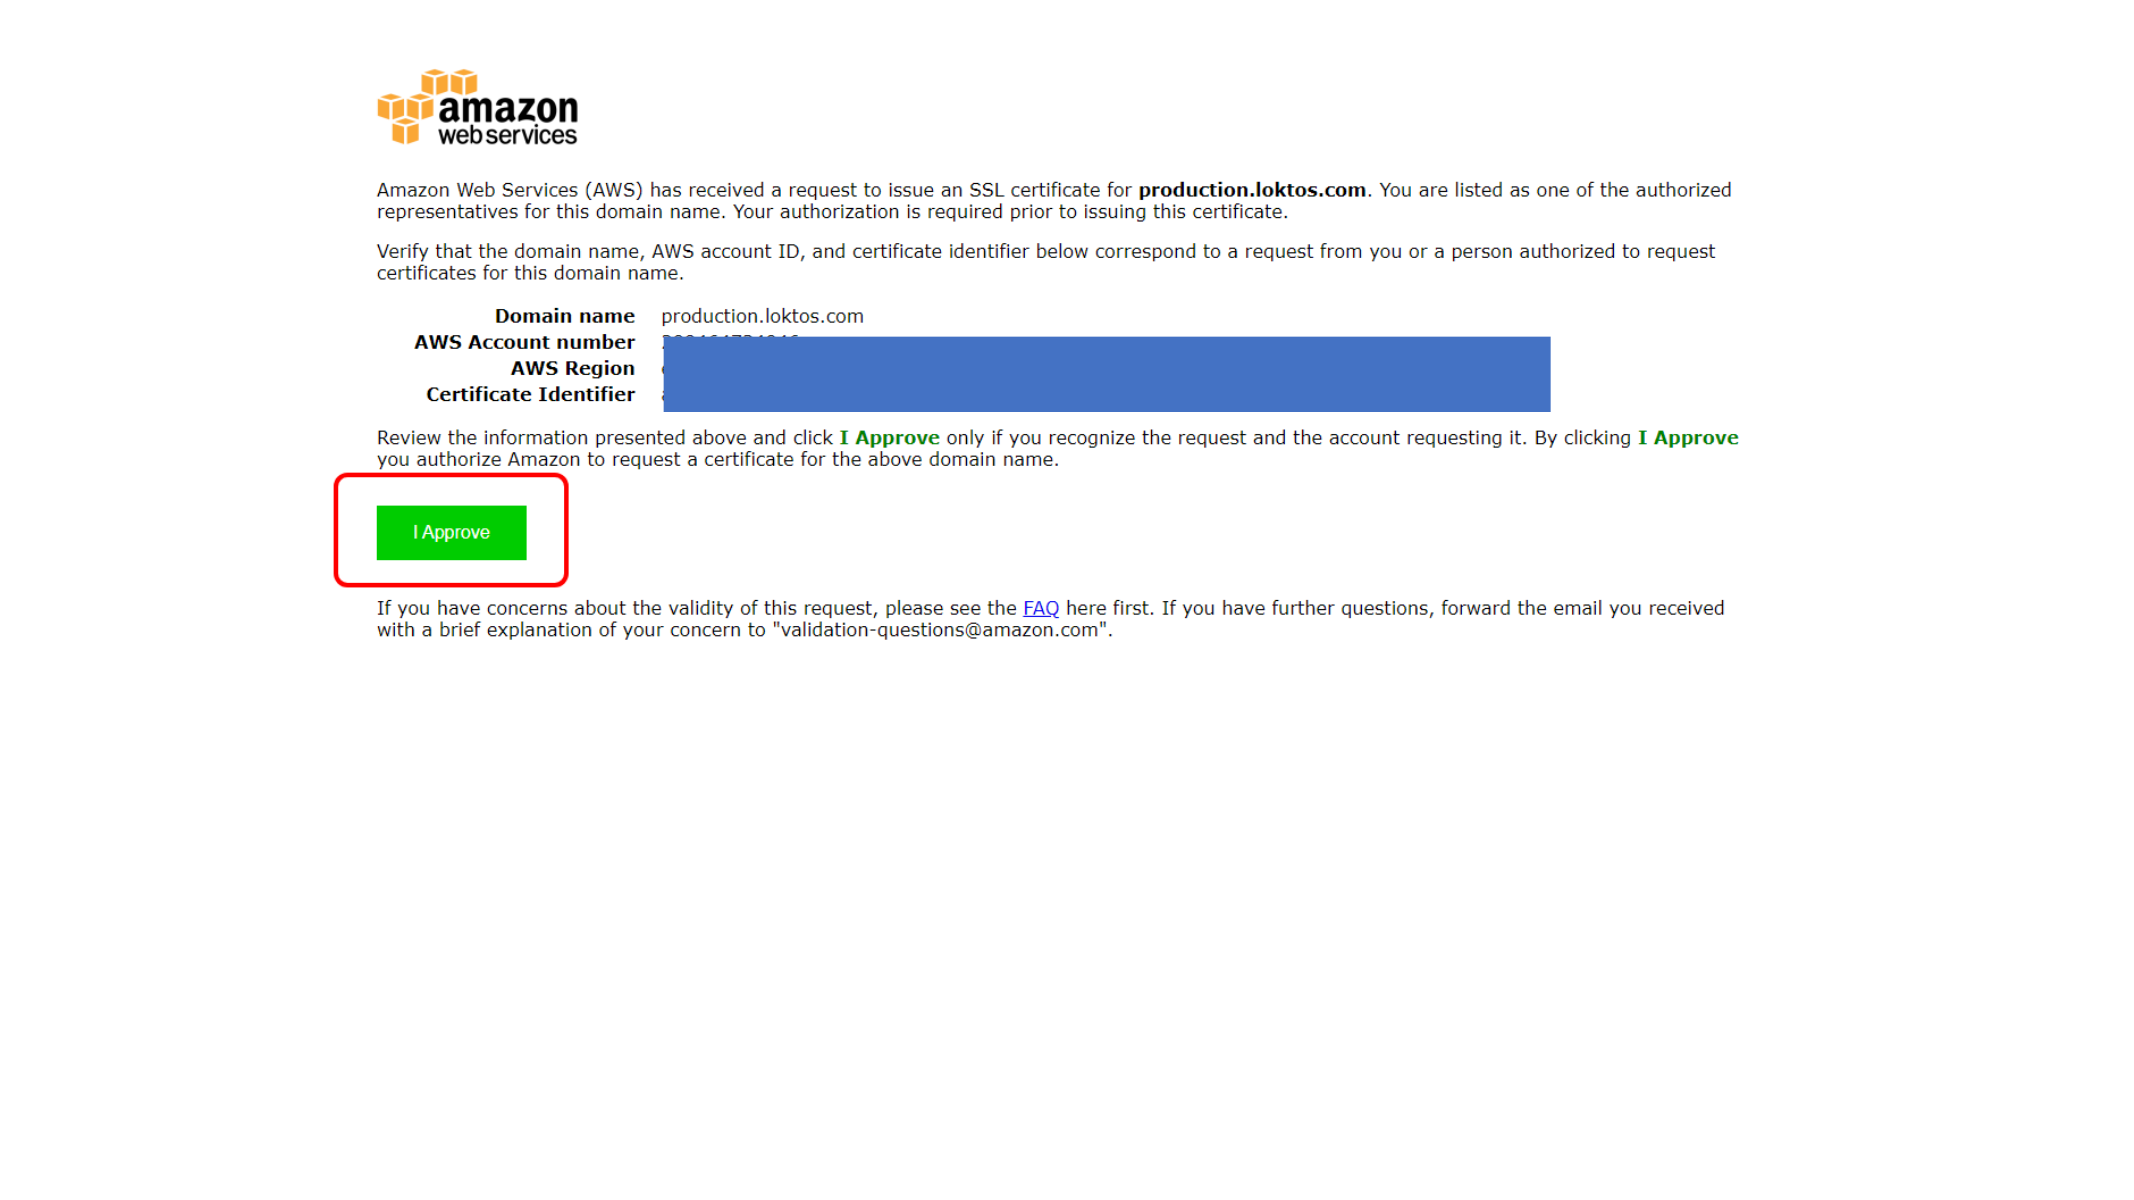
This screen shows ACM certificate validation in progress.
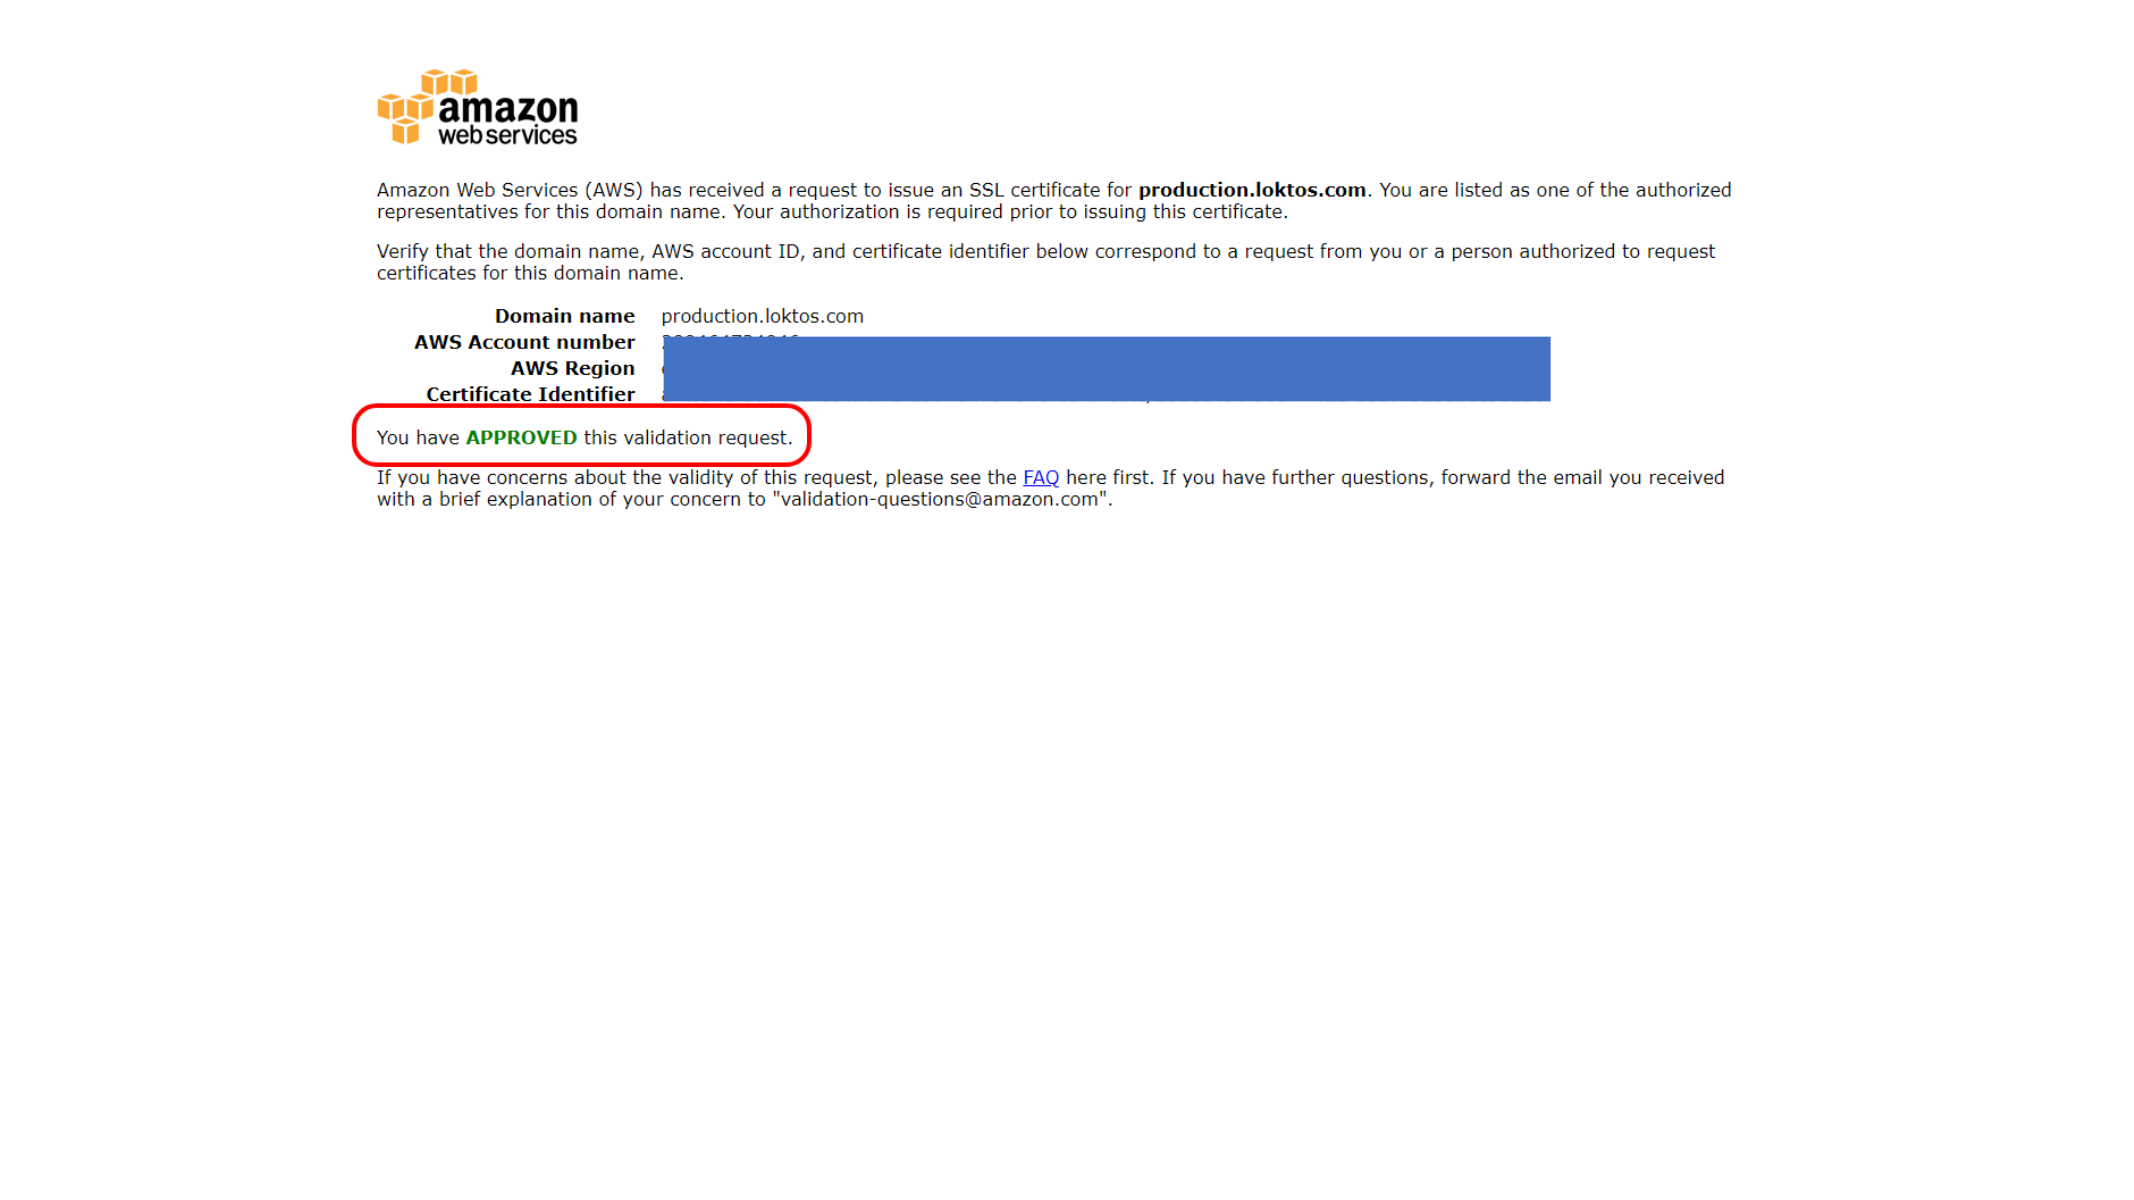
This screen shows ACM certificate issued after DNS validation.
This screen shows Issued ACM certificate details.
This screen shows Validated ACM certificate ready for load balancer usage.
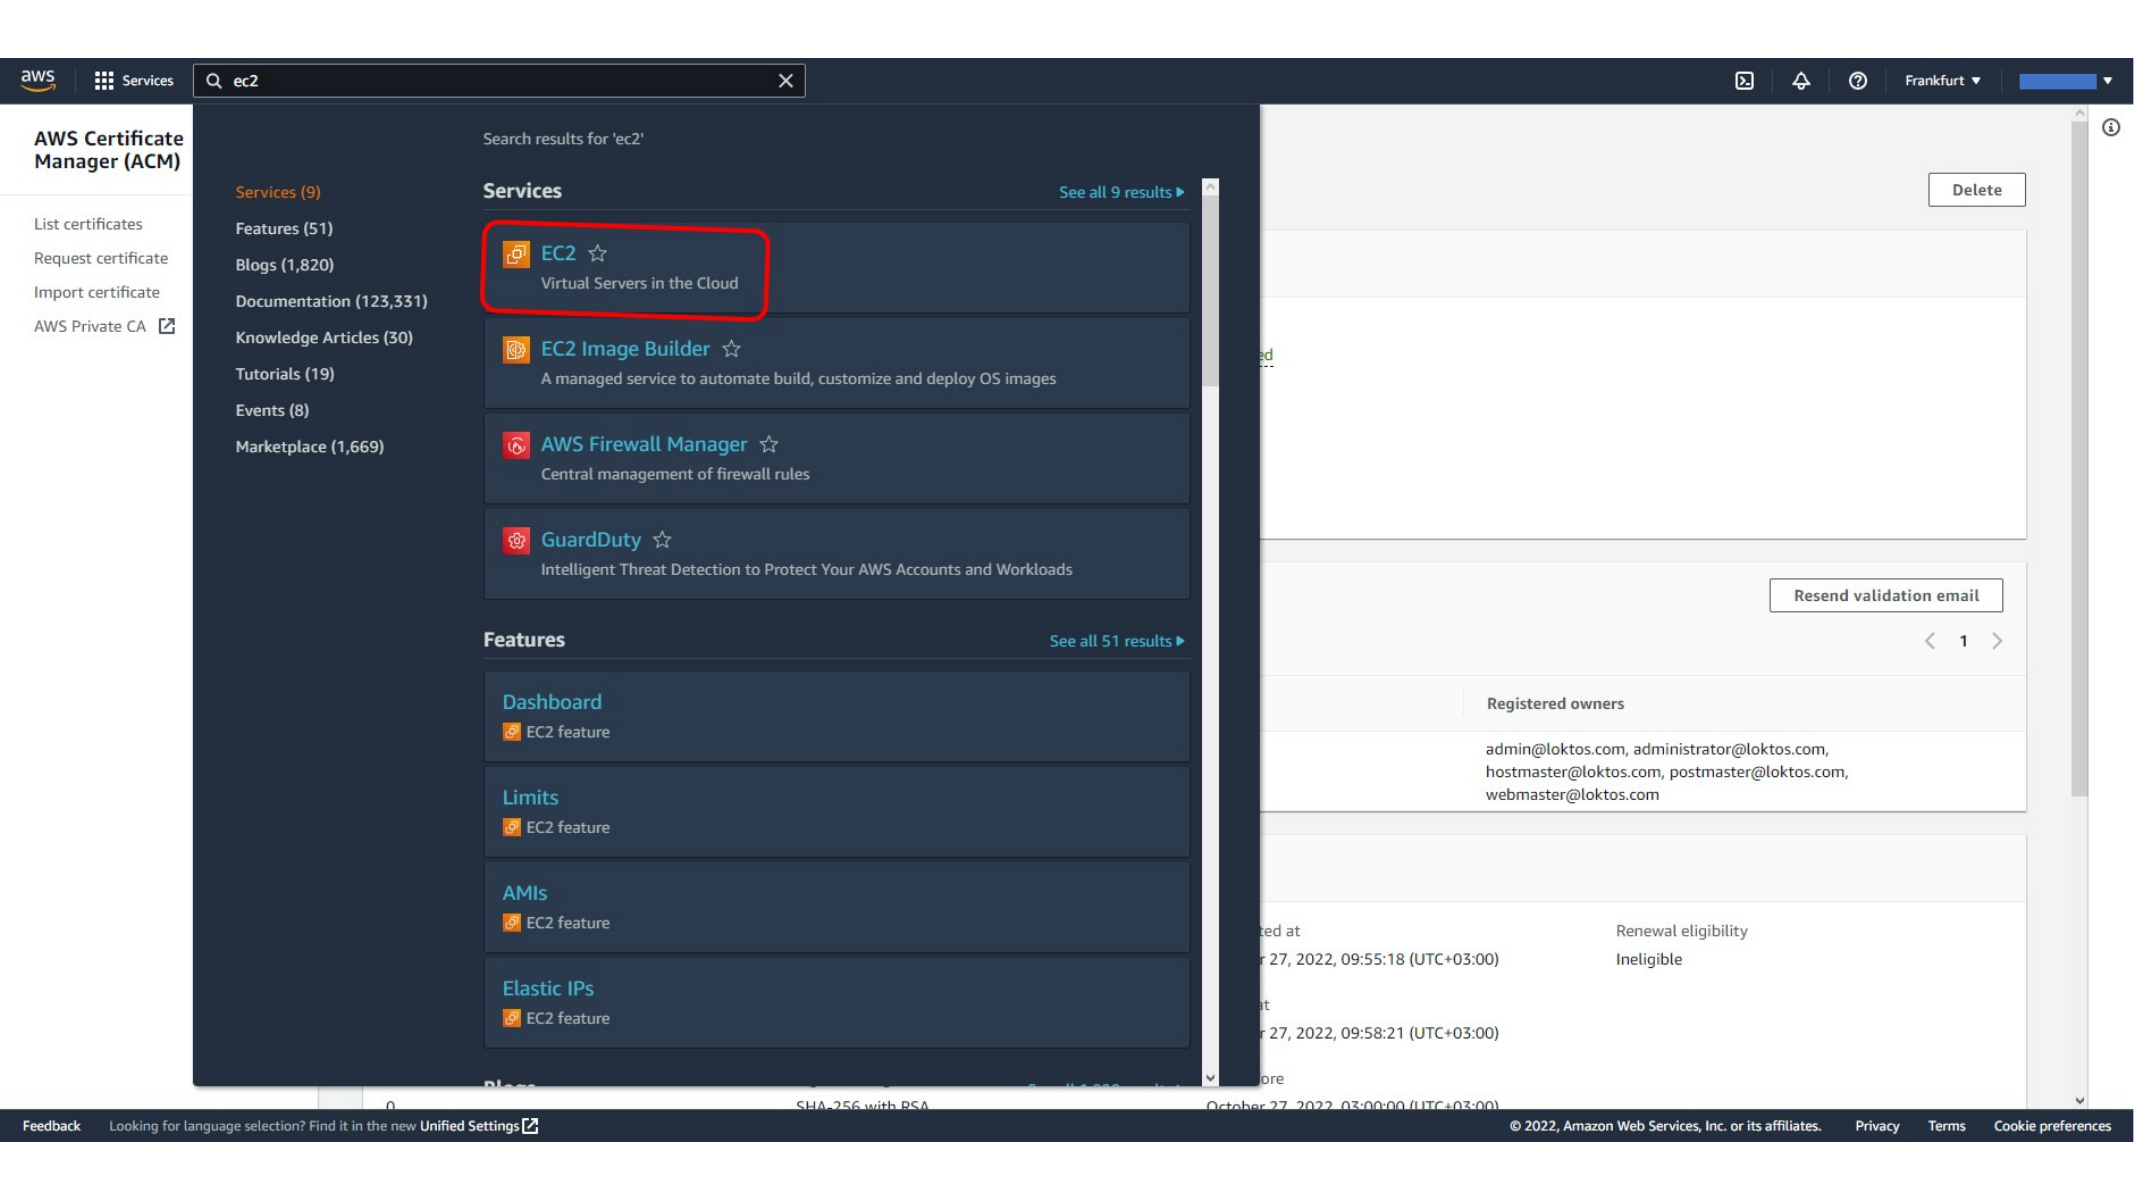
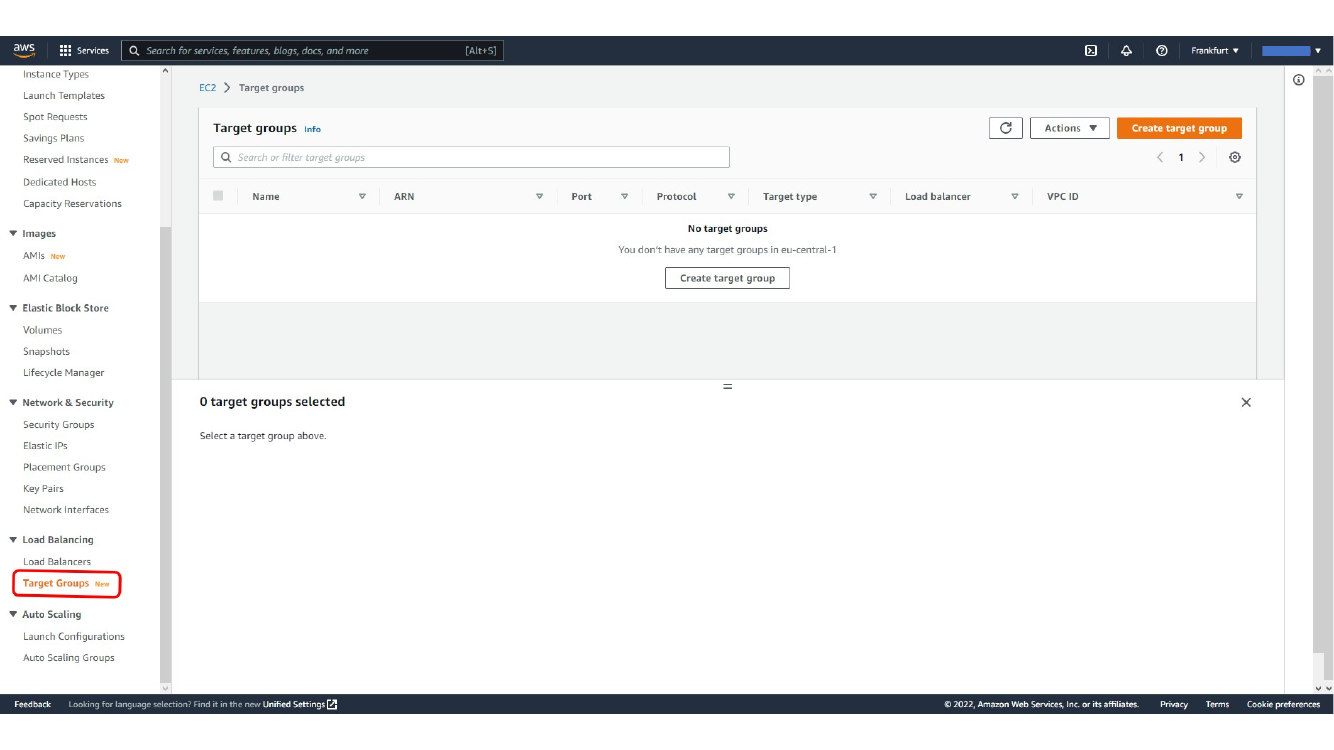
Creating a Target Group for EC2
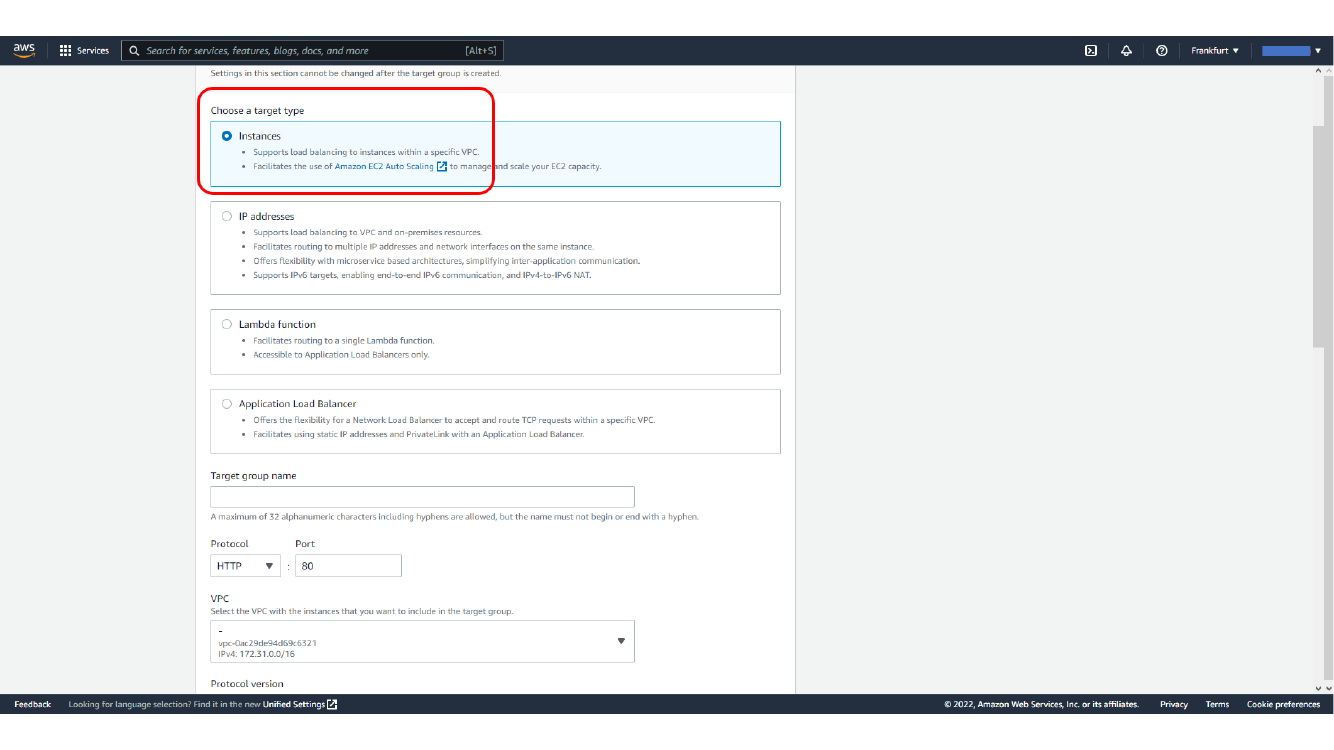
The Application Load Balancer routes requests to a target group. Create a target group with Instances as the target type and route traffic to the EC2 instance on the application port, usually HTTP port 80.
Here, we choose instances as the target type.
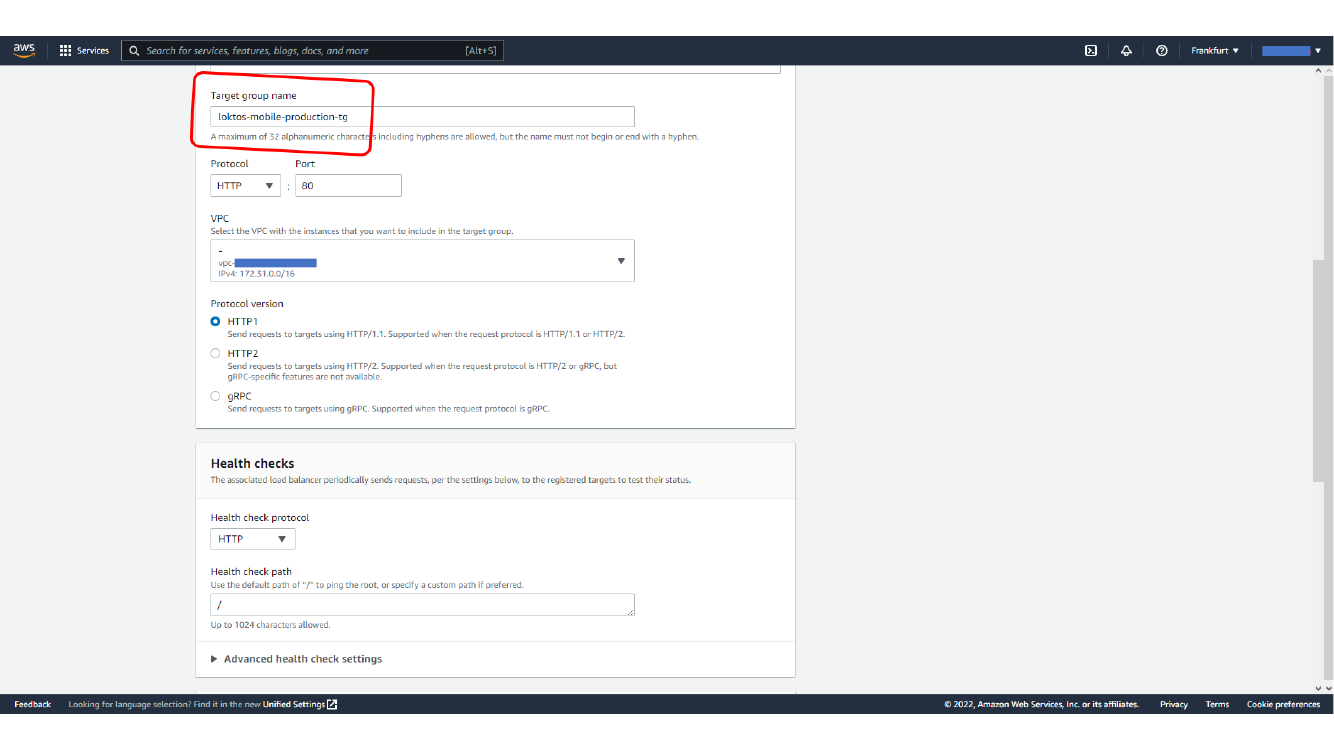
Here, we set target group protocol and port.
This screen shows Configuring target group health check settings.
Here, we review target group settings.
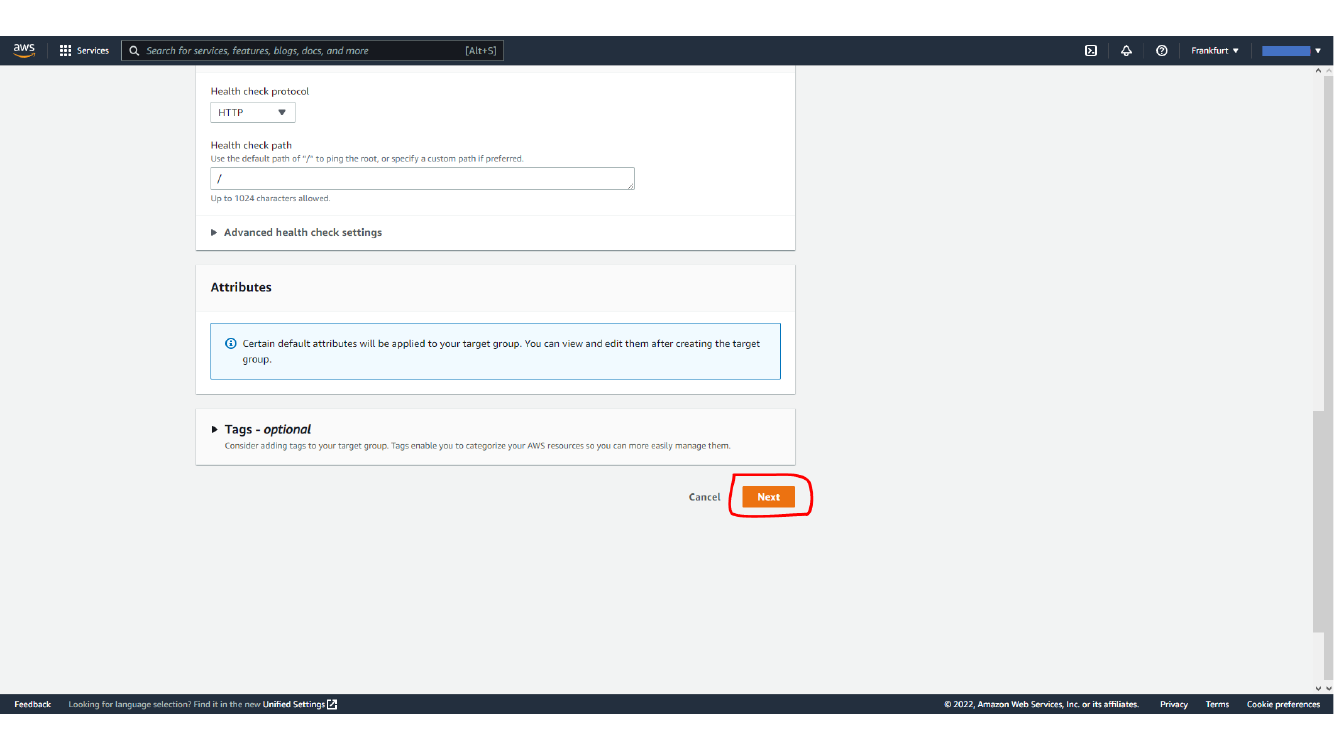
Register the EC2 instance as a target and create the target group. After that, the load balancer can forward traffic to this group.
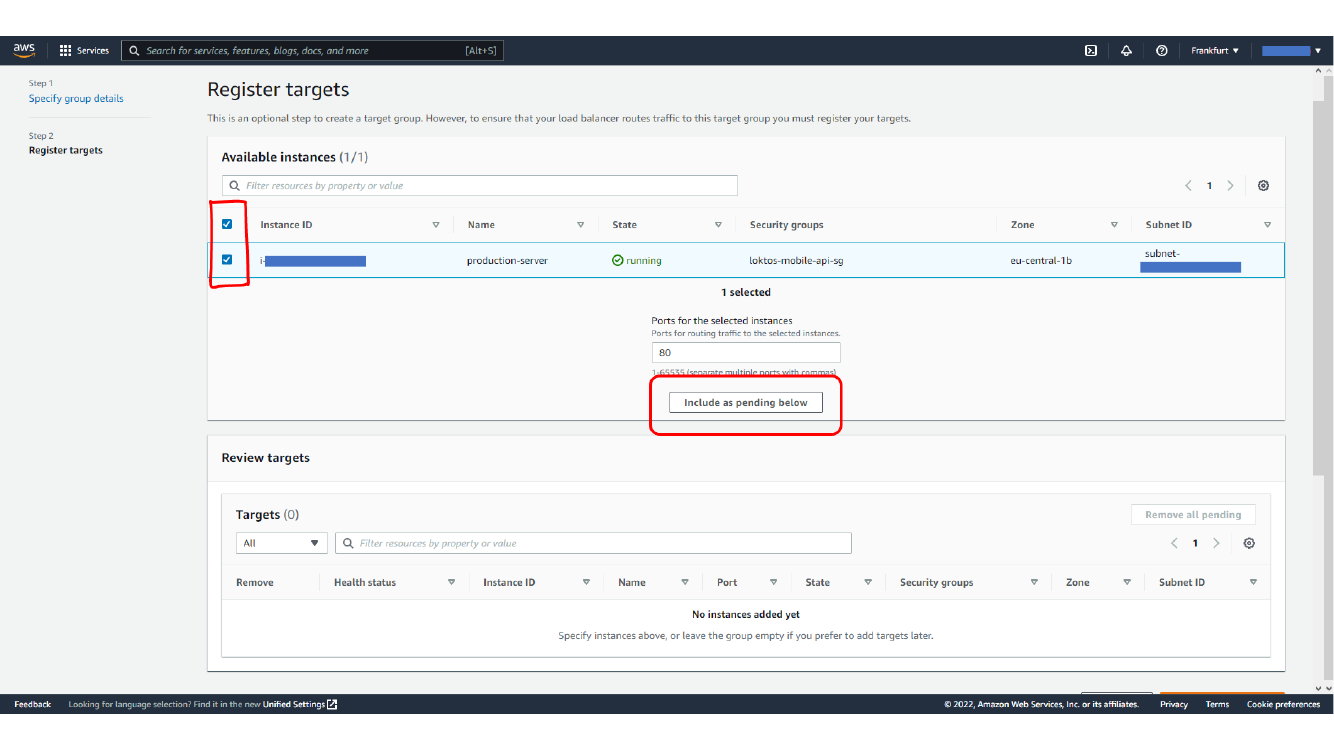
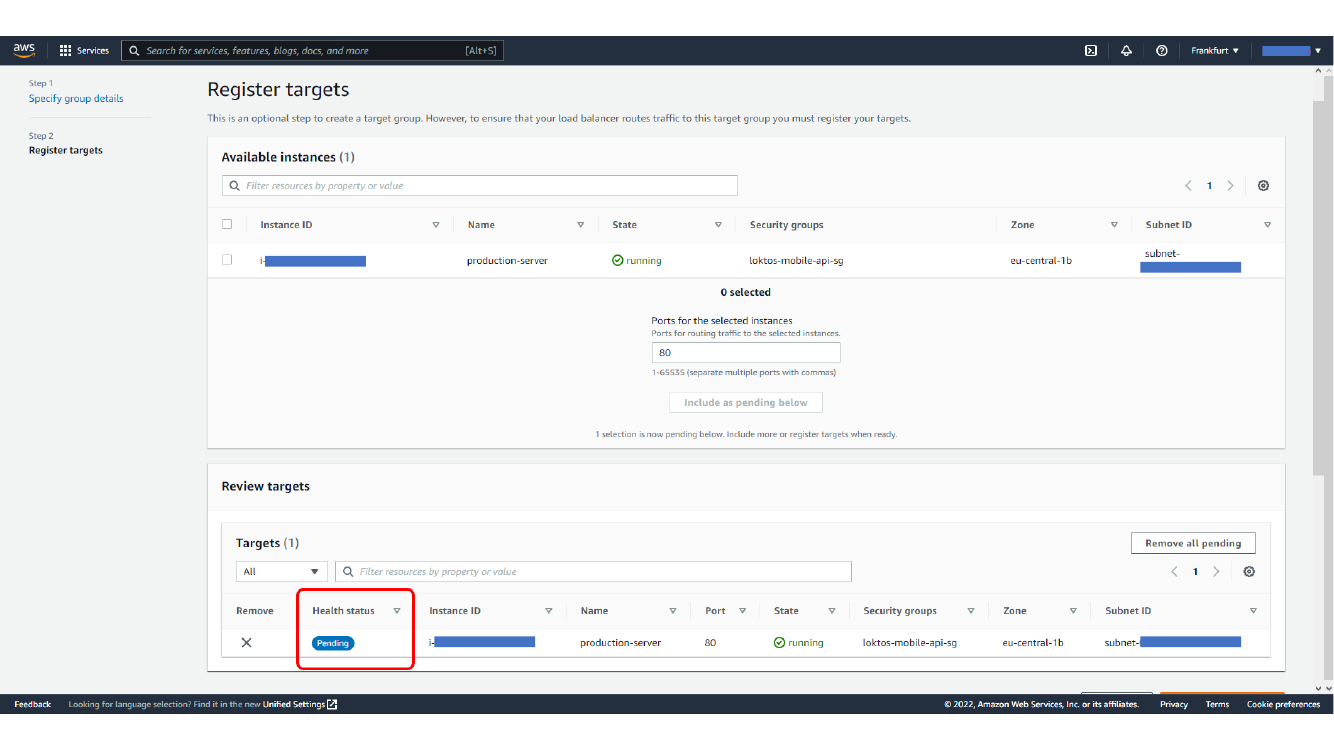
Here, we add selected EC2 instance as target.
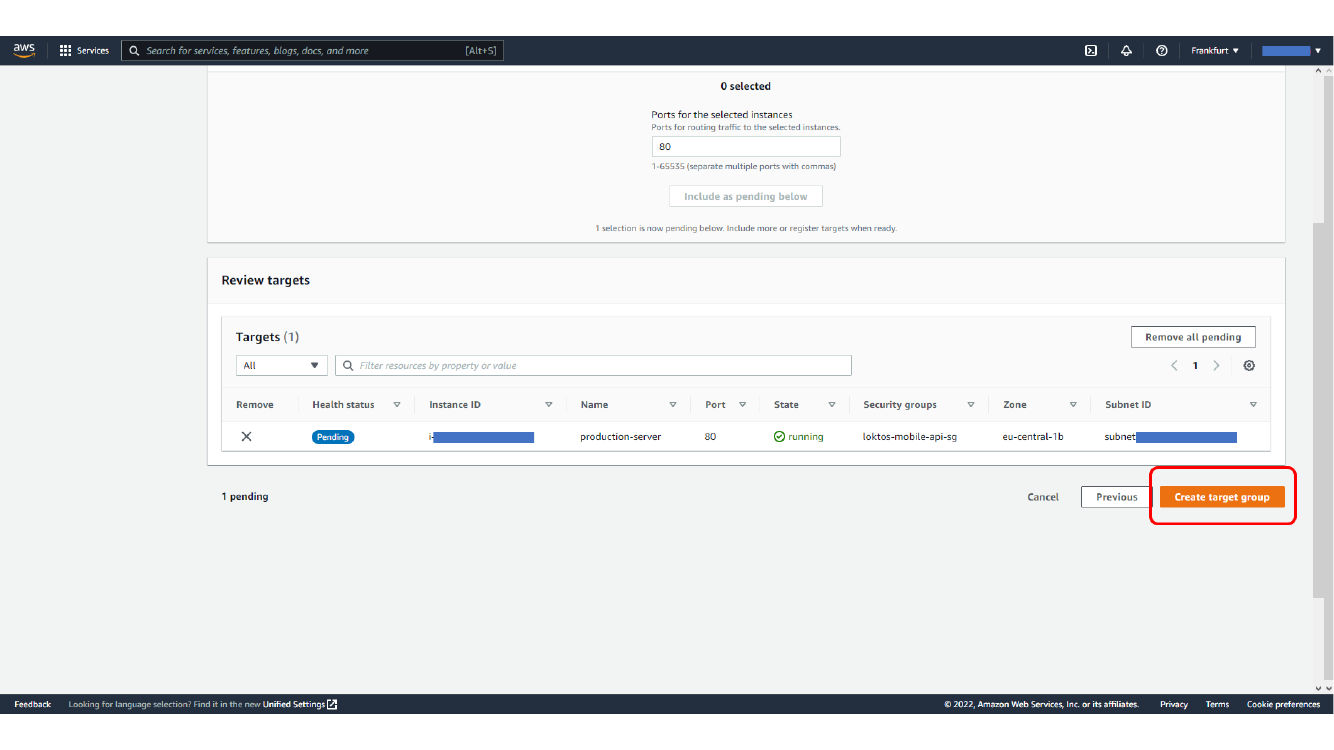
Here, we create the target group.
This screen shows Created target group with EC2 instance target.
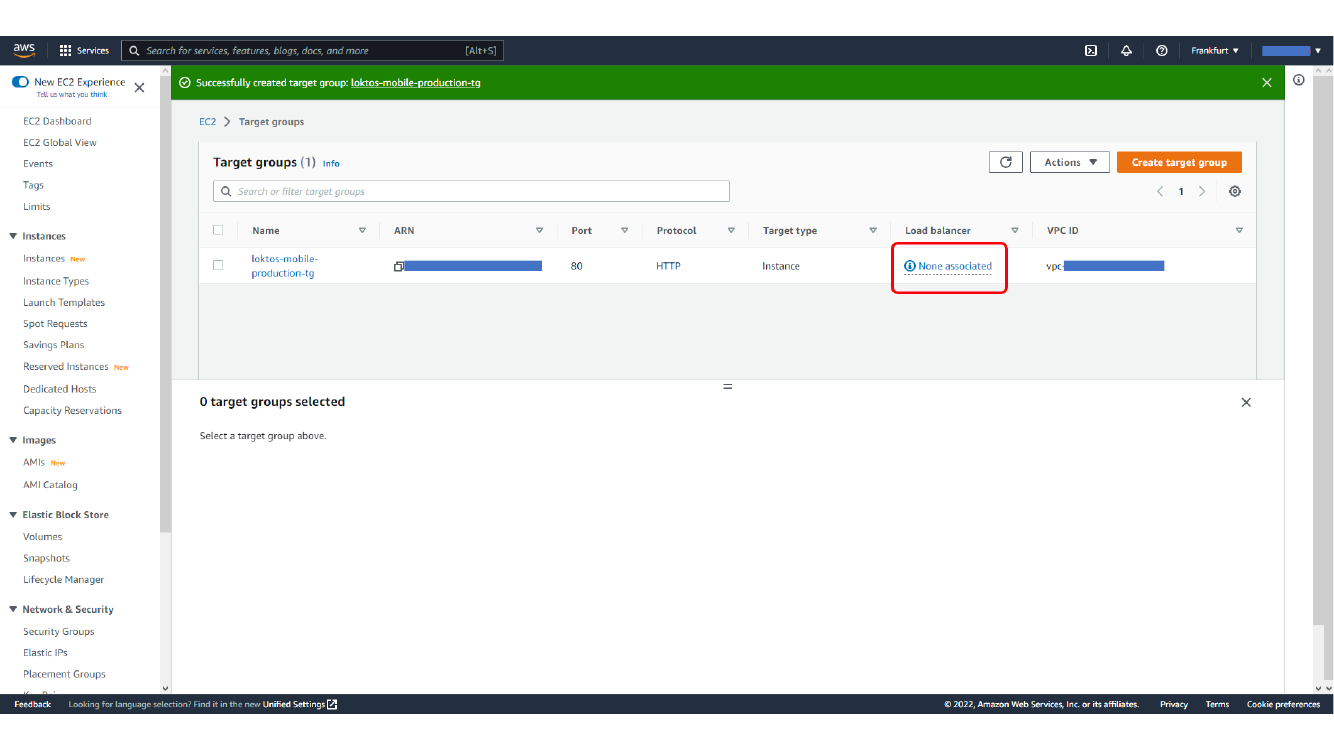
Creating the Application Load Balancer
Create an Application Load Balancer and make it internet-facing if the site should be public. Select the VPC, availability zones, and the load balancer security group created earlier.
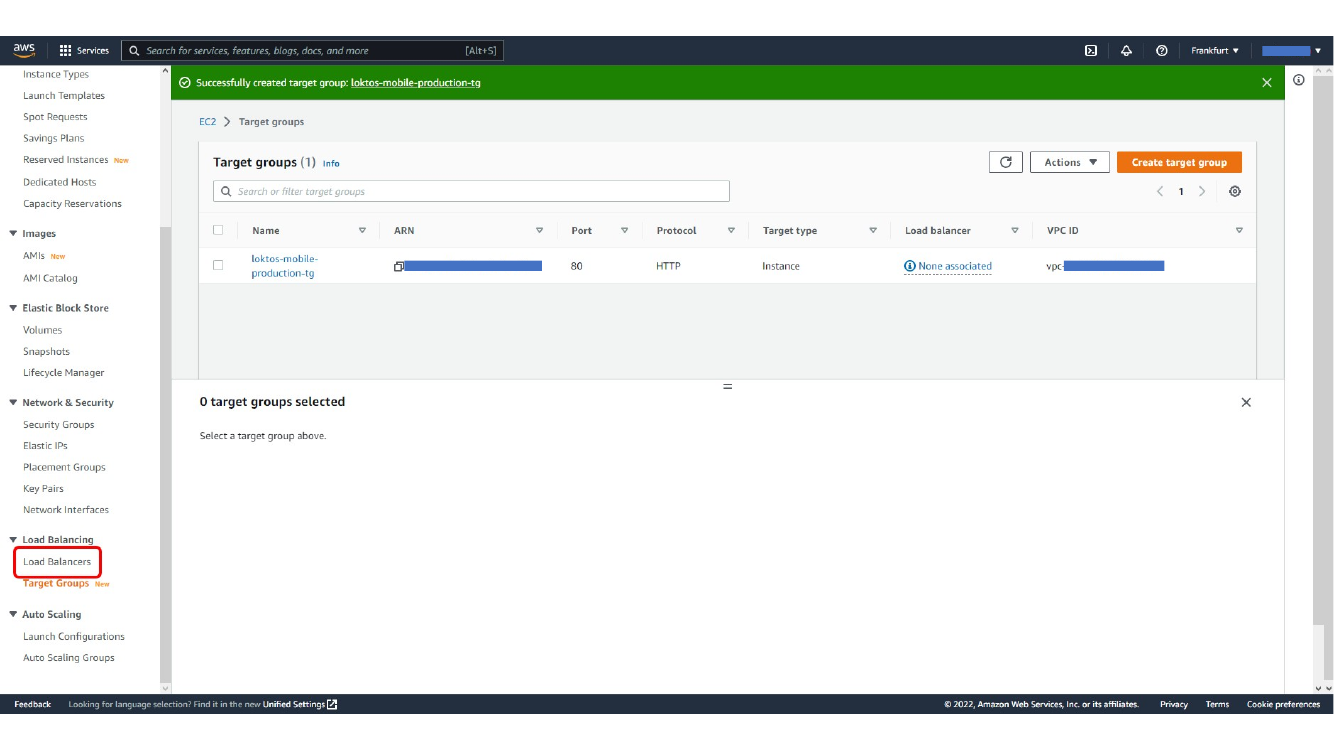
This screen shows Naming and configuring the Application Load Balancer scheme.
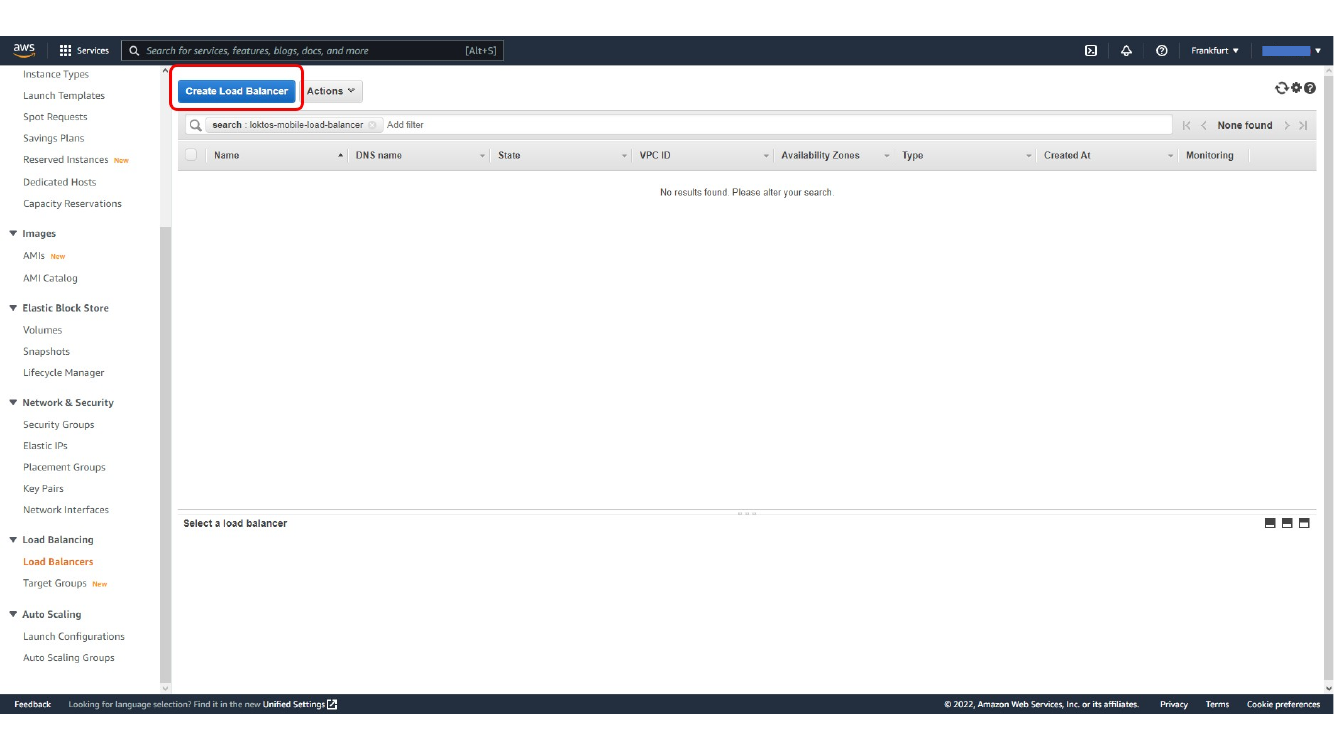
Here, we select network mapping for the Application Load Balancer.
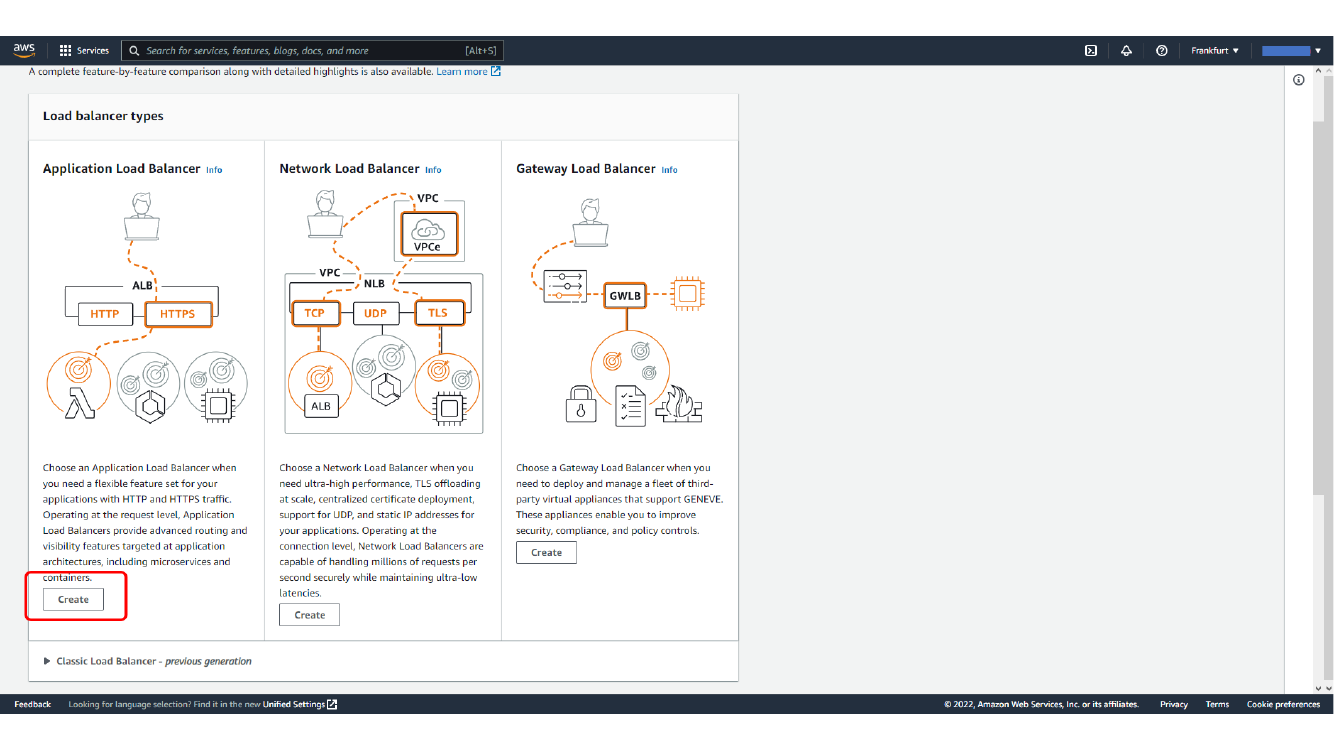
Here, we select the load balancer security group.
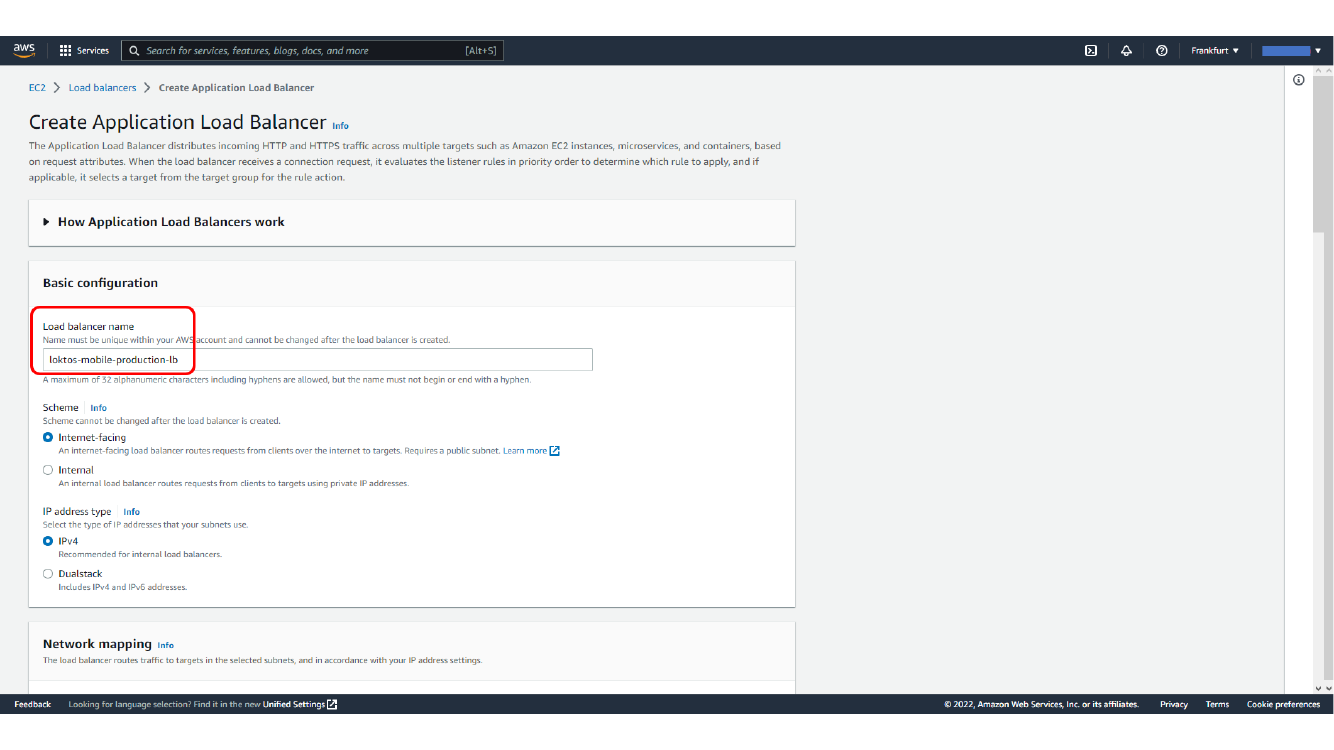
Add listeners for HTTP and HTTPS. For the HTTPS listener, choose the ACM certificate that was issued earlier and route traffic to the target group.
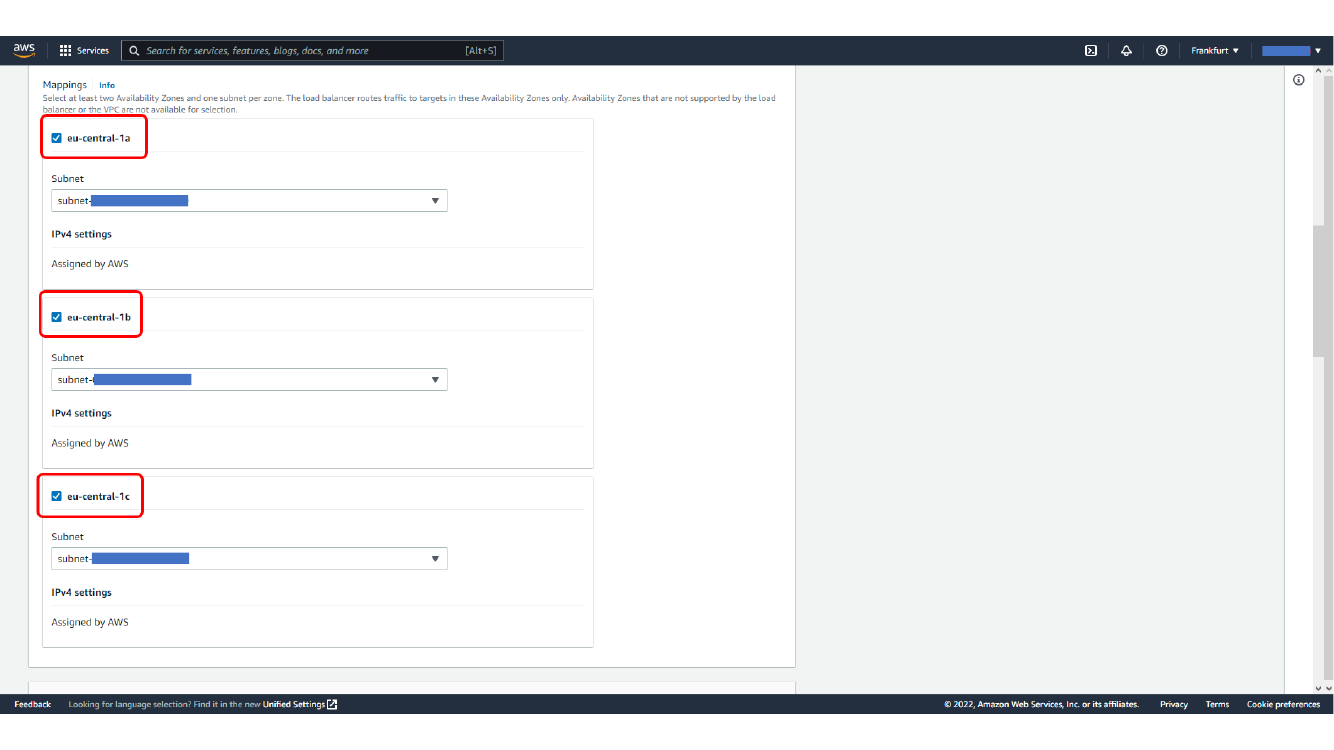
Here, we select the target group for load balancer routing.
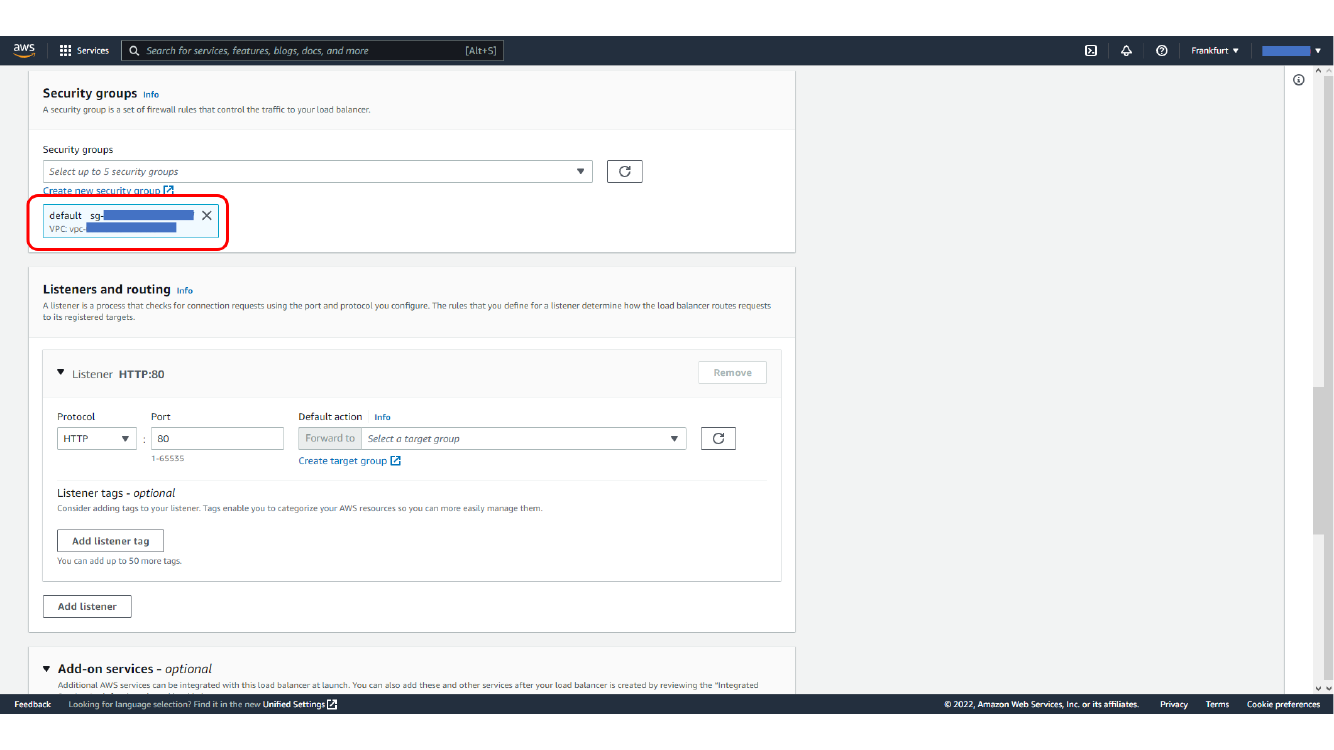
Here, we select the ACM certificate for HTTPS listener.
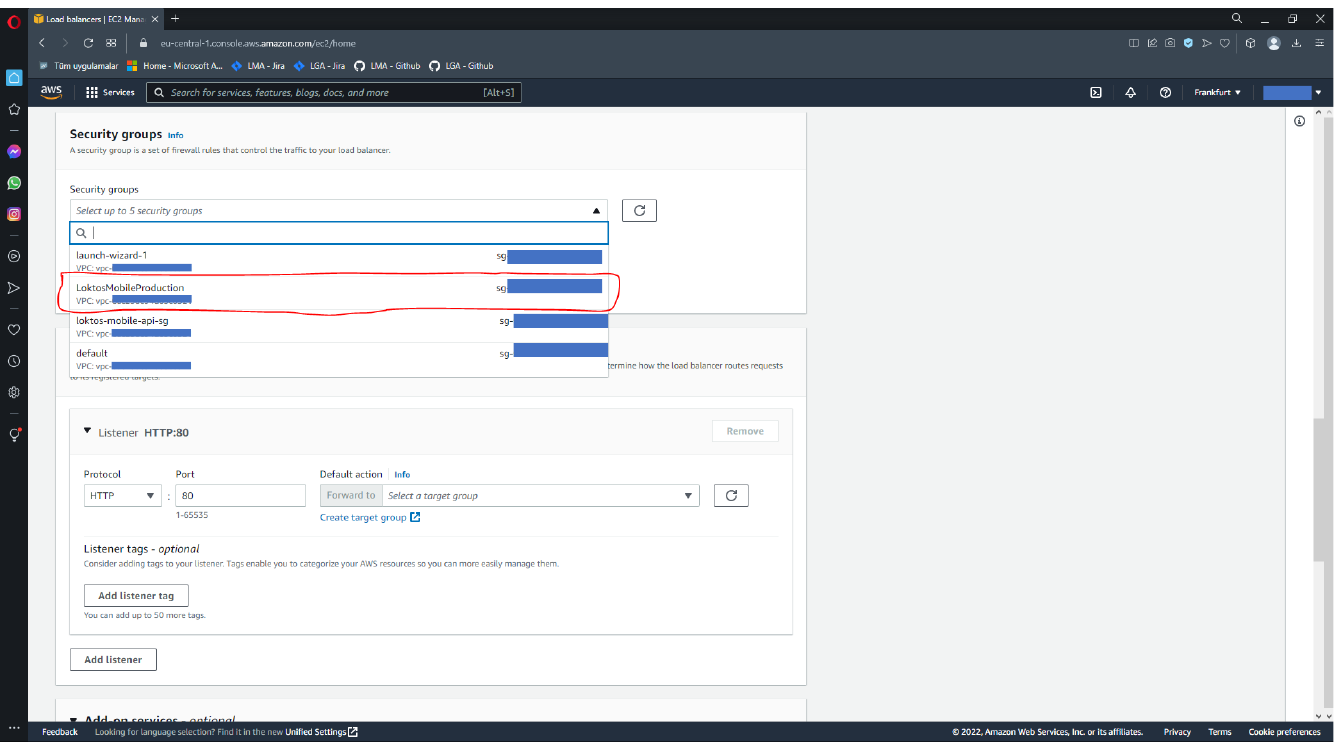
Here, we review HTTPS listener and certificate settings.
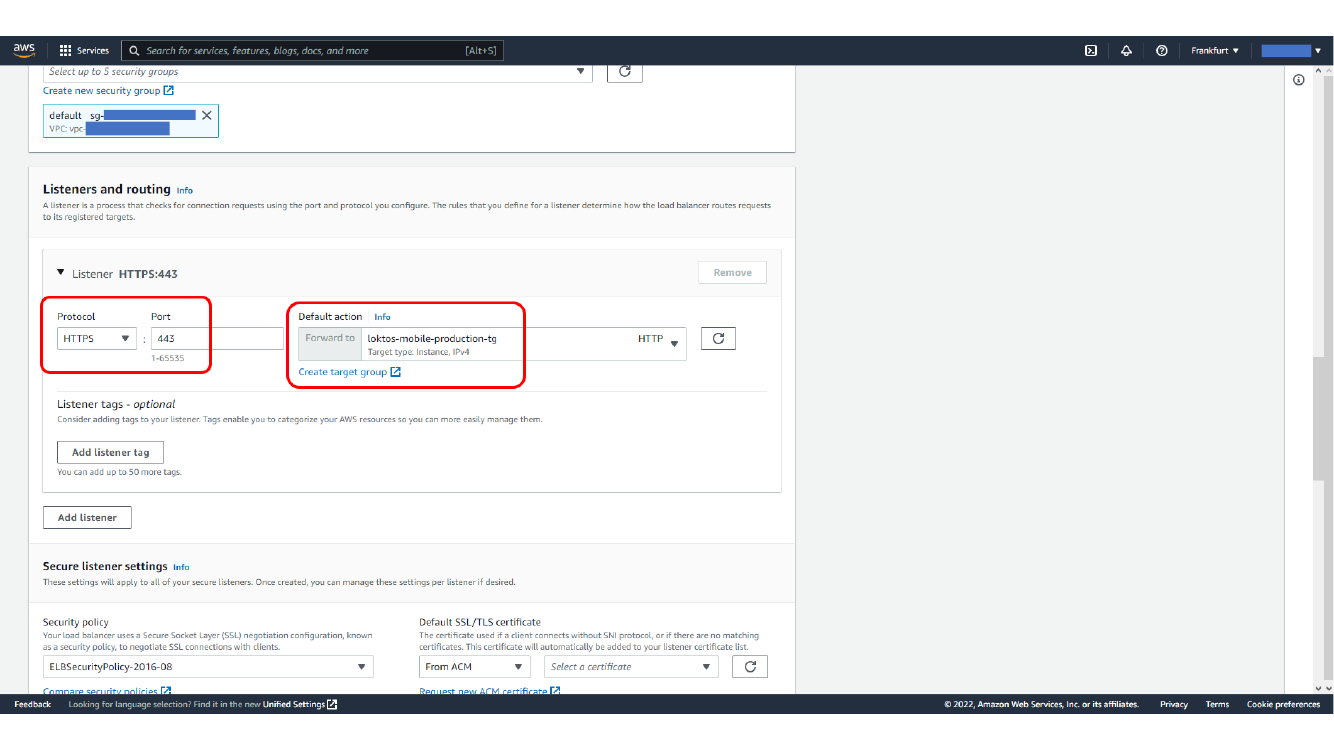
Here, we review Application Load Balancer configuration.
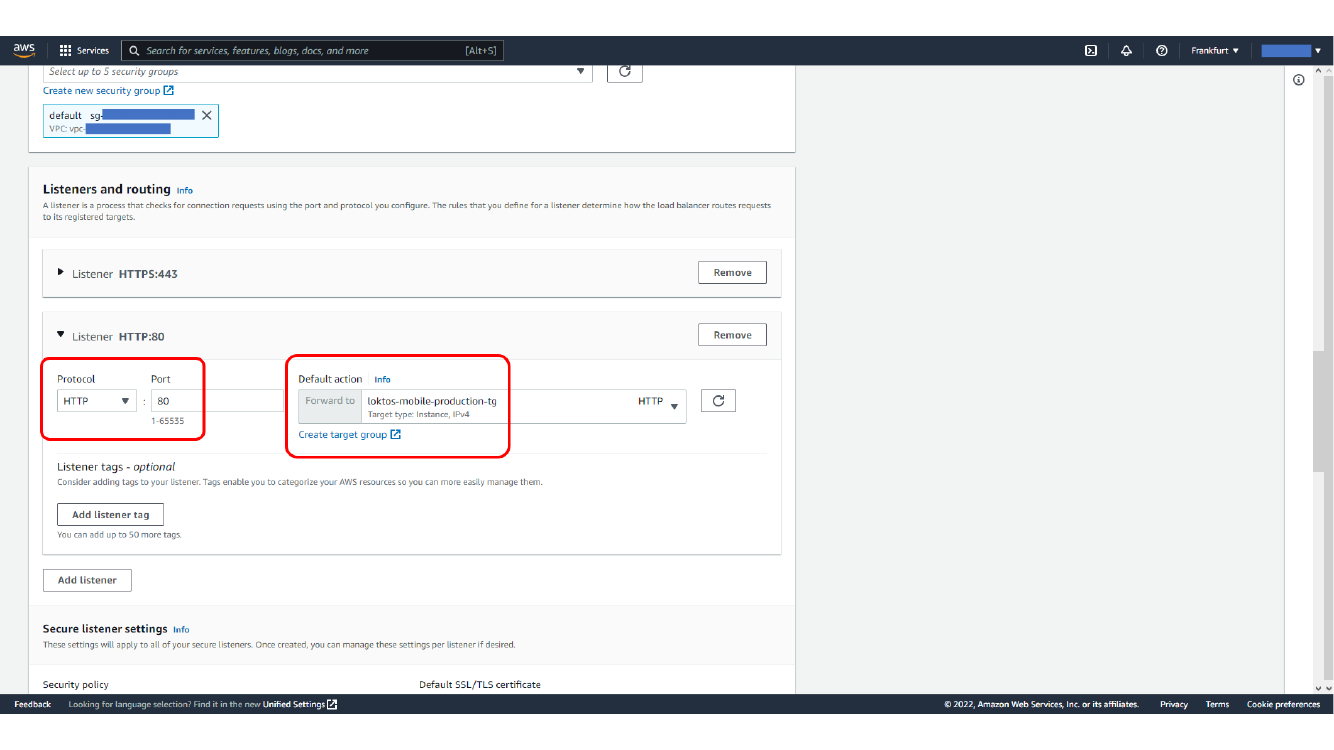
Here, we create the Application Load Balancer.
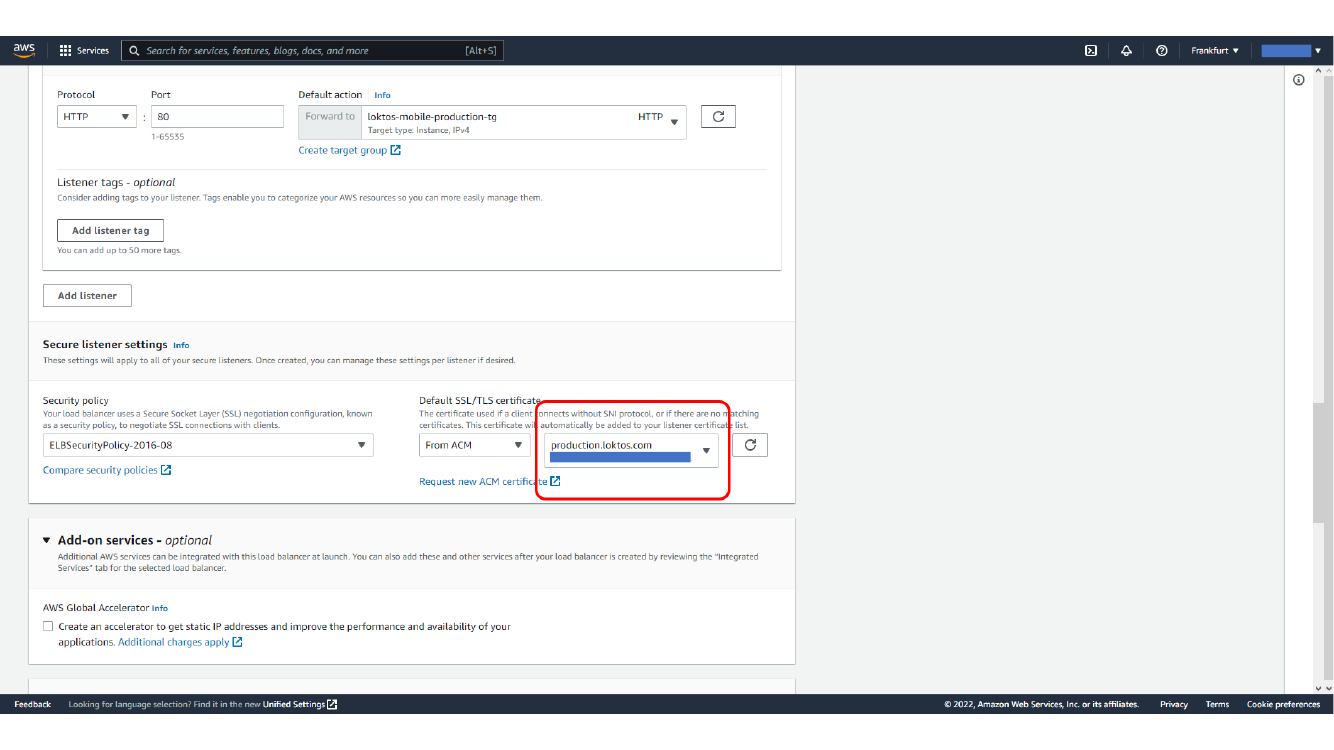
This screen shows Application Load Balancer creation in progress.
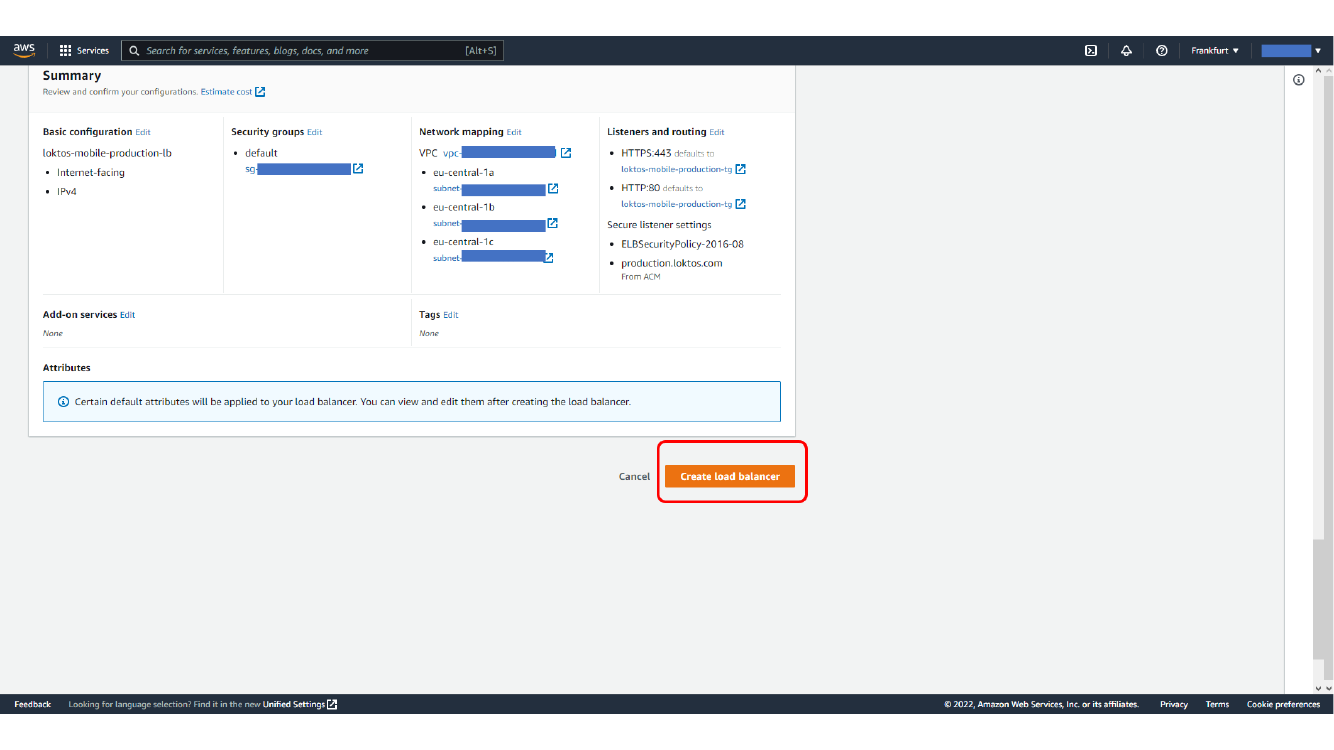
This screen shows Created Application Load Balancer details.
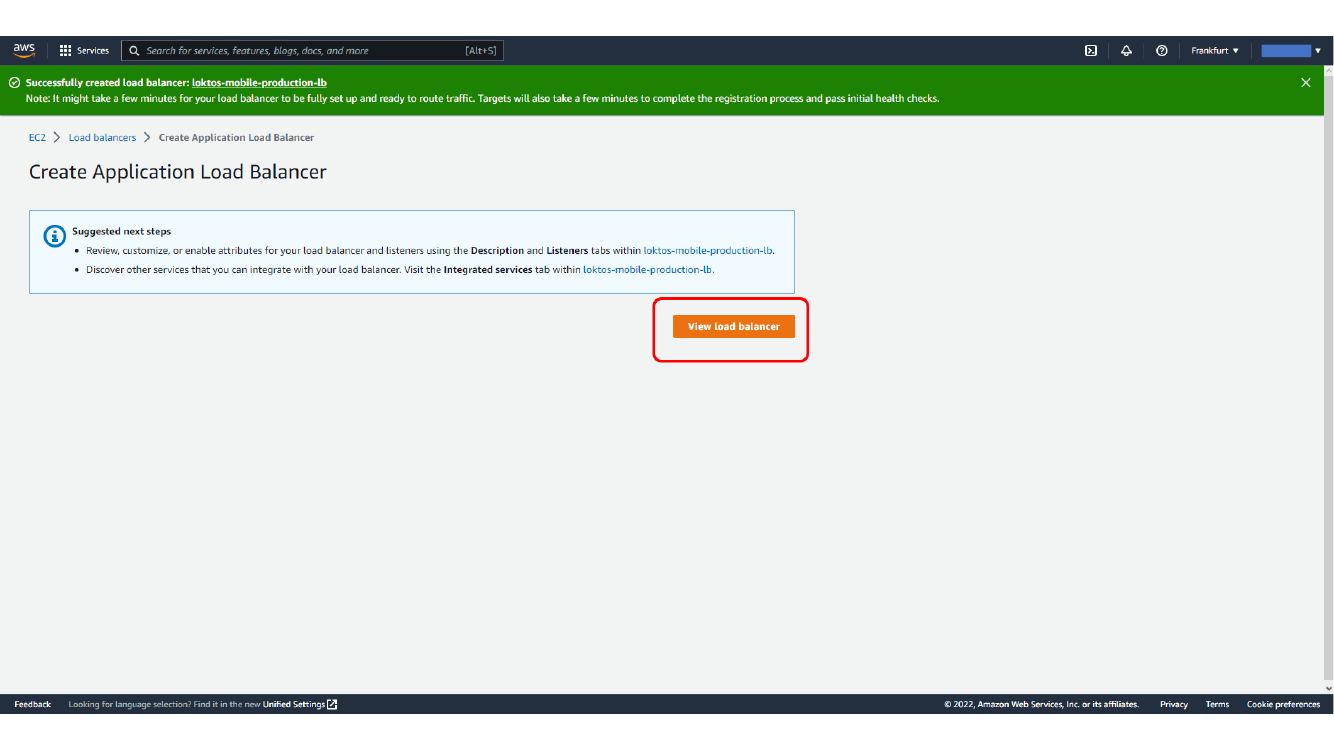
Here, we check load balancer listener configuration.
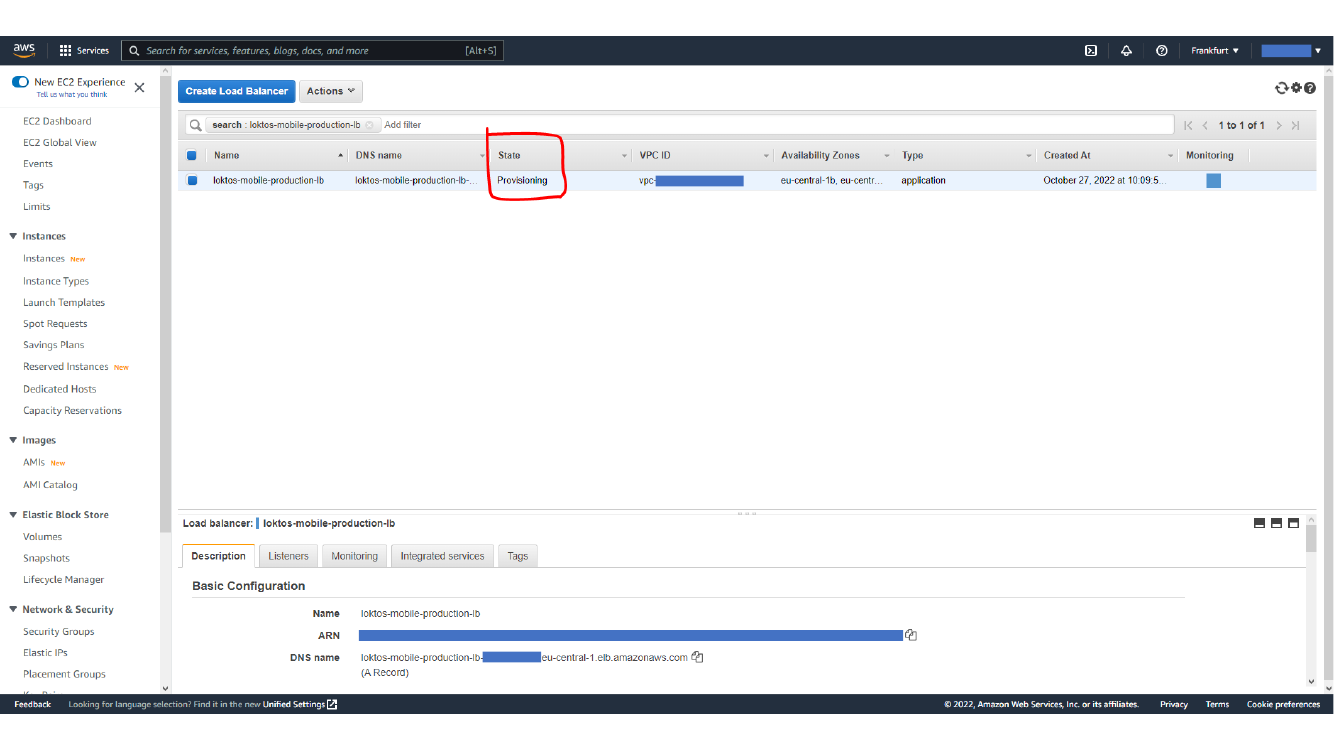
Here, we check target group health behind the load balancer.
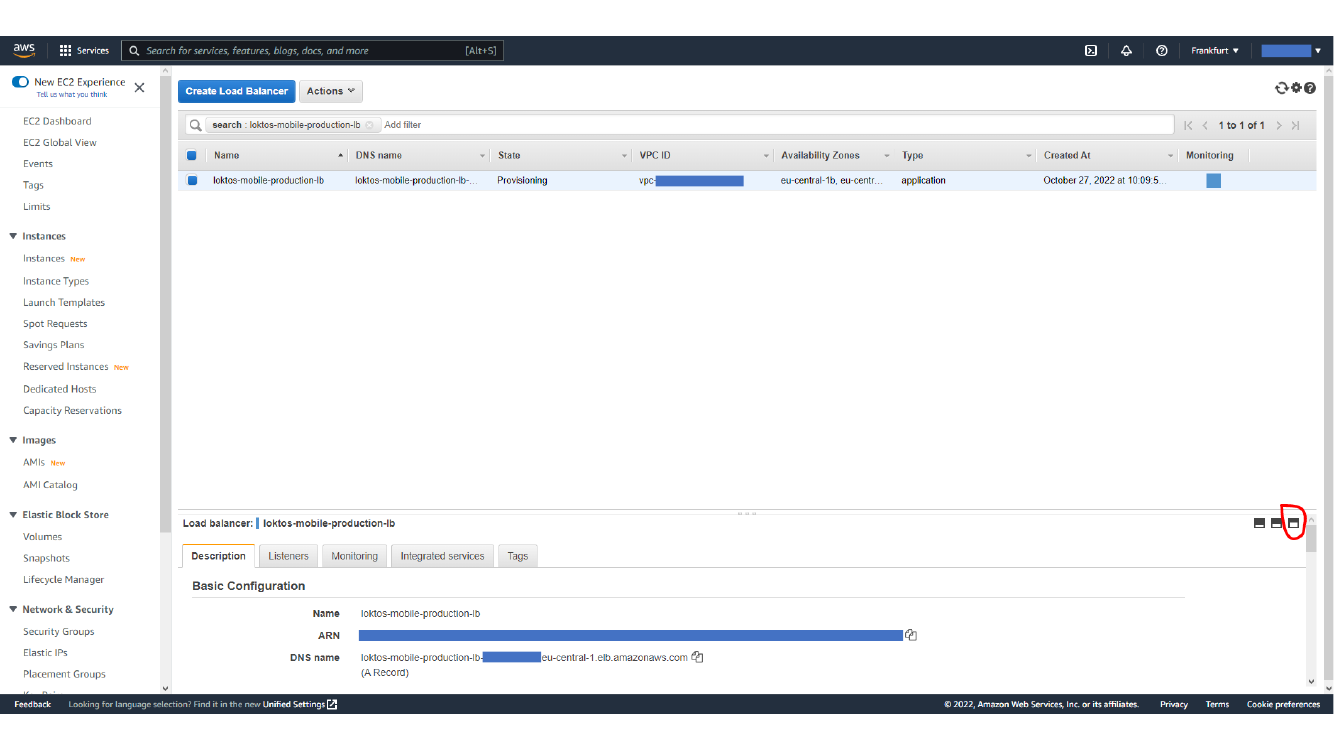
This screen shows Application Load Balancer ready with target group and certificate.
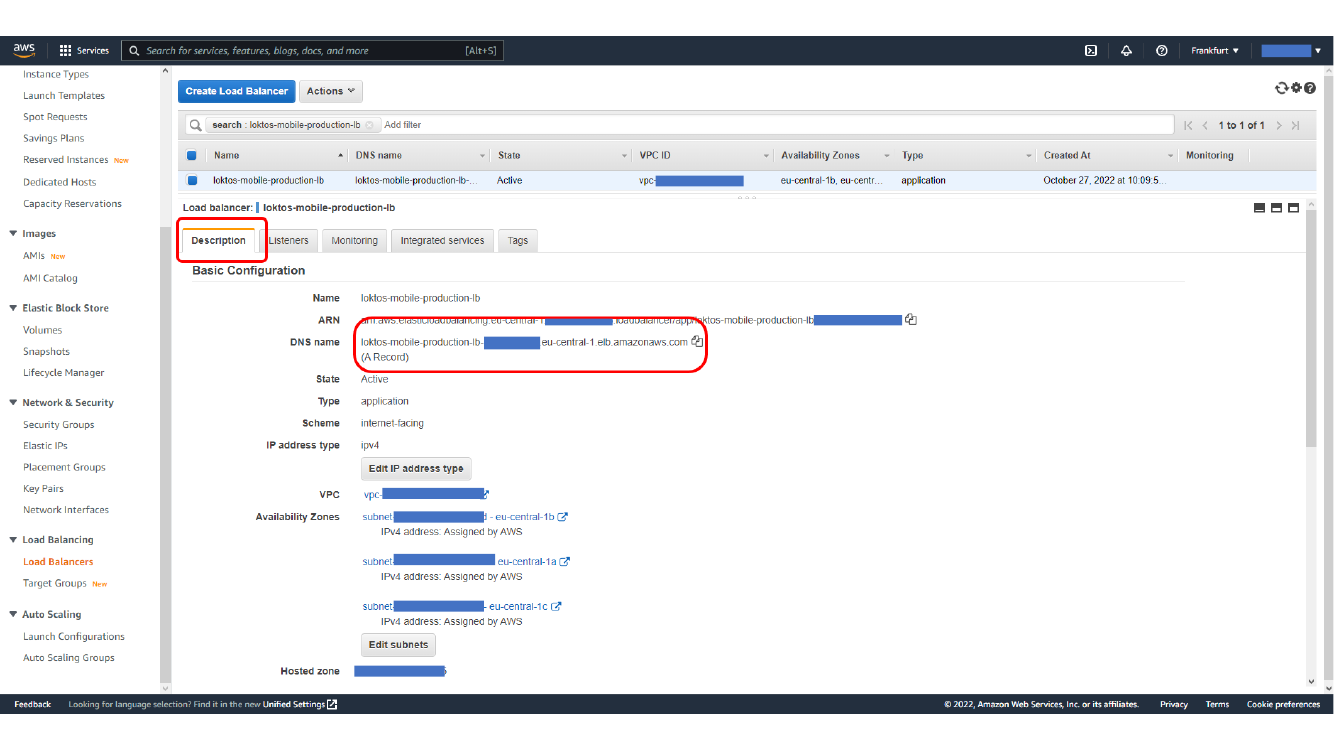
Redirecting HTTP to HTTPS
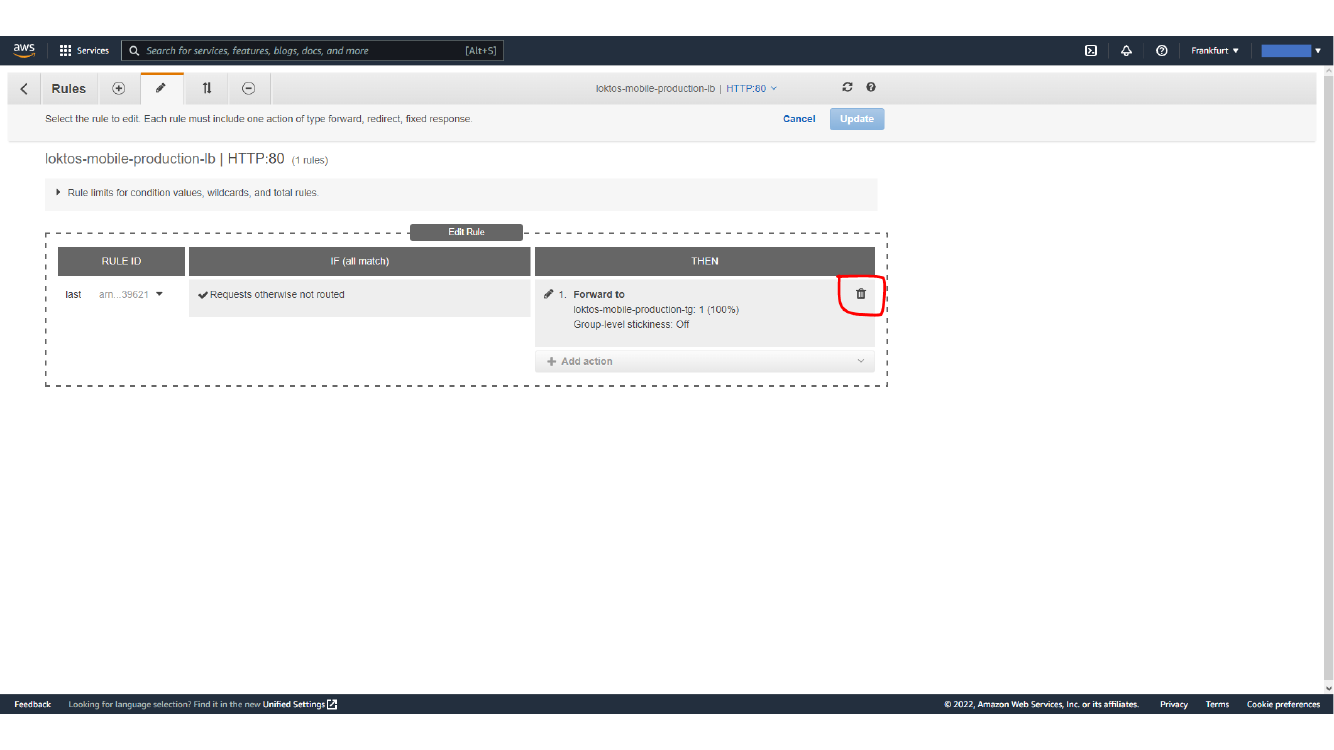
After HTTPS works, update the HTTP listener so that it redirects requests to HTTPS instead of forwarding them directly. This keeps users on the secure endpoint even if they type the plain HTTP address.
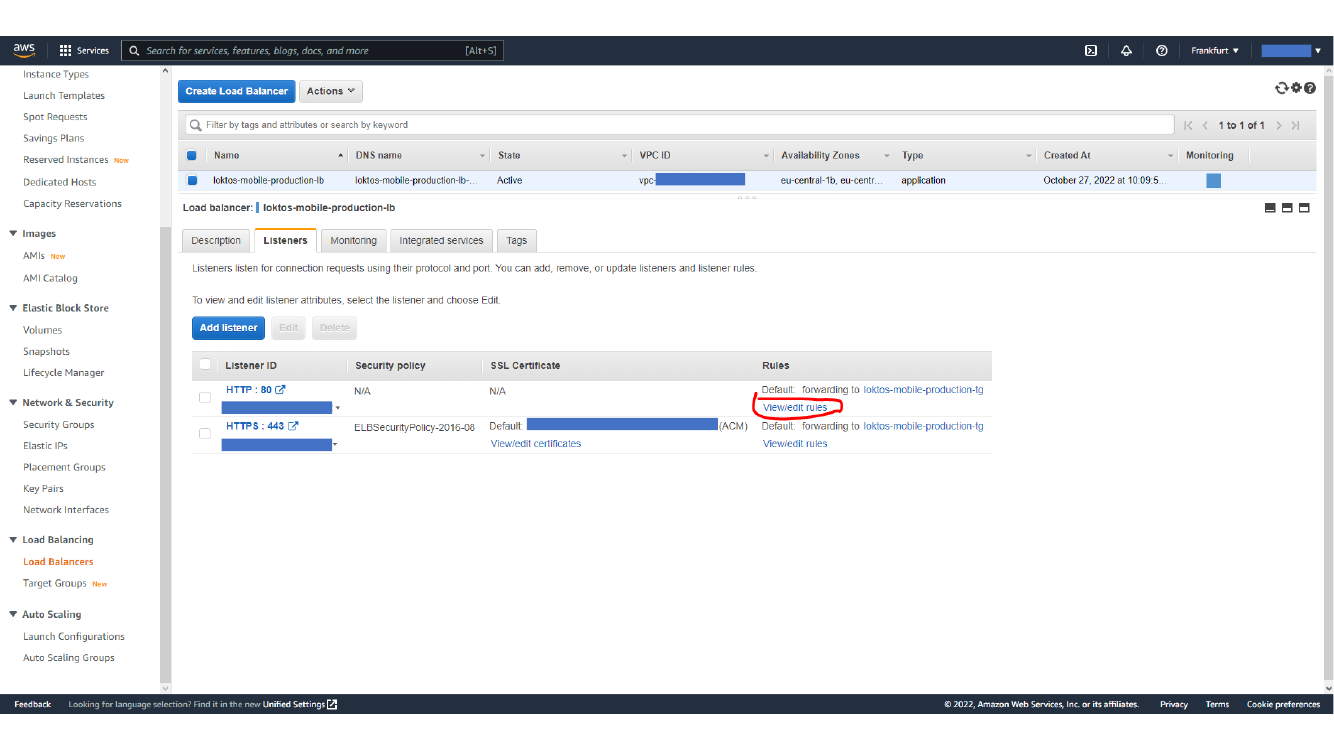
Here, we edit the HTTP listener default action.
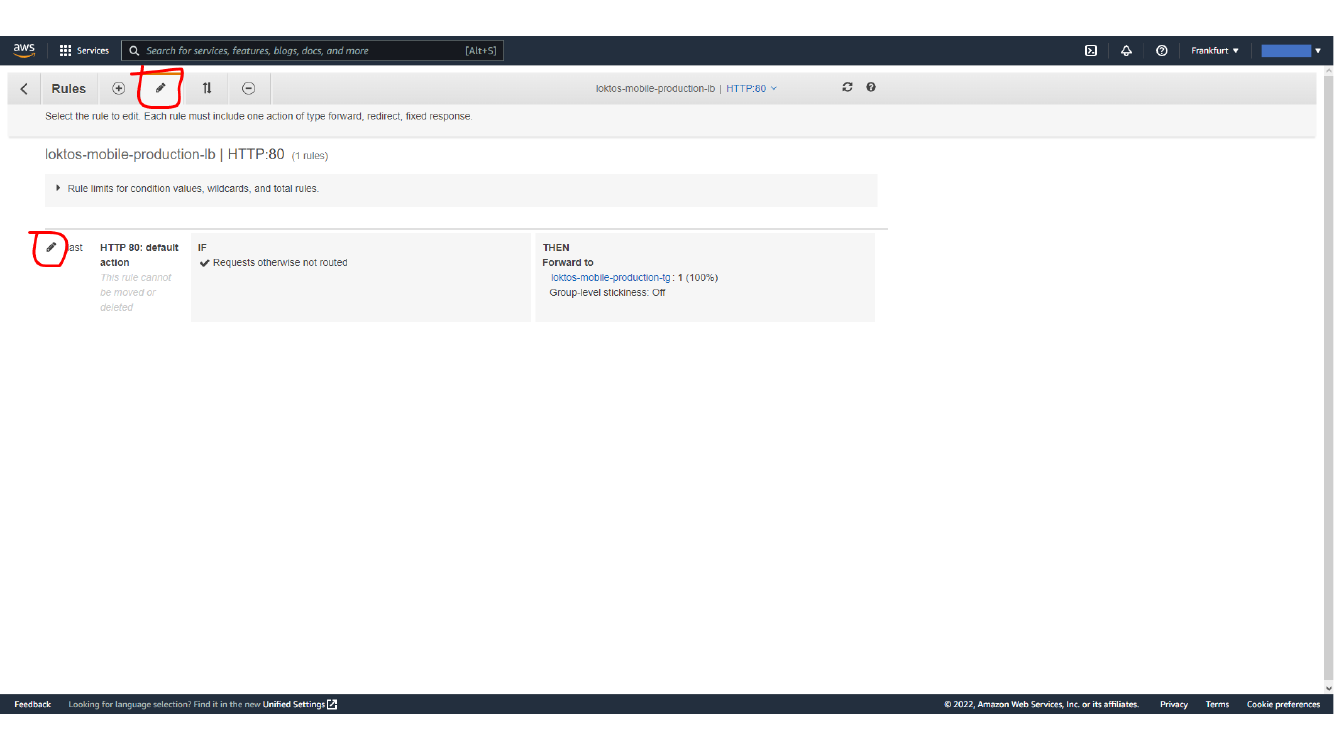
This screen shows Removing HTTP forwarding action.
Here, we add HTTPS redirect action.
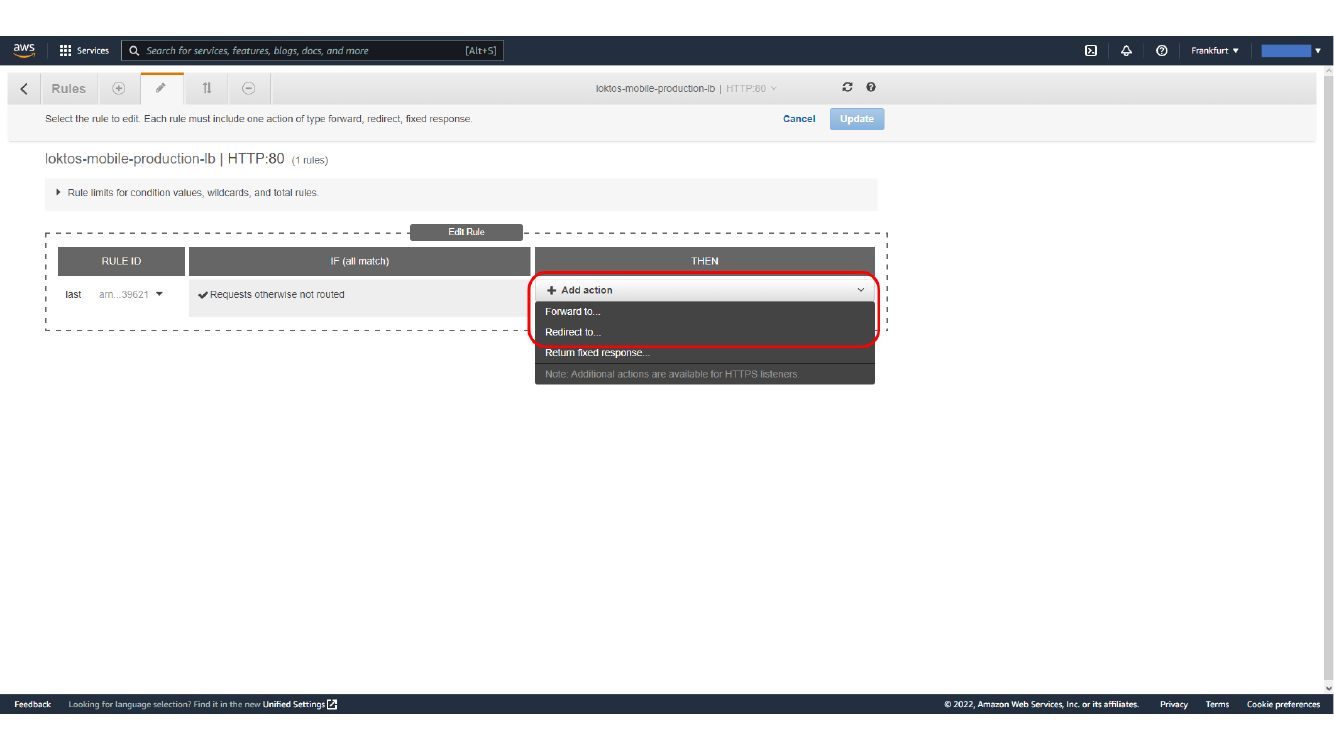
This screen shows Configuring redirect to HTTPS port 443.
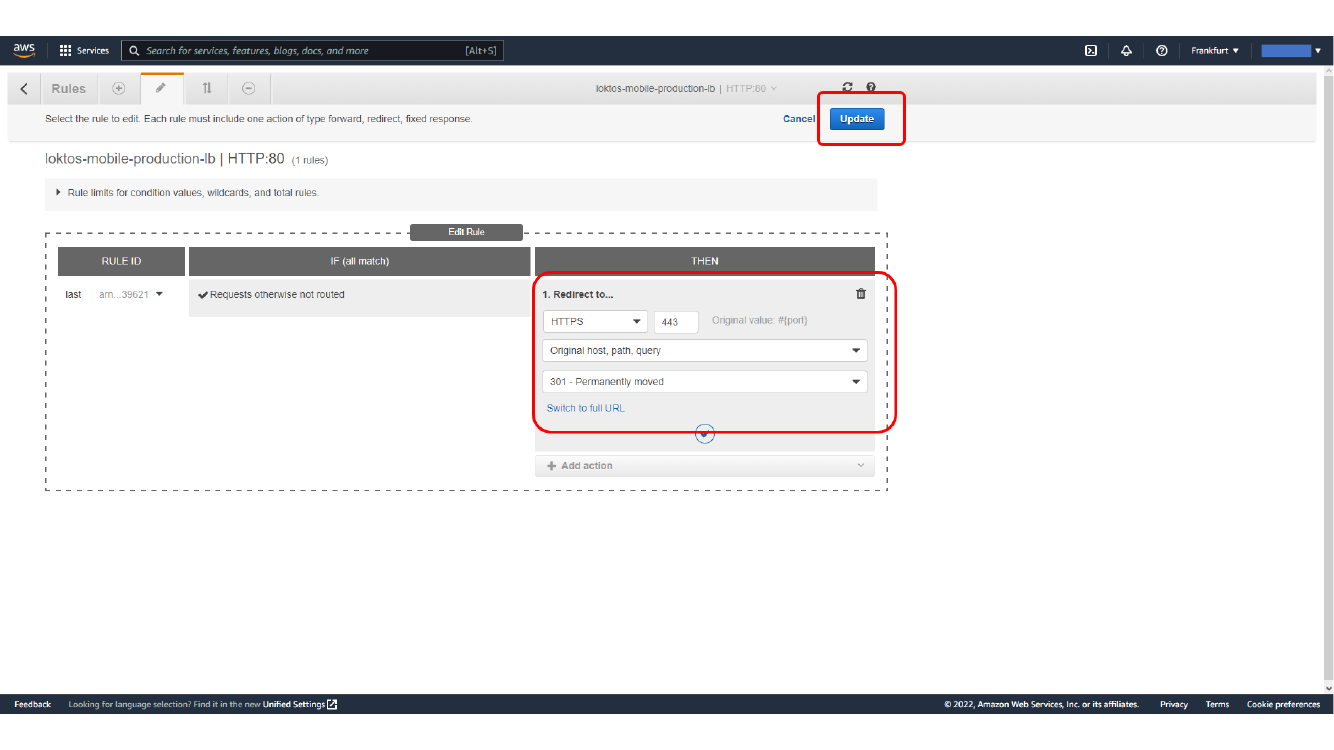
Here, we save HTTP to HTTPS redirect rule.
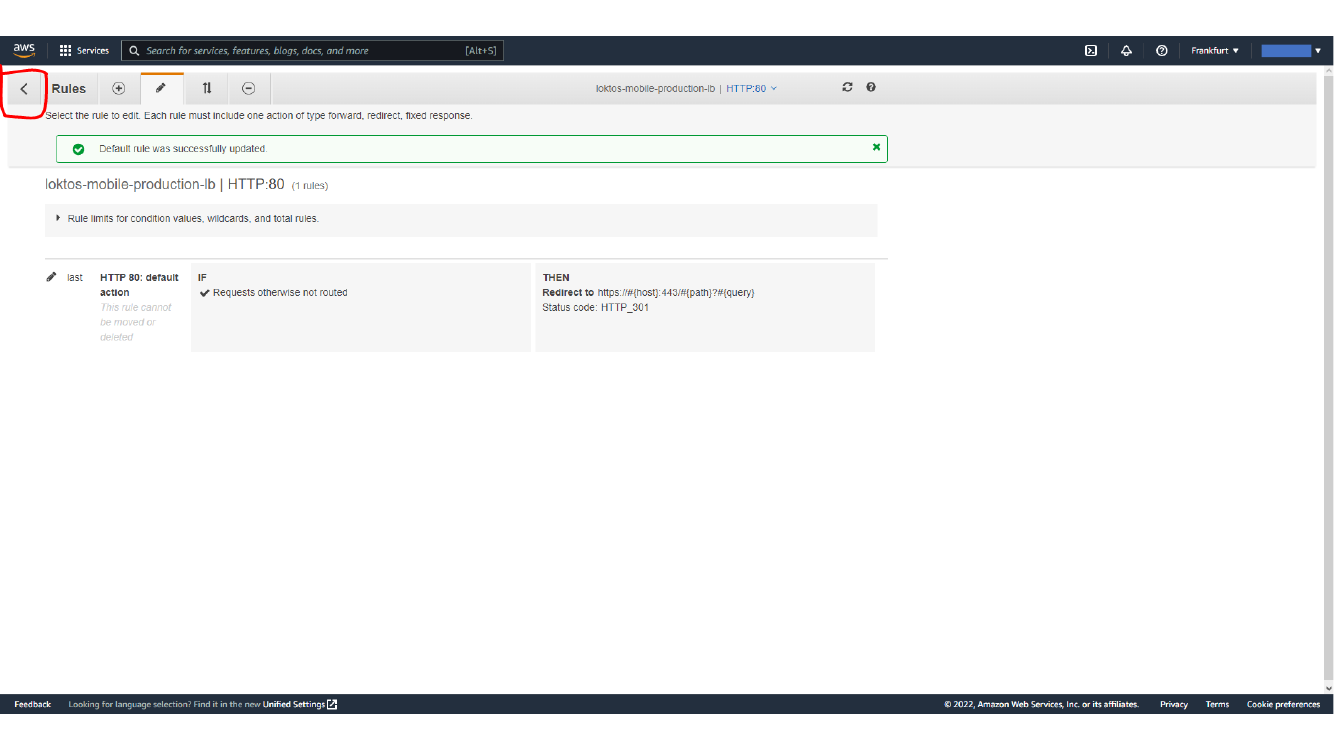
This screen shows Updated HTTP listener rule redirecting to HTTPS.
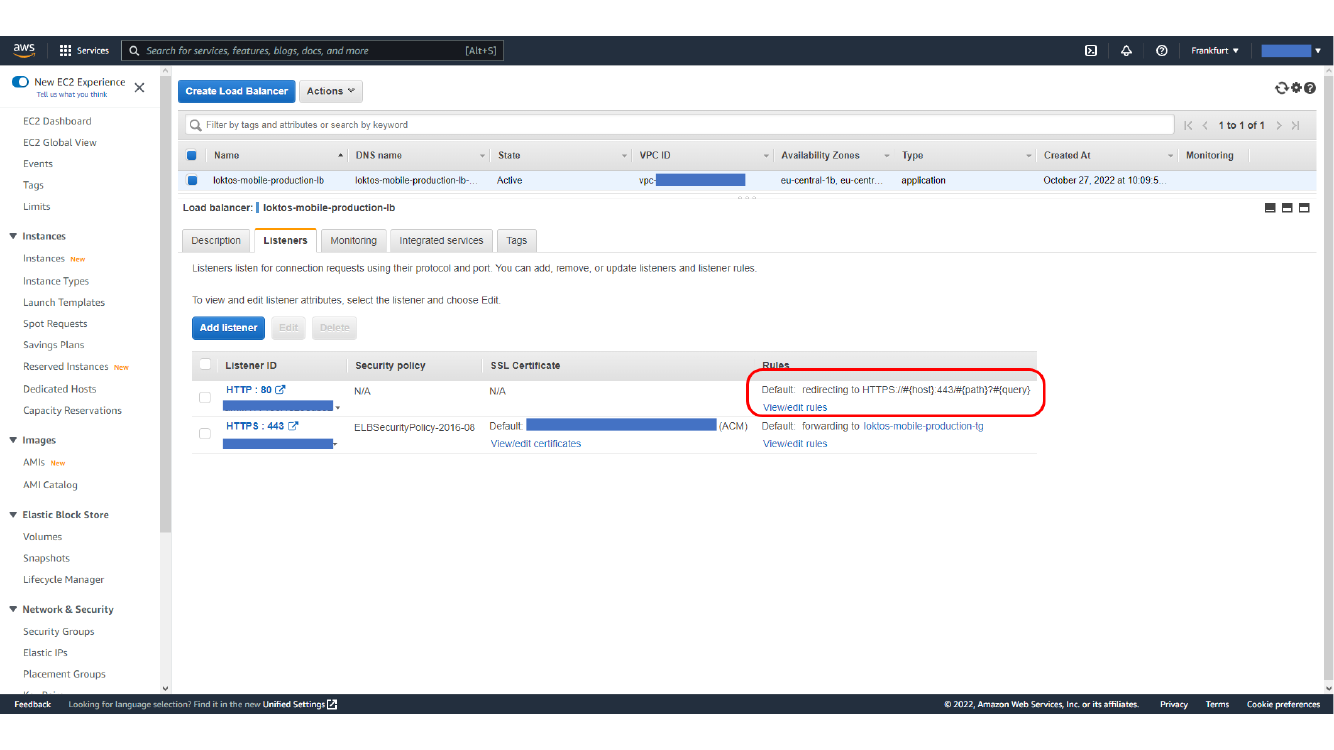
Here, we test HTTPS listener behavior.
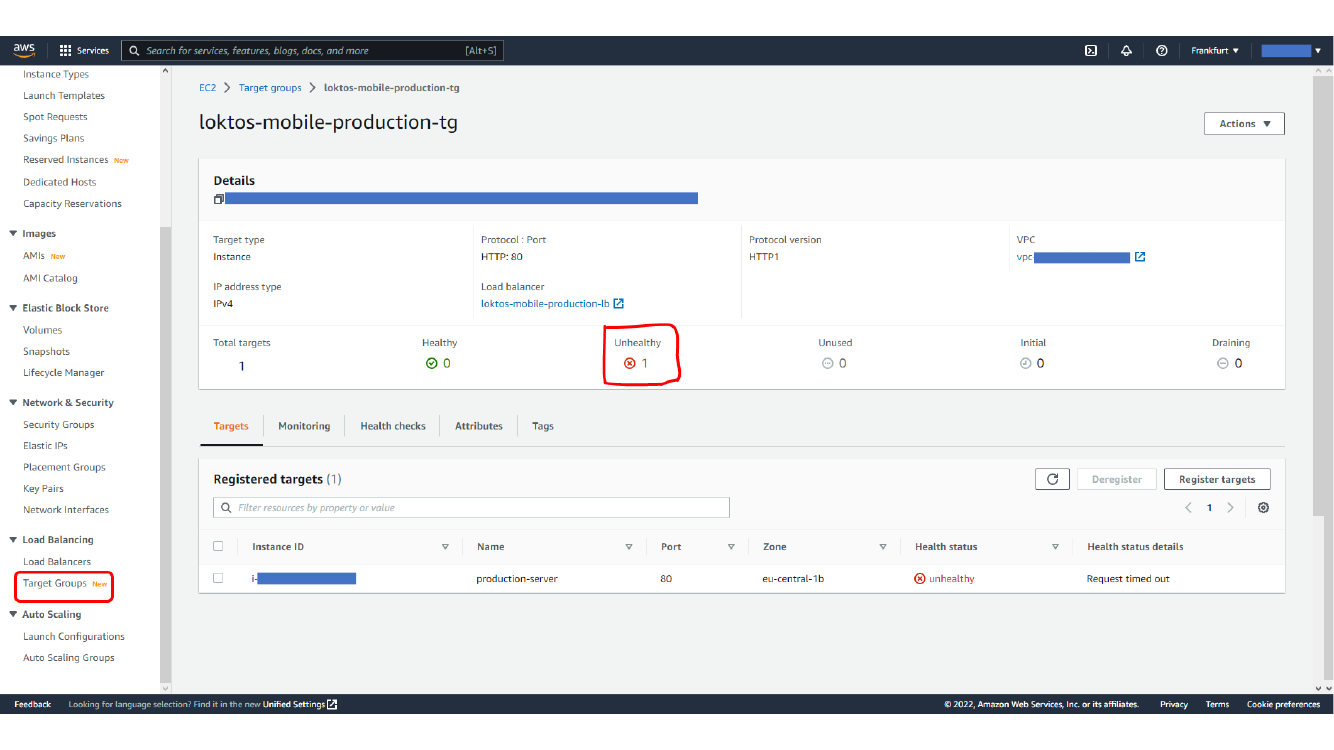
This screen shows HTTP traffic redirected to HTTPS successfully.
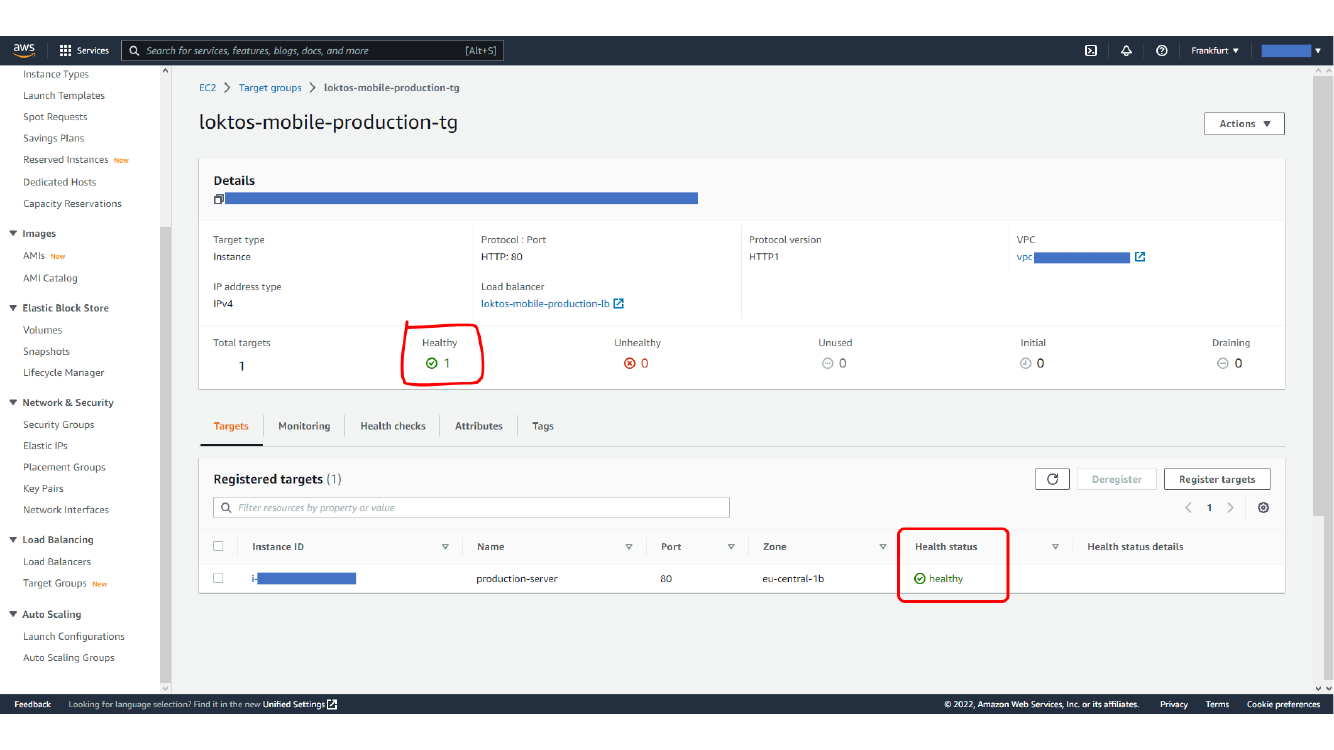
Checking DNS Records
Finally, point the domain or subdomain to the load balancer DNS name. Depending on your DNS provider, this may be a CNAME record or another supported alias-style record. Use DNS lookup tools to check whether the record has propagated.
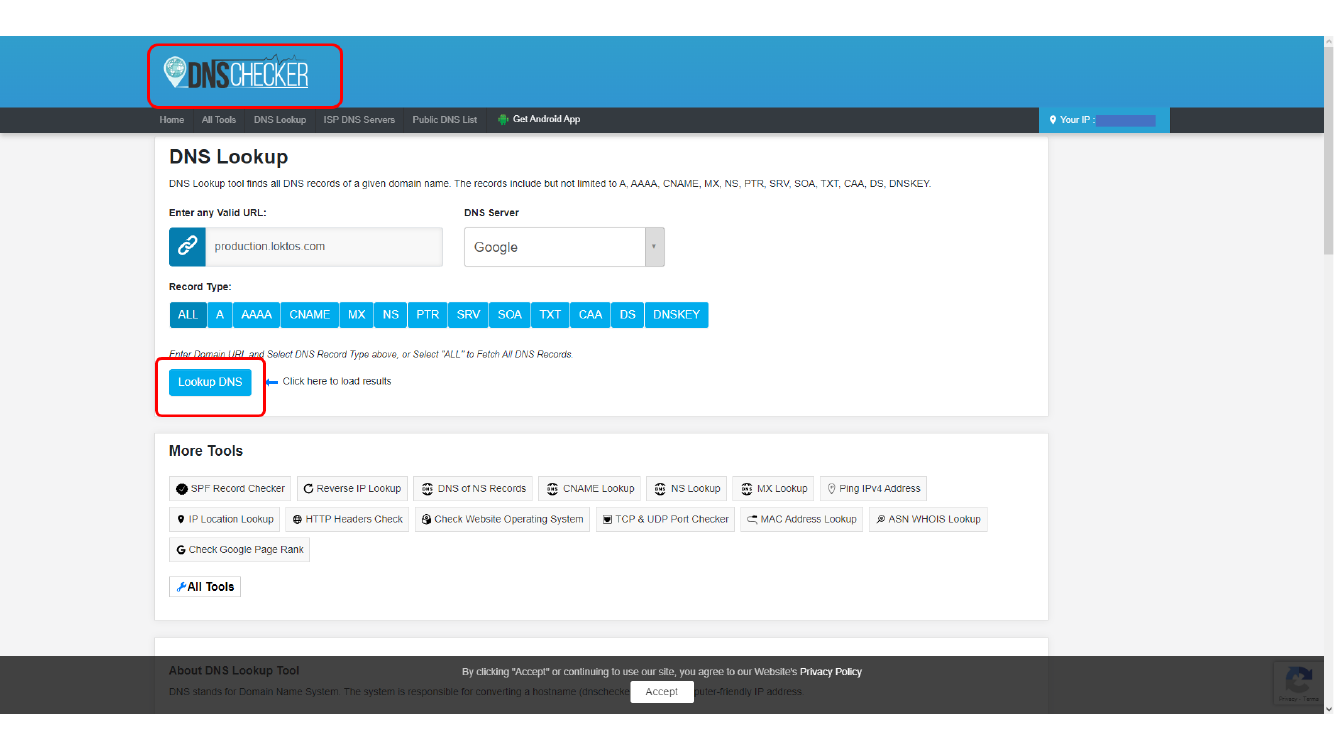
This screen shows DNS lookup result for the configured domain.
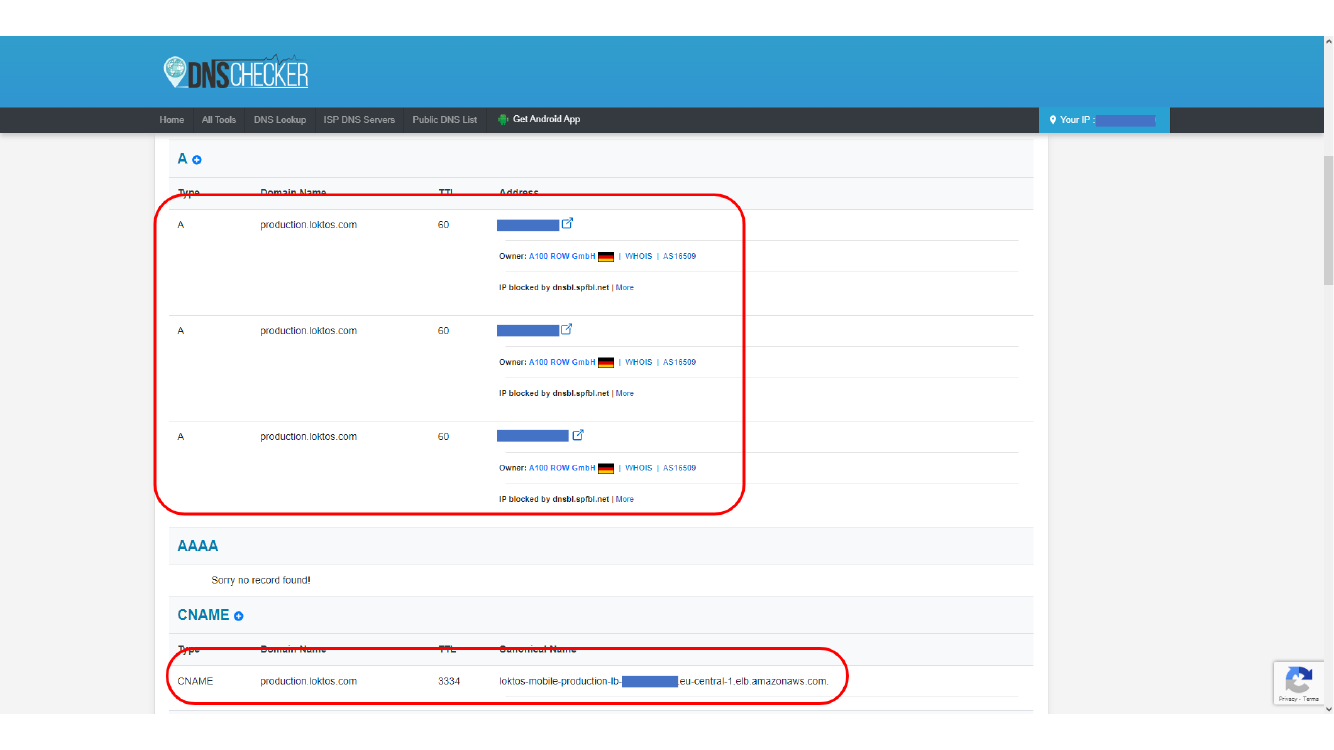
This screen shows Verifying domain points to the load balancer.
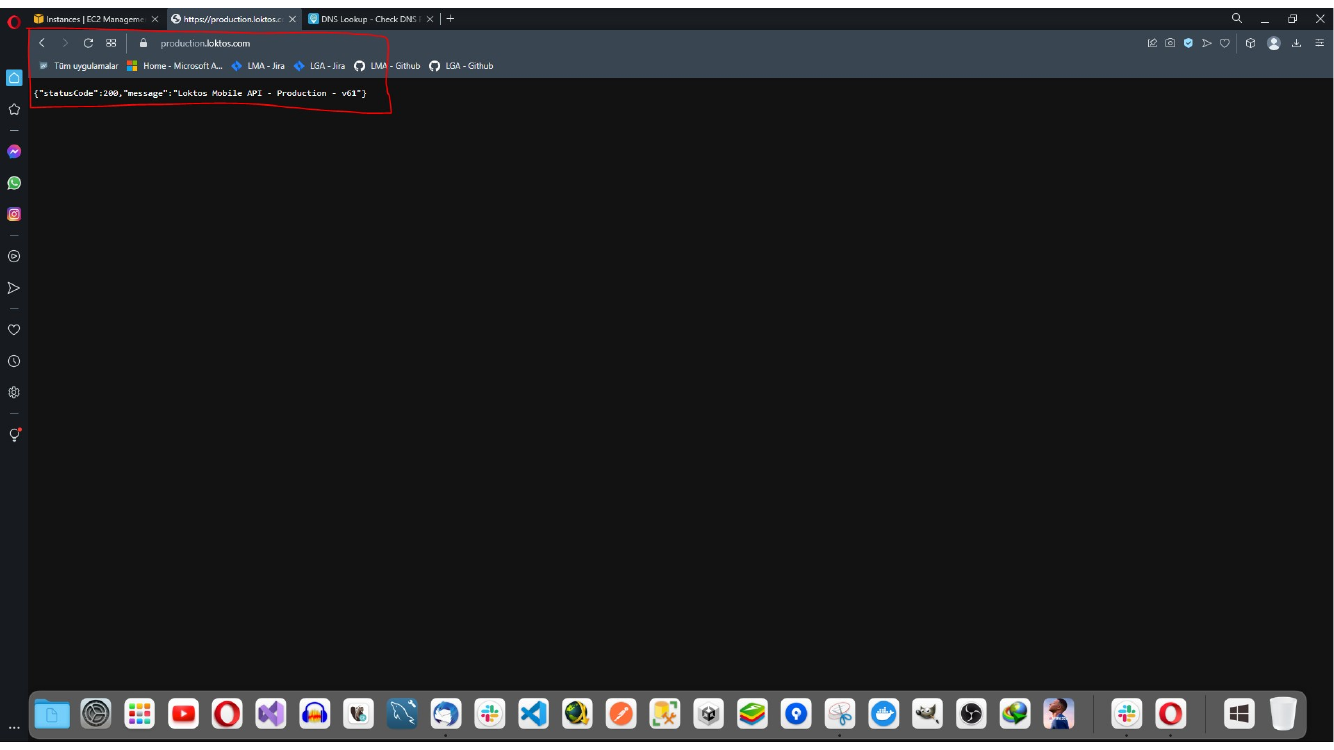
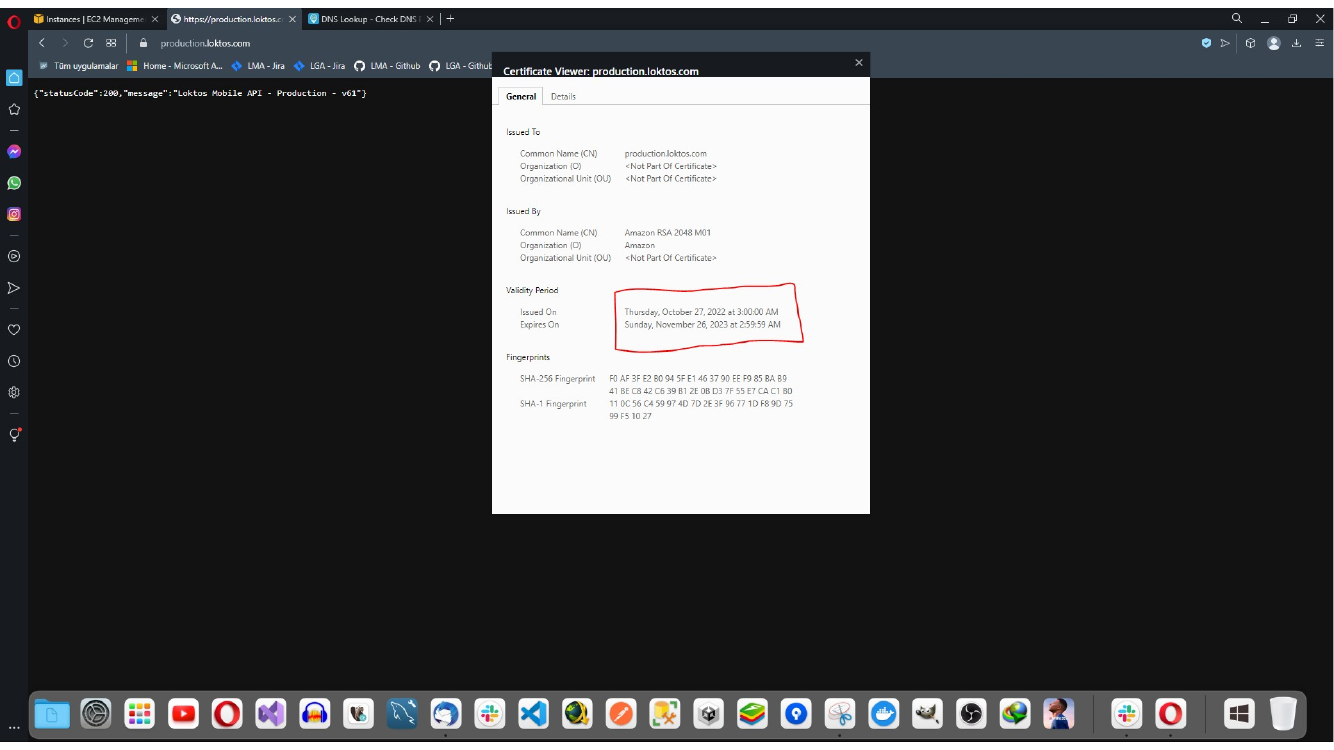
Here, we test the domain over HTTPS after DNS propagation.
Summary
At the end of this setup, the browser reaches the domain over HTTPS, the Application Load Balancer terminates SSL with the ACM certificate, and traffic is forwarded to the EC2 instance through the target group. HTTP requests are redirected to HTTPS, and DNS lookup confirms that the domain points to the expected load balancer endpoint.
Comments