Moodle can let learners create their own accounts through email-based self-registration. This archived 2016 walkthrough enables that method, opens the registration form, and shows the first account-creation flow.
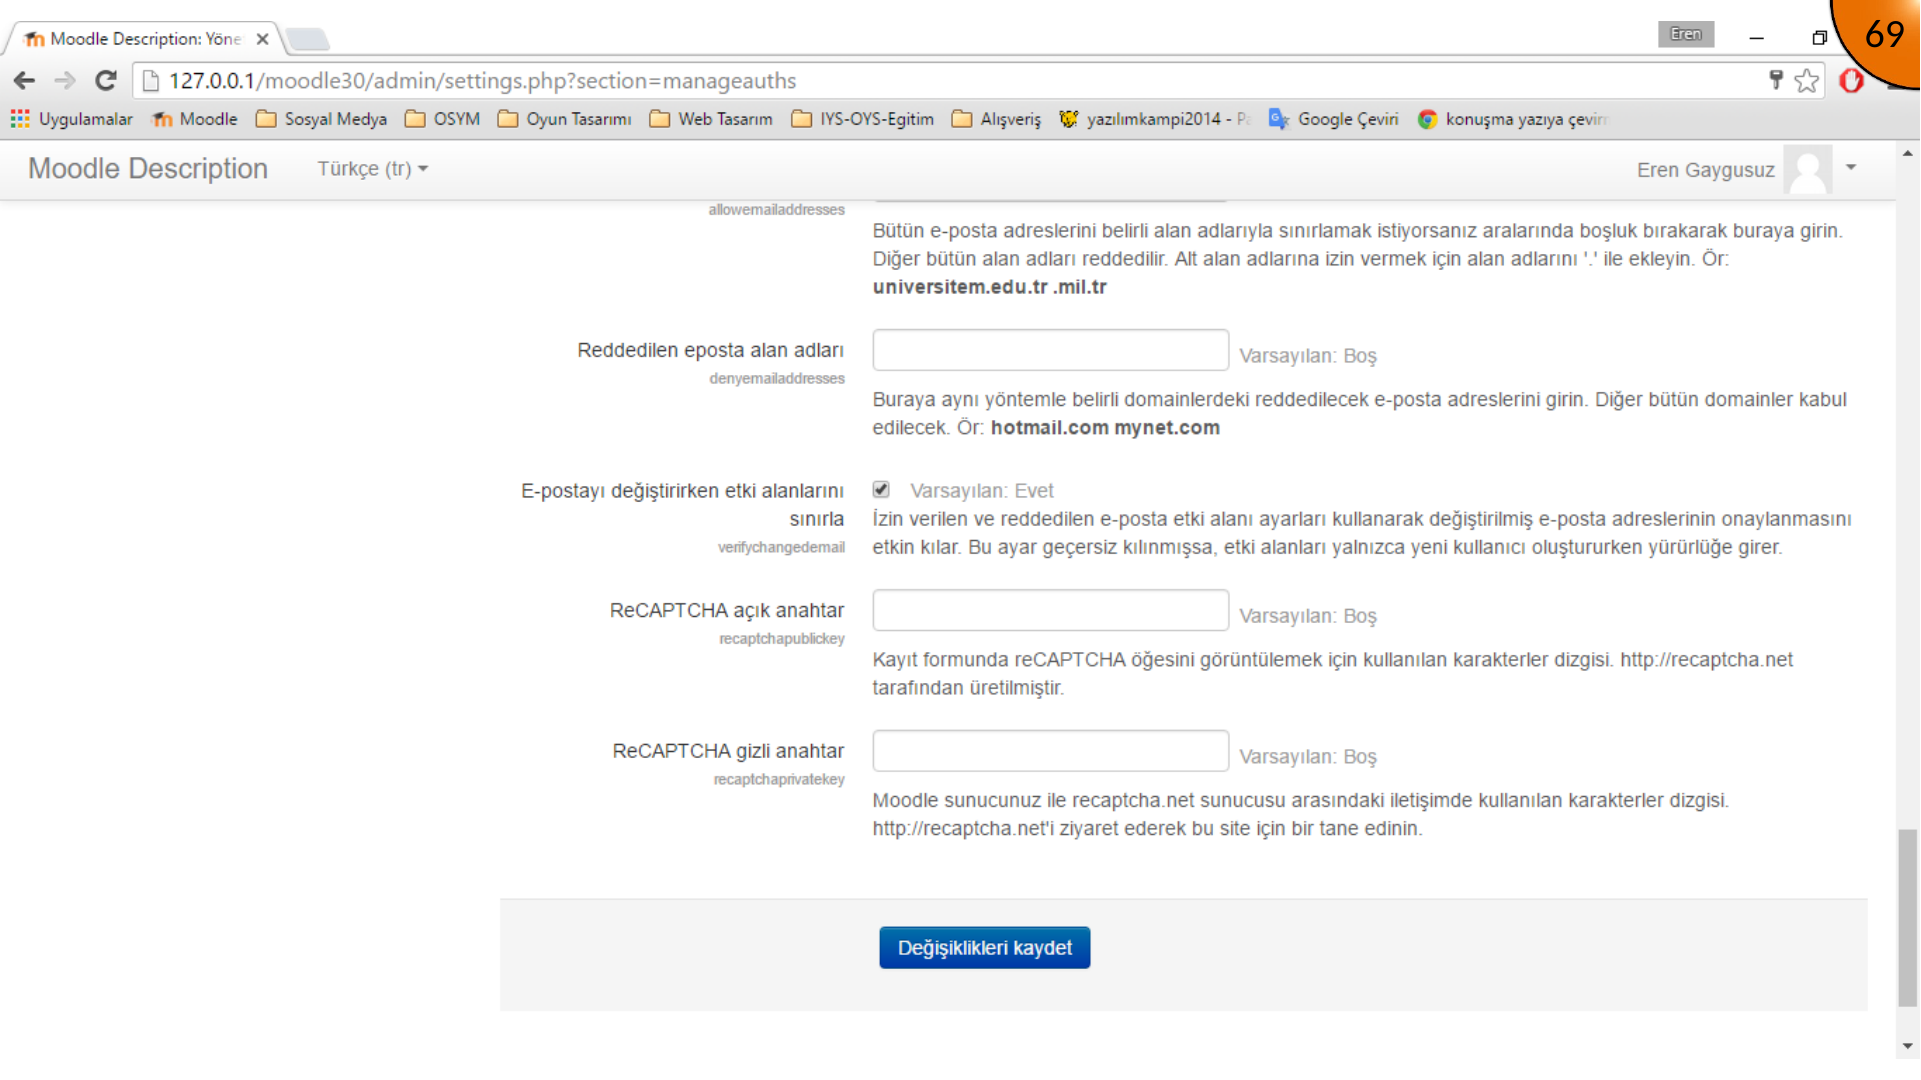
Self-registration changes who can create accounts on the site. Before enabling it on a public system, configure a real outbound email service, use CAPTCHA or other anti-abuse controls, and decide whether new accounts need administrator approval.
Table of contents
Open Table of contents
Opening Authentication Settings
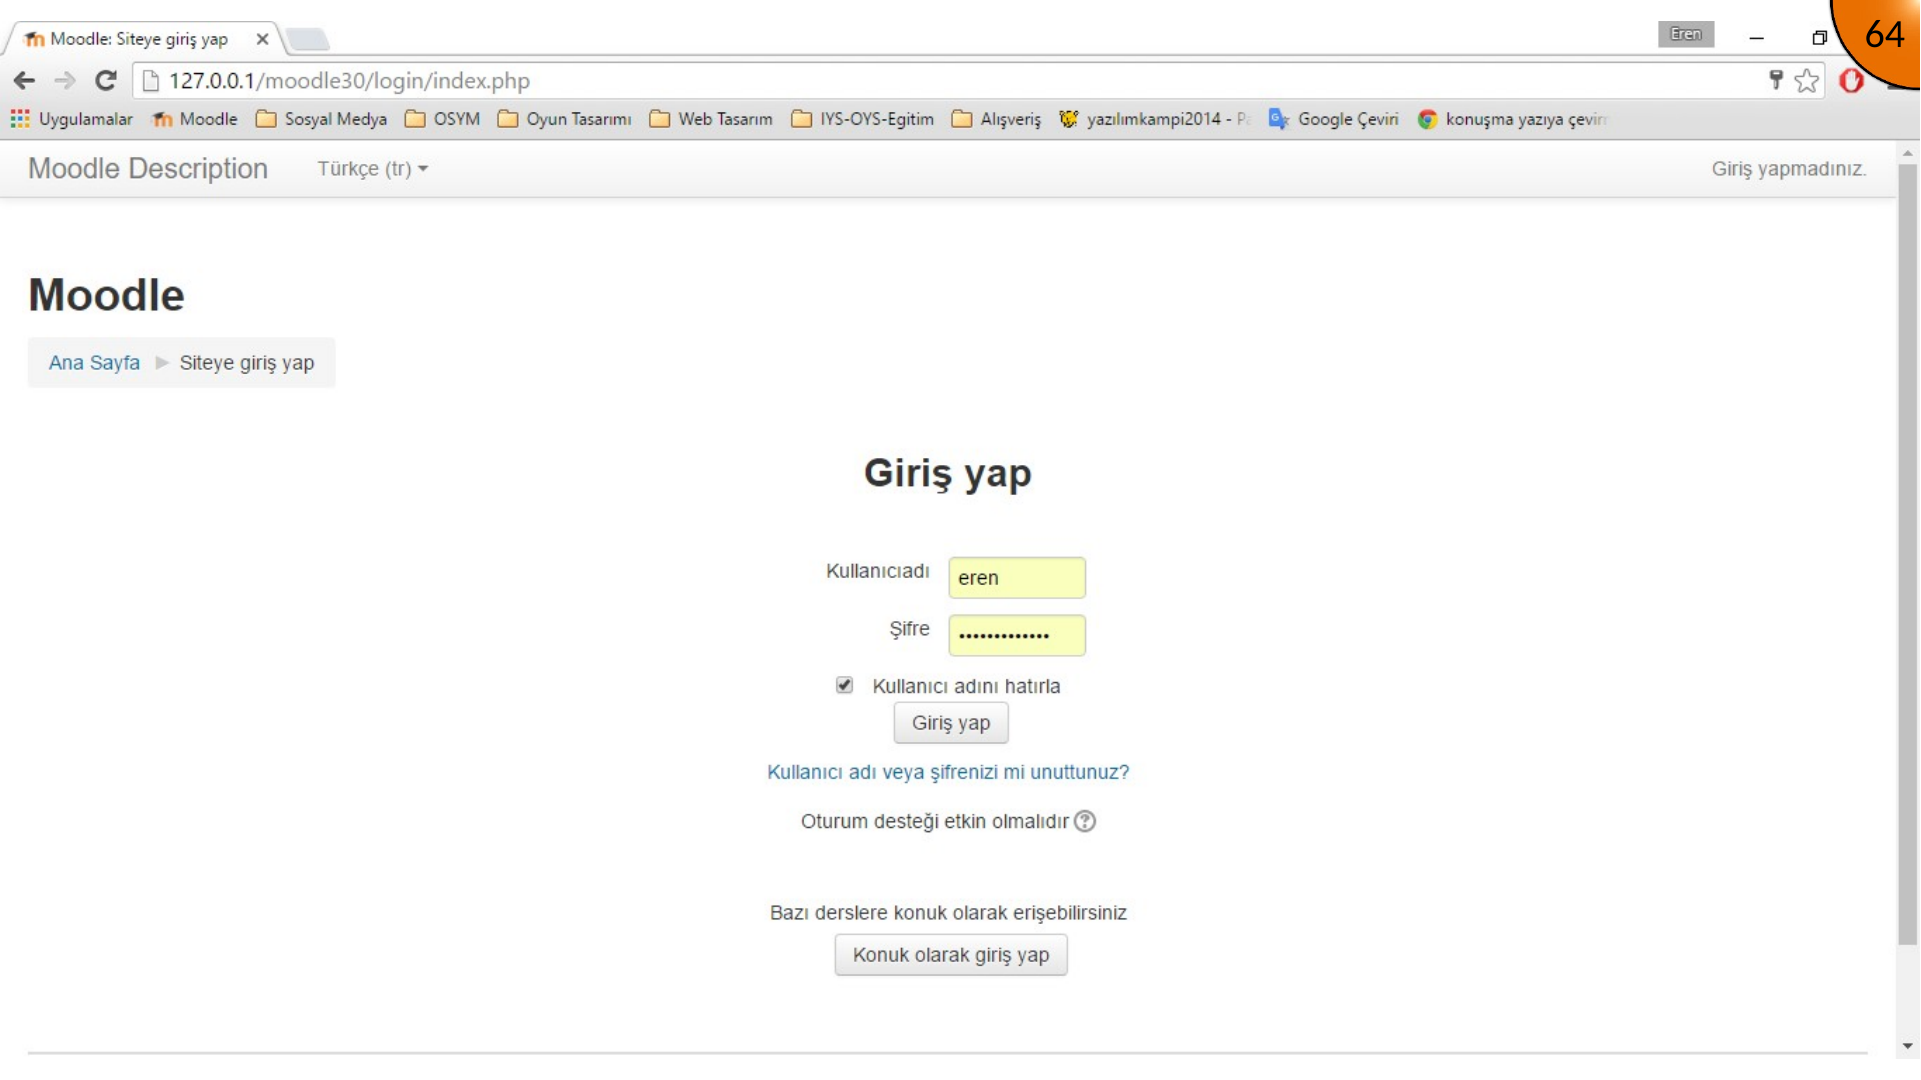
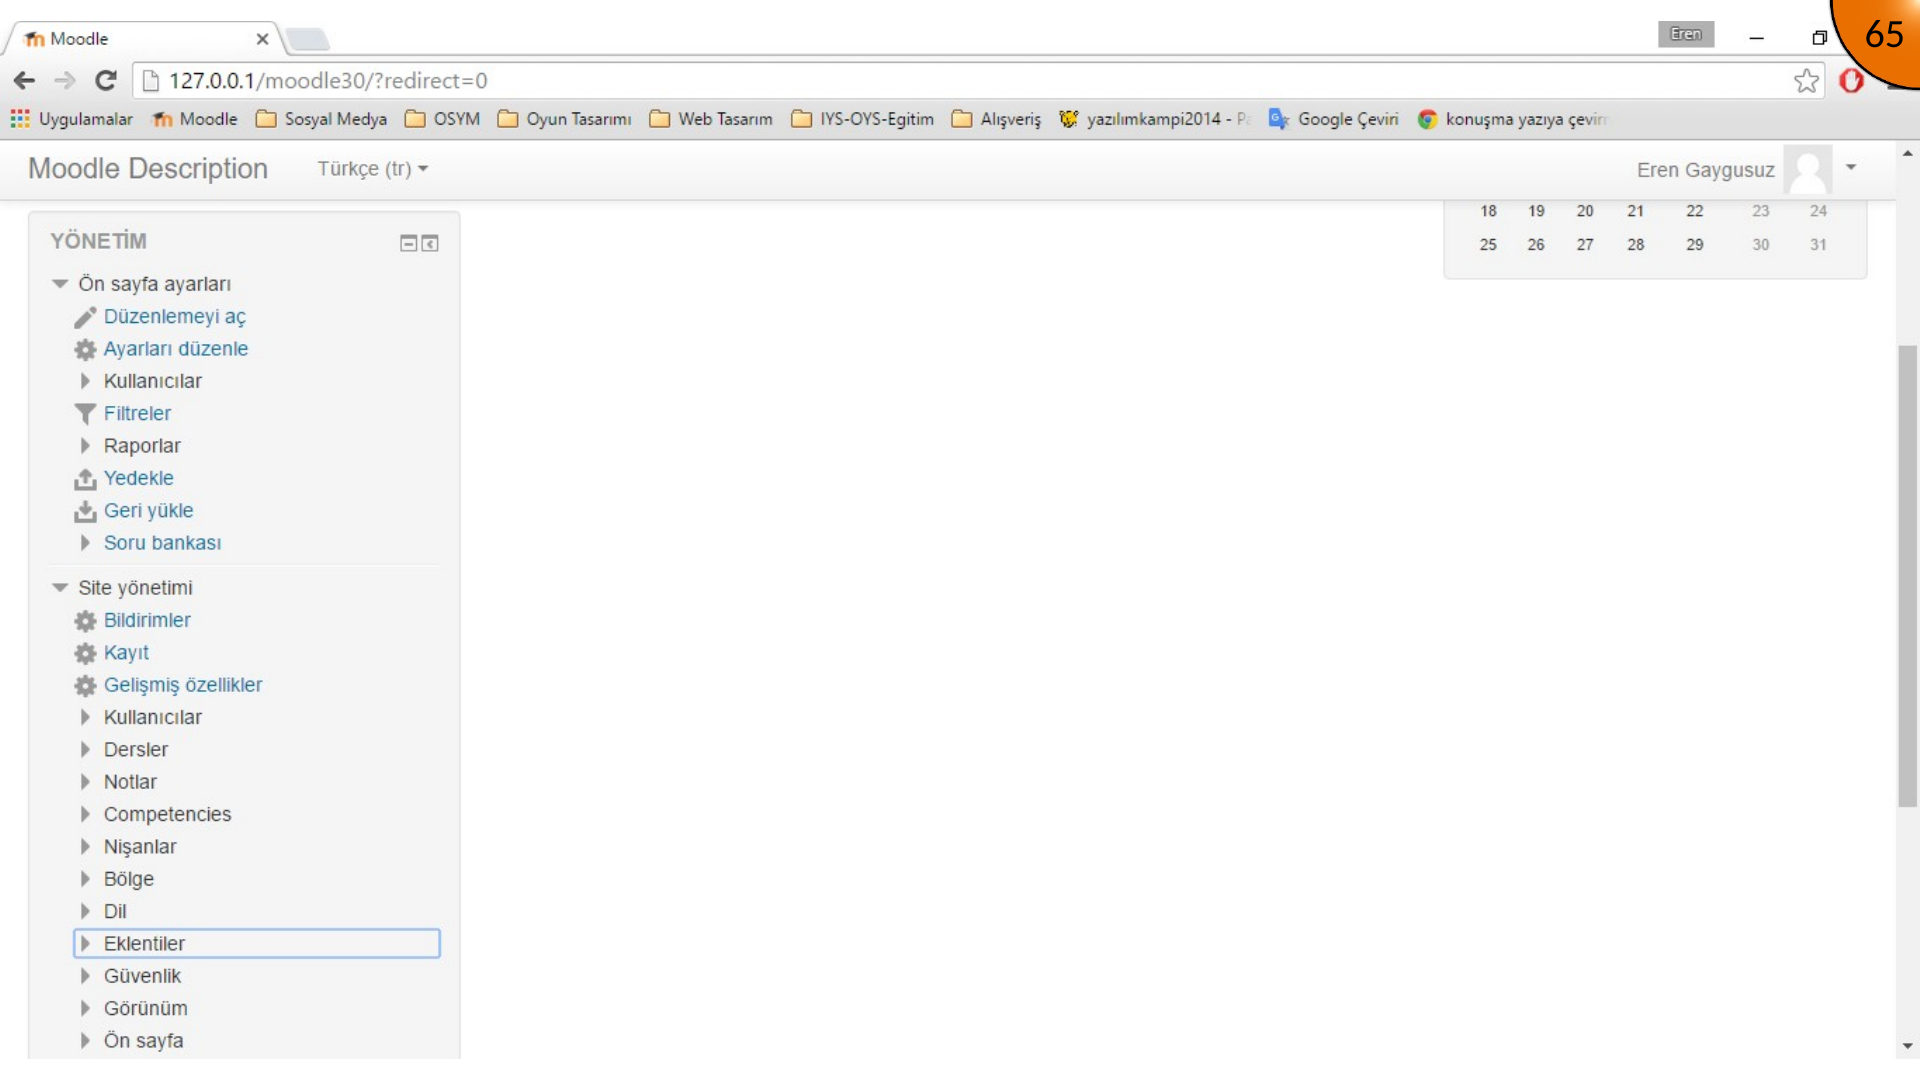
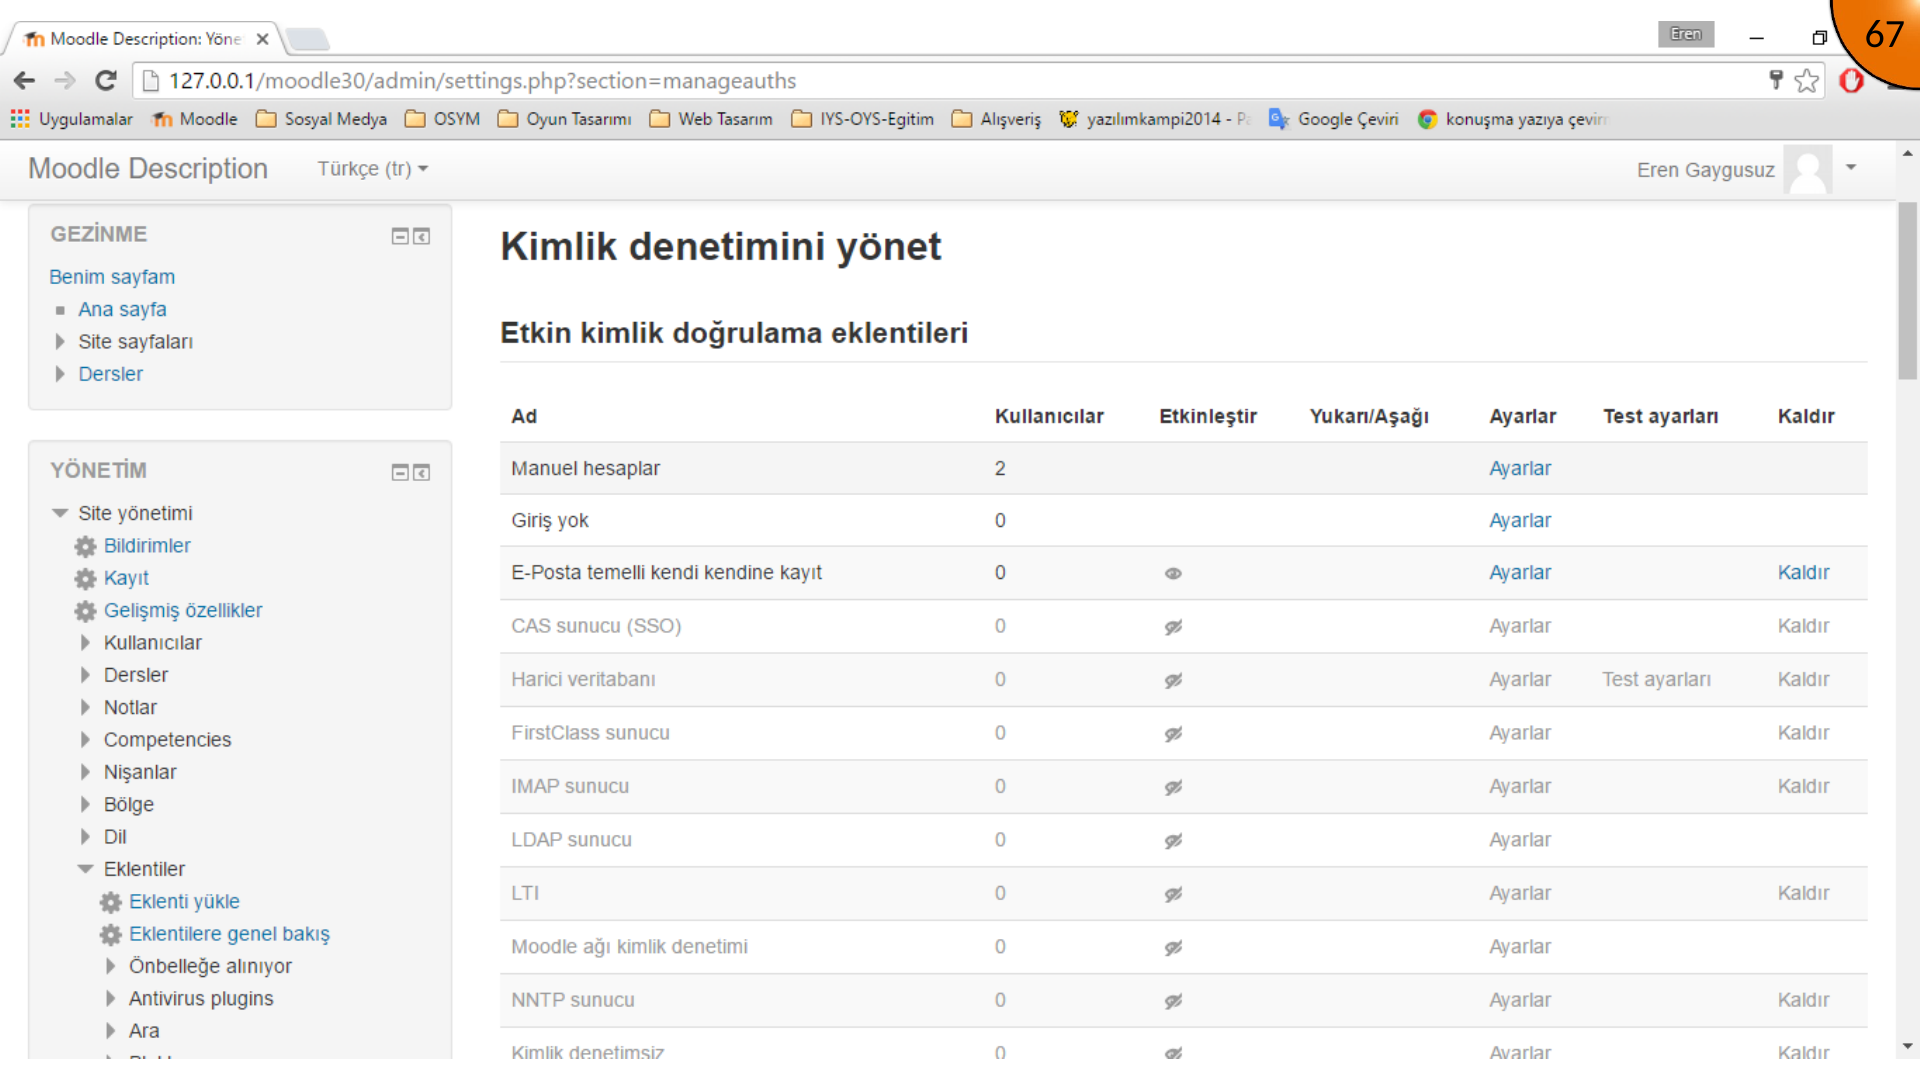
Sign in as the site administrator. In the original interface, open Site administration, select Plugins, then open the authentication area.
Enabling Email-Based Self-Registration
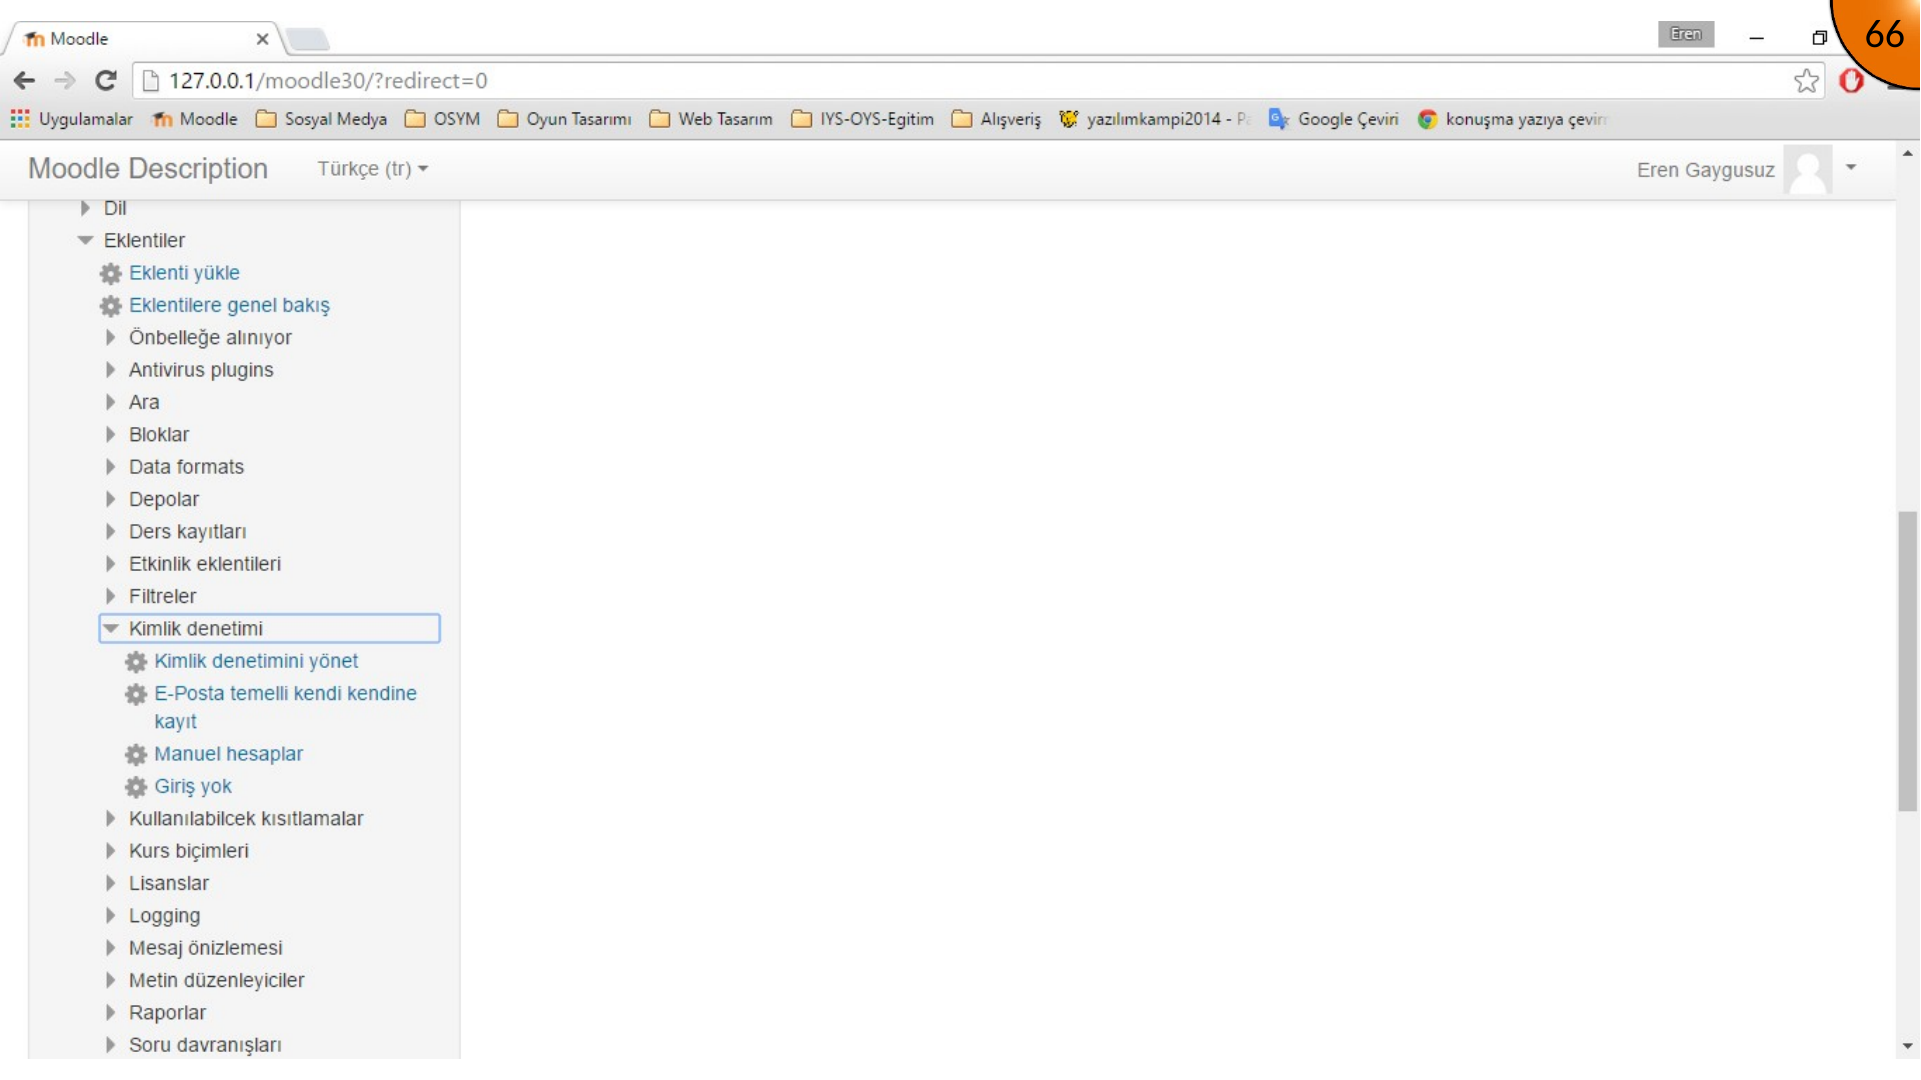
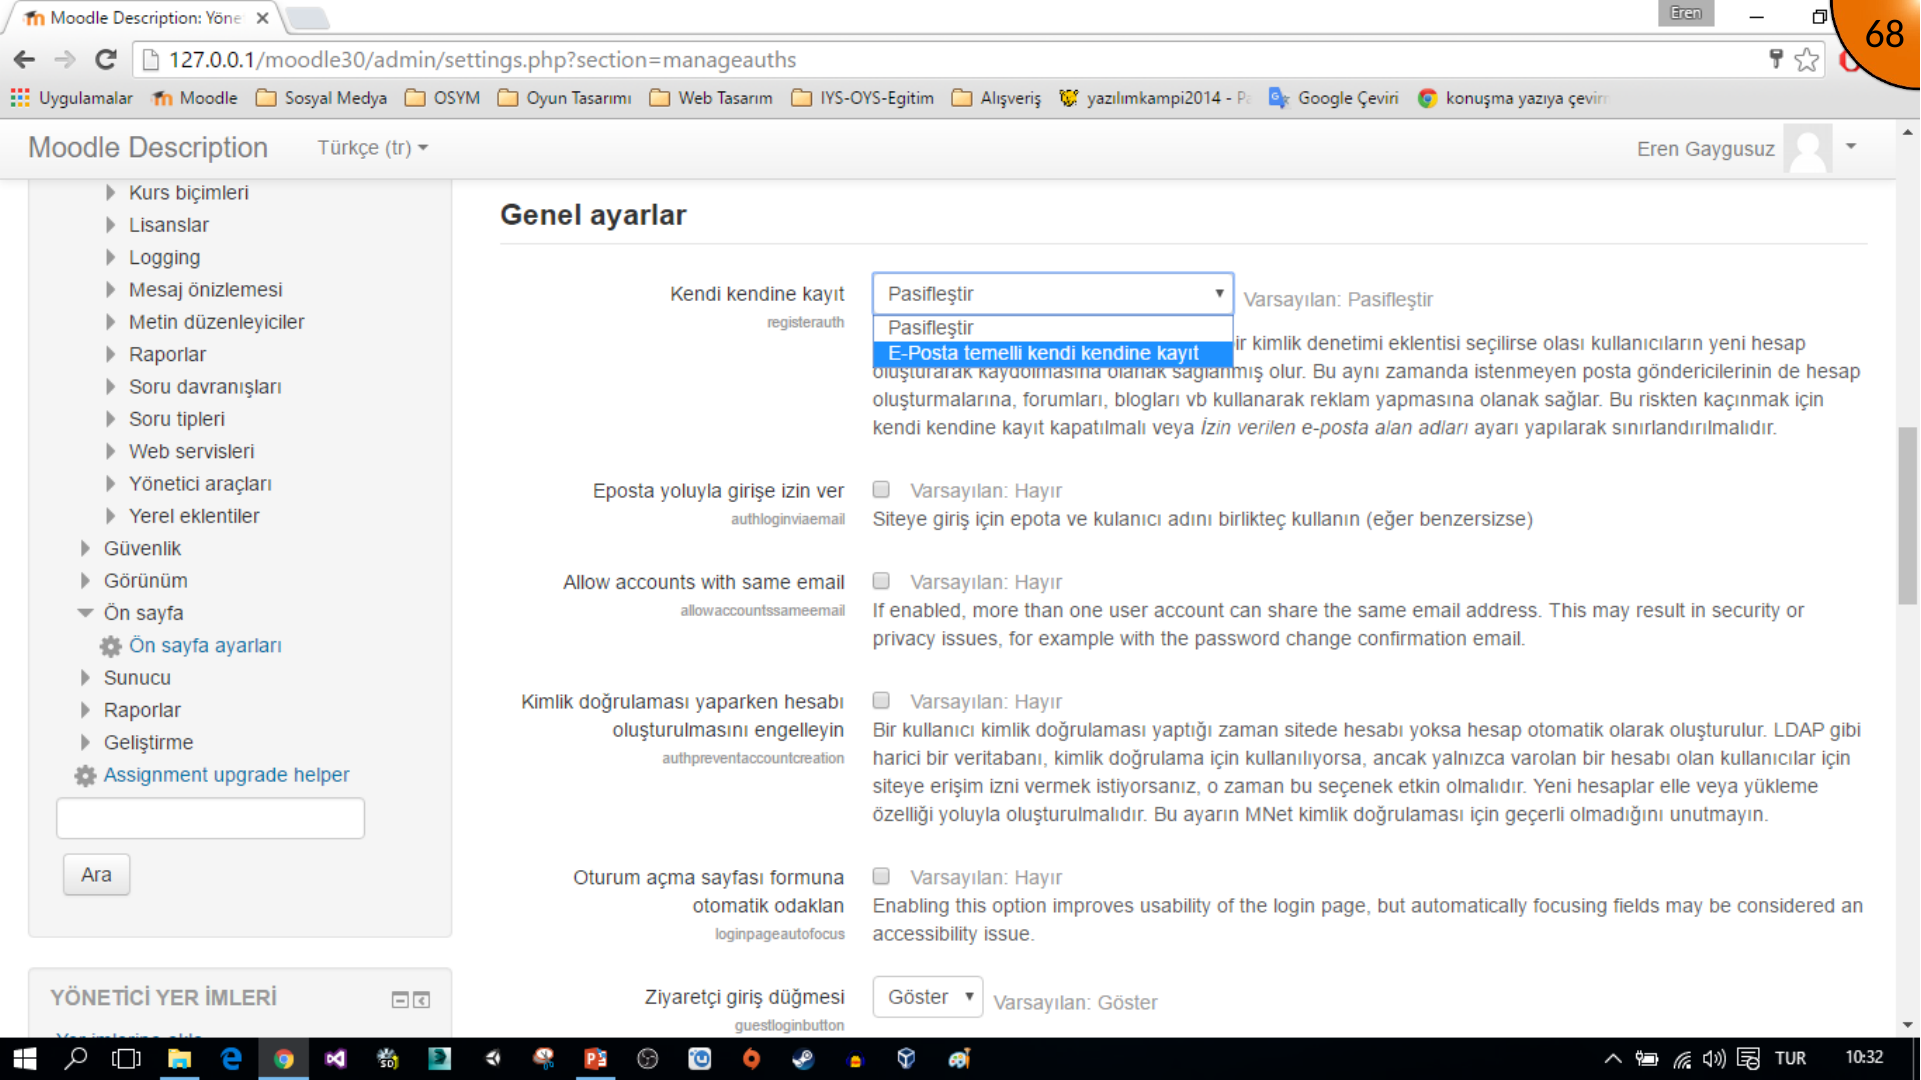
Open the general authentication settings and find the self-registration option.
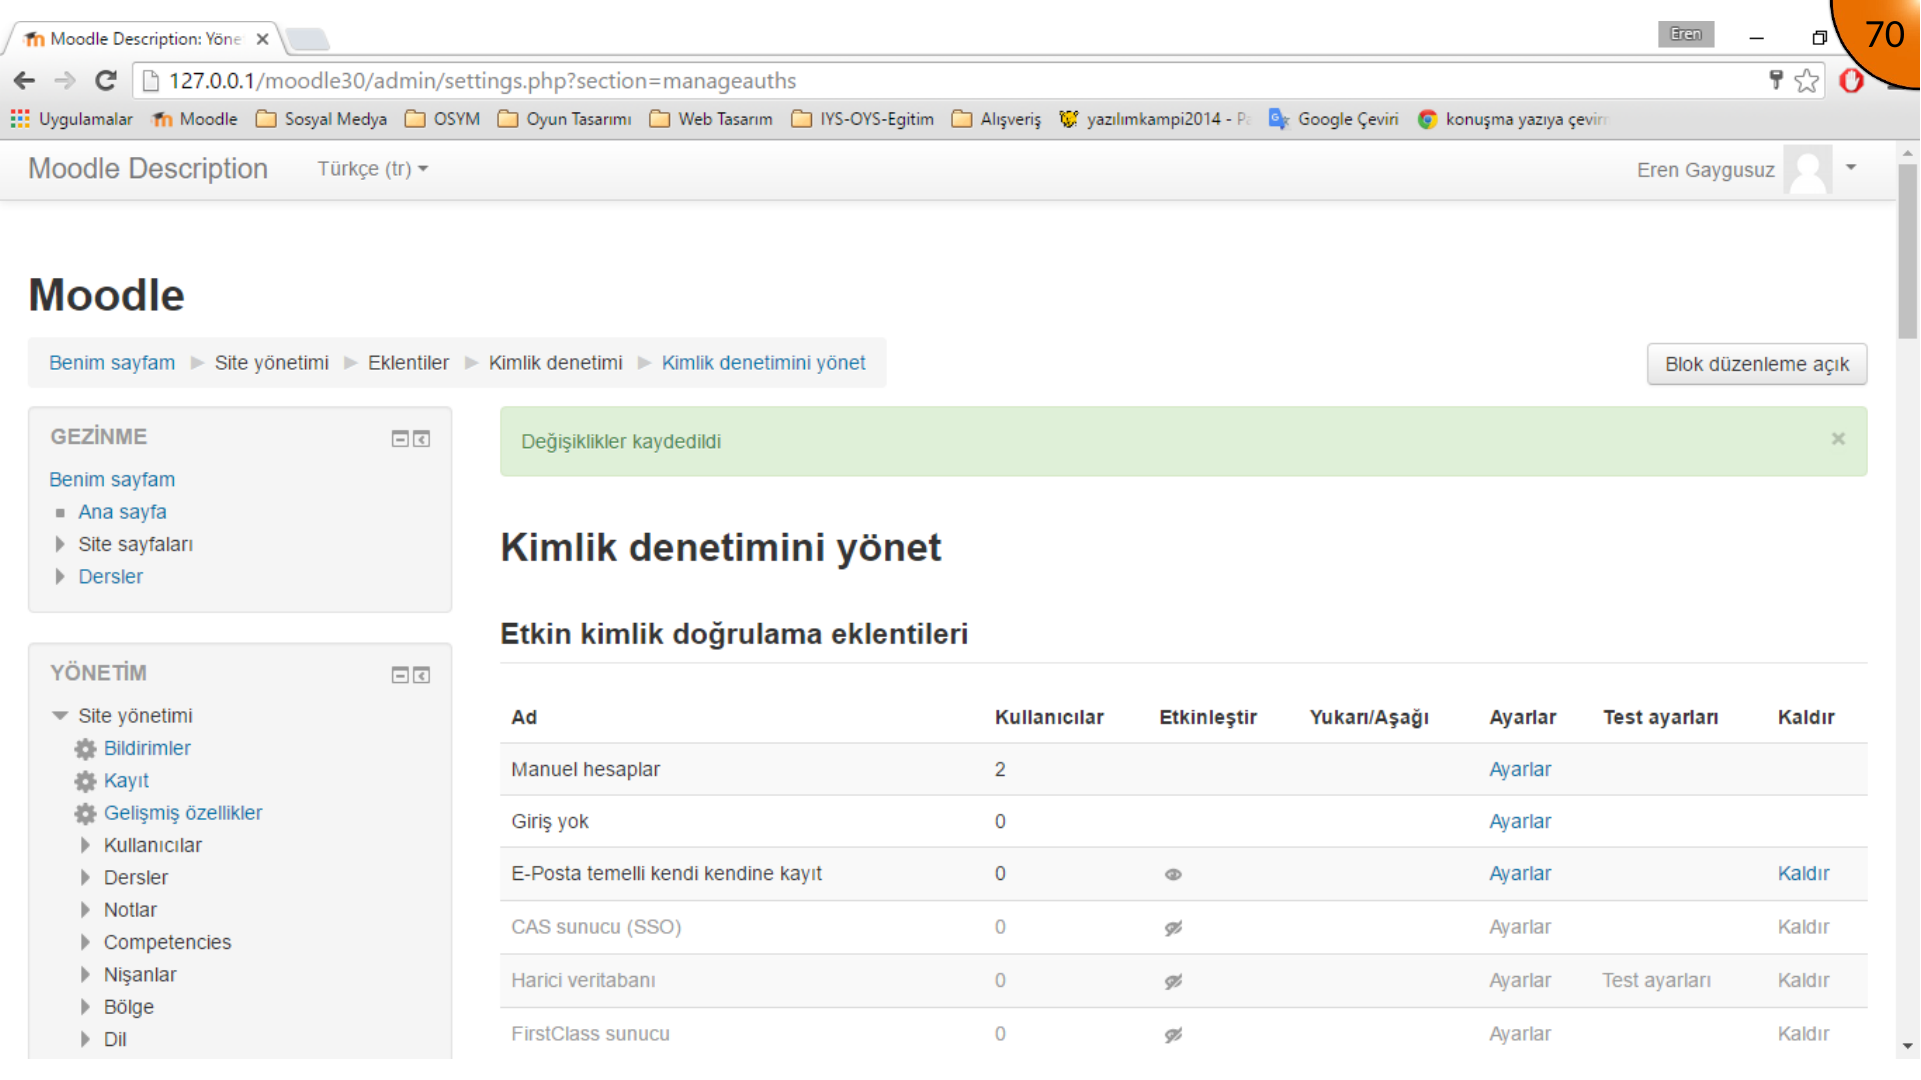
Select Email-based self-registration instead of the disabled option, then save the changes.
Creating a New Account
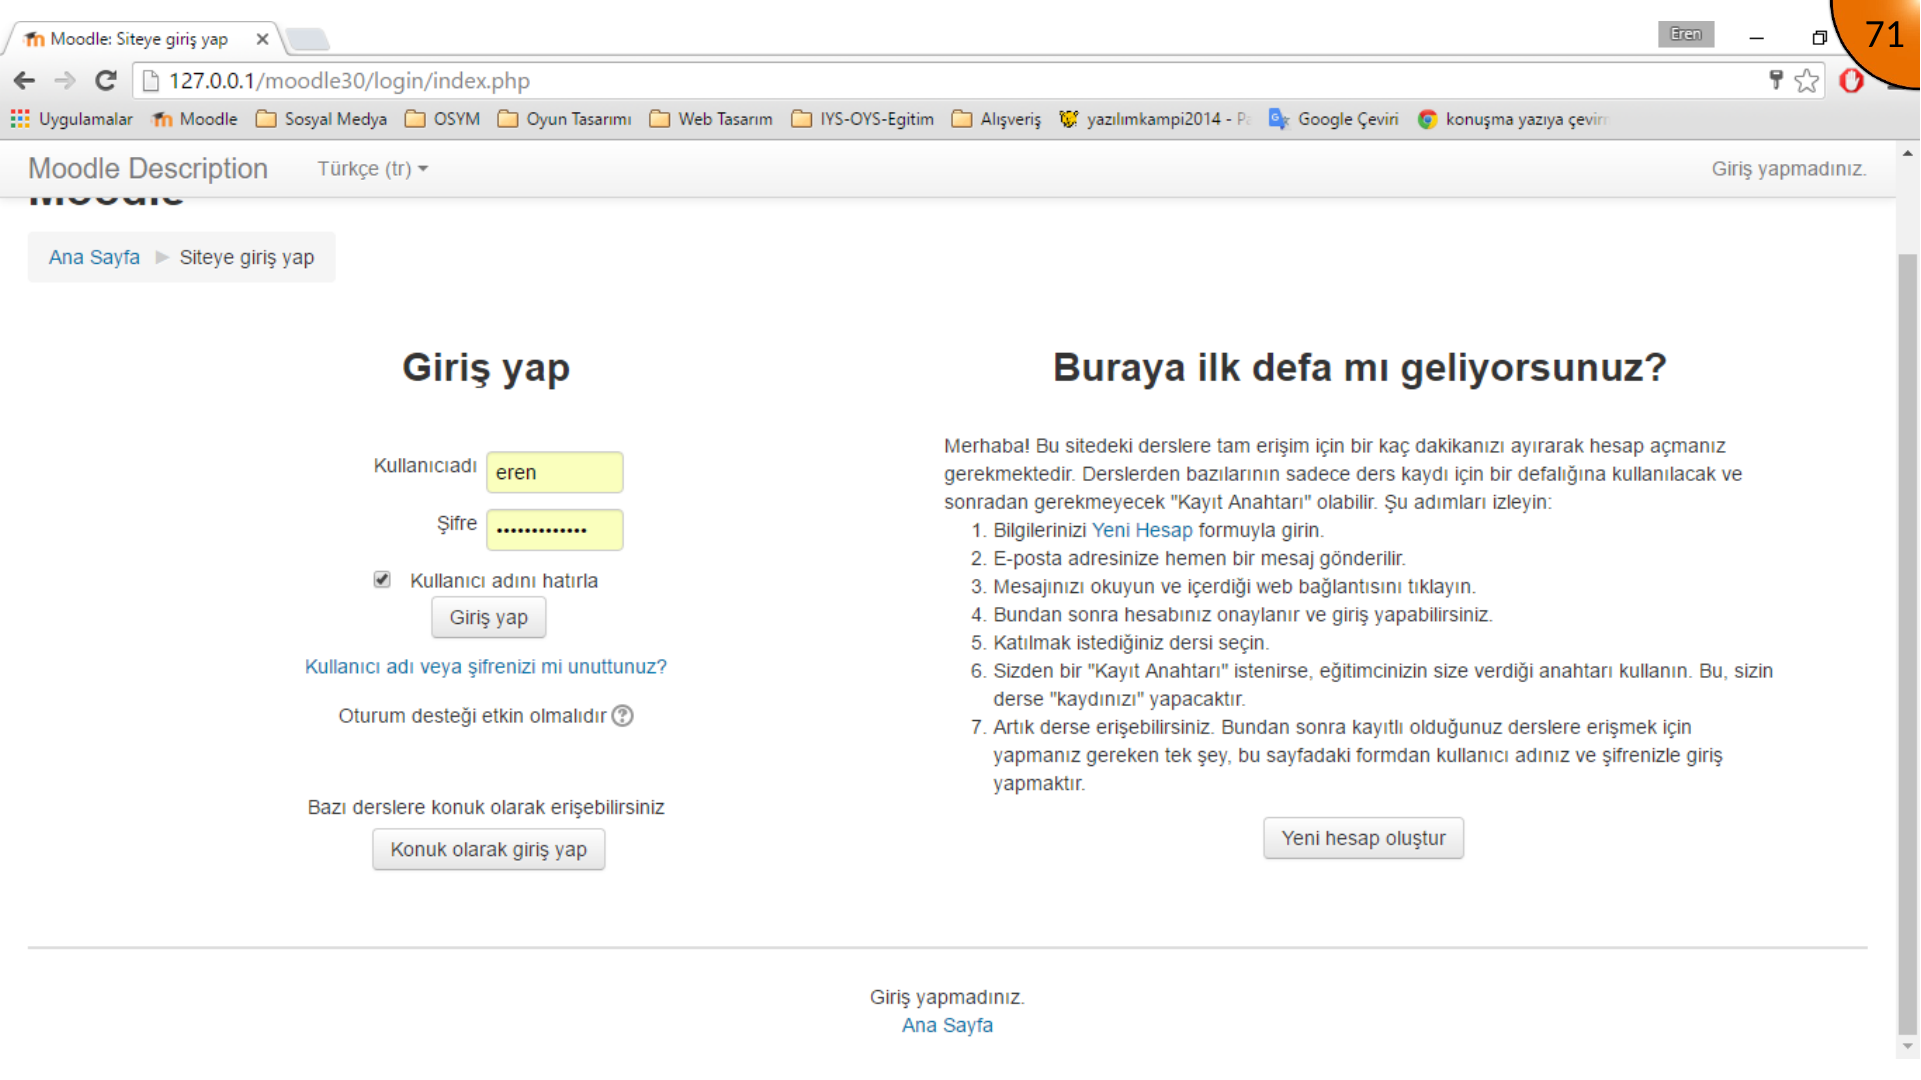
Sign out and return to the login page. The Create new account option now appears for visitors.
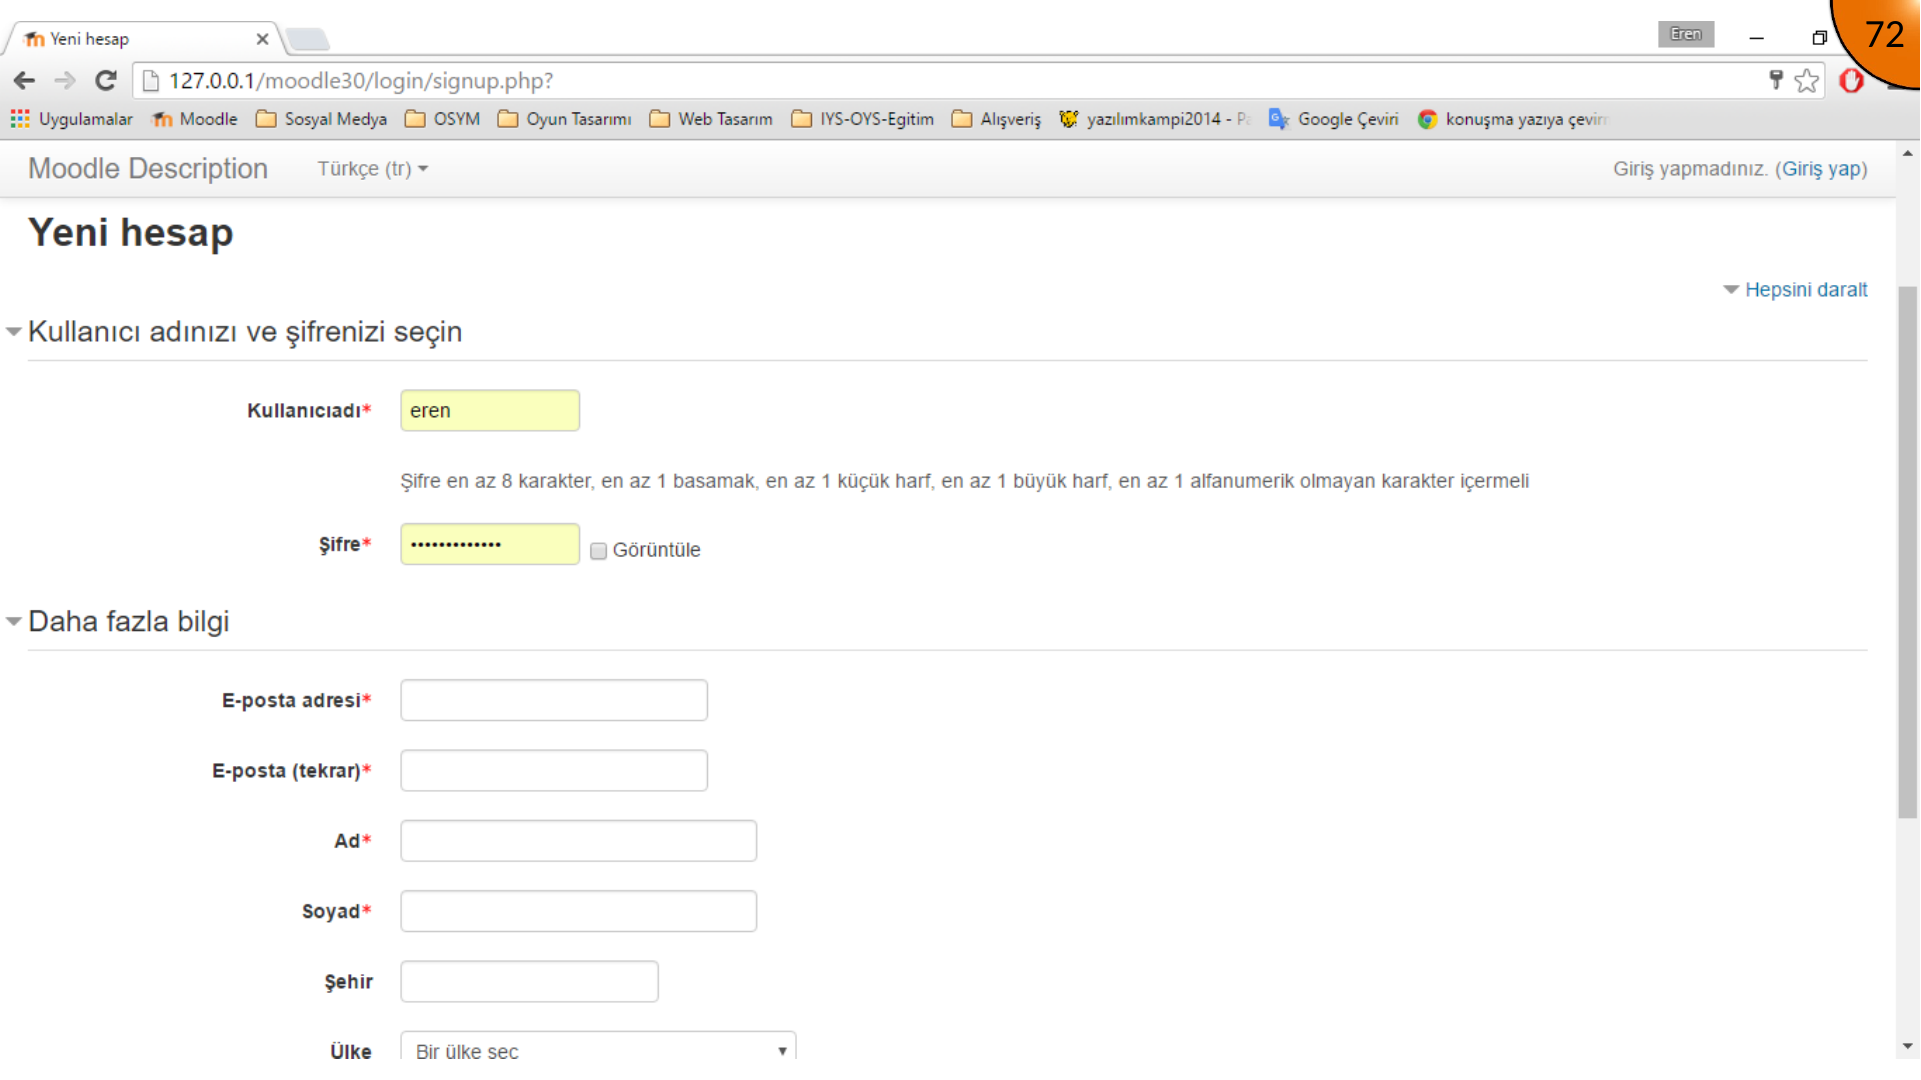
Enter the required username, password, email address, first name, and surname. Follow the configured password policy rather than weakening it simply to make registration easier.
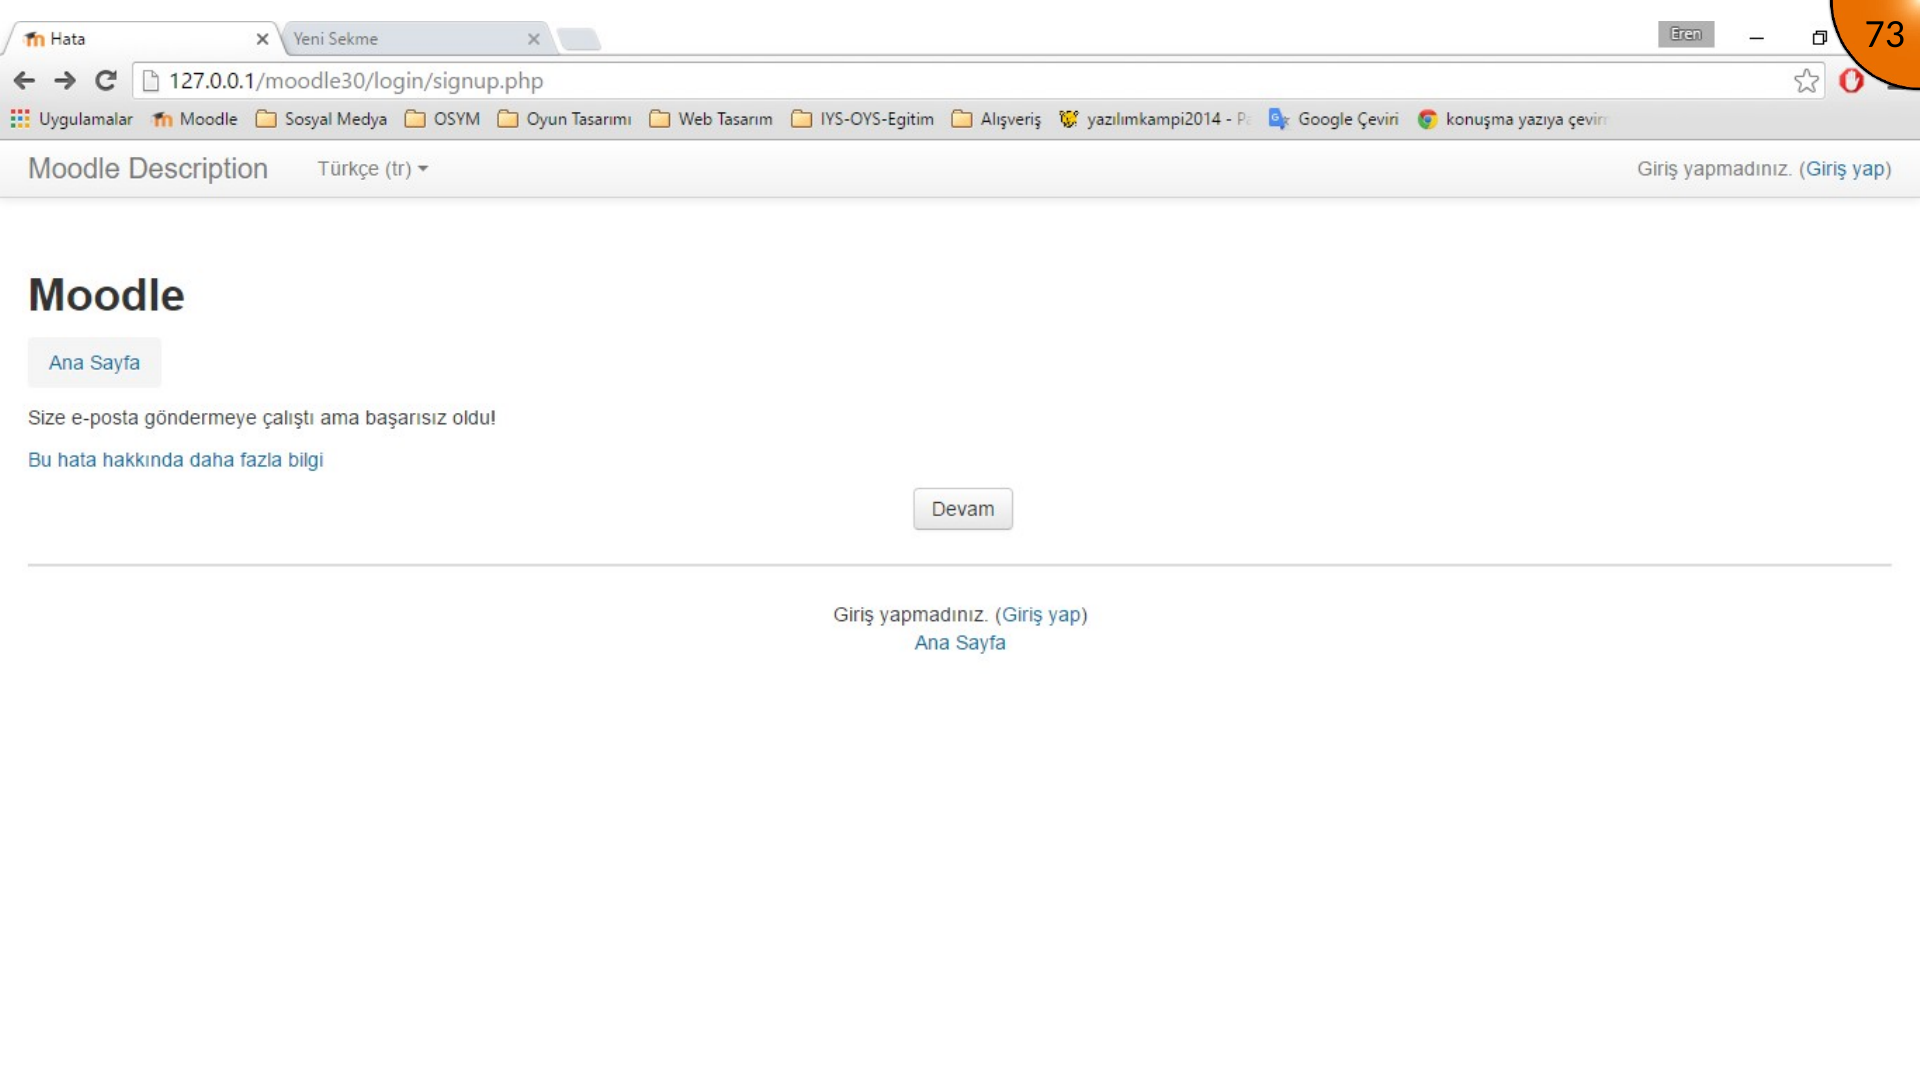
The original local installation displays an error after registration because it does not have a working outgoing email configuration. On a properly configured site, Moodle sends a confirmation message to the new user’s email address.
Return to the administrator account to review and approve pending registrations when your site workflow requires approval.
Summary
Email-based self-registration makes it possible for learners to start their own account creation, but it depends on secure email delivery and abuse protection. Test the whole flow—from the registration form to the confirmation email and account activation—before enabling it for a public Moodle site.
Comments