Amazon EC2 is one of the most common AWS services for creating and managing virtual machines in the cloud. In this guide, I create a Linux EC2 instance, connect to it from the browser with EC2 Instance Connect, connect again from Windows Command Prompt over SSH, and fix the PEM file permission error that can appear on Windows.
The example uses a Free Tier eligible Amazon Linux instance type. AWS screens can change over time, but the main flow stays the same: choose an operating system image, create or select a key pair, launch the instance, and connect securely.
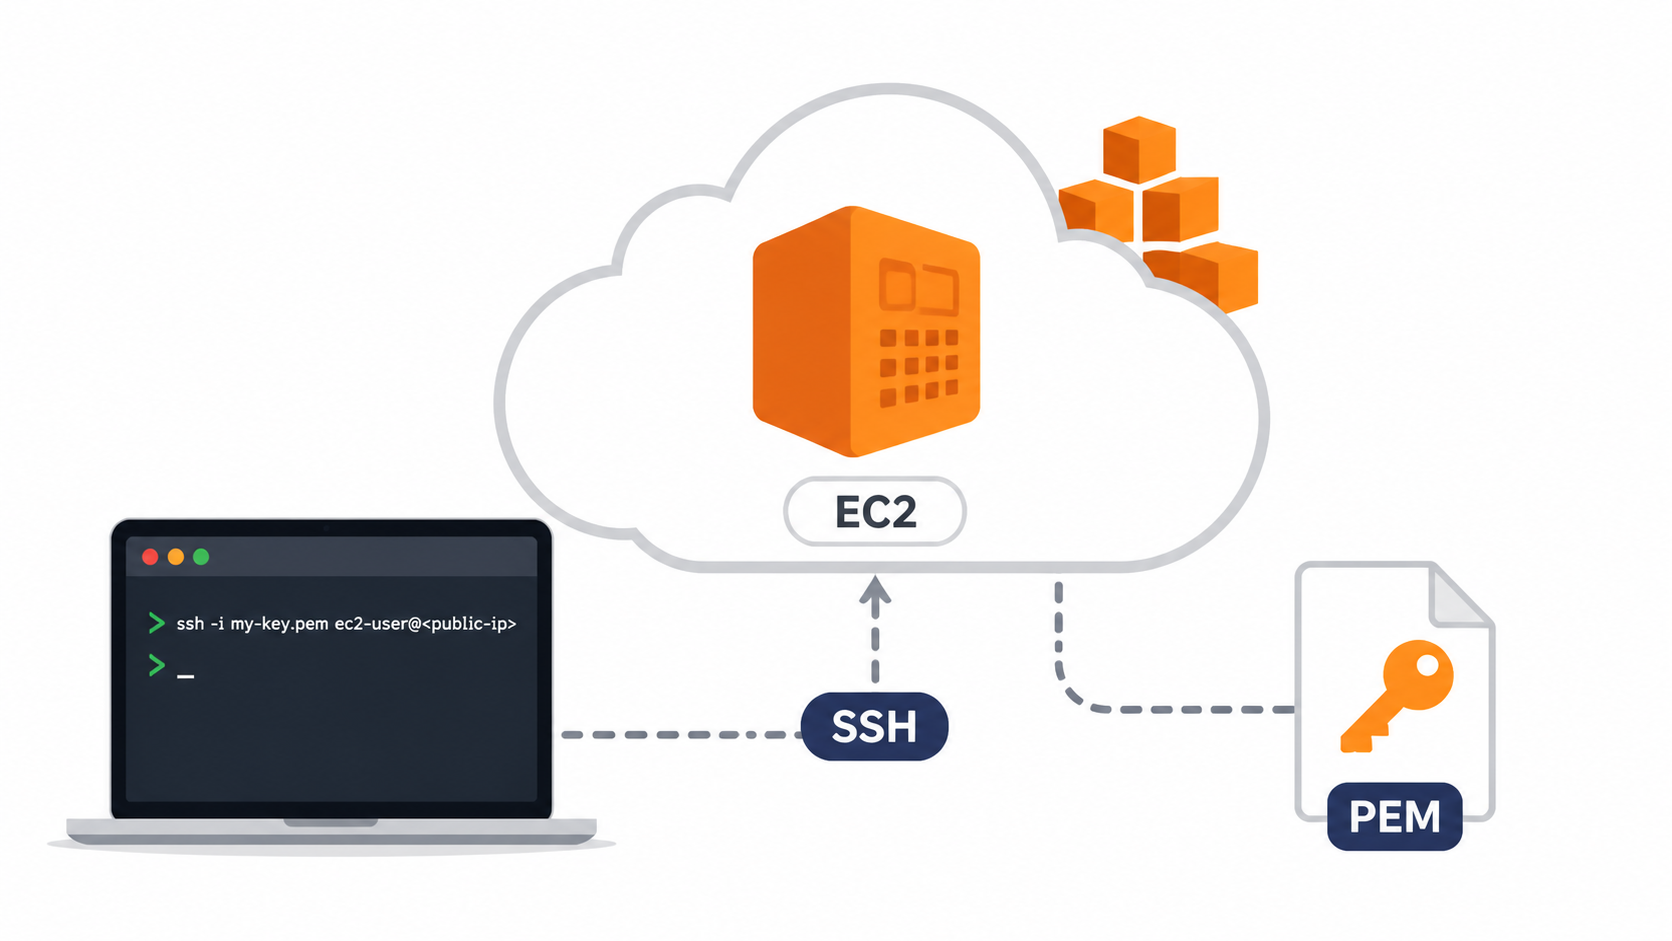
Table of contents
Open Table of contents
Creating an EC2 Instance
Open the AWS Console in your browser. After signing in with your AWS account, use the search bar to find the EC2 service.
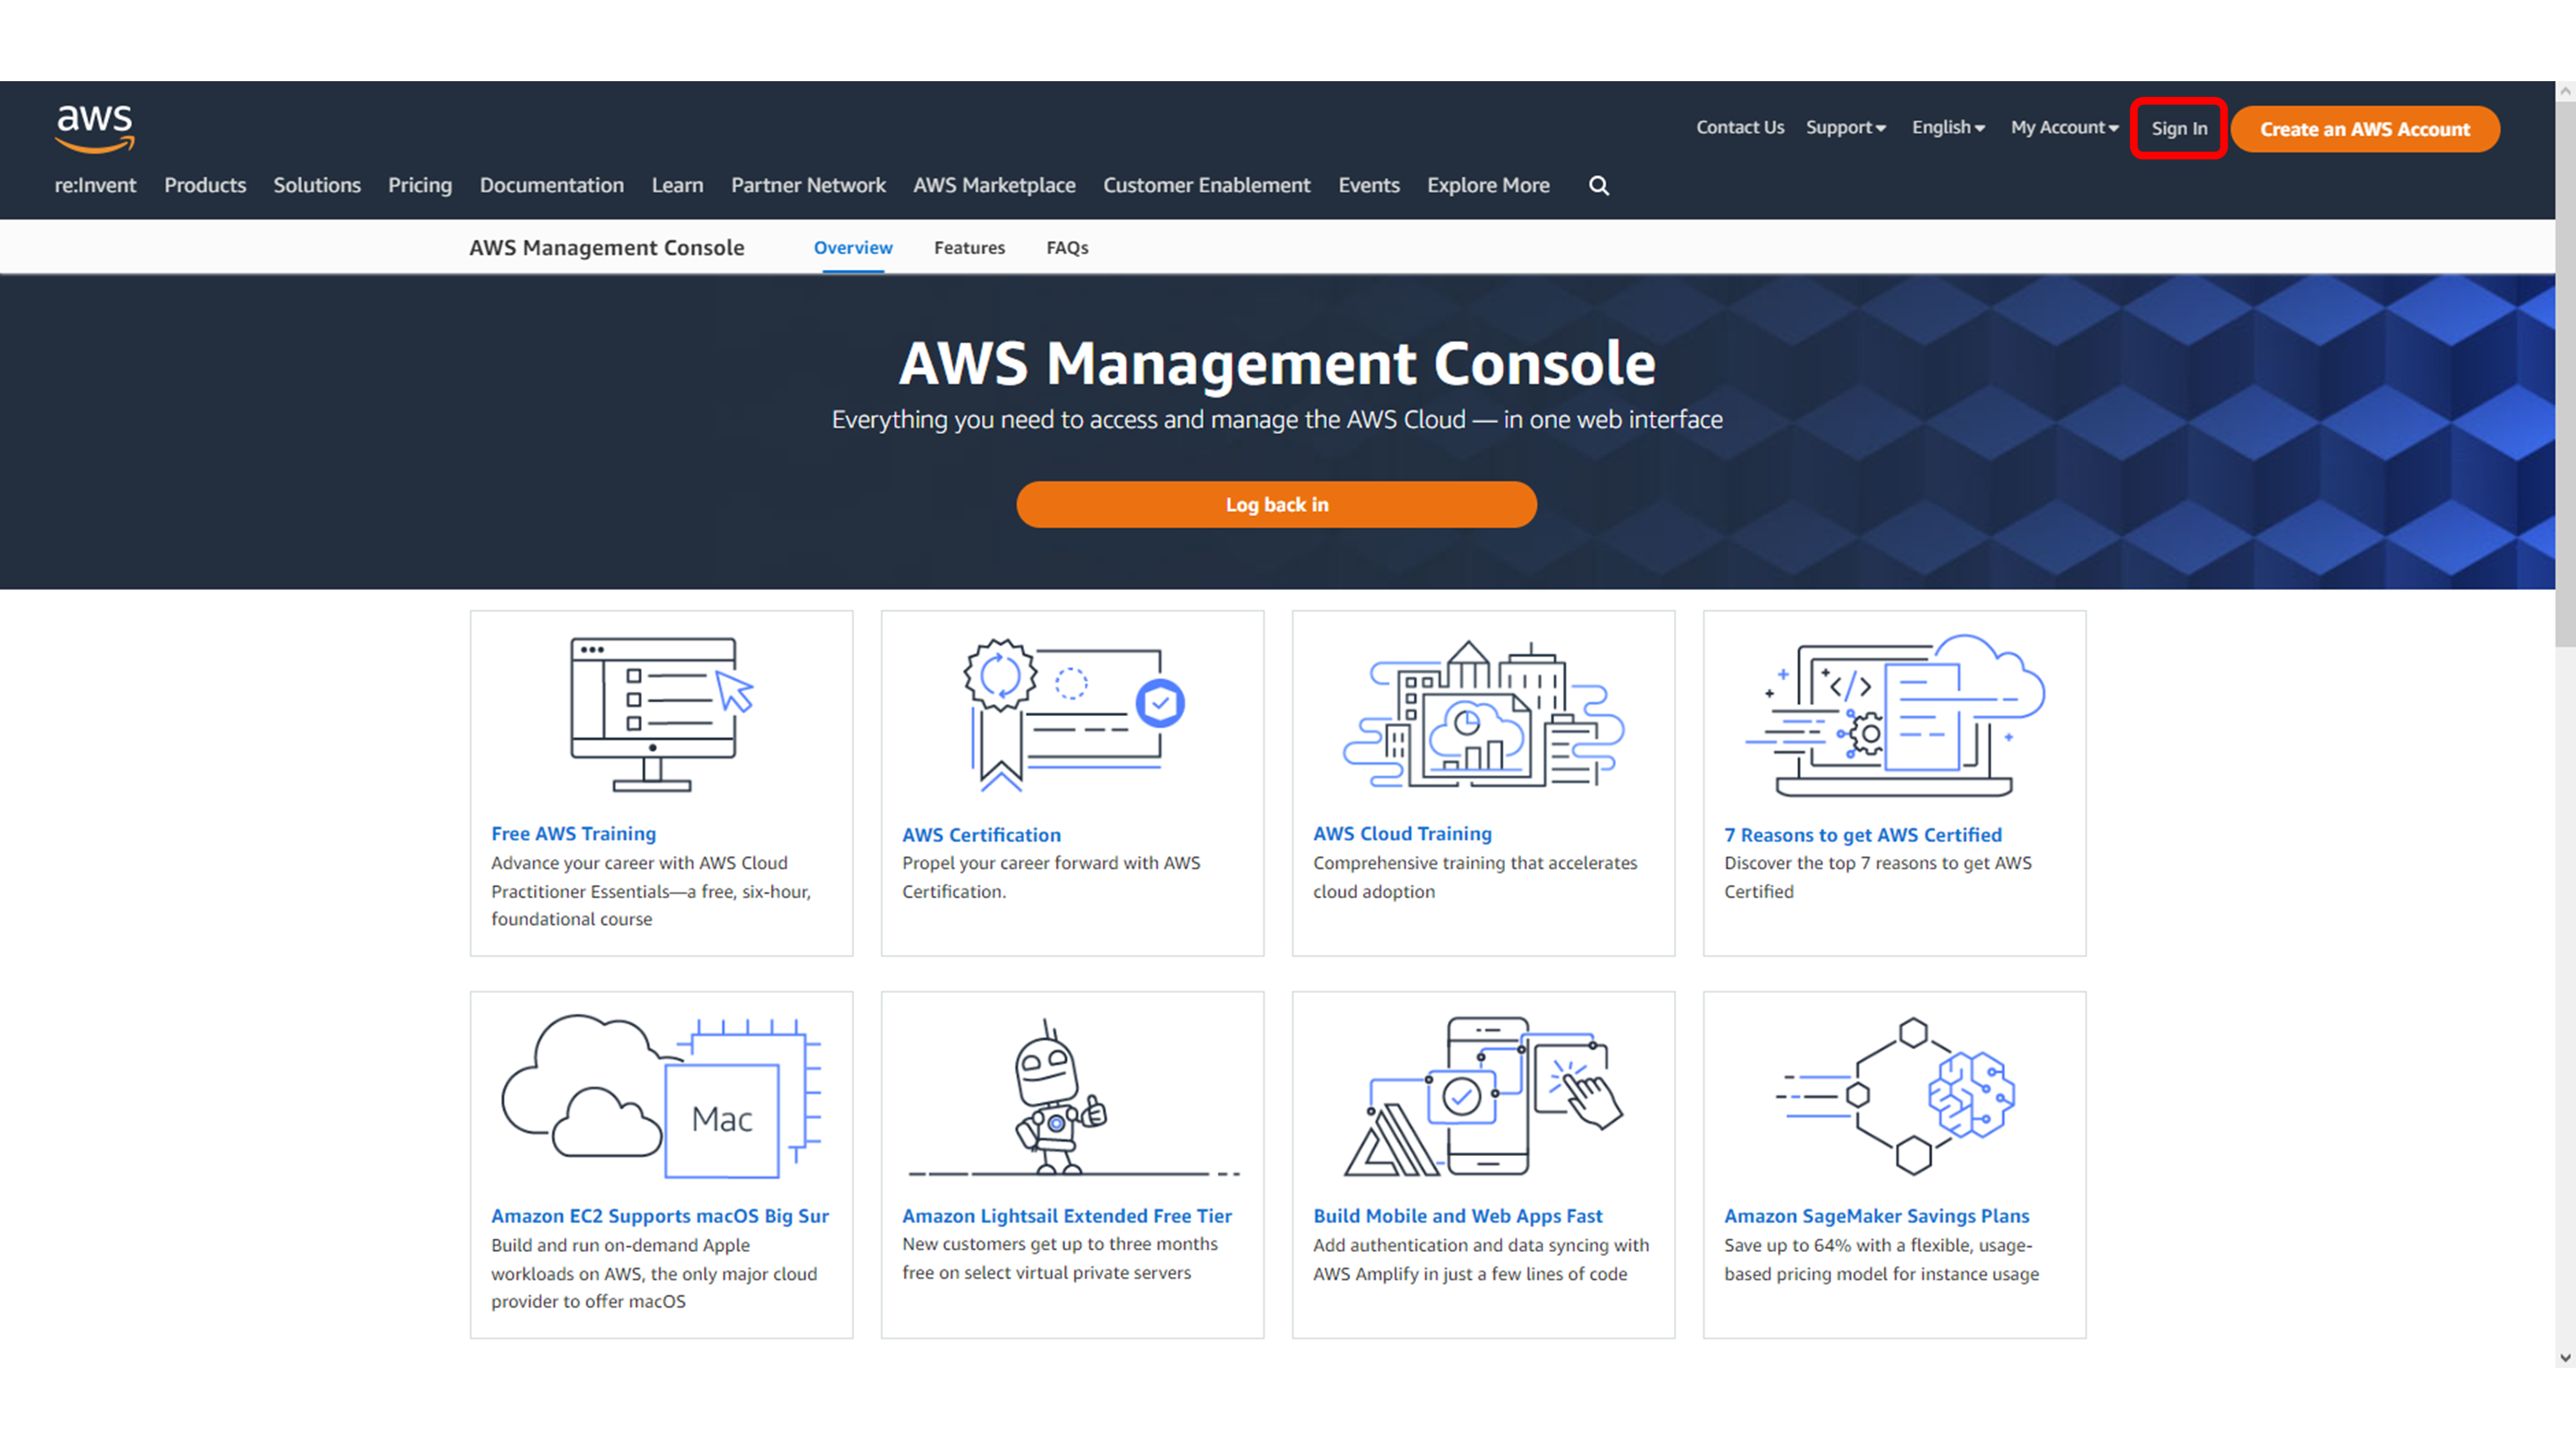
This screen shows AWS Console sign-in screen.
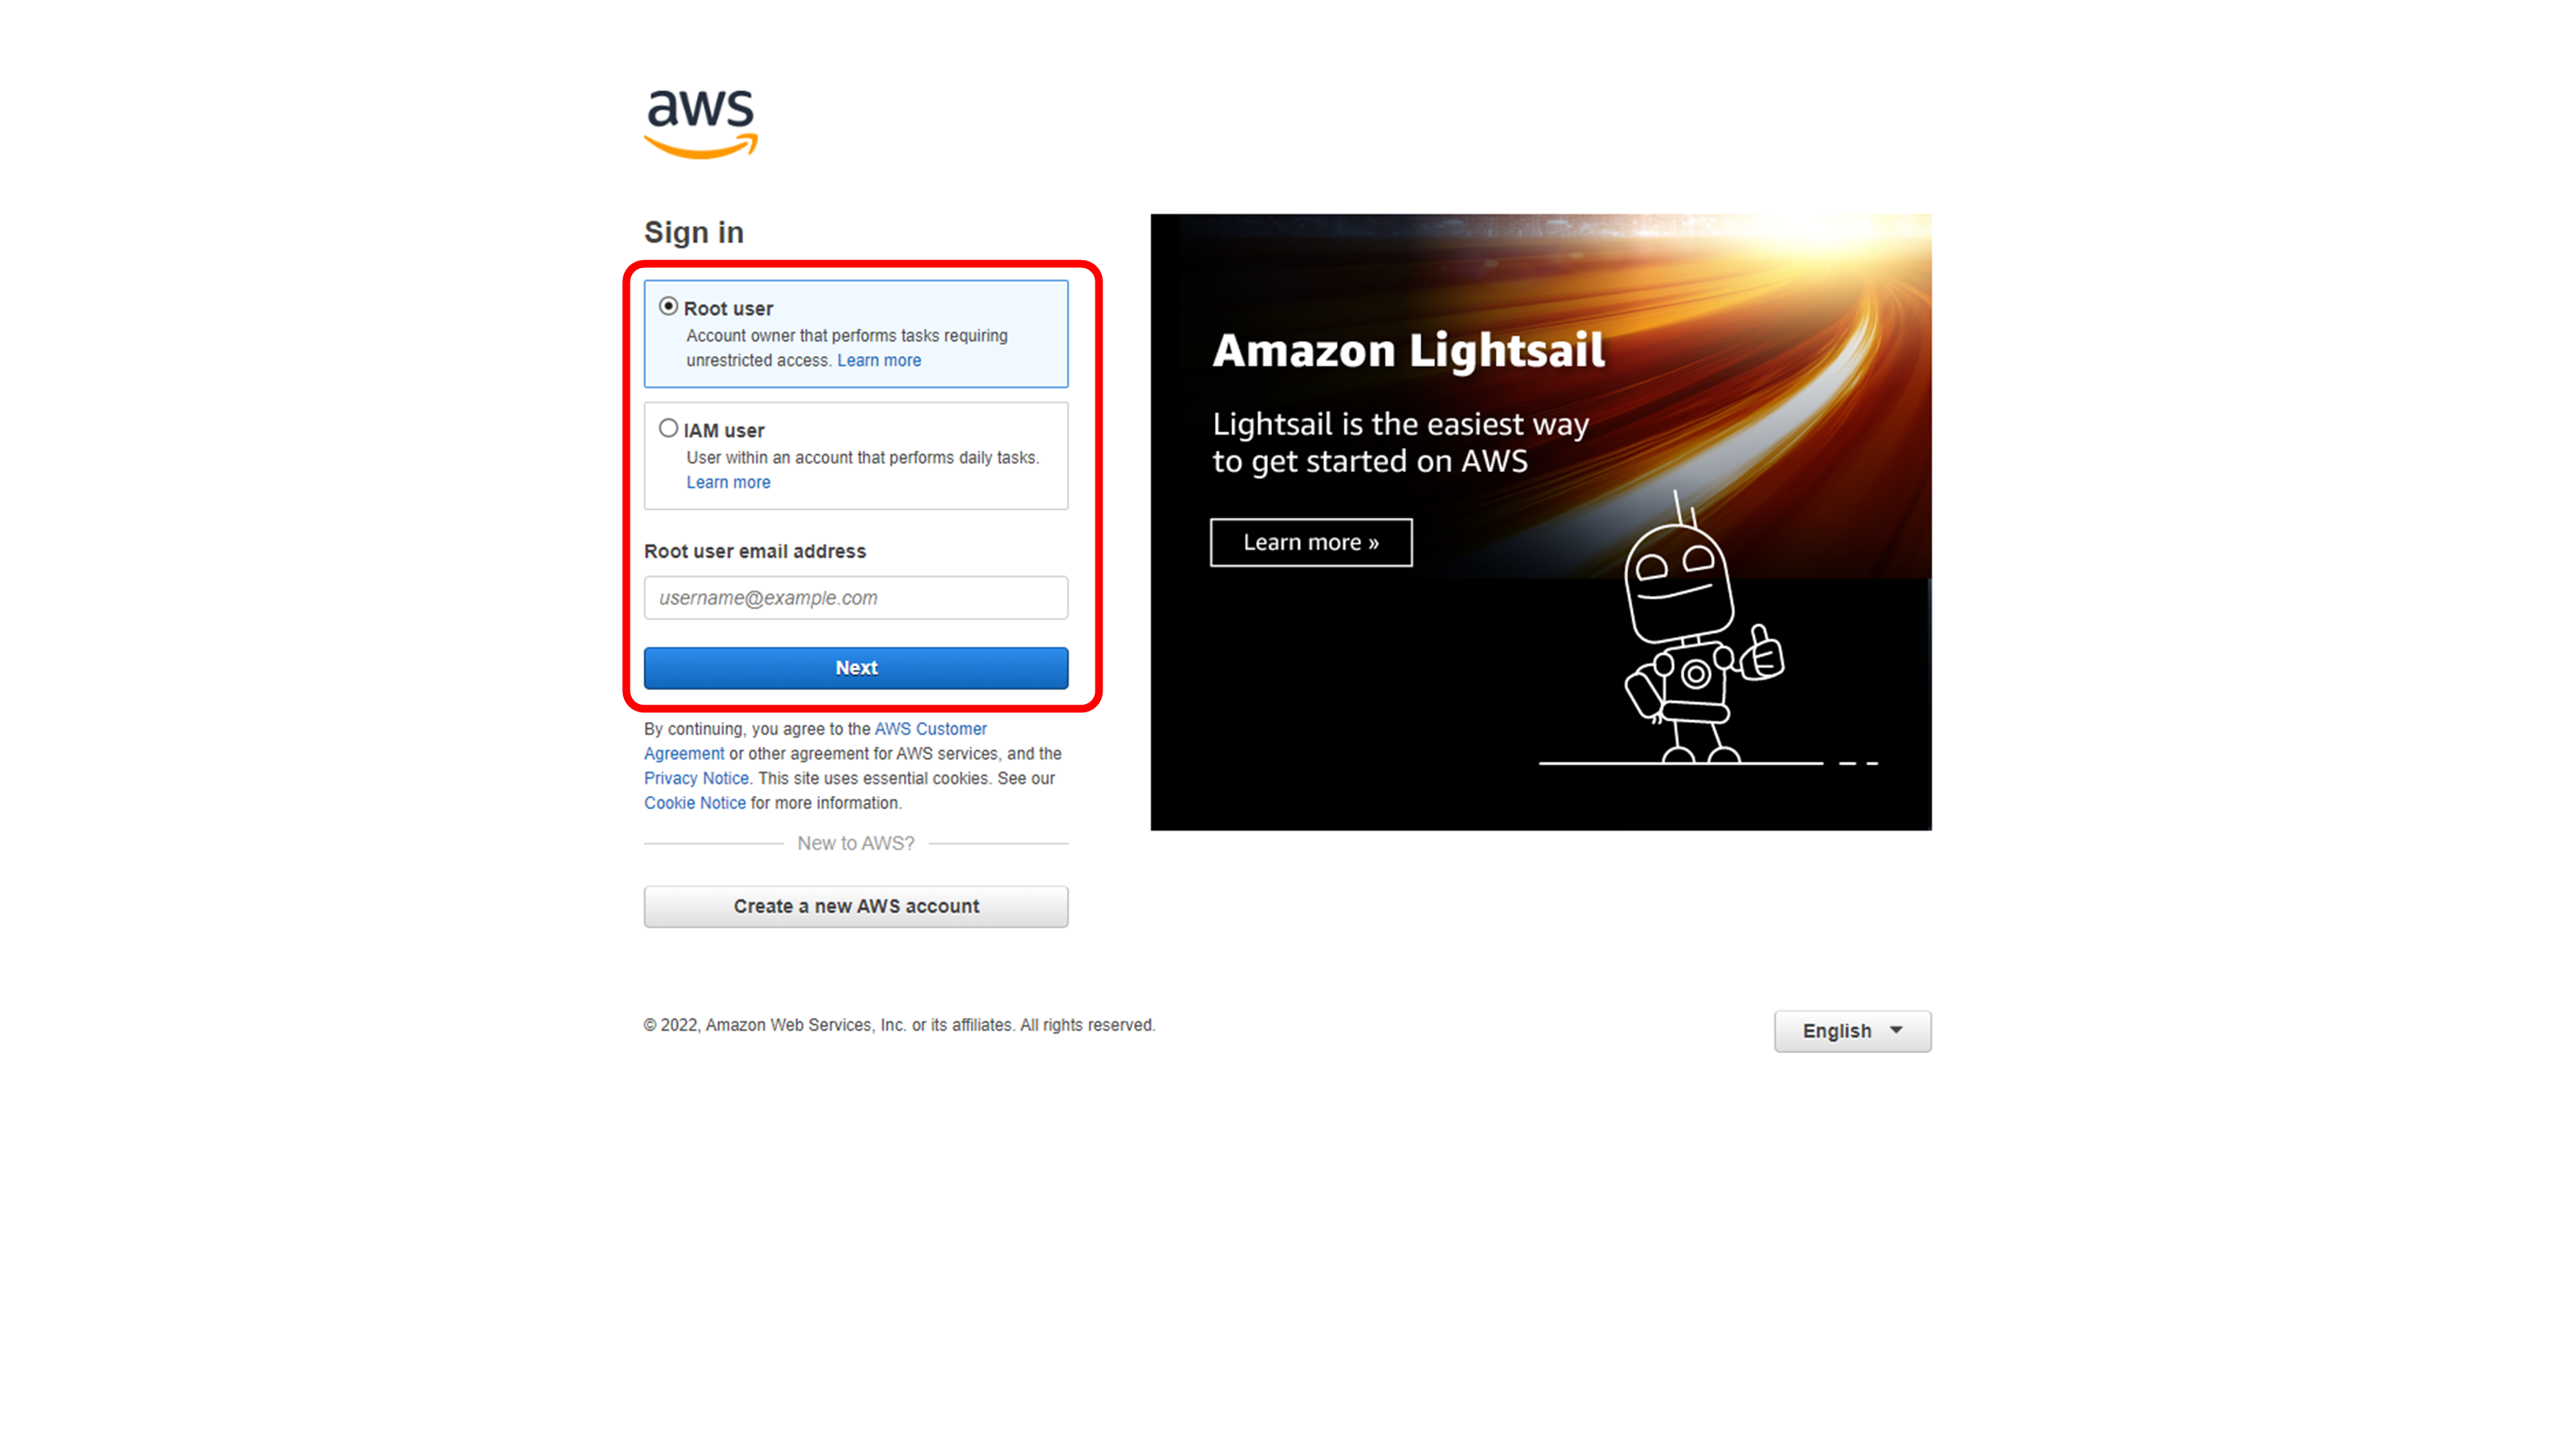
Here, we search for EC2 in AWS Console.
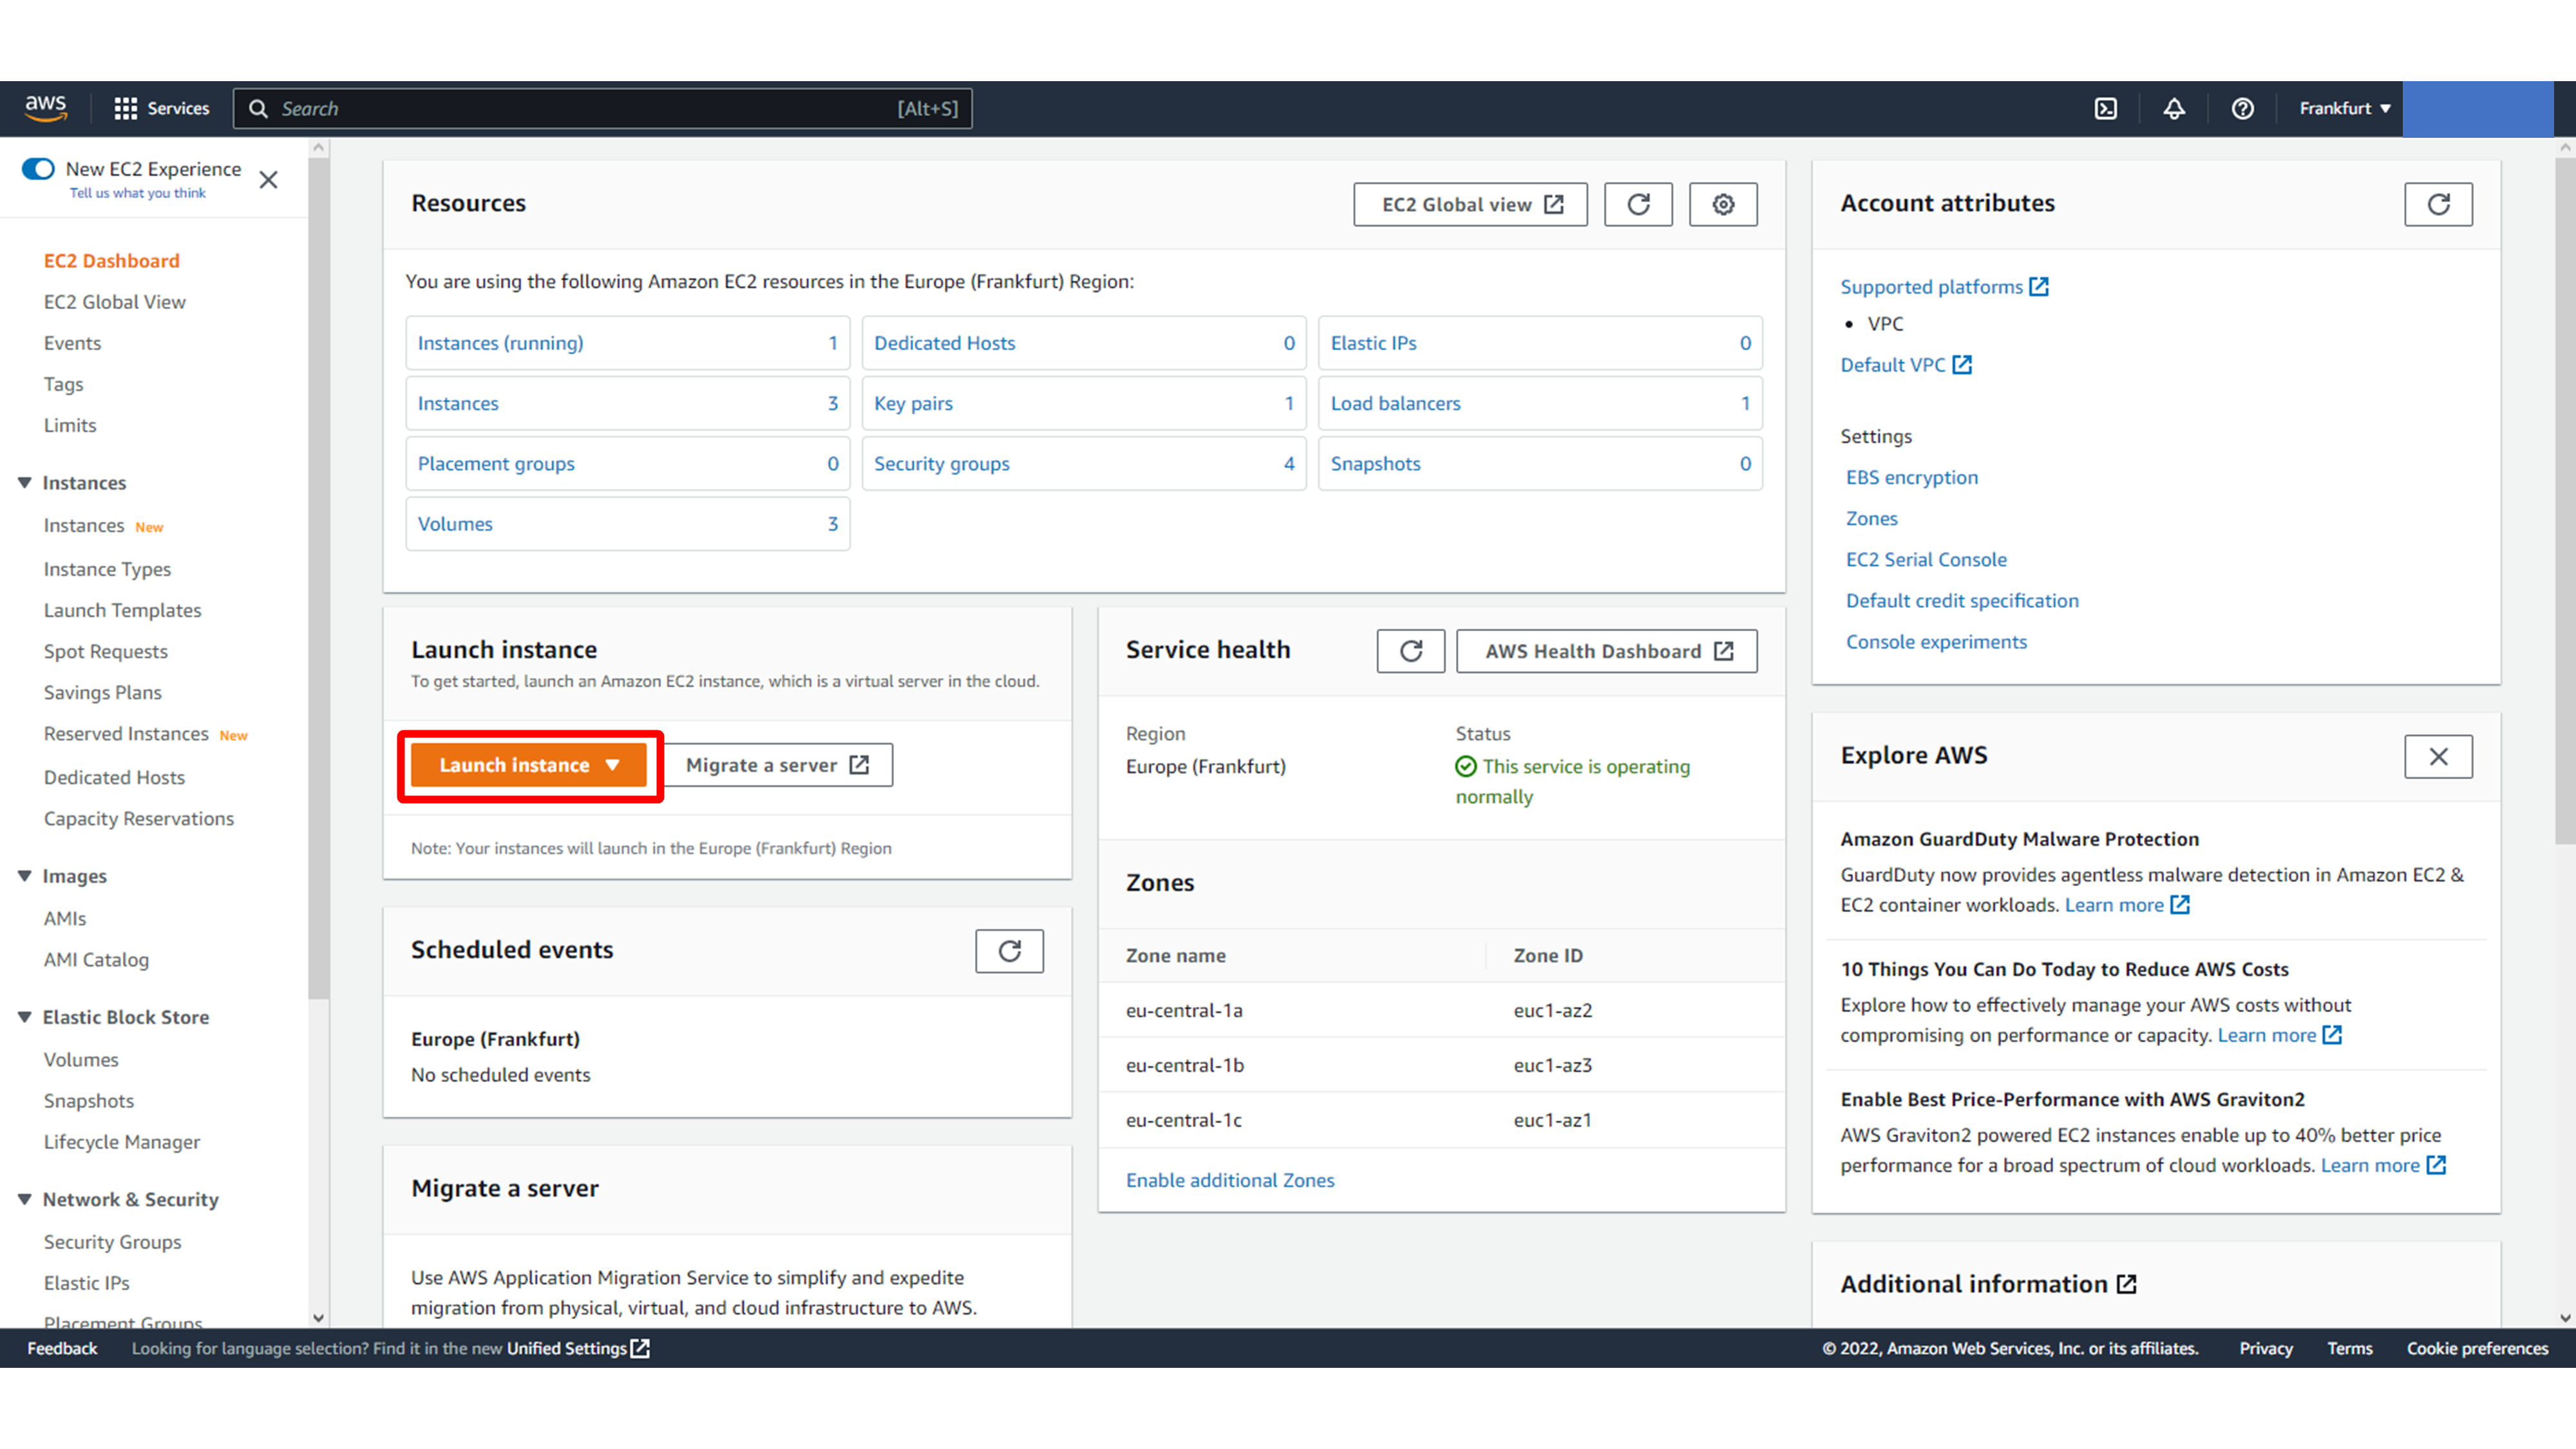
On the EC2 dashboard, start the instance creation flow with Launch instance.
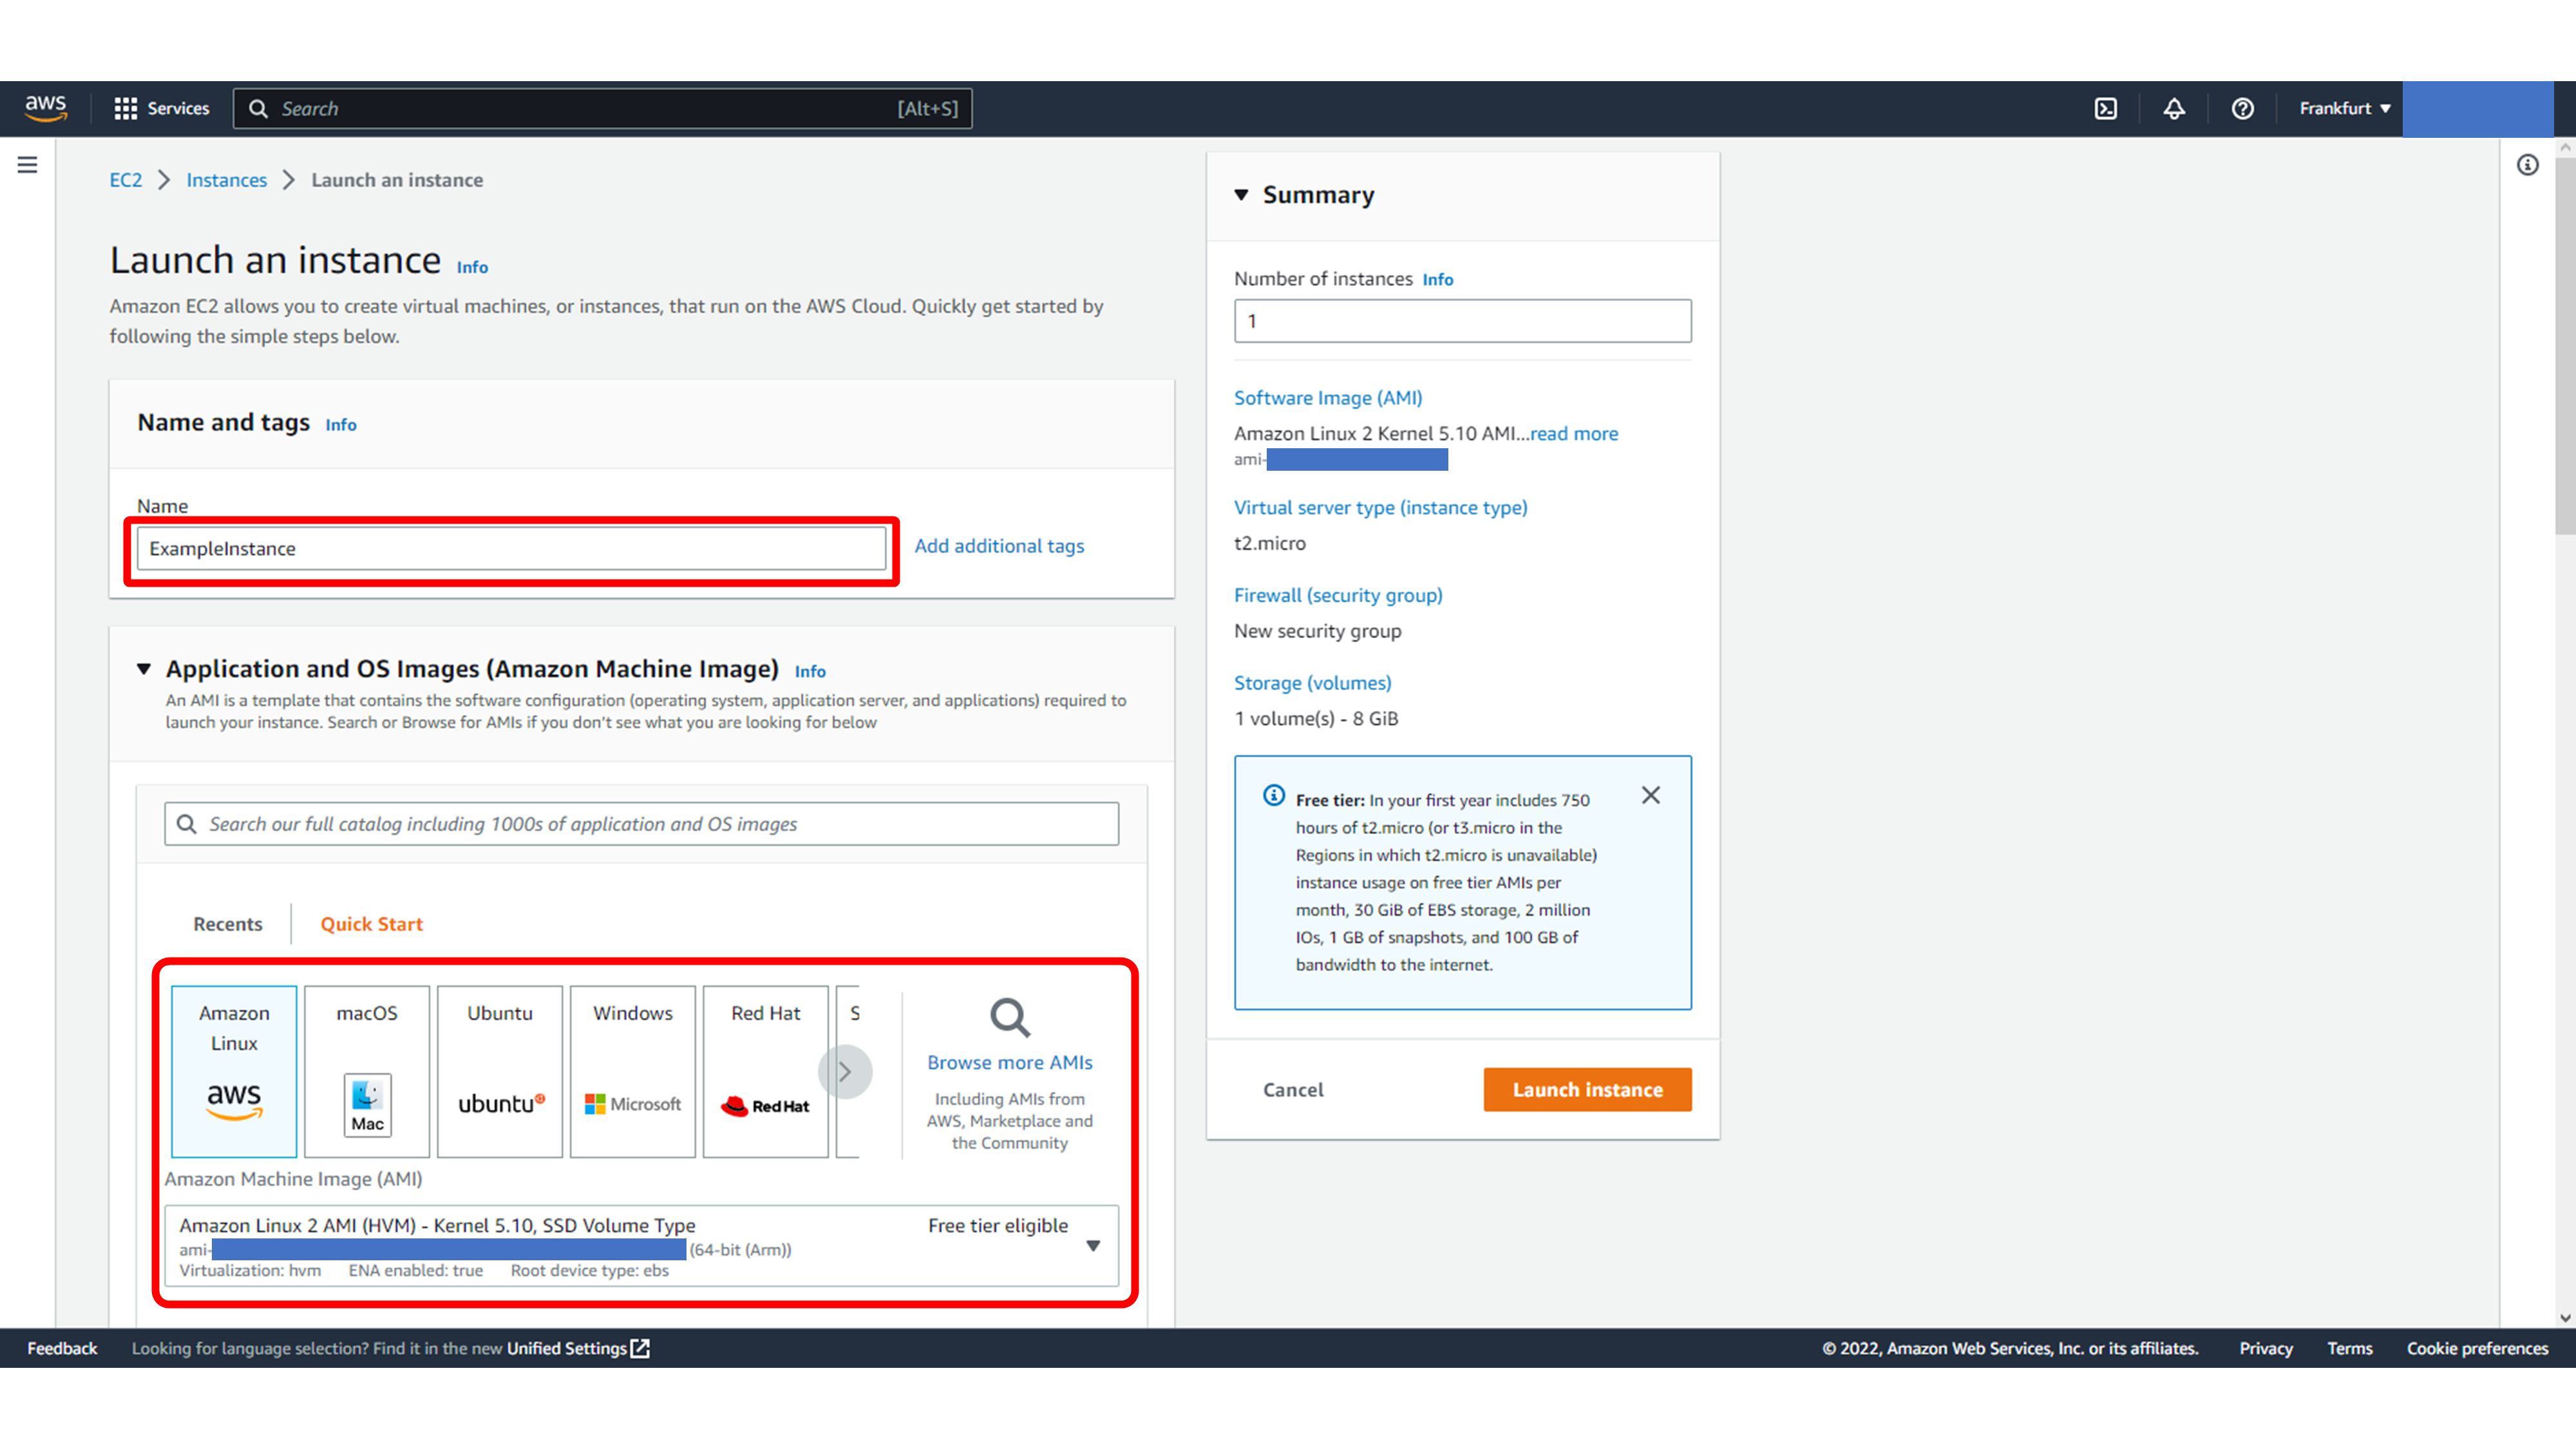
Give the instance a clear name. Then choose an Amazon Machine Image. In this example, Amazon Linux is selected because it is Free Tier eligible.
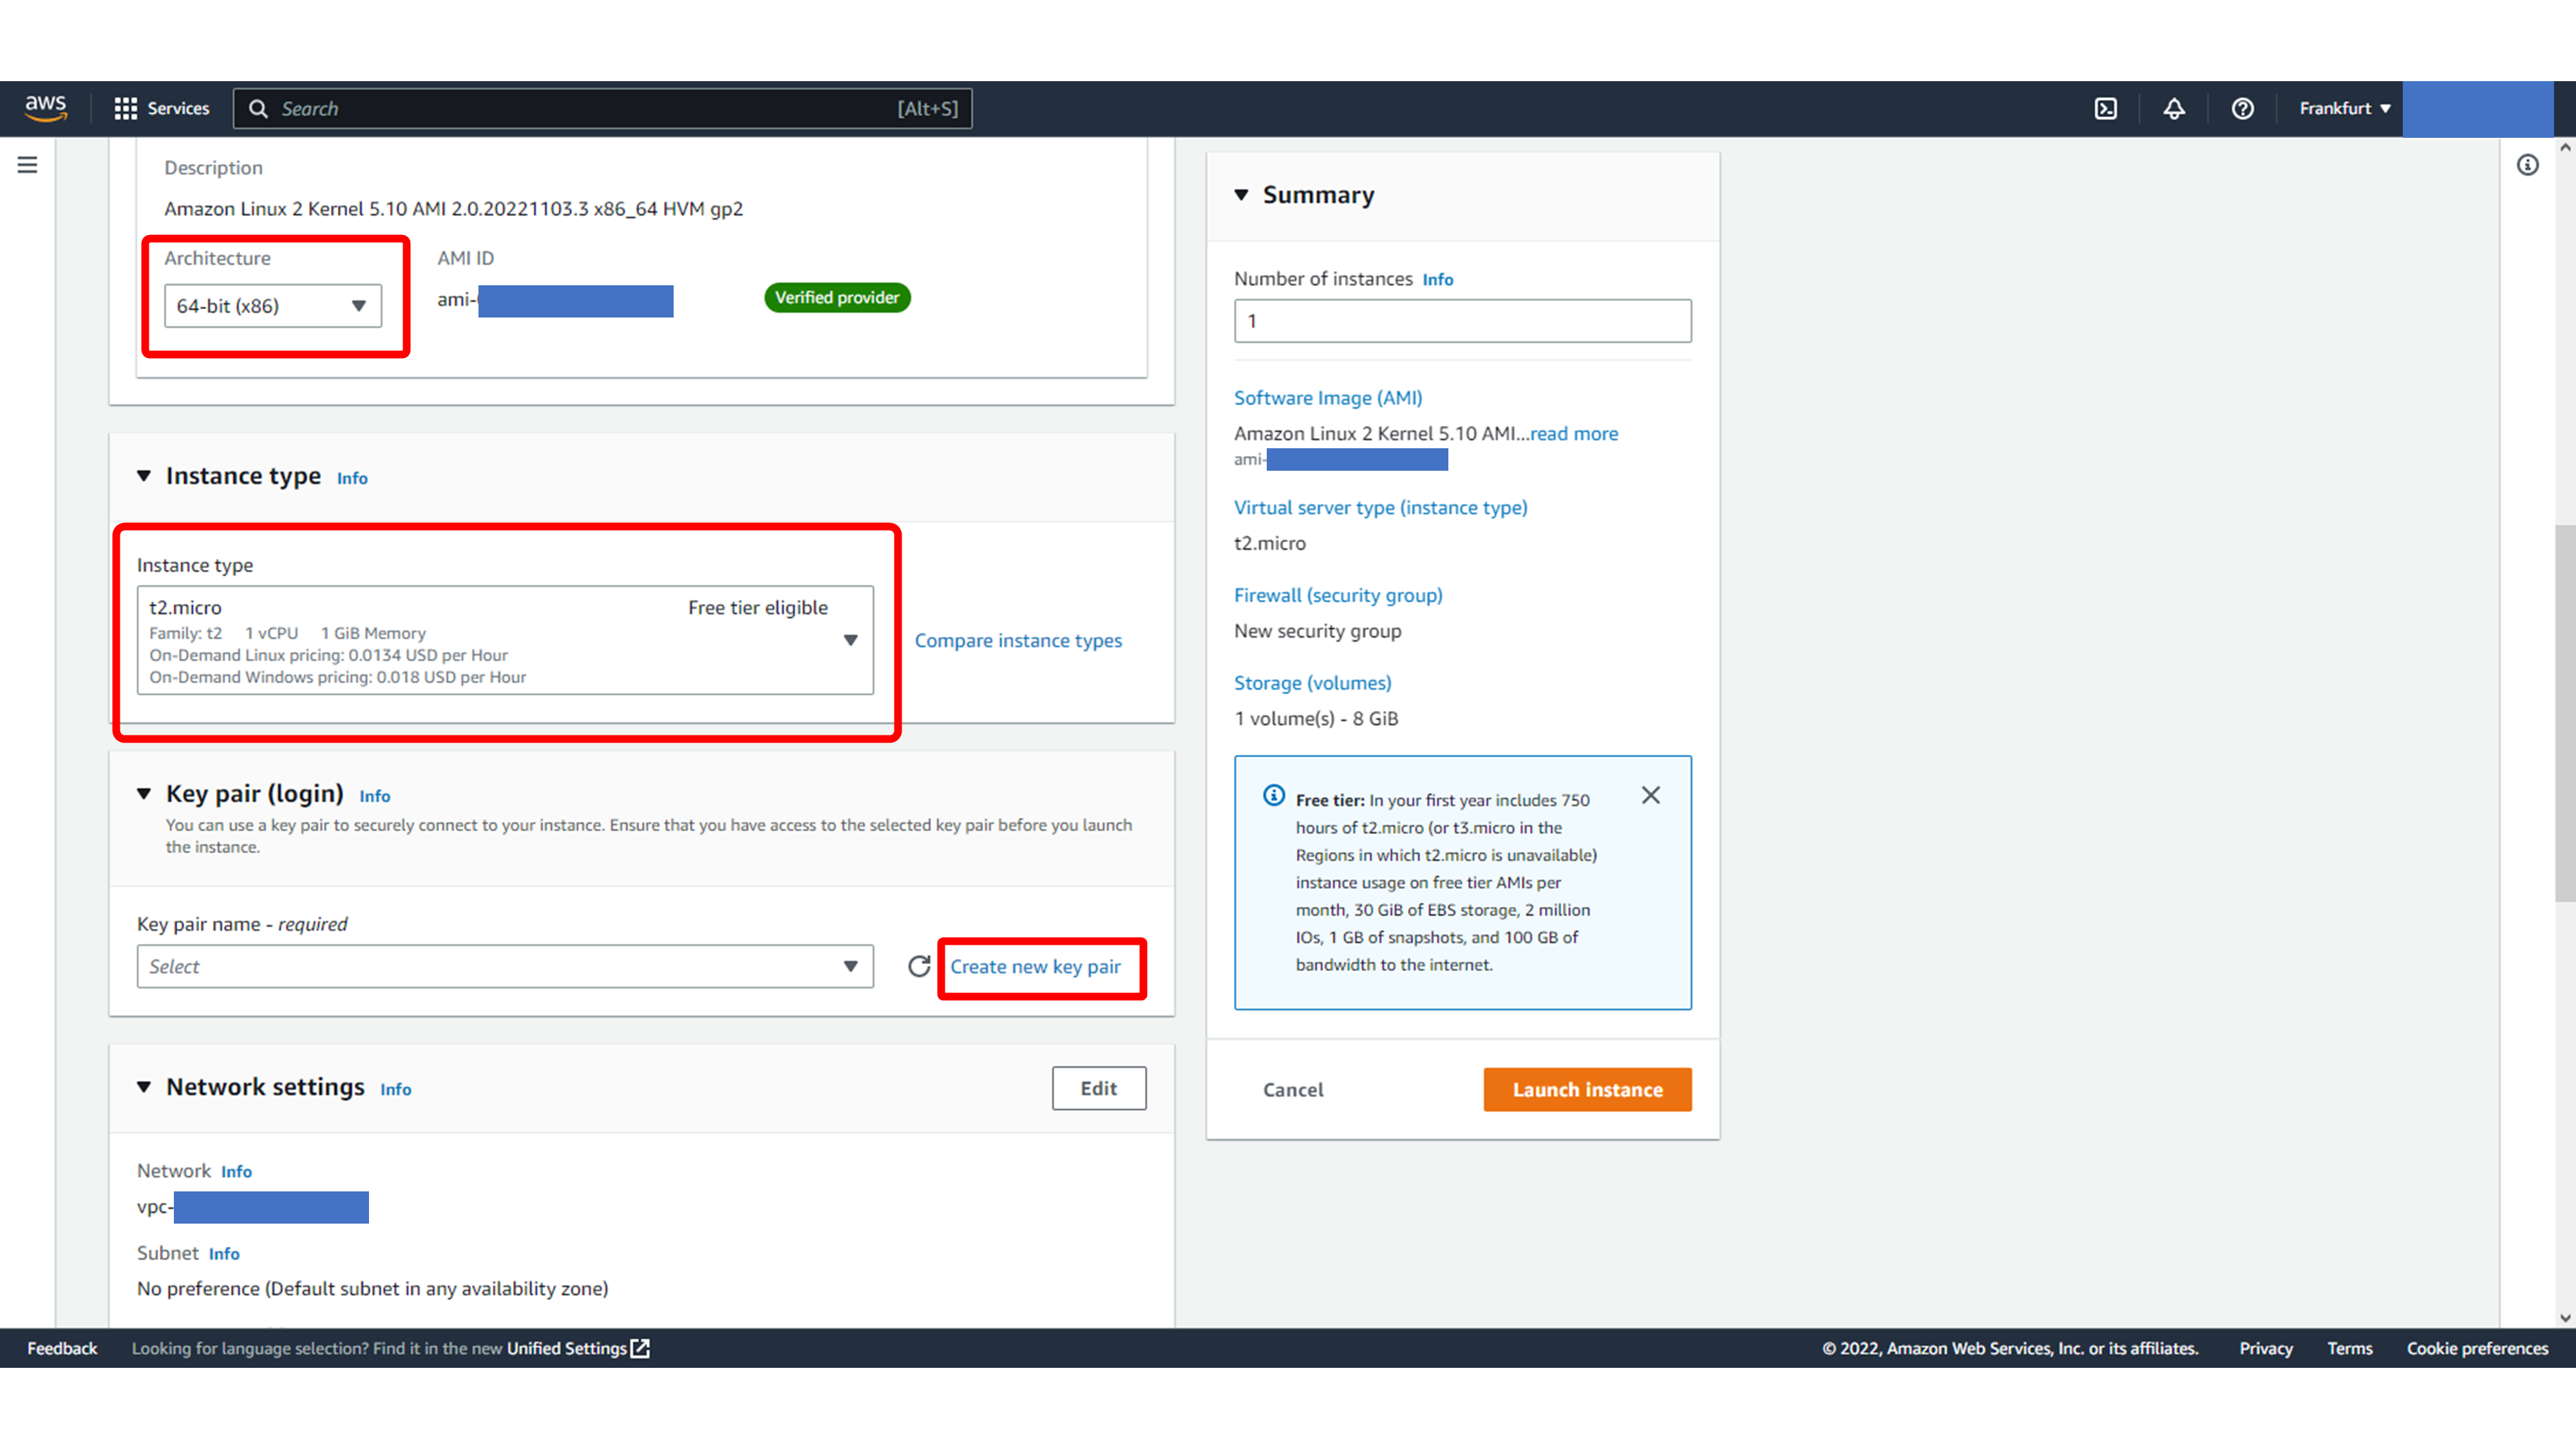
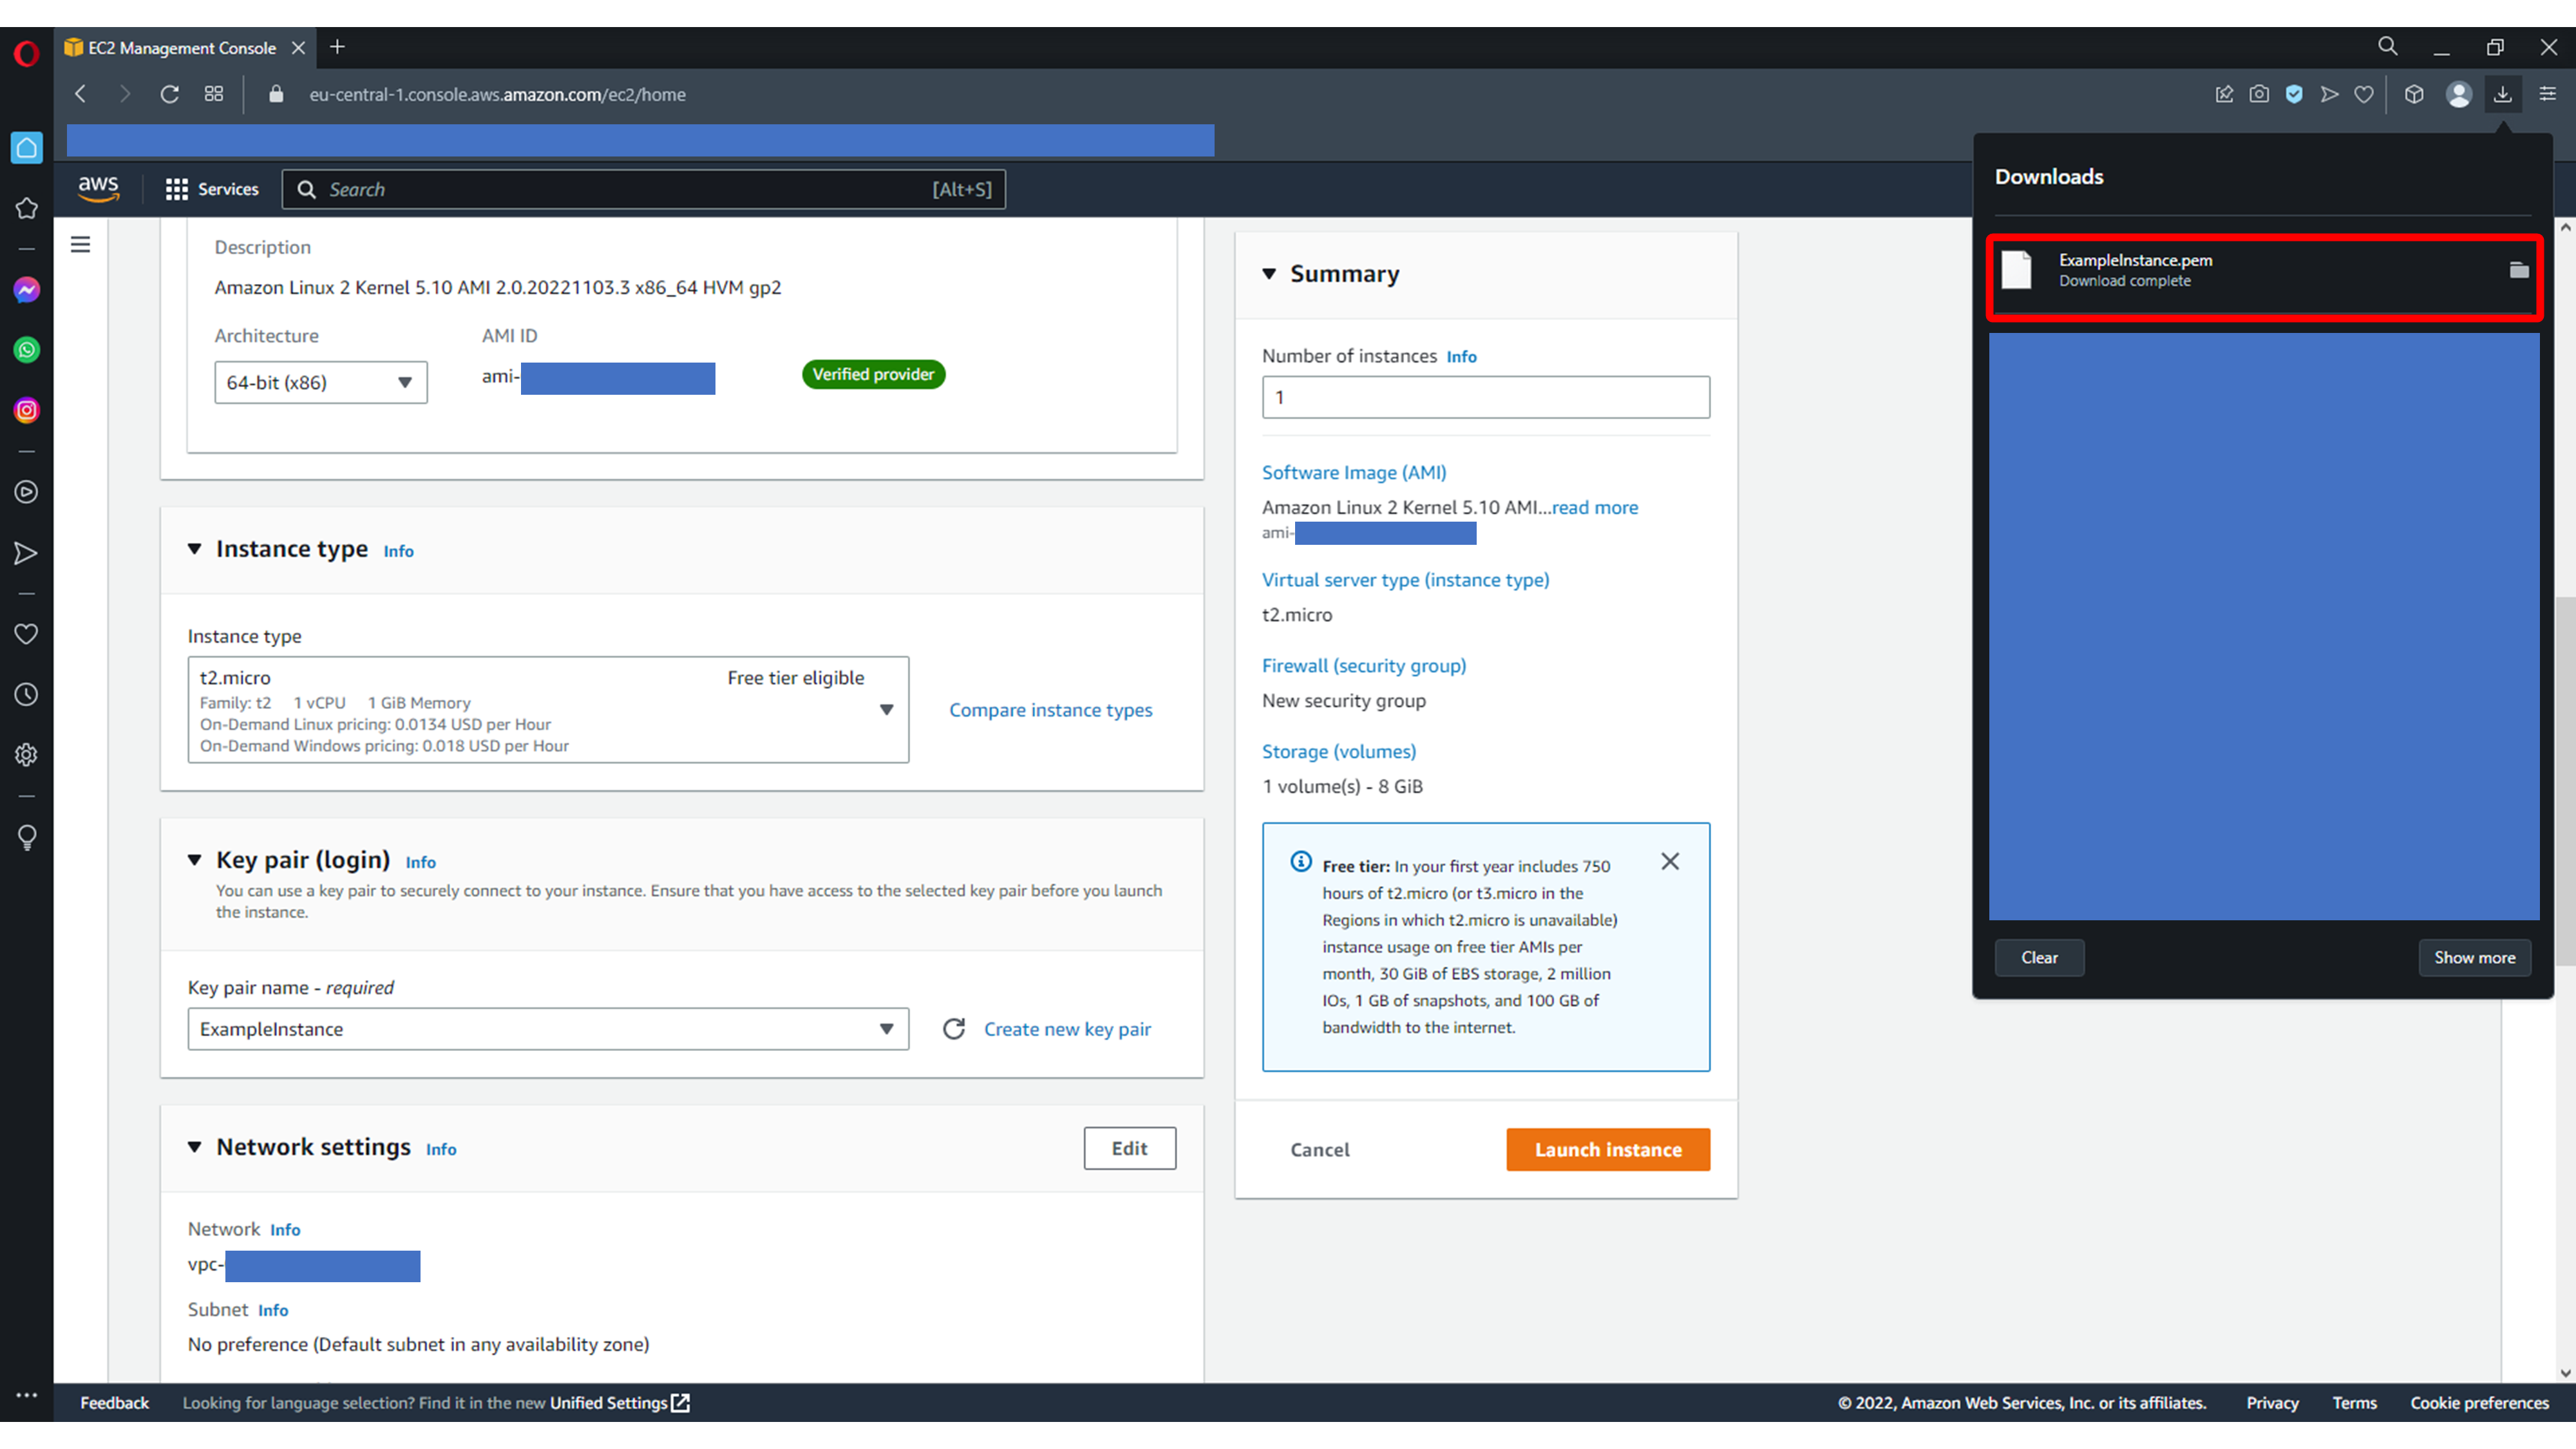
For a basic test instance, choose a Free Tier eligible instance type such as t2.micro. Keep the architecture as 64-bit. To connect to the instance later, create a new key pair.
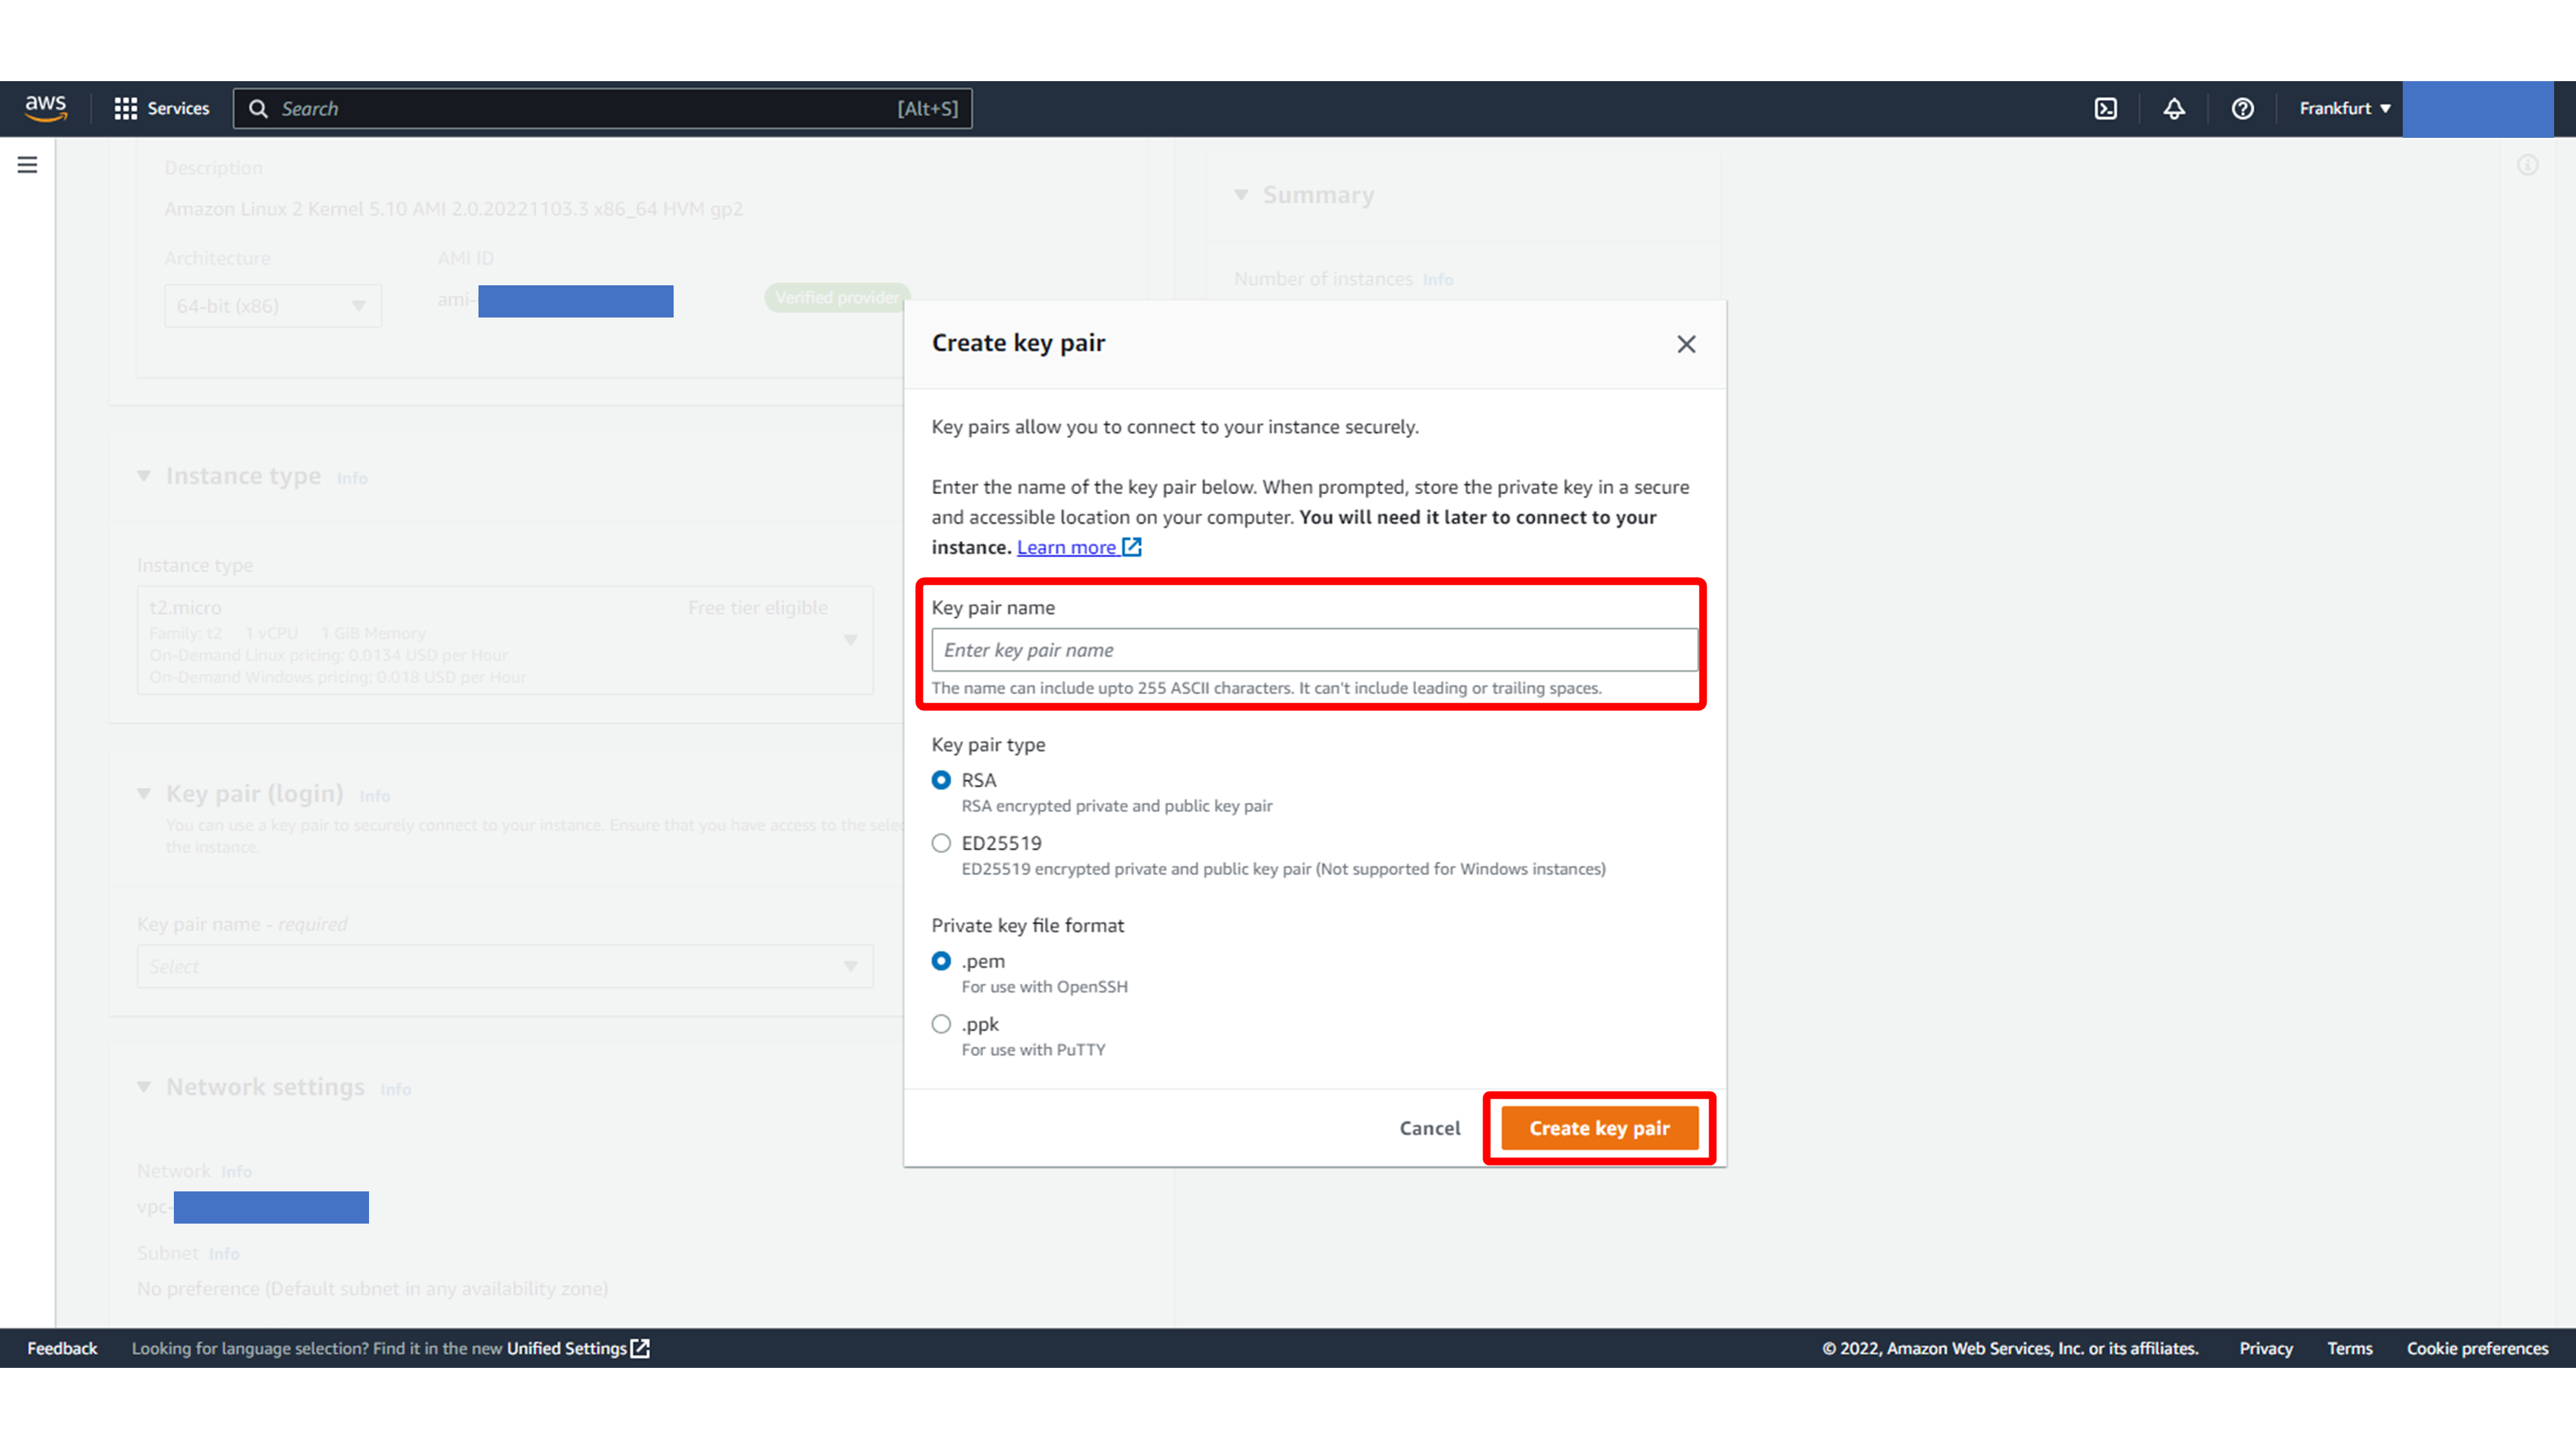
Enter a name for the key pair and create it. AWS downloads a .pem file to your computer. Keep this file safe, because it is required for SSH access.
This screen shows Downloaded EC2 PEM key file.
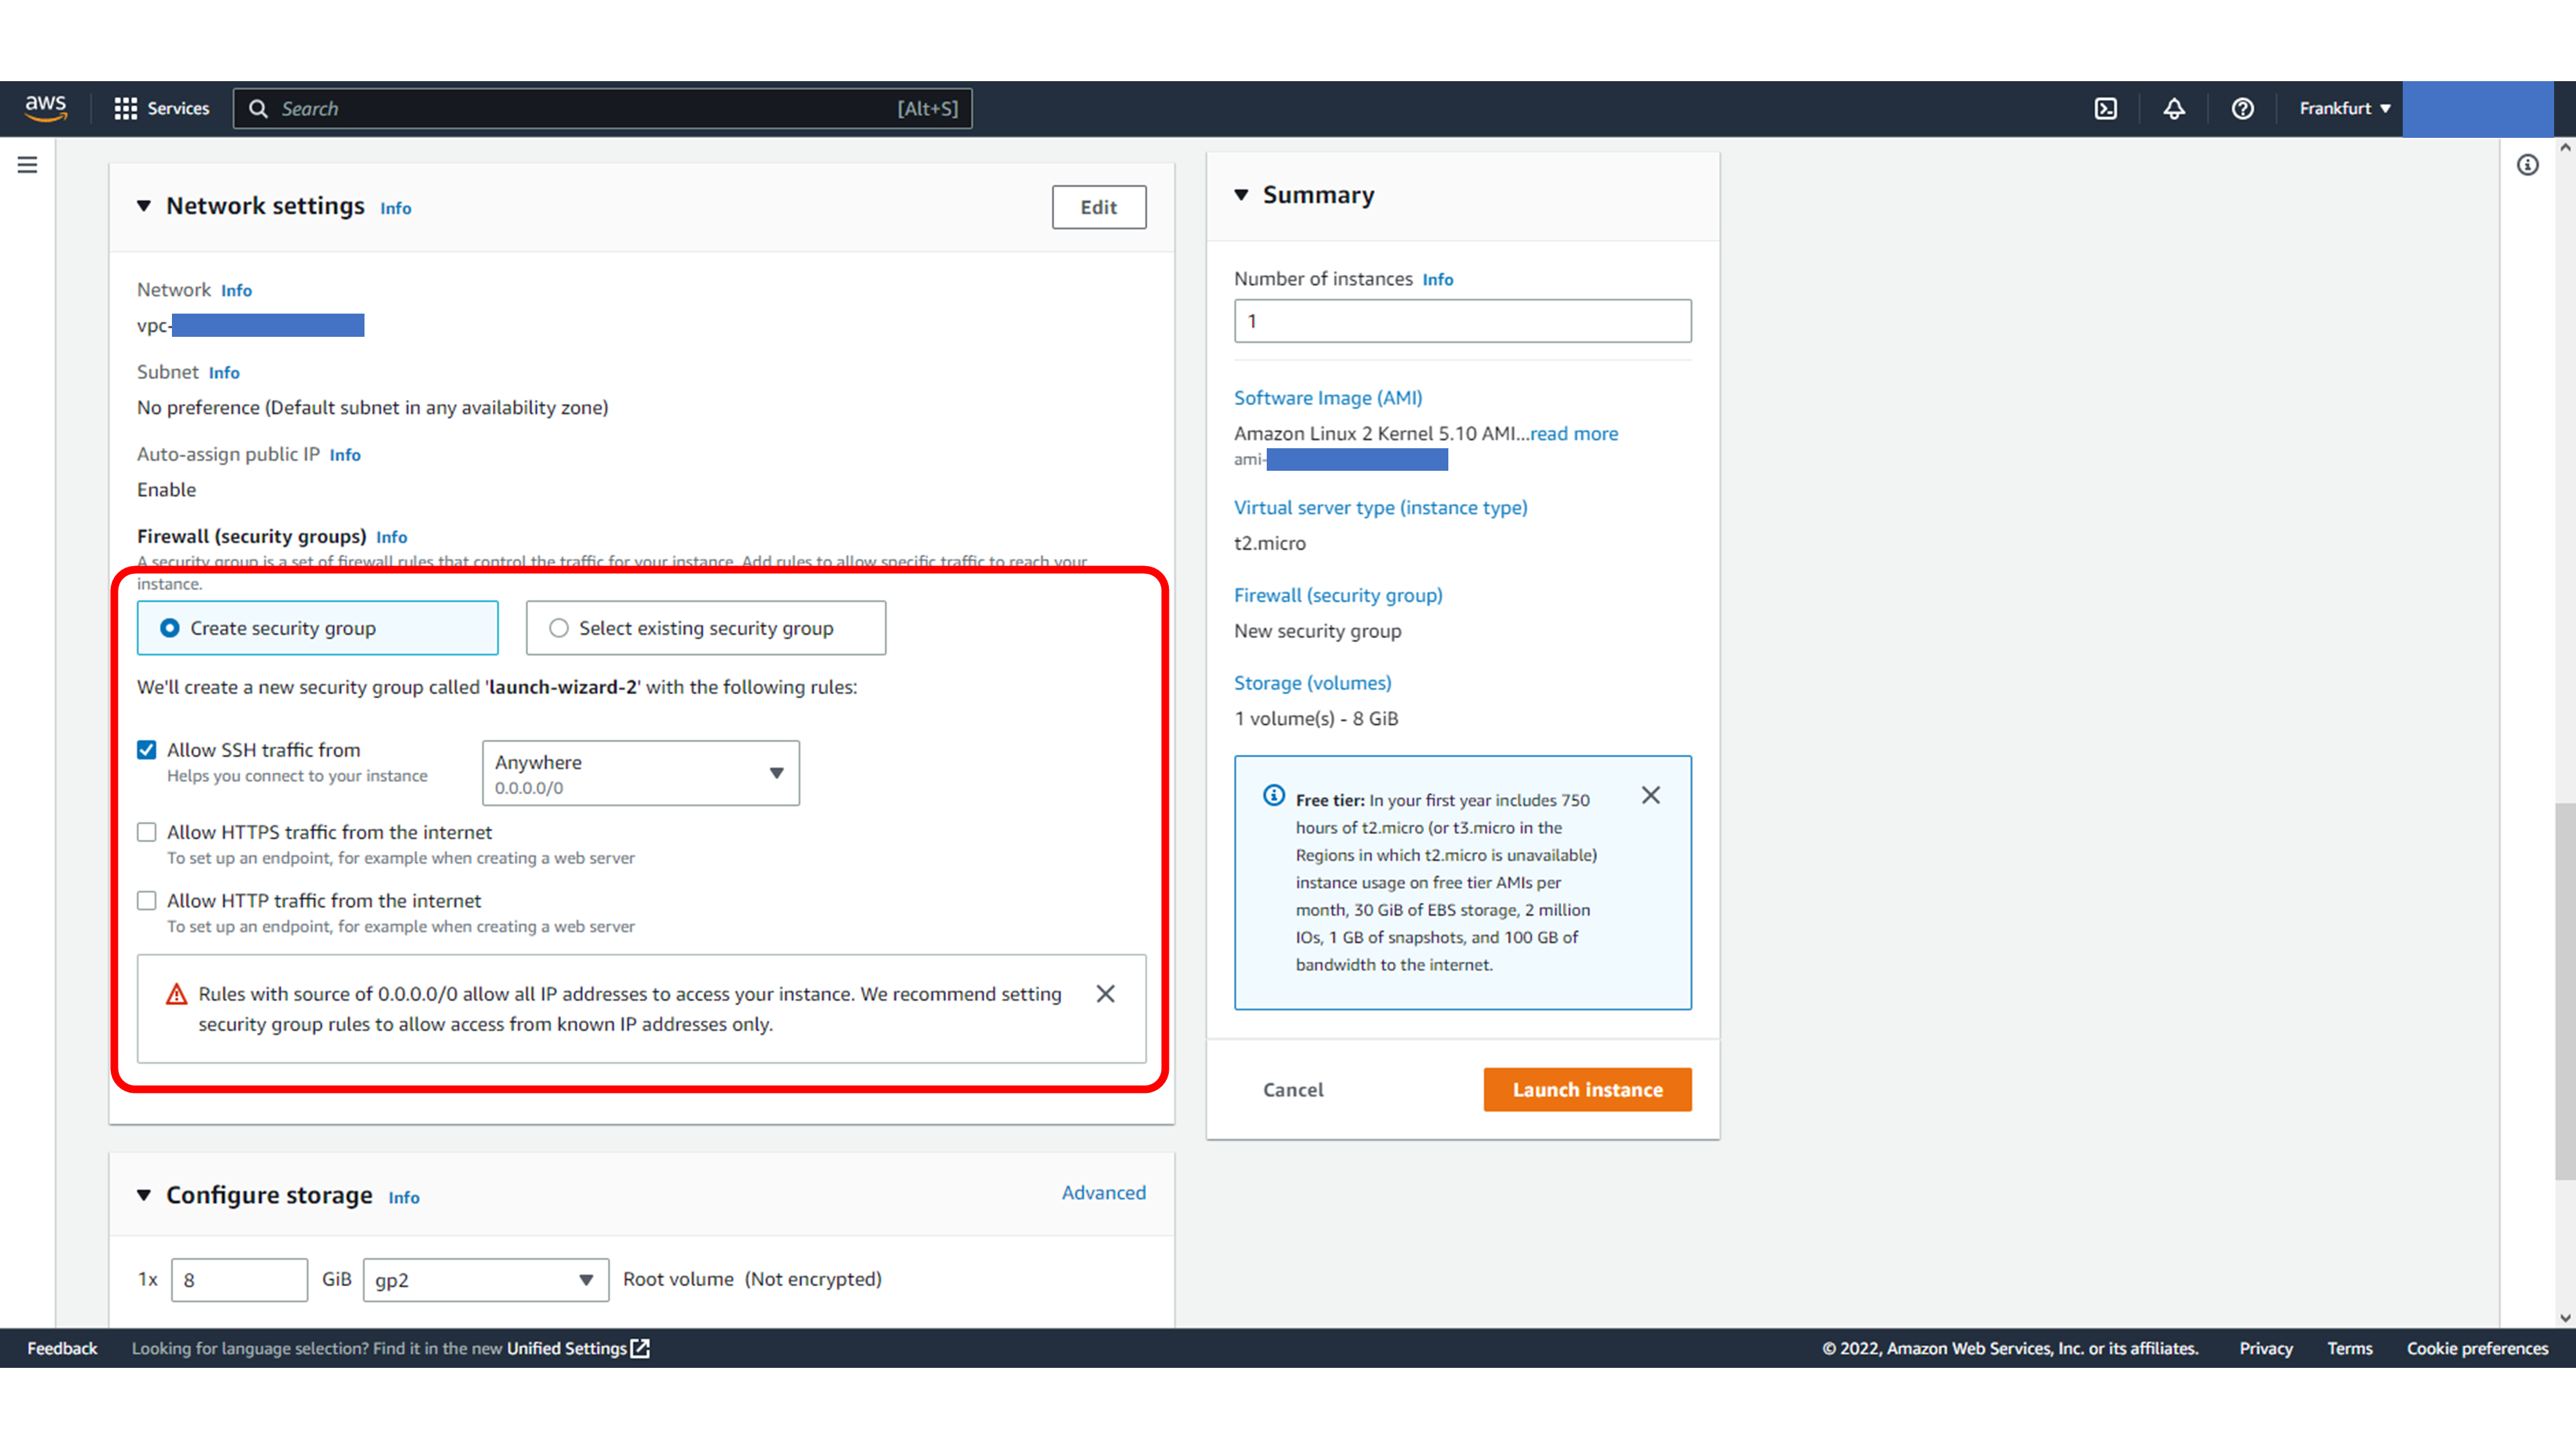
For the network settings, keep SSH access enabled. For a learning setup, the default values are enough, but in a real environment you should restrict inbound access as much as possible.
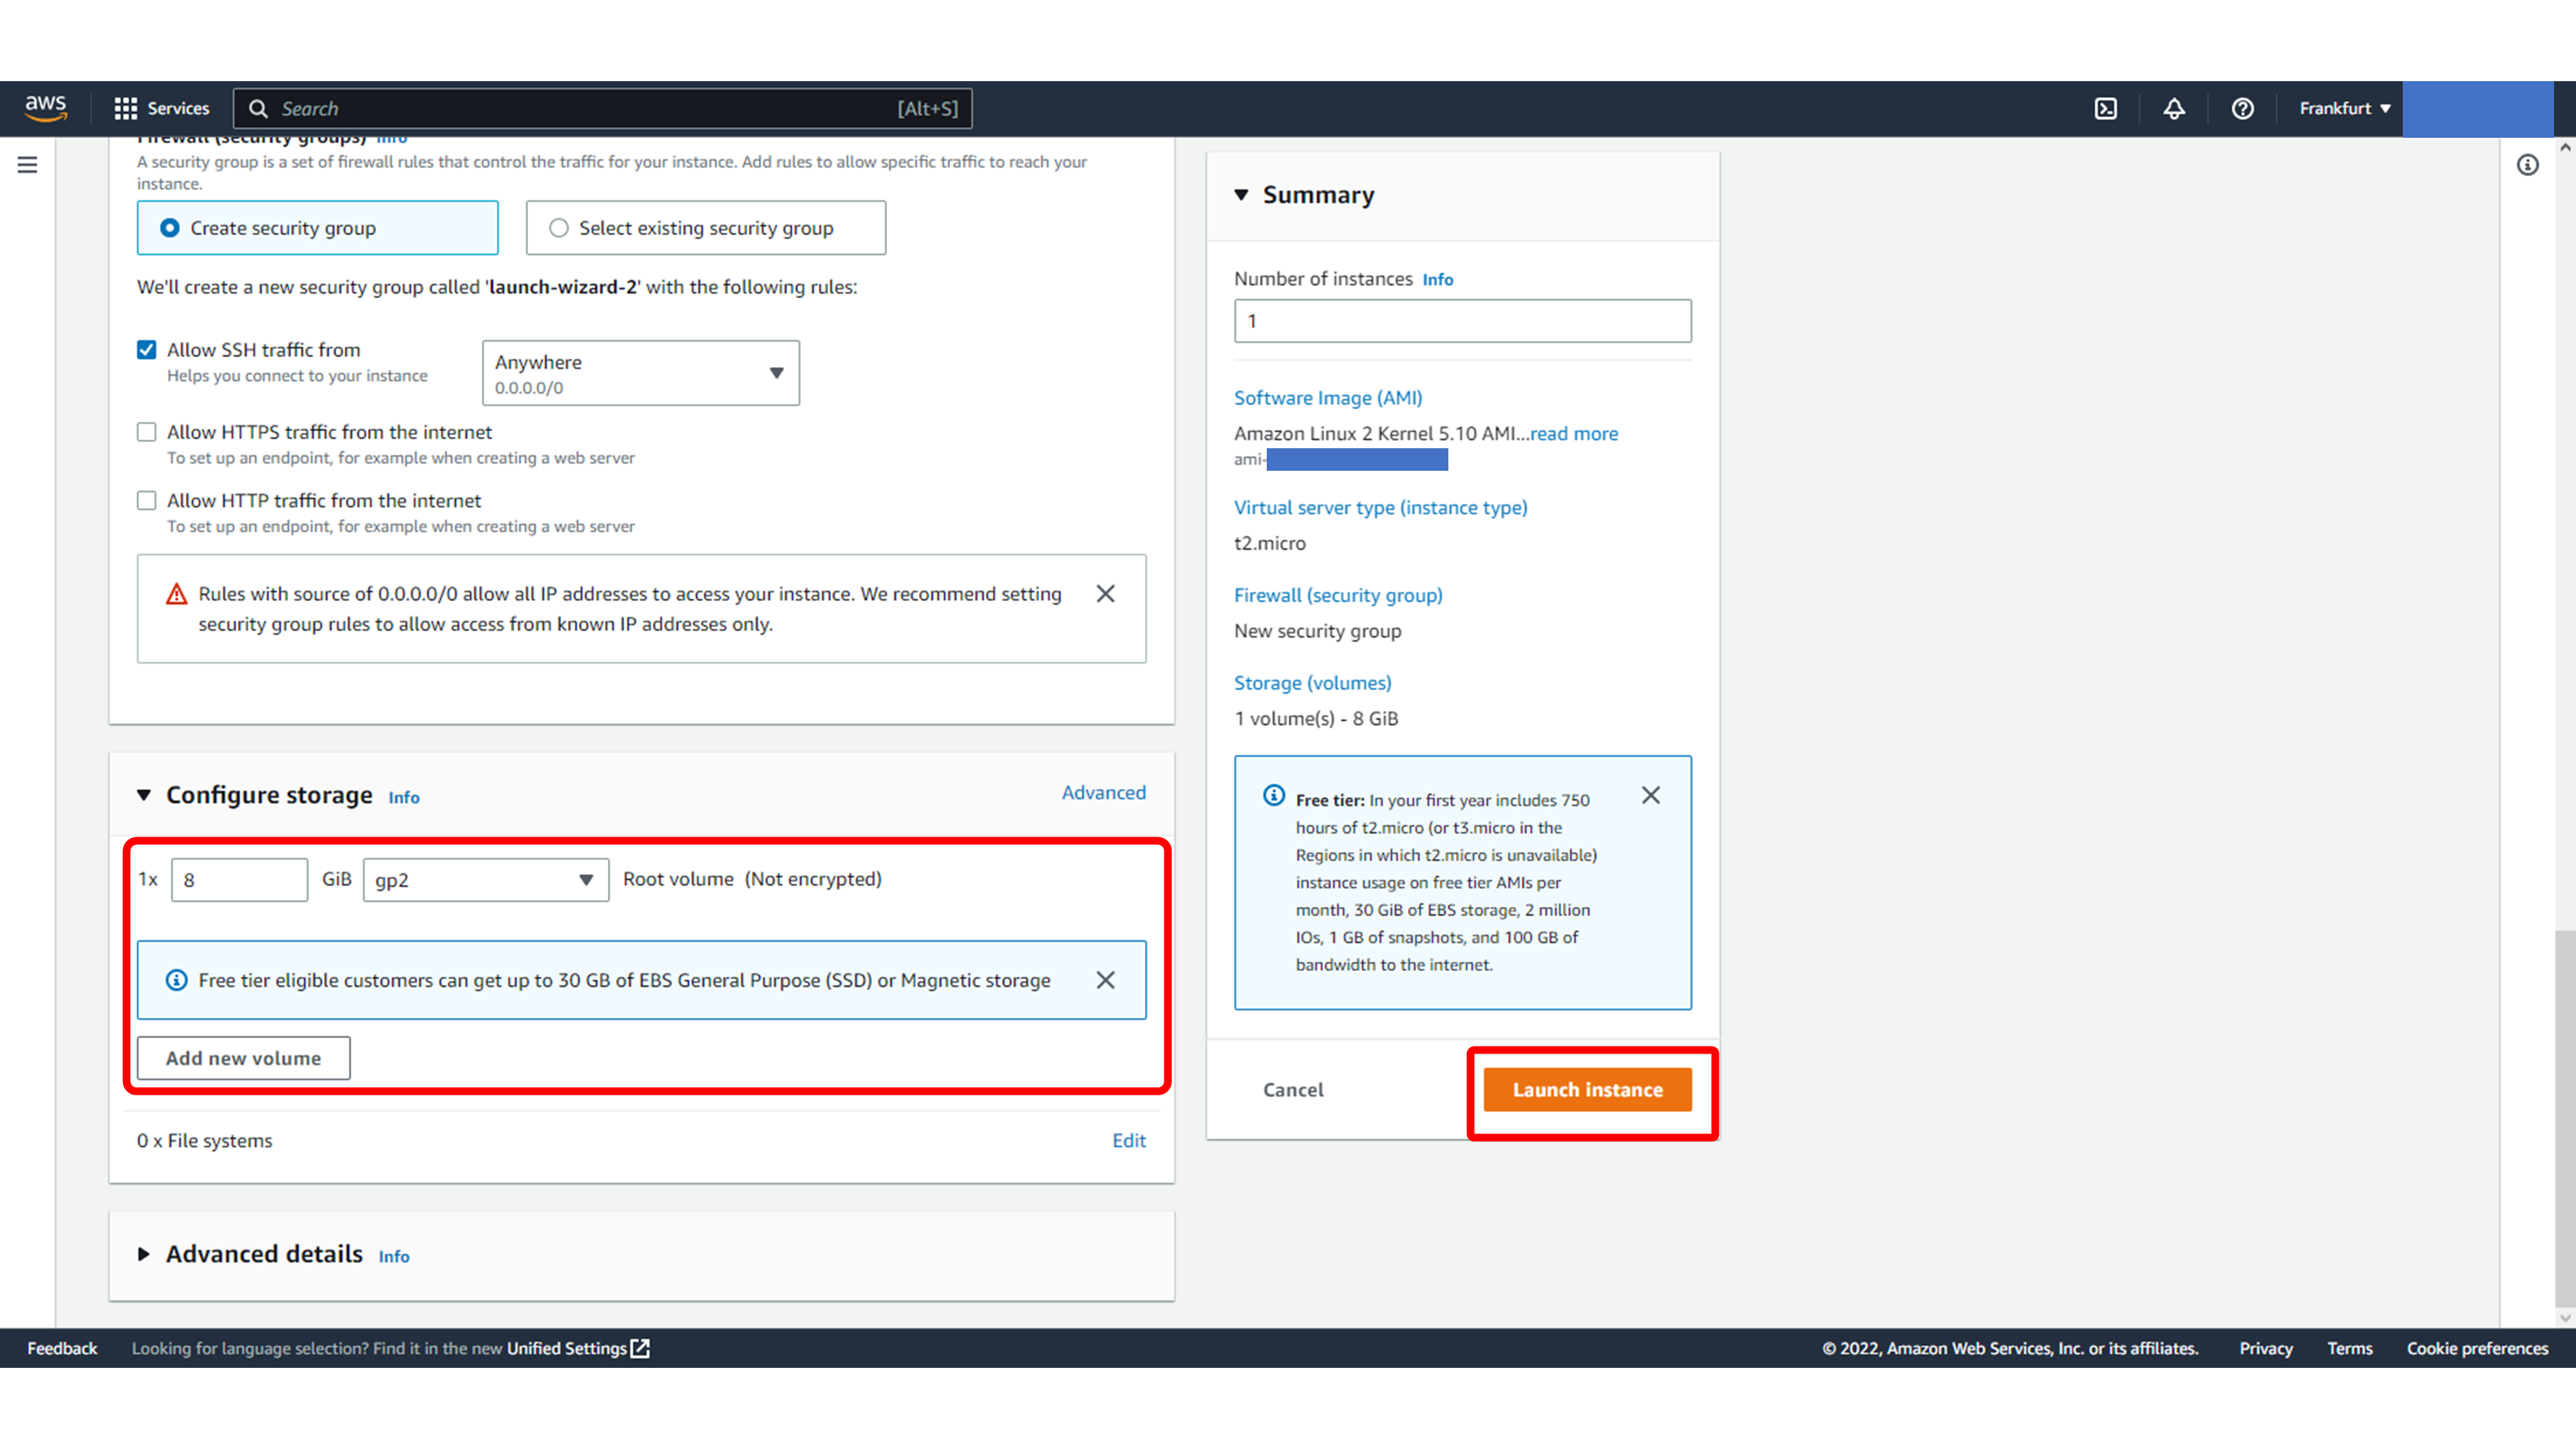
Review the storage settings and launch the instance.
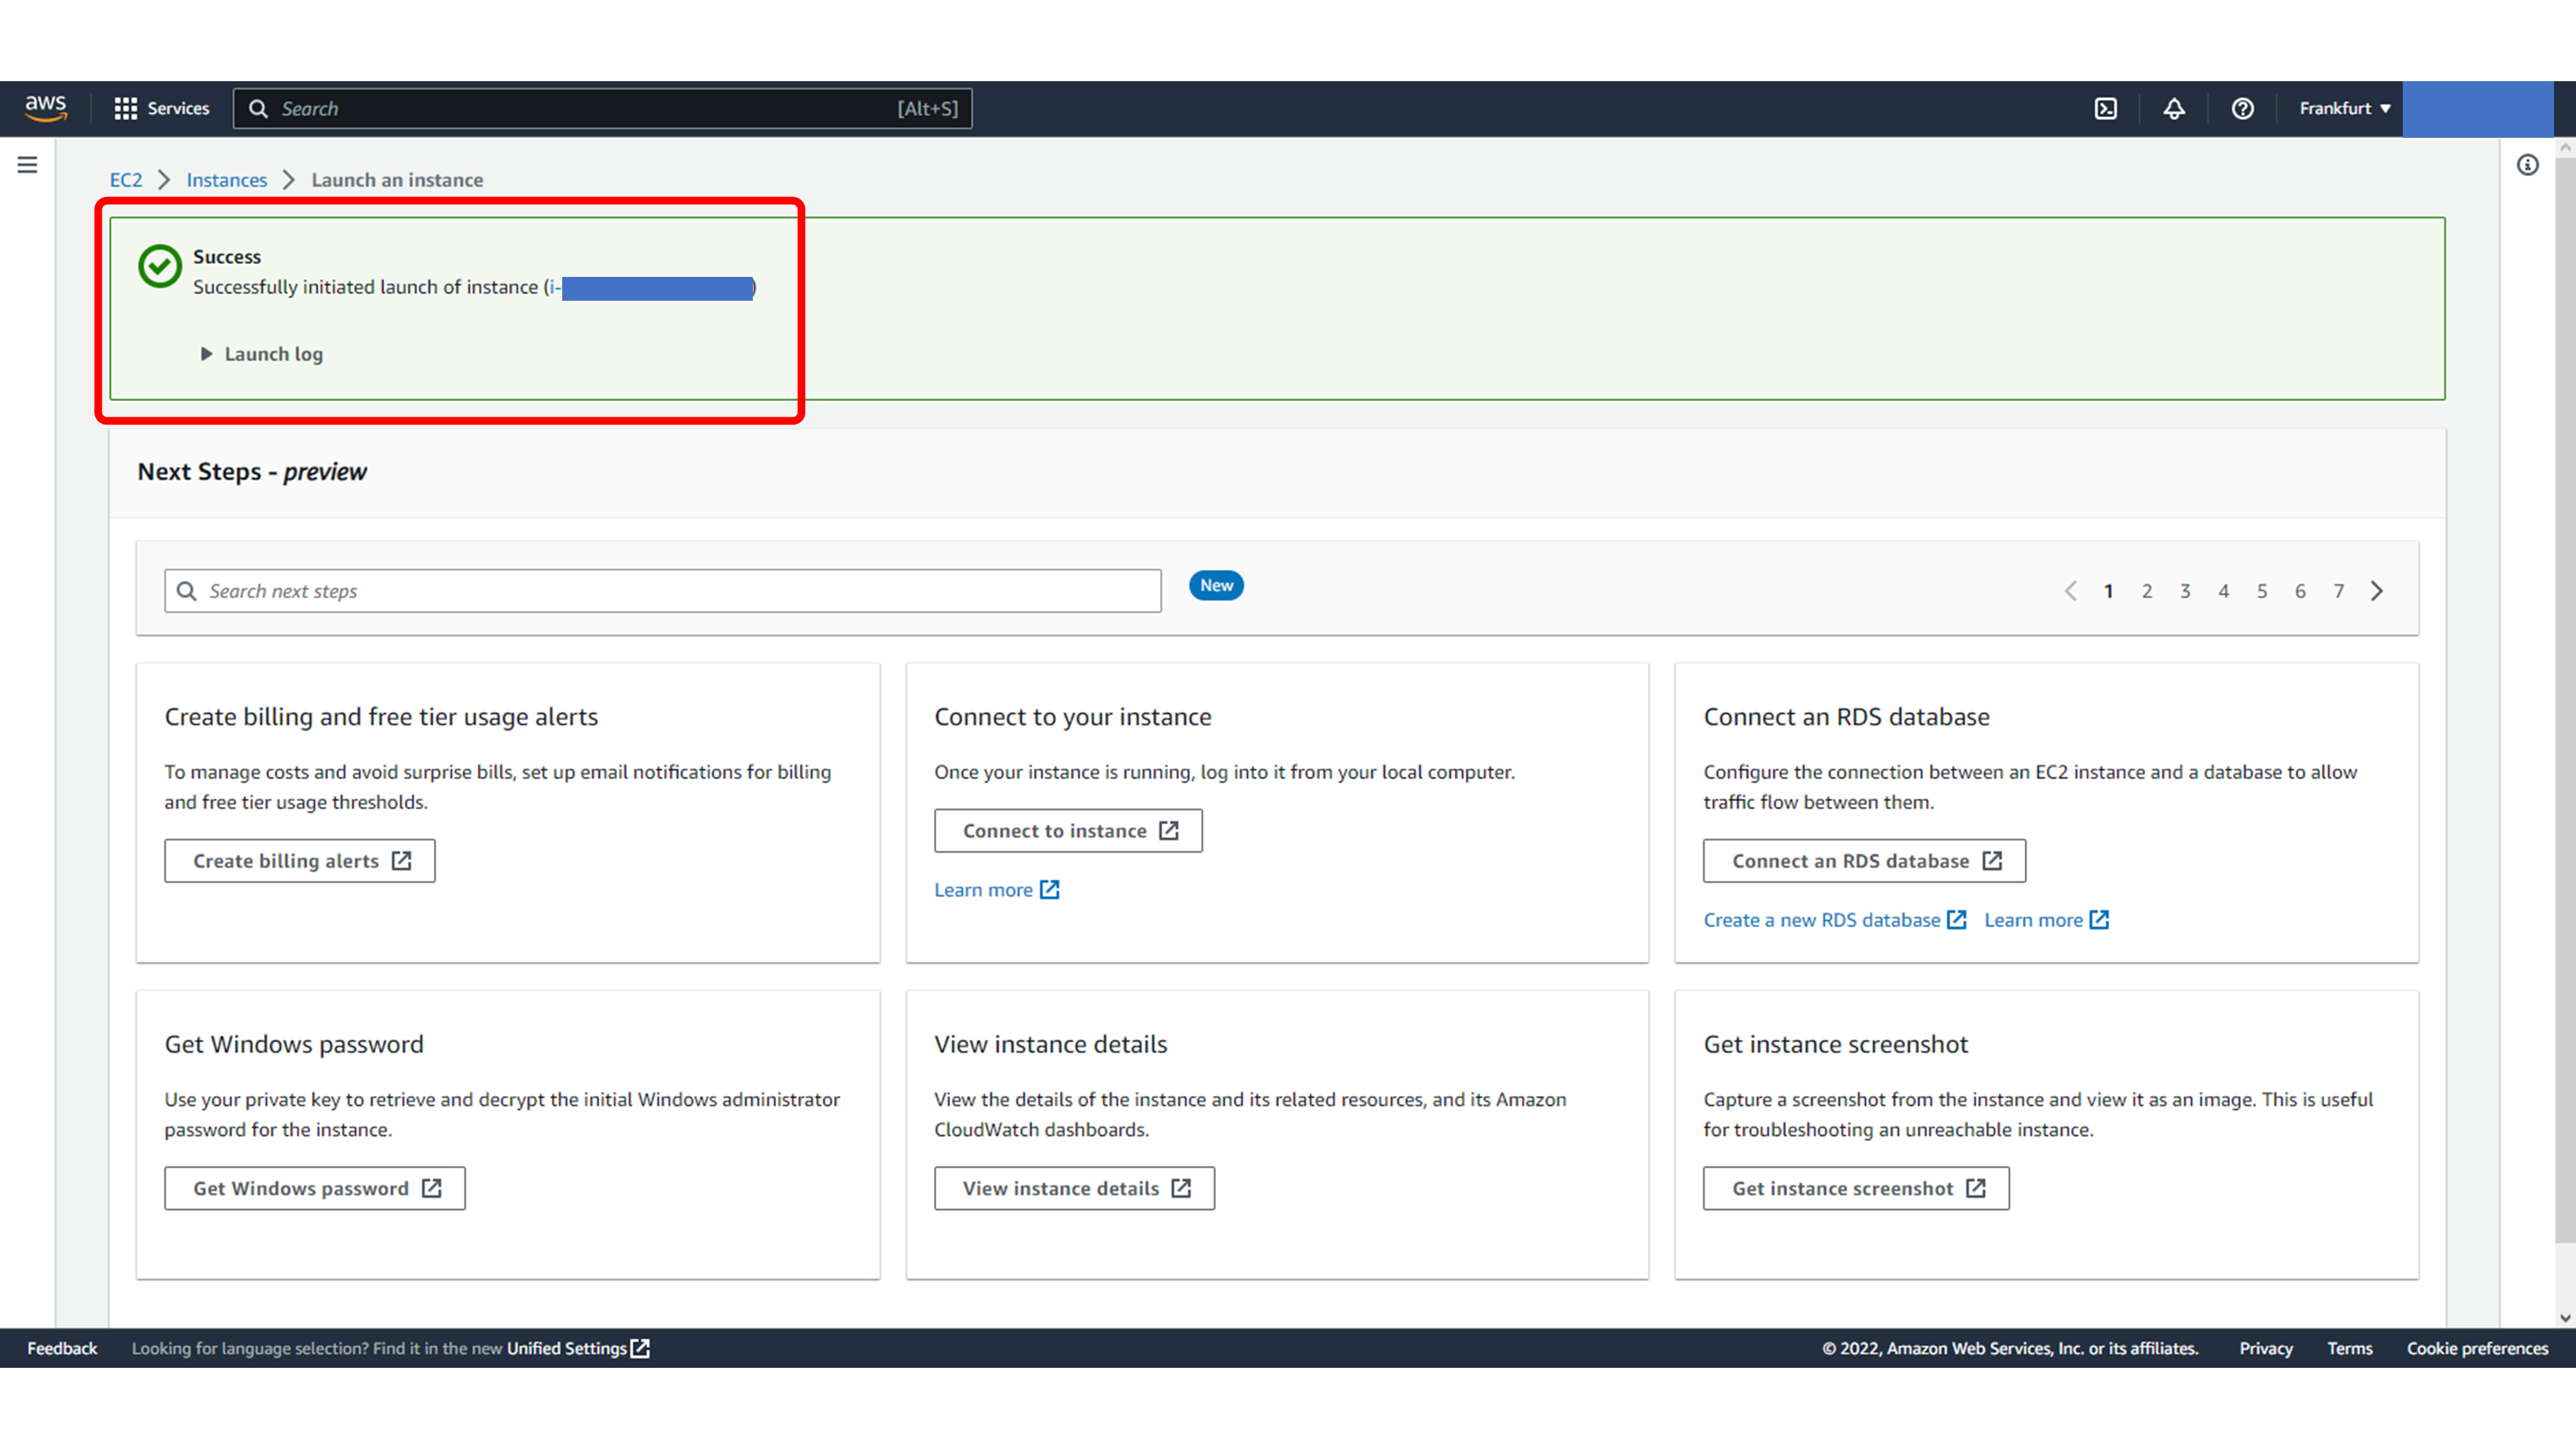
When AWS finishes creating the instance, a success message appears.
Connecting from the Browser
Return to the instance list. The new instance appears in the table, and you can track its status from the Instance state column.
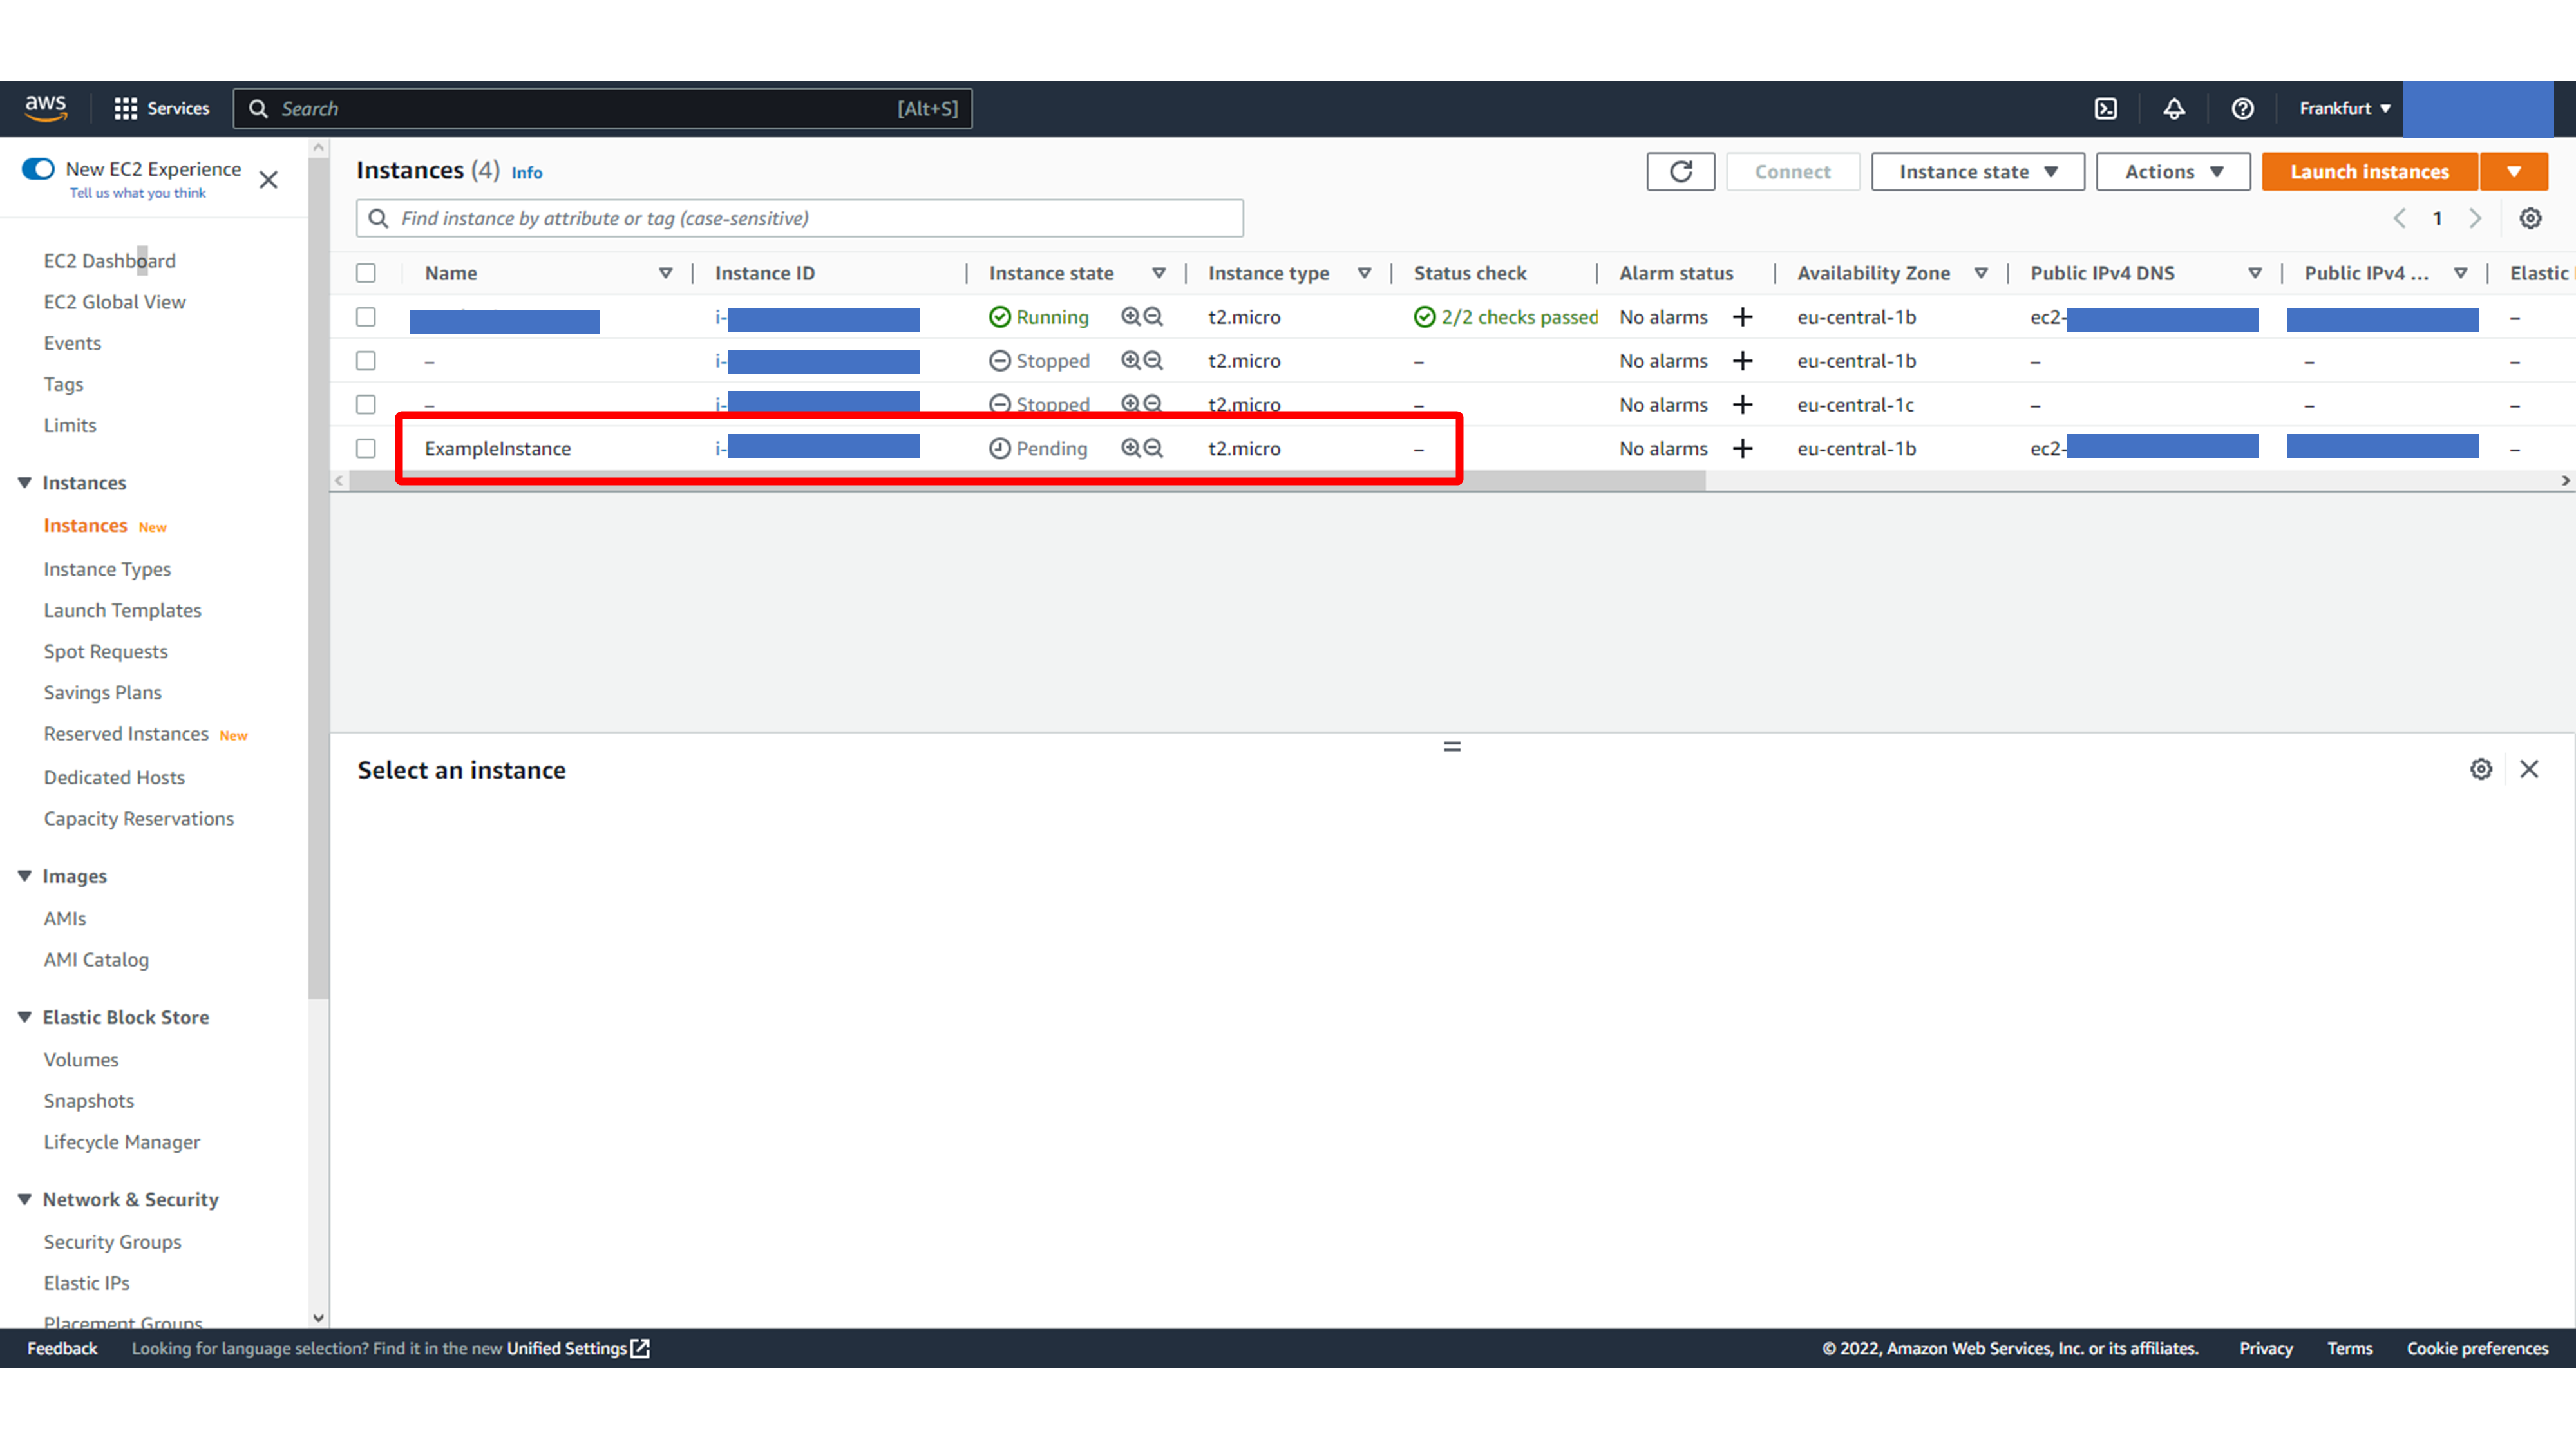
This screen shows EC2 instance state column.
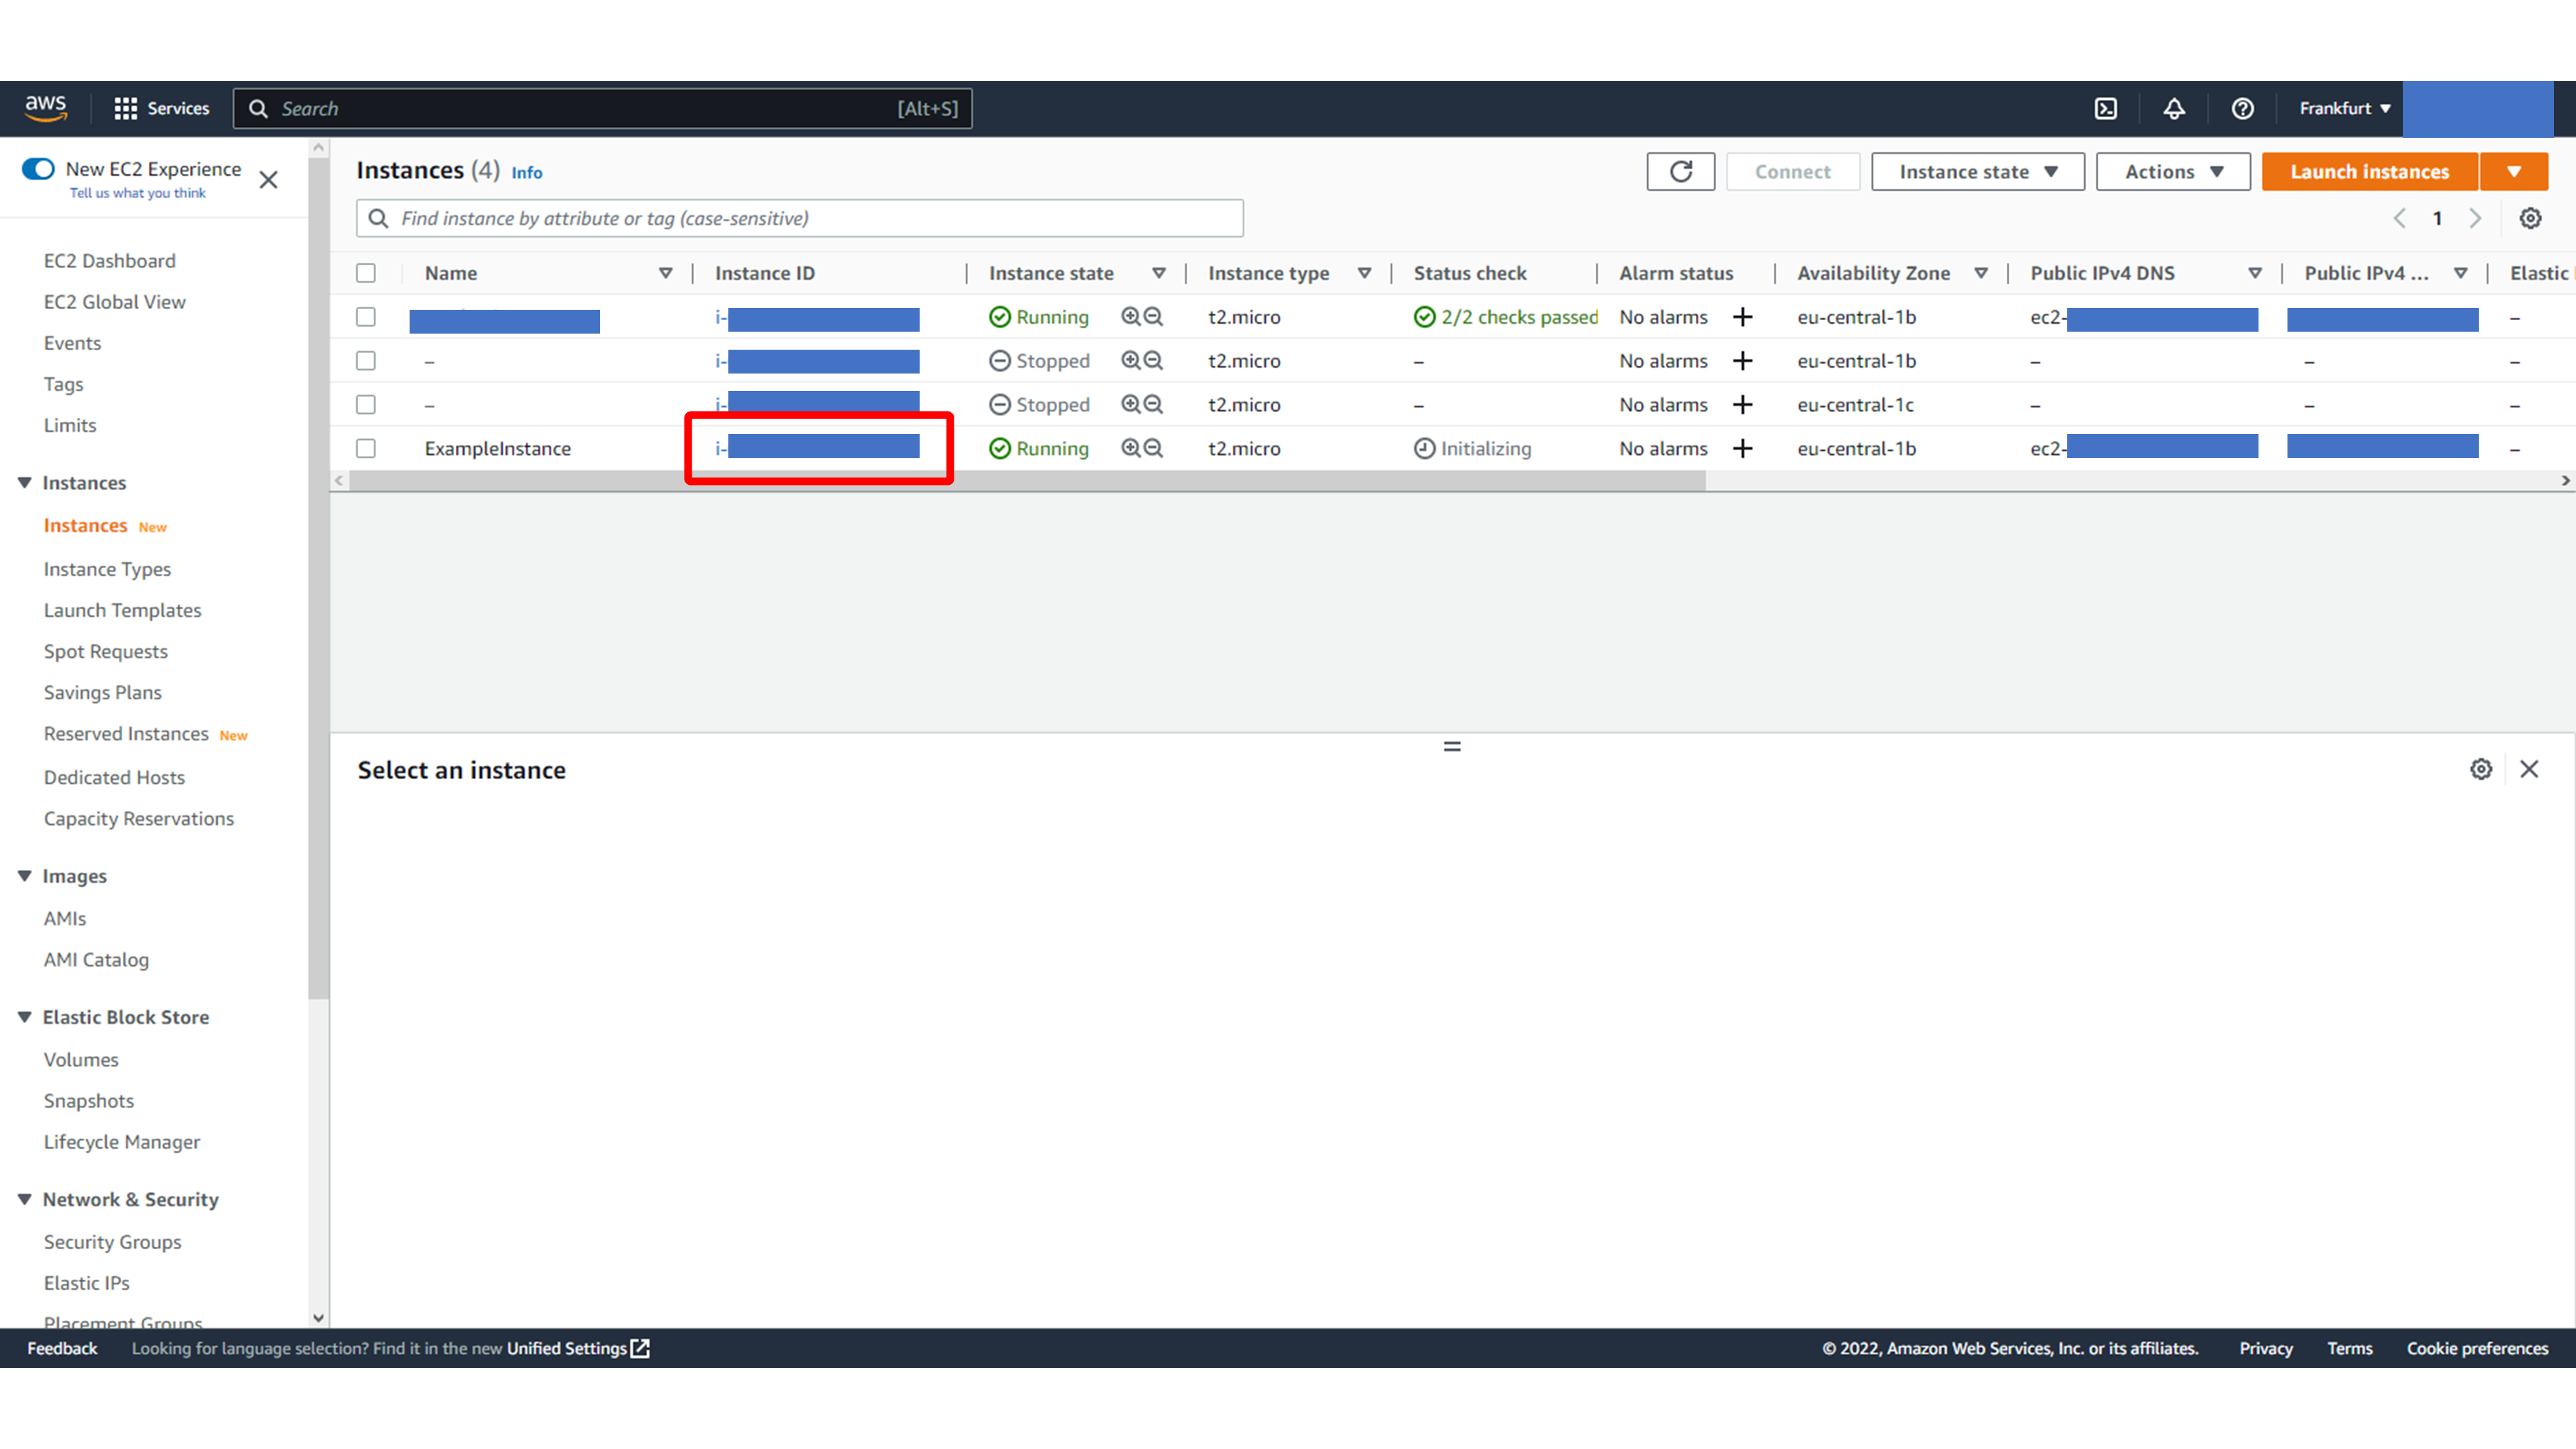
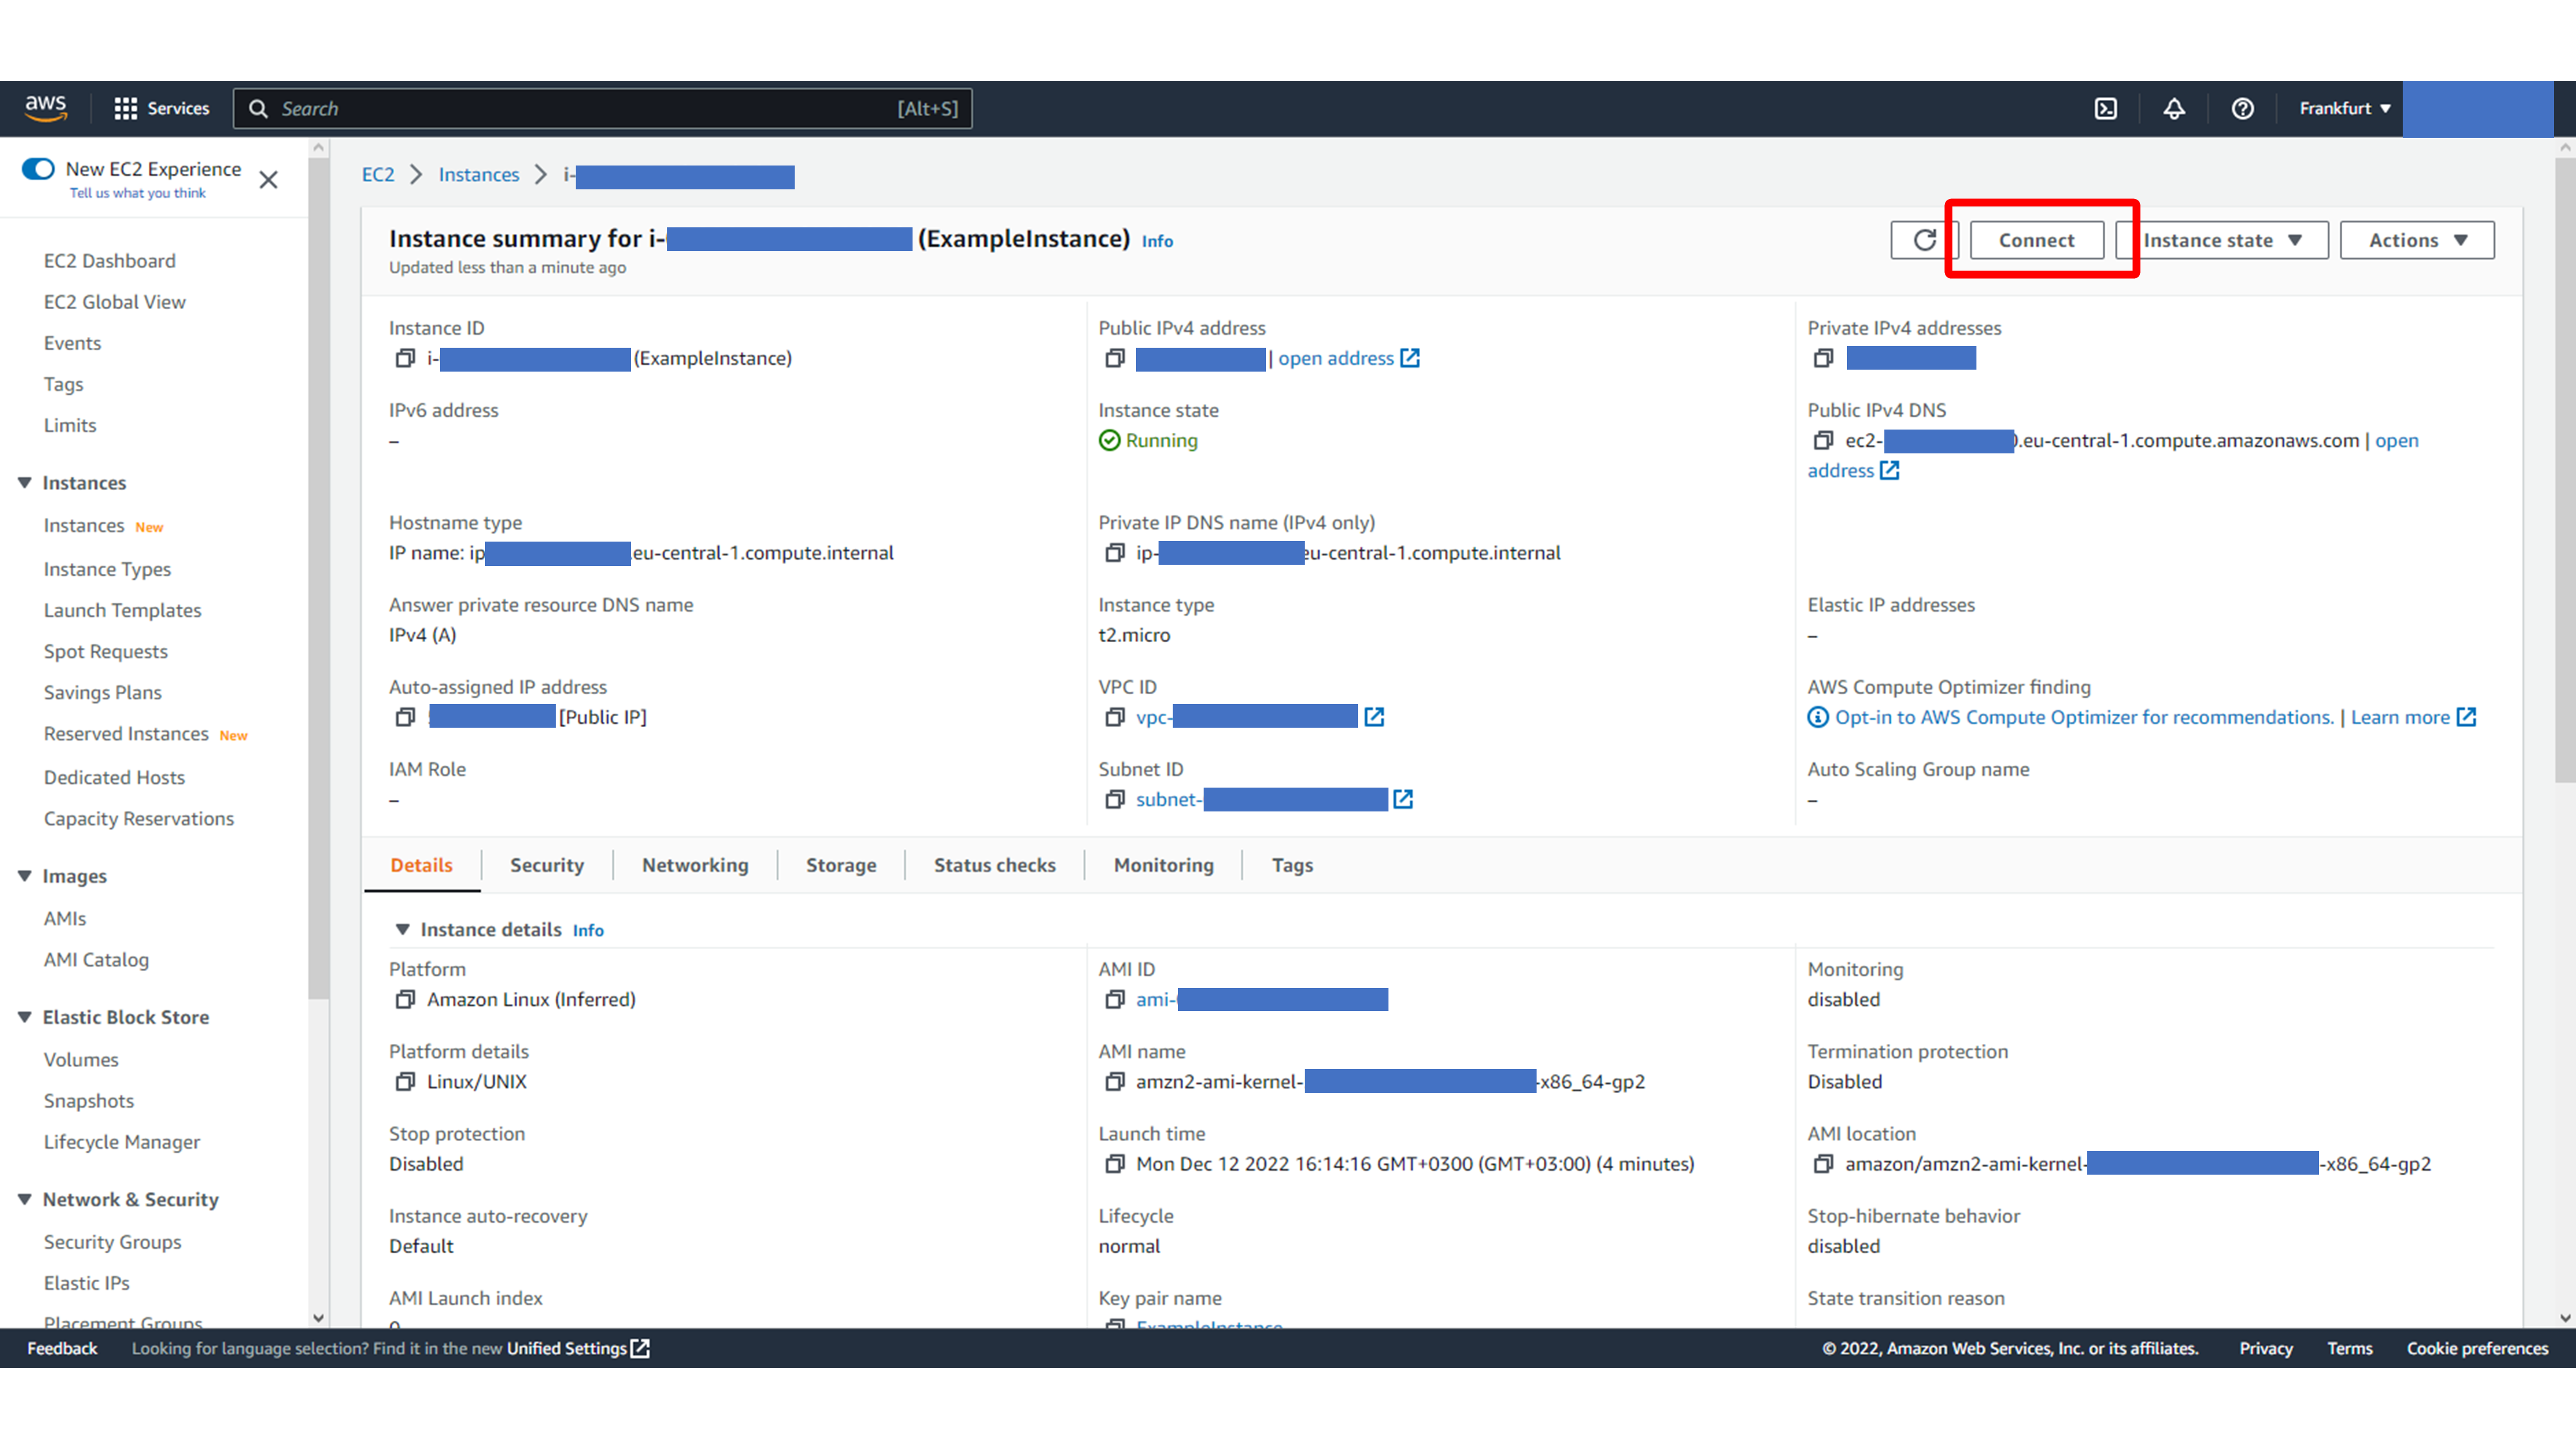
Open the instance details page and click Connect.
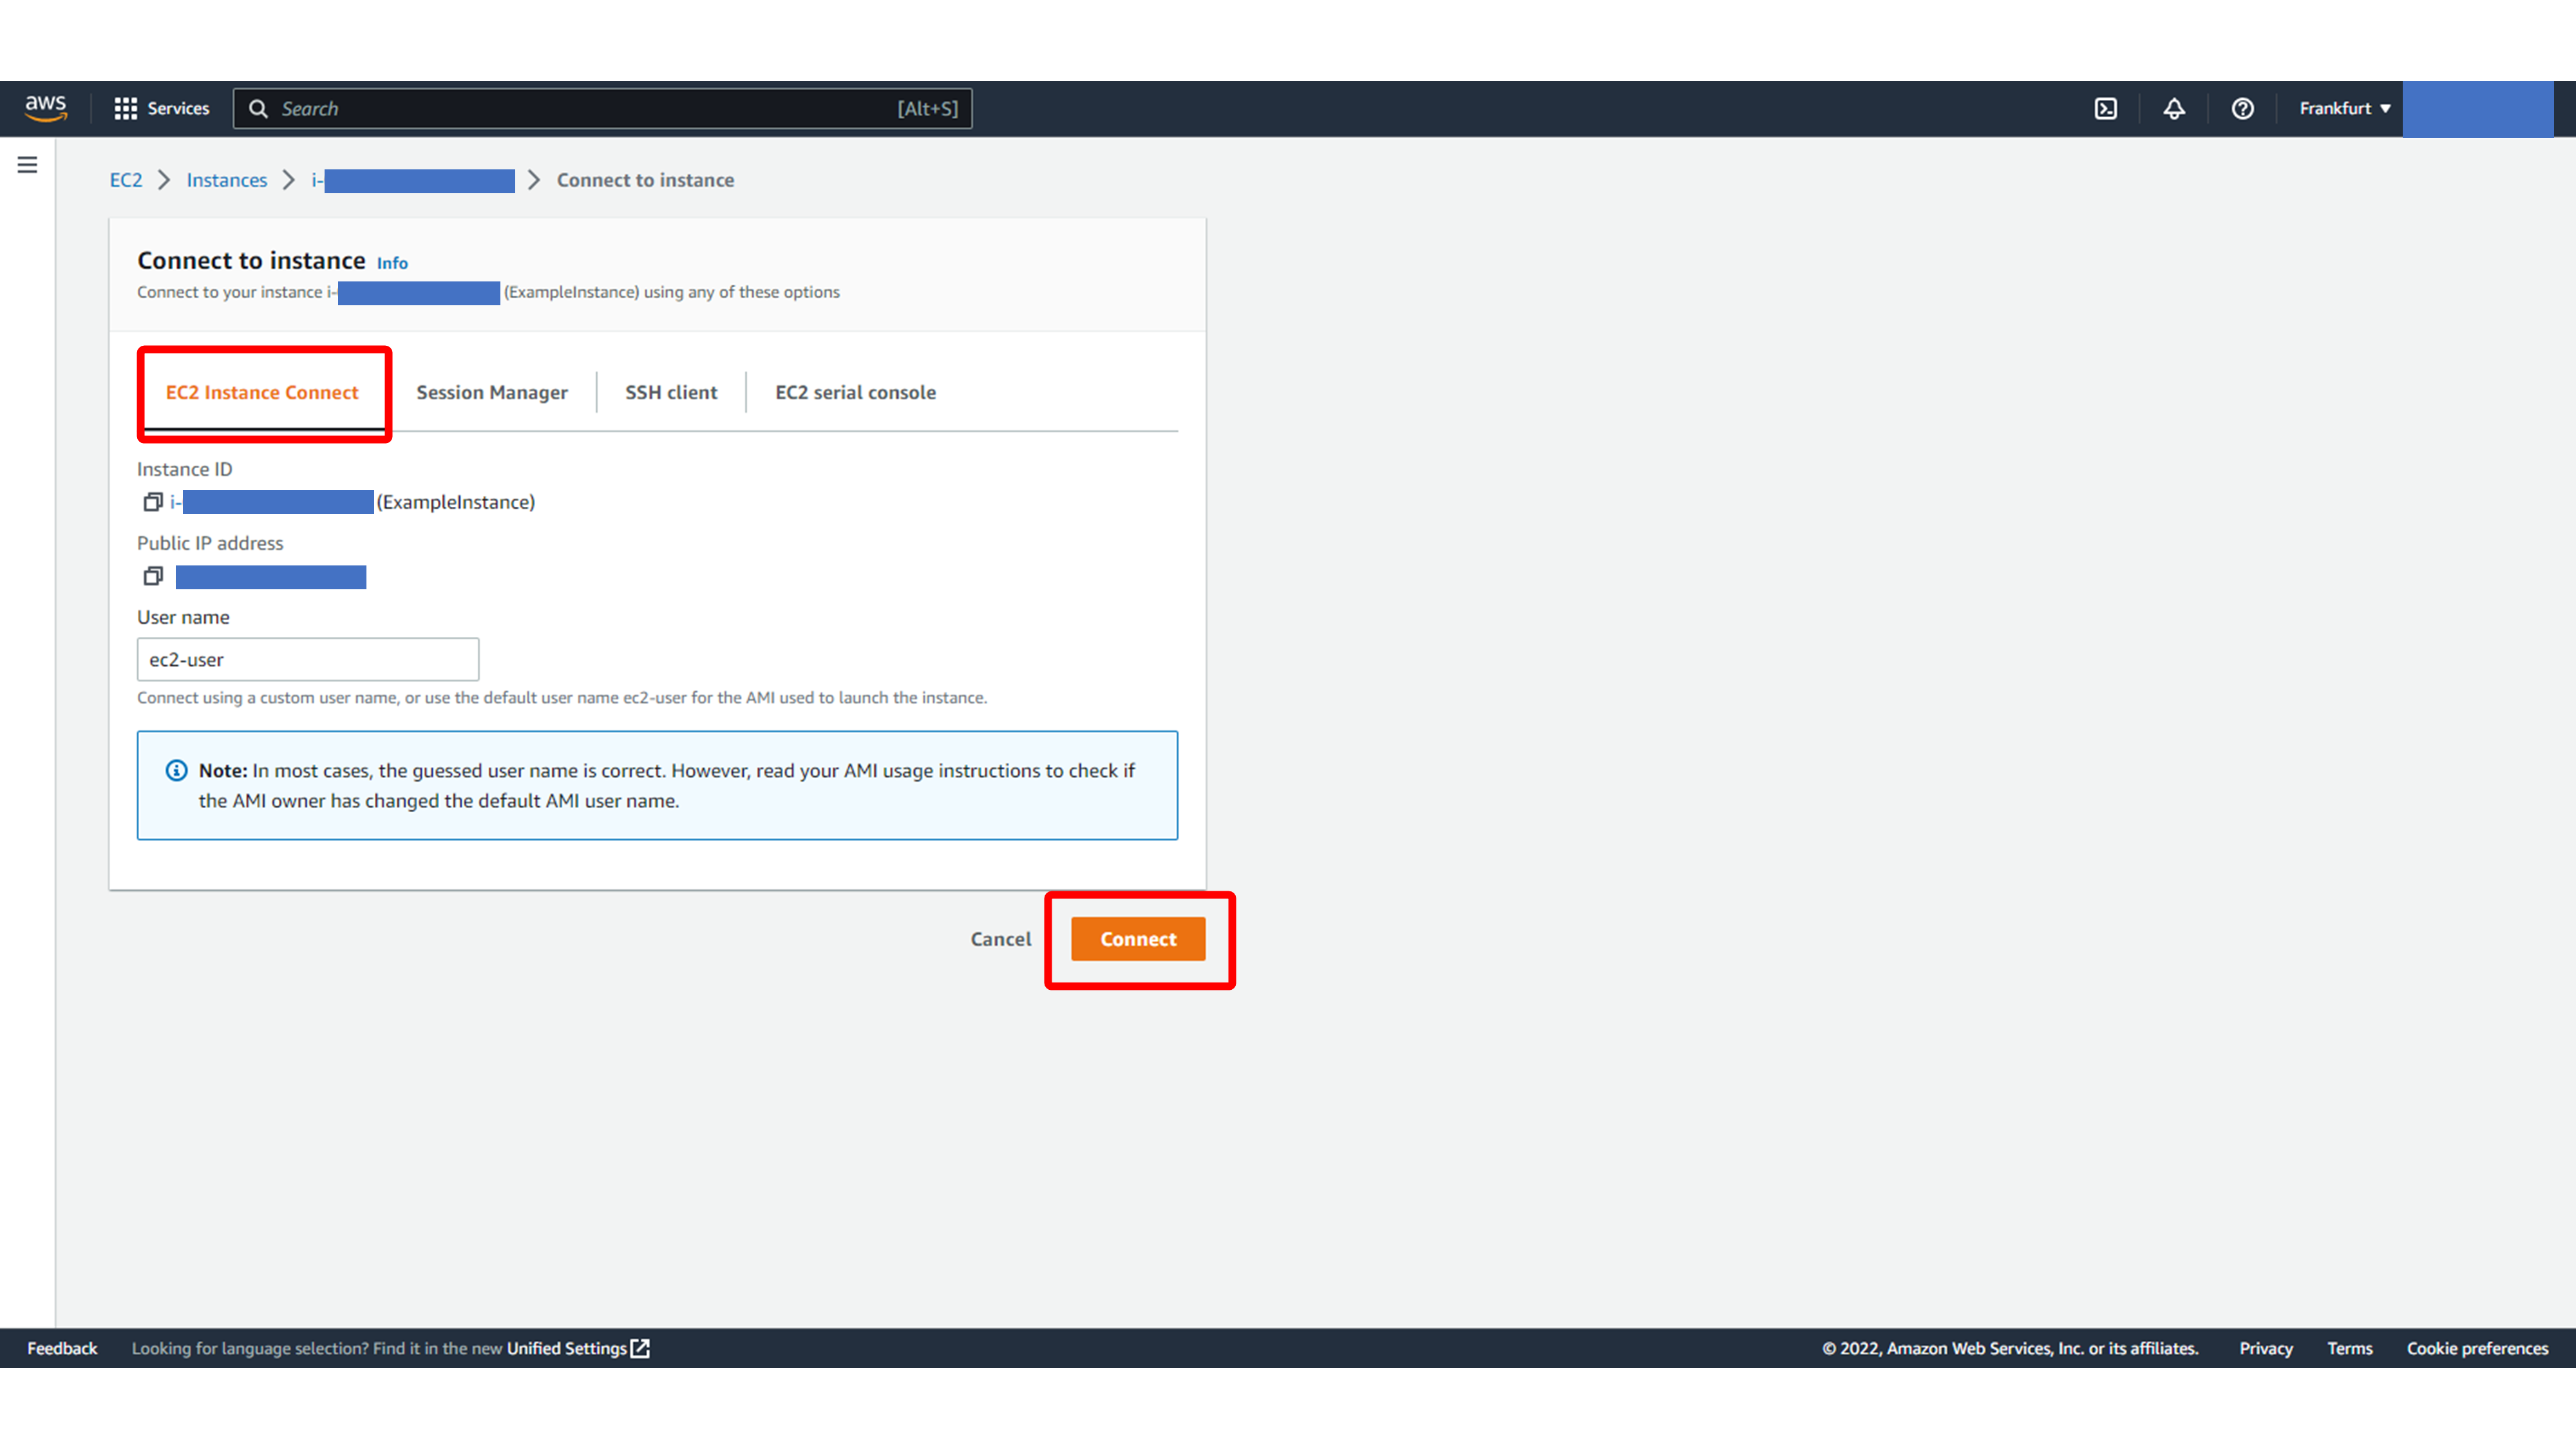
In the connection window, choose the EC2 Instance Connect tab and continue with Connect.
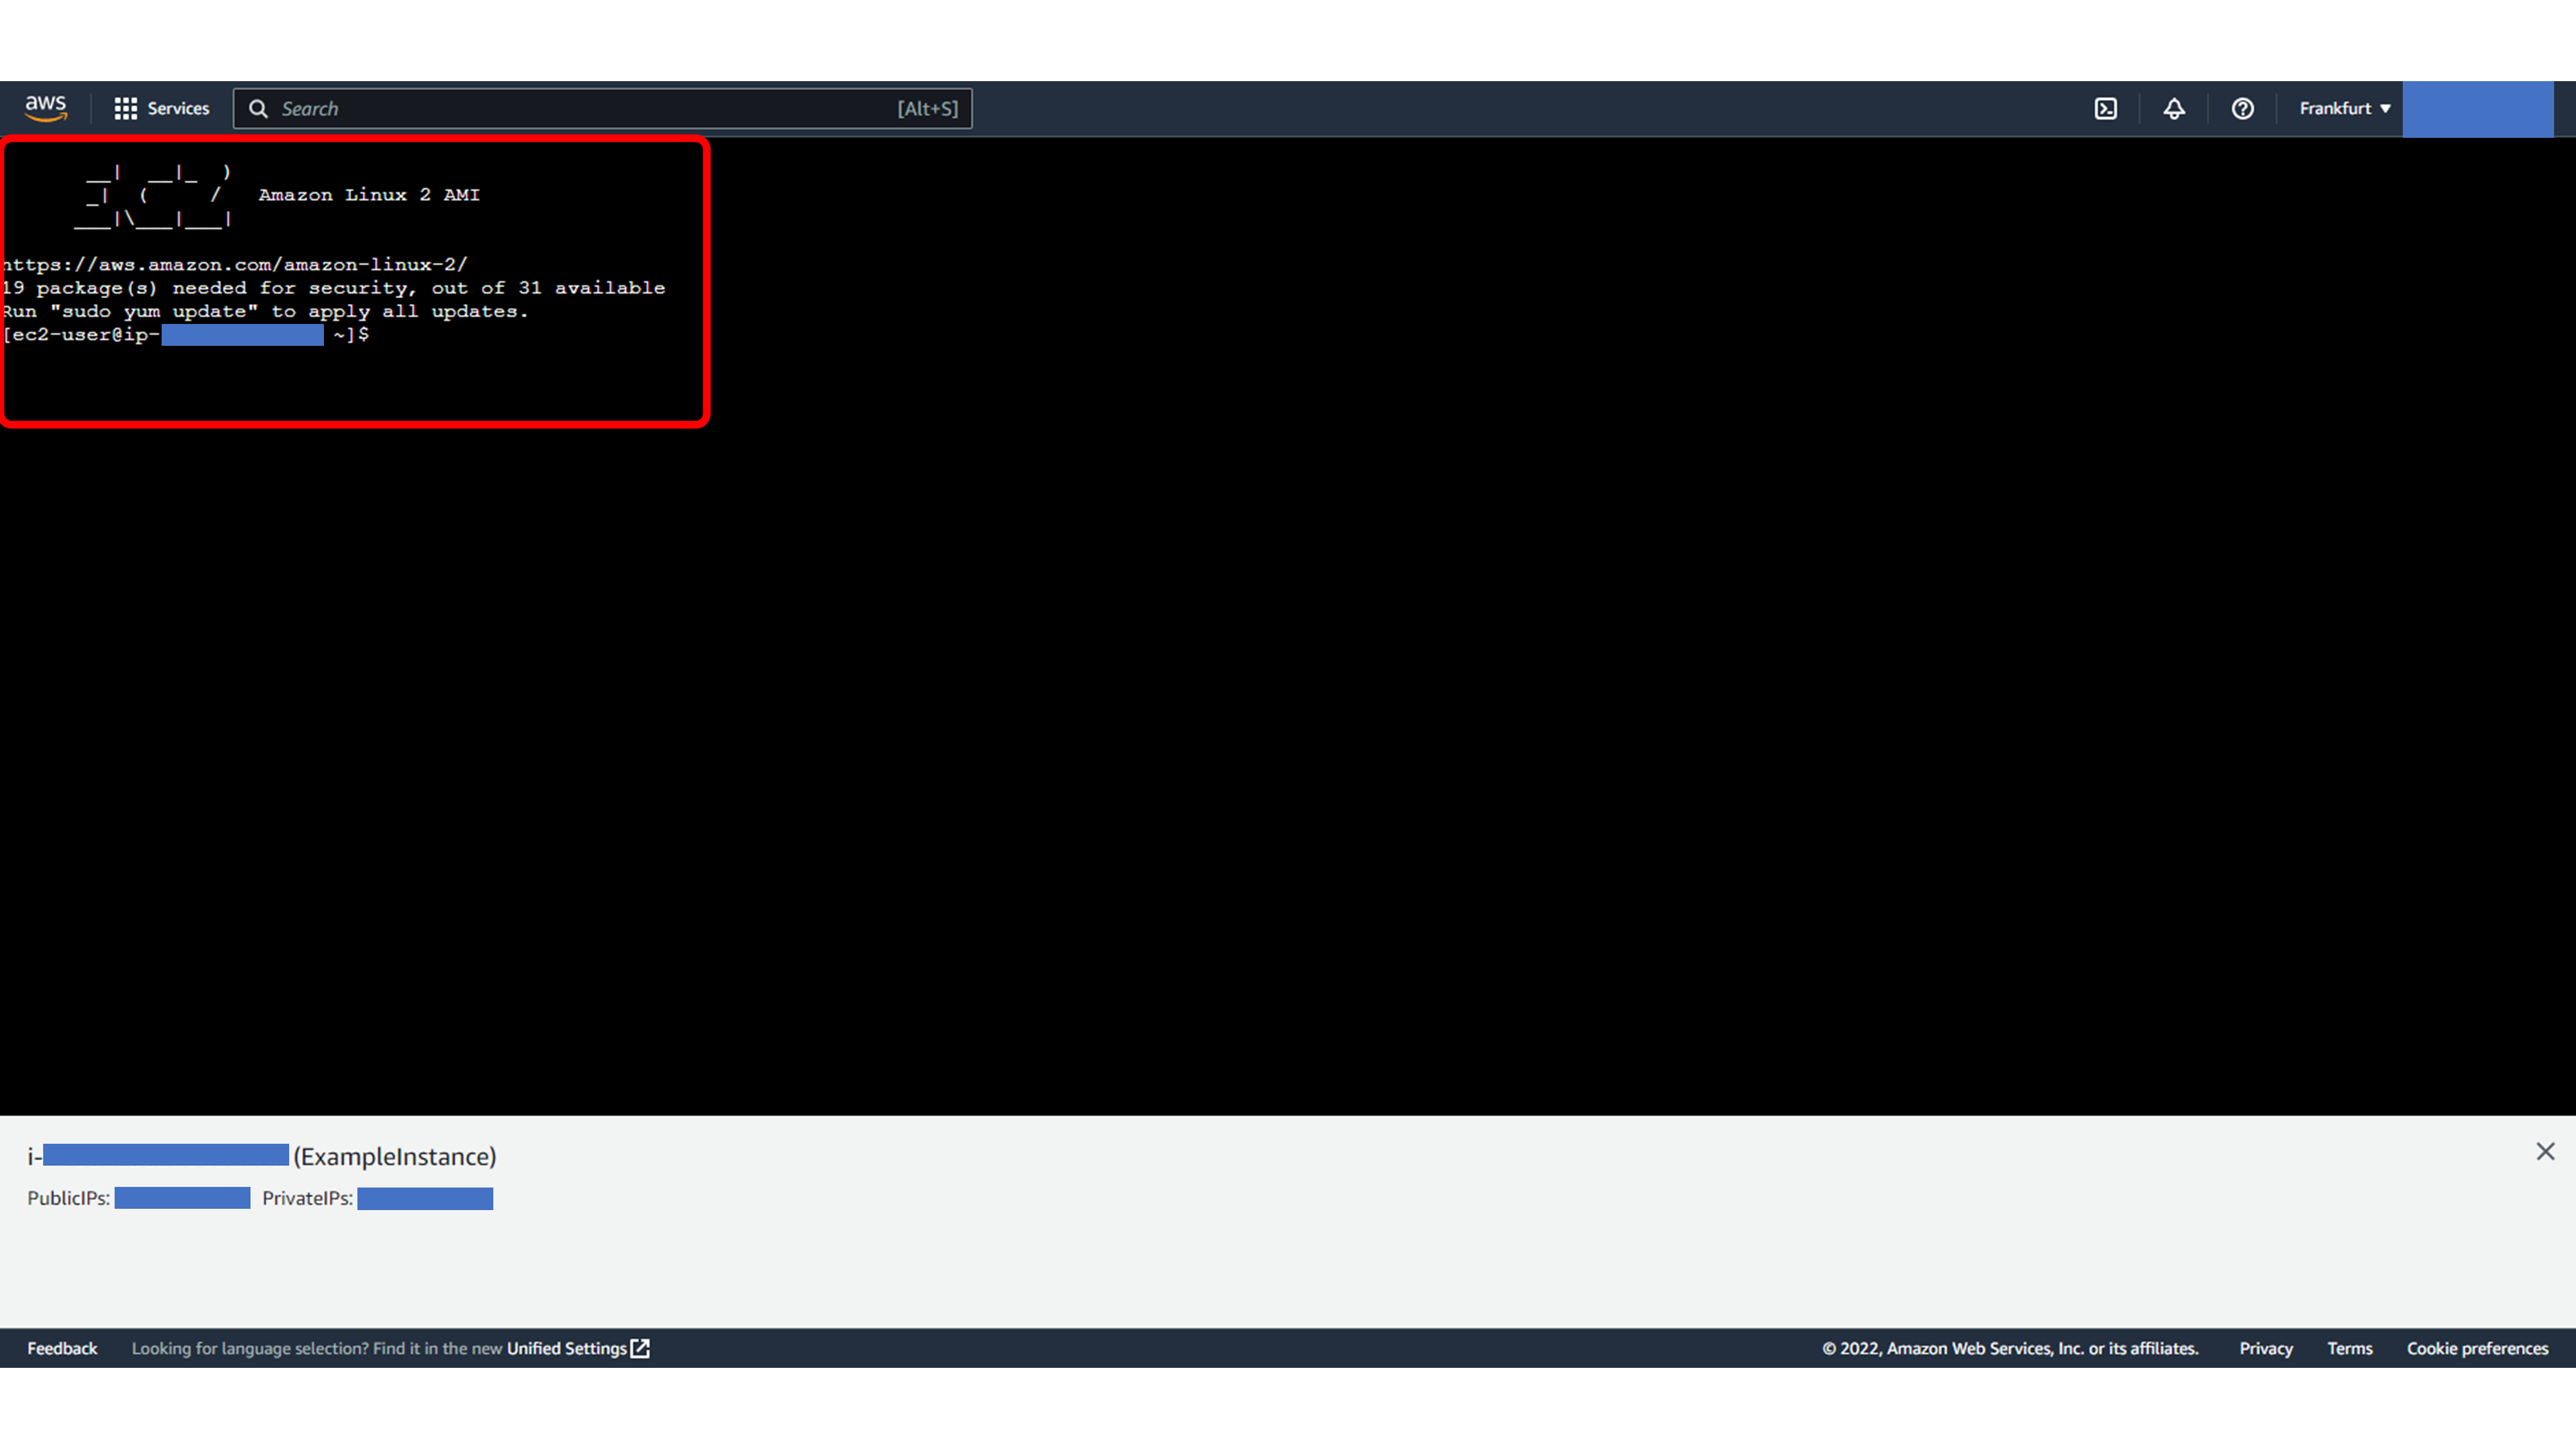
If the connection succeeds, AWS opens a browser-based terminal session. This is the quickest way to test that the instance is running and reachable.
Connecting over SSH from Windows
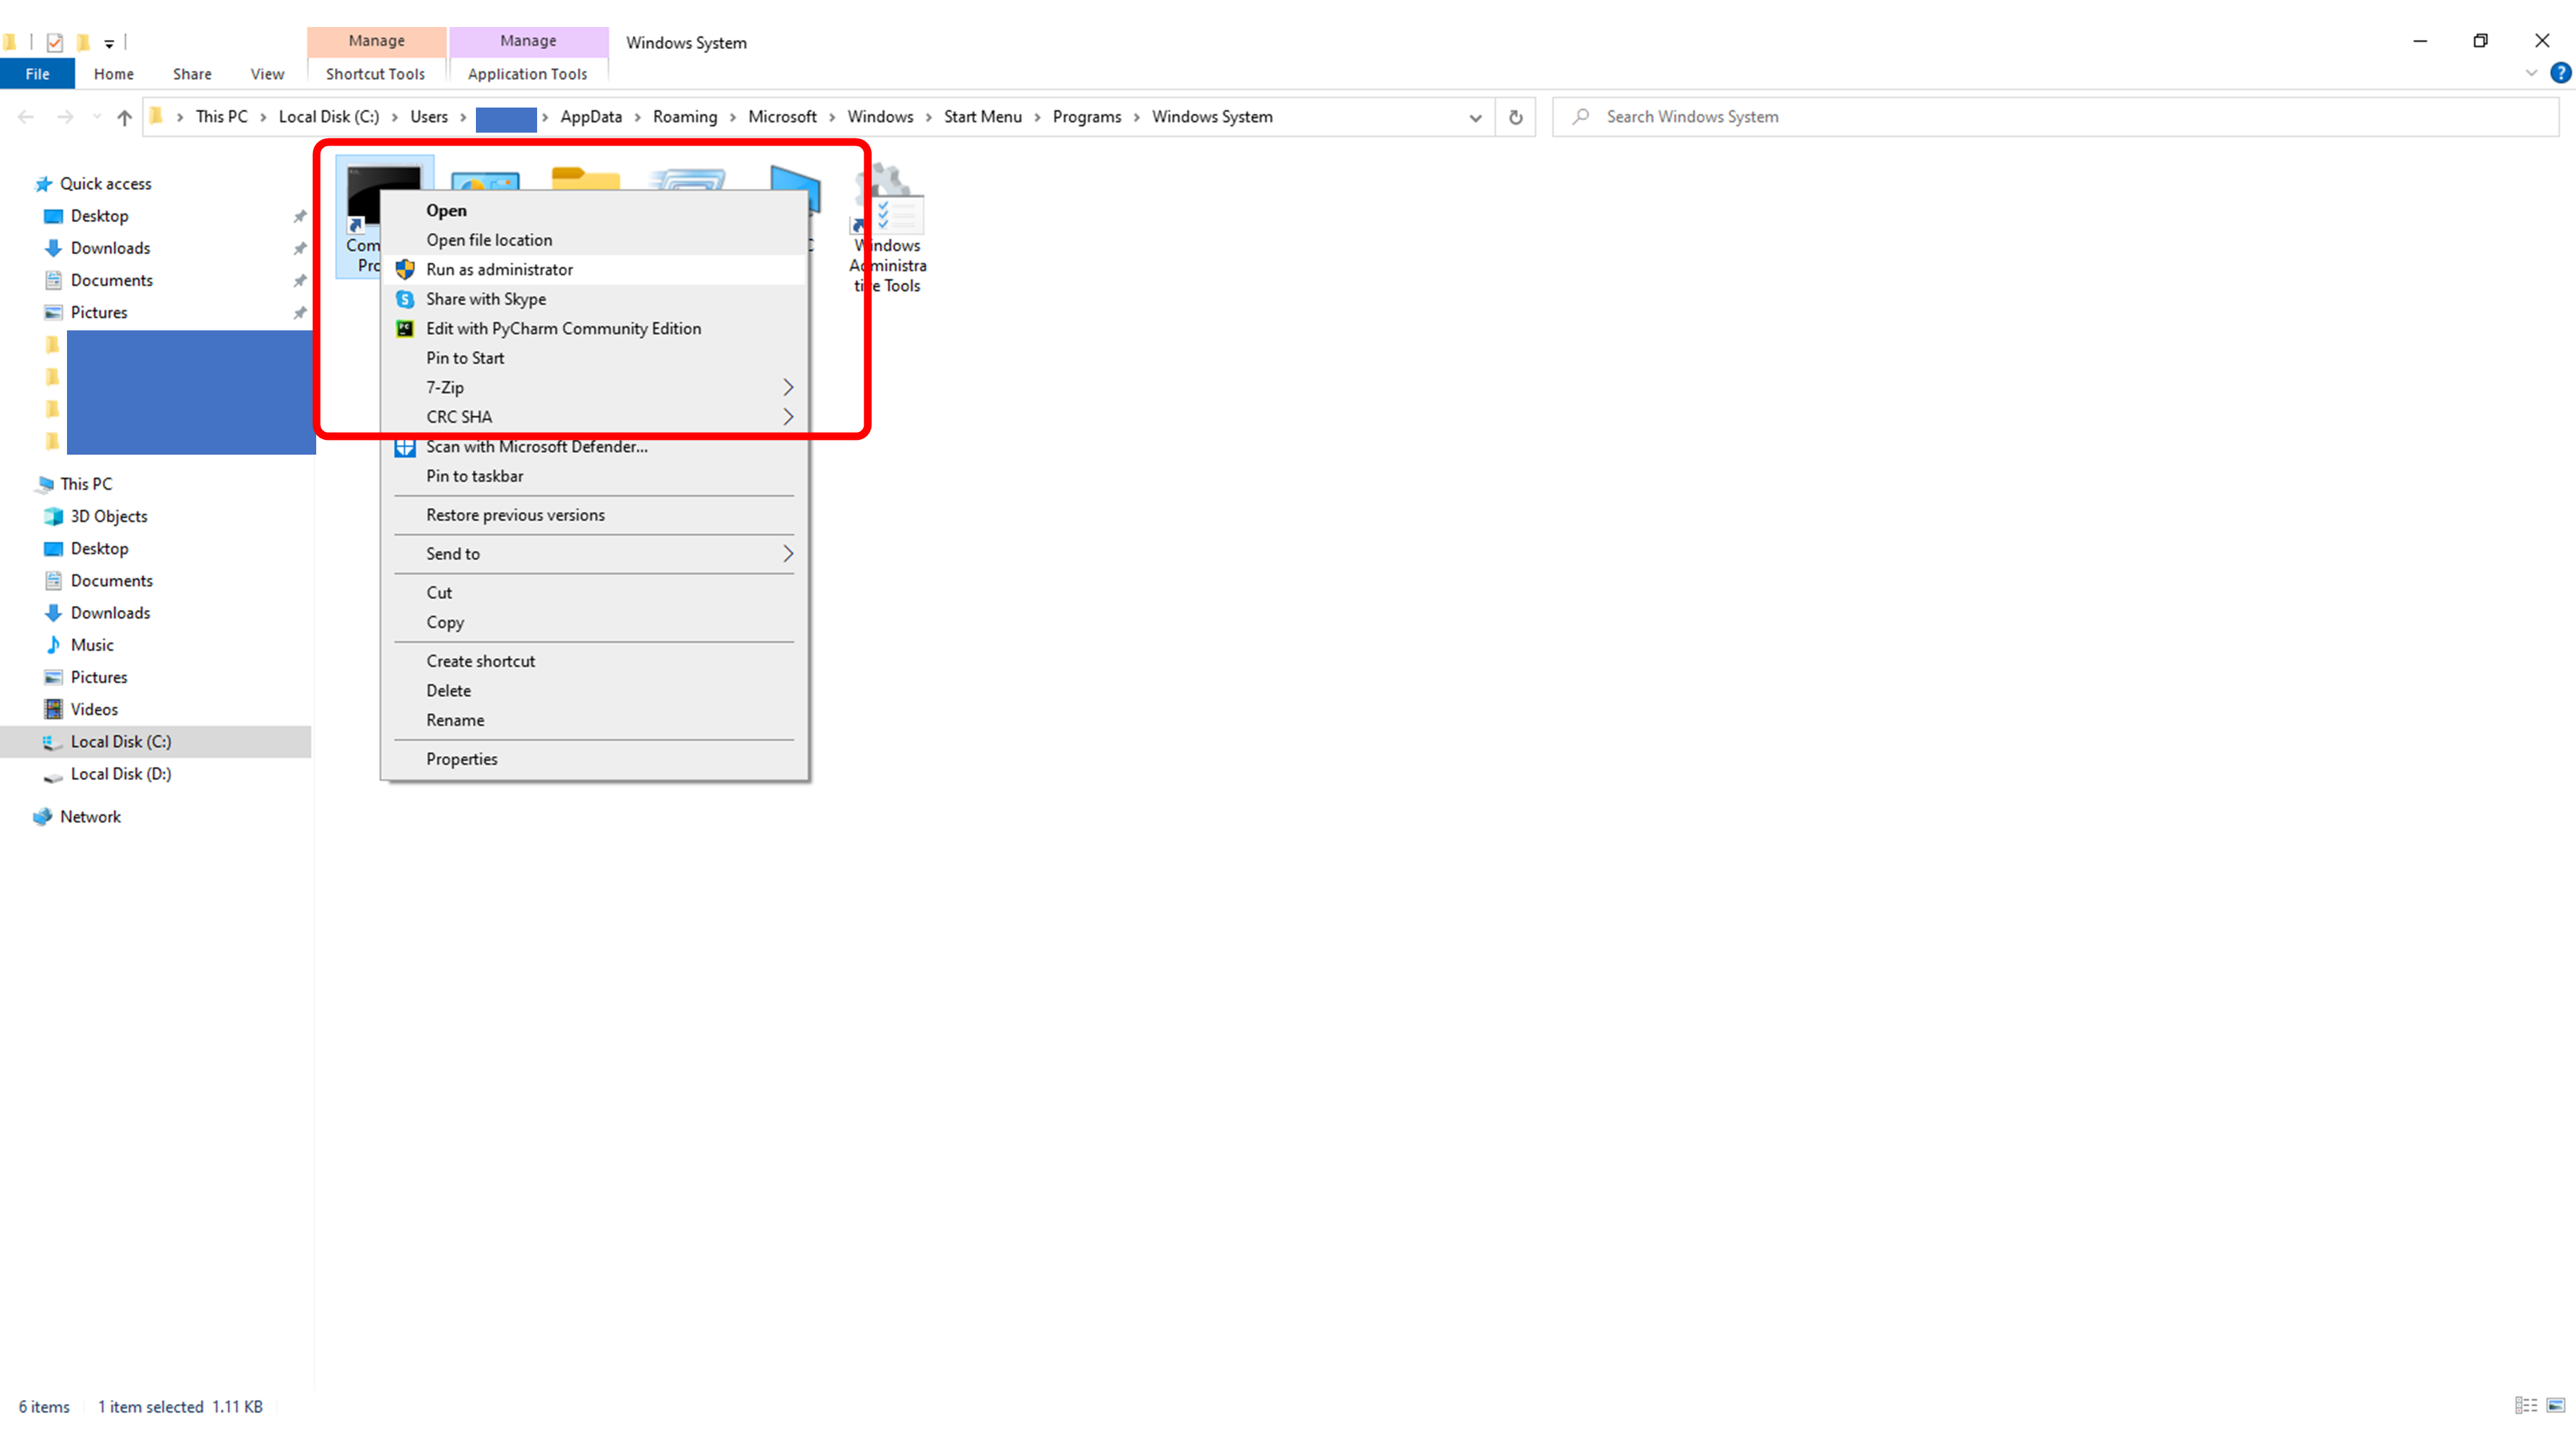
For a local SSH connection, you need the PEM file downloaded while creating the key pair. In this example, the file is on the desktop. Open Command Prompt as administrator.
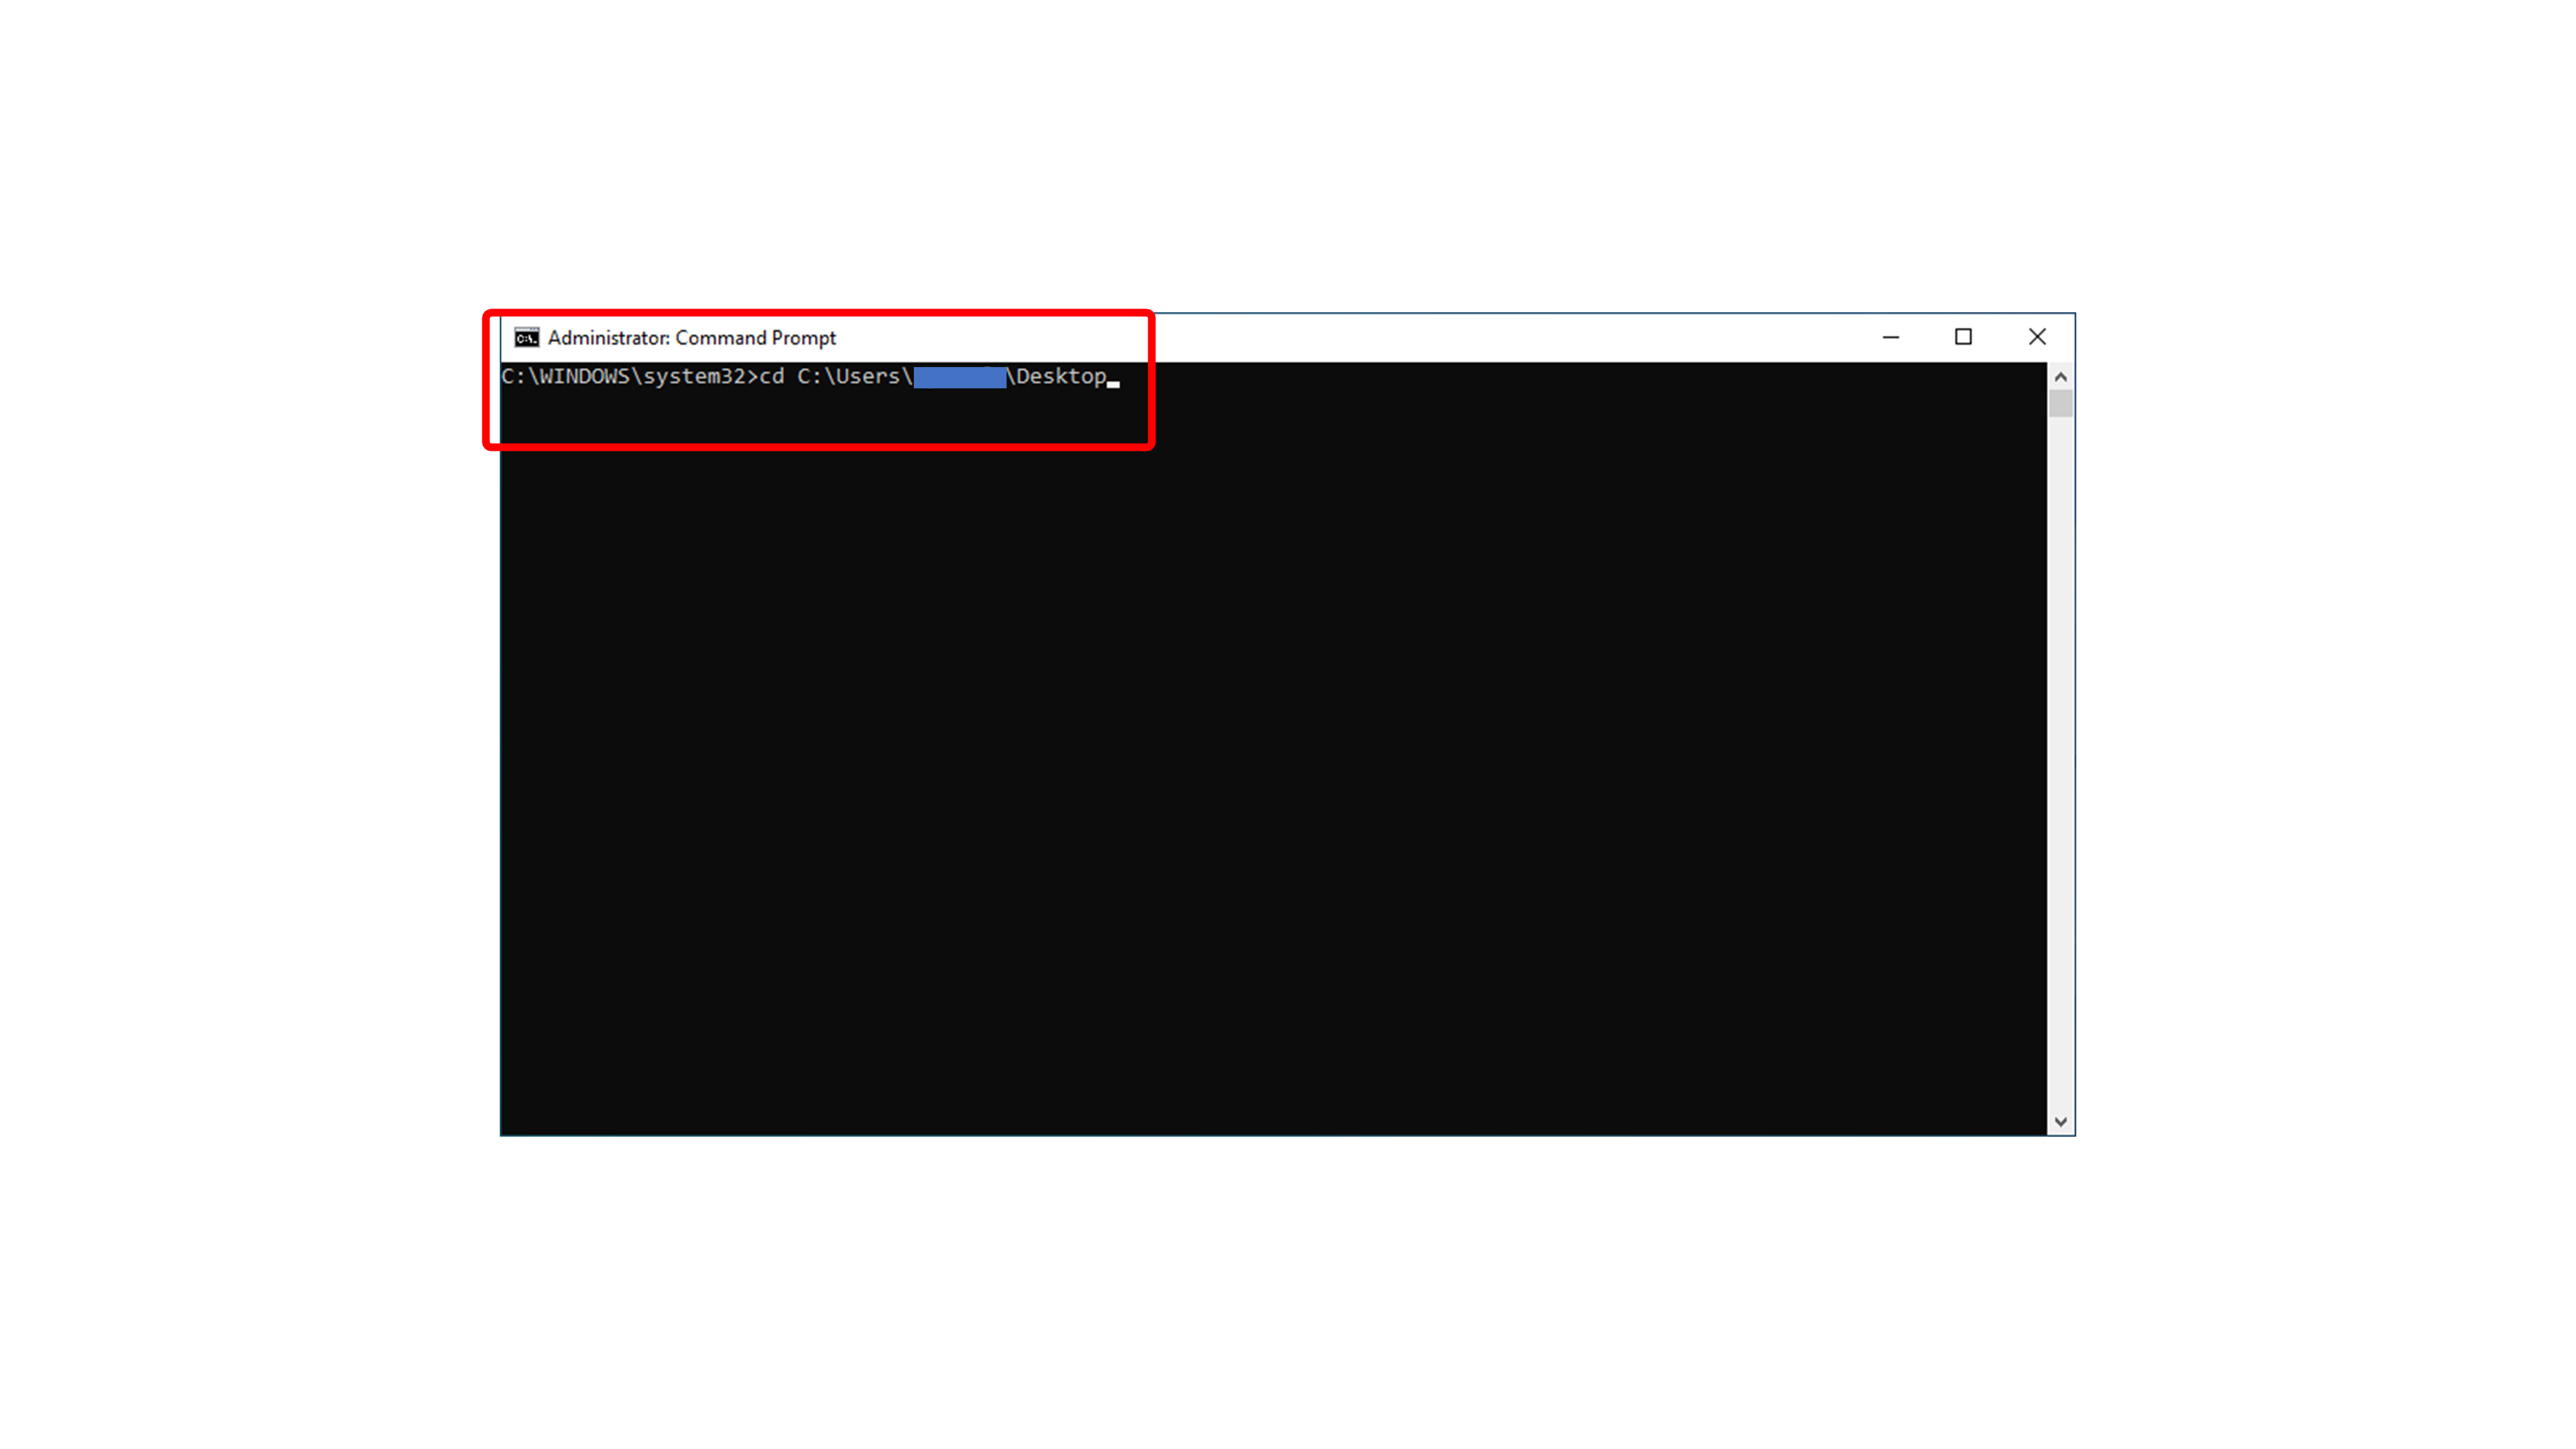
Move to the folder that contains the PEM file. If it is on the desktop, the command looks like this:
cd C:\Users\USERNAME\DesktopHere, we change directory to Desktop in Command Prompt.
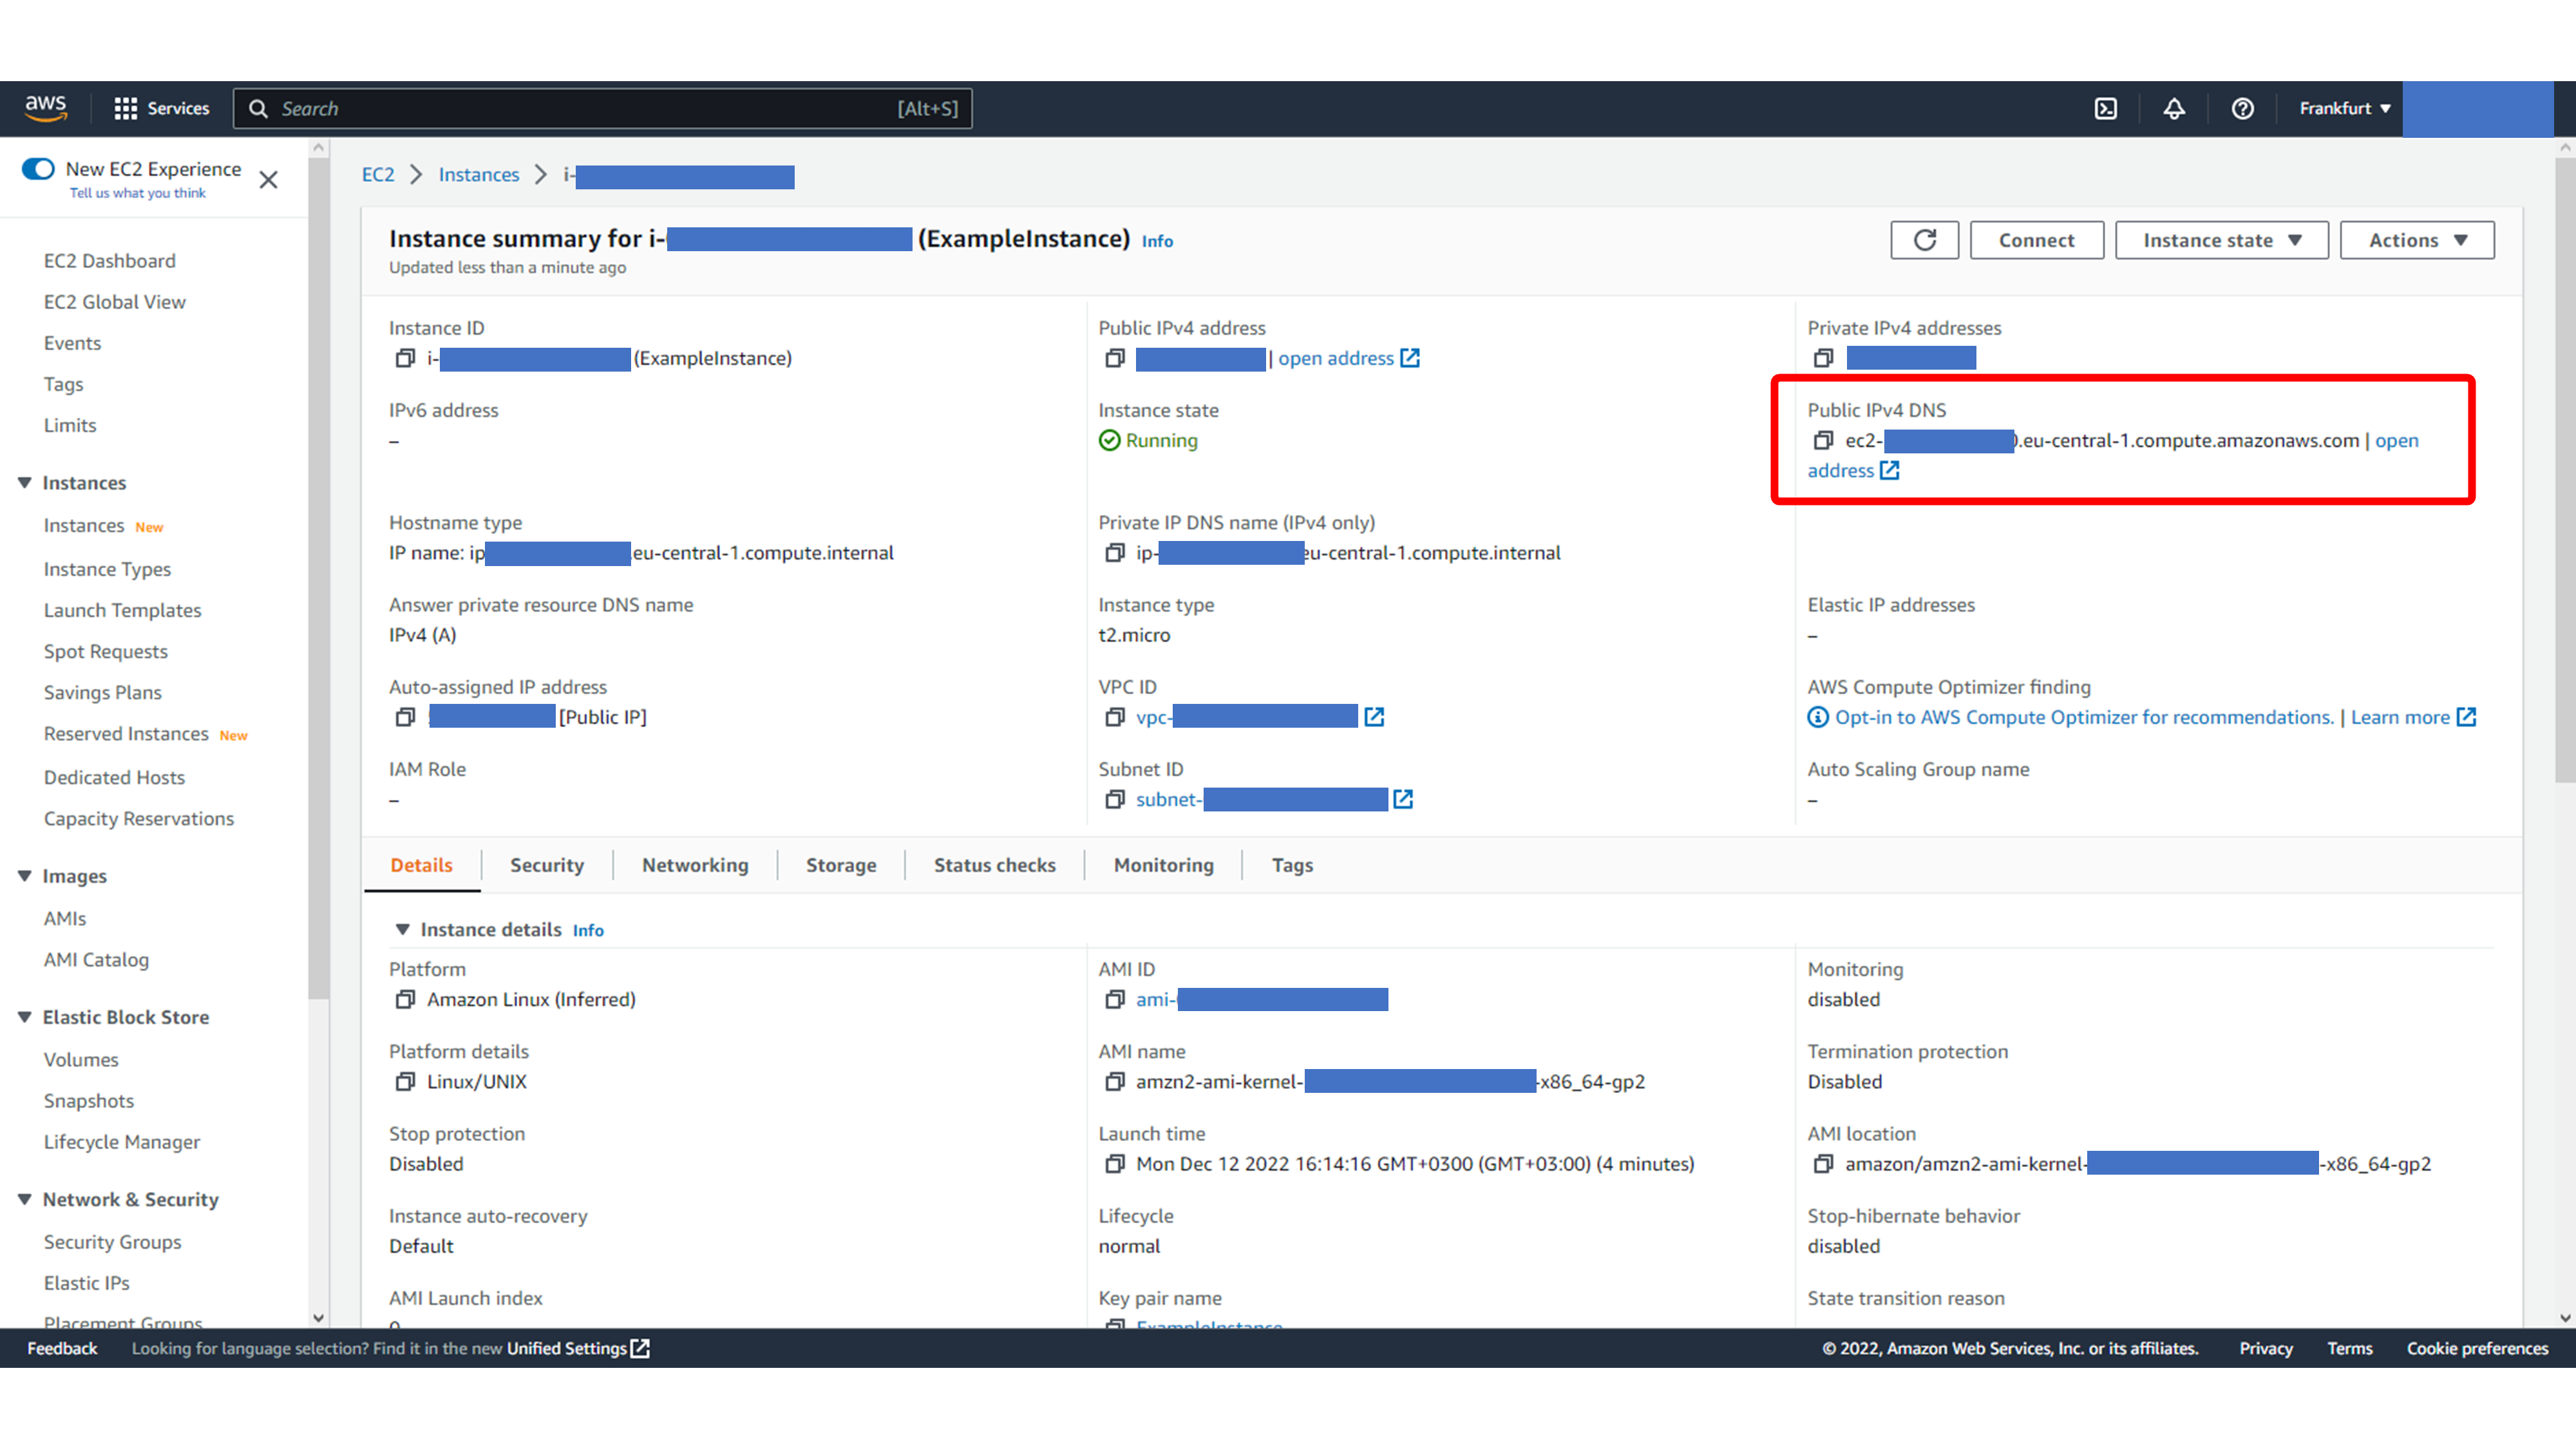
Go back to the EC2 instance details page and copy the Public IPv4 DNS value.
The SSH command contains four parts:
ssh -i- the PEM file name
- the default Linux user, such as
ec2-user - the public DNS address of the instance
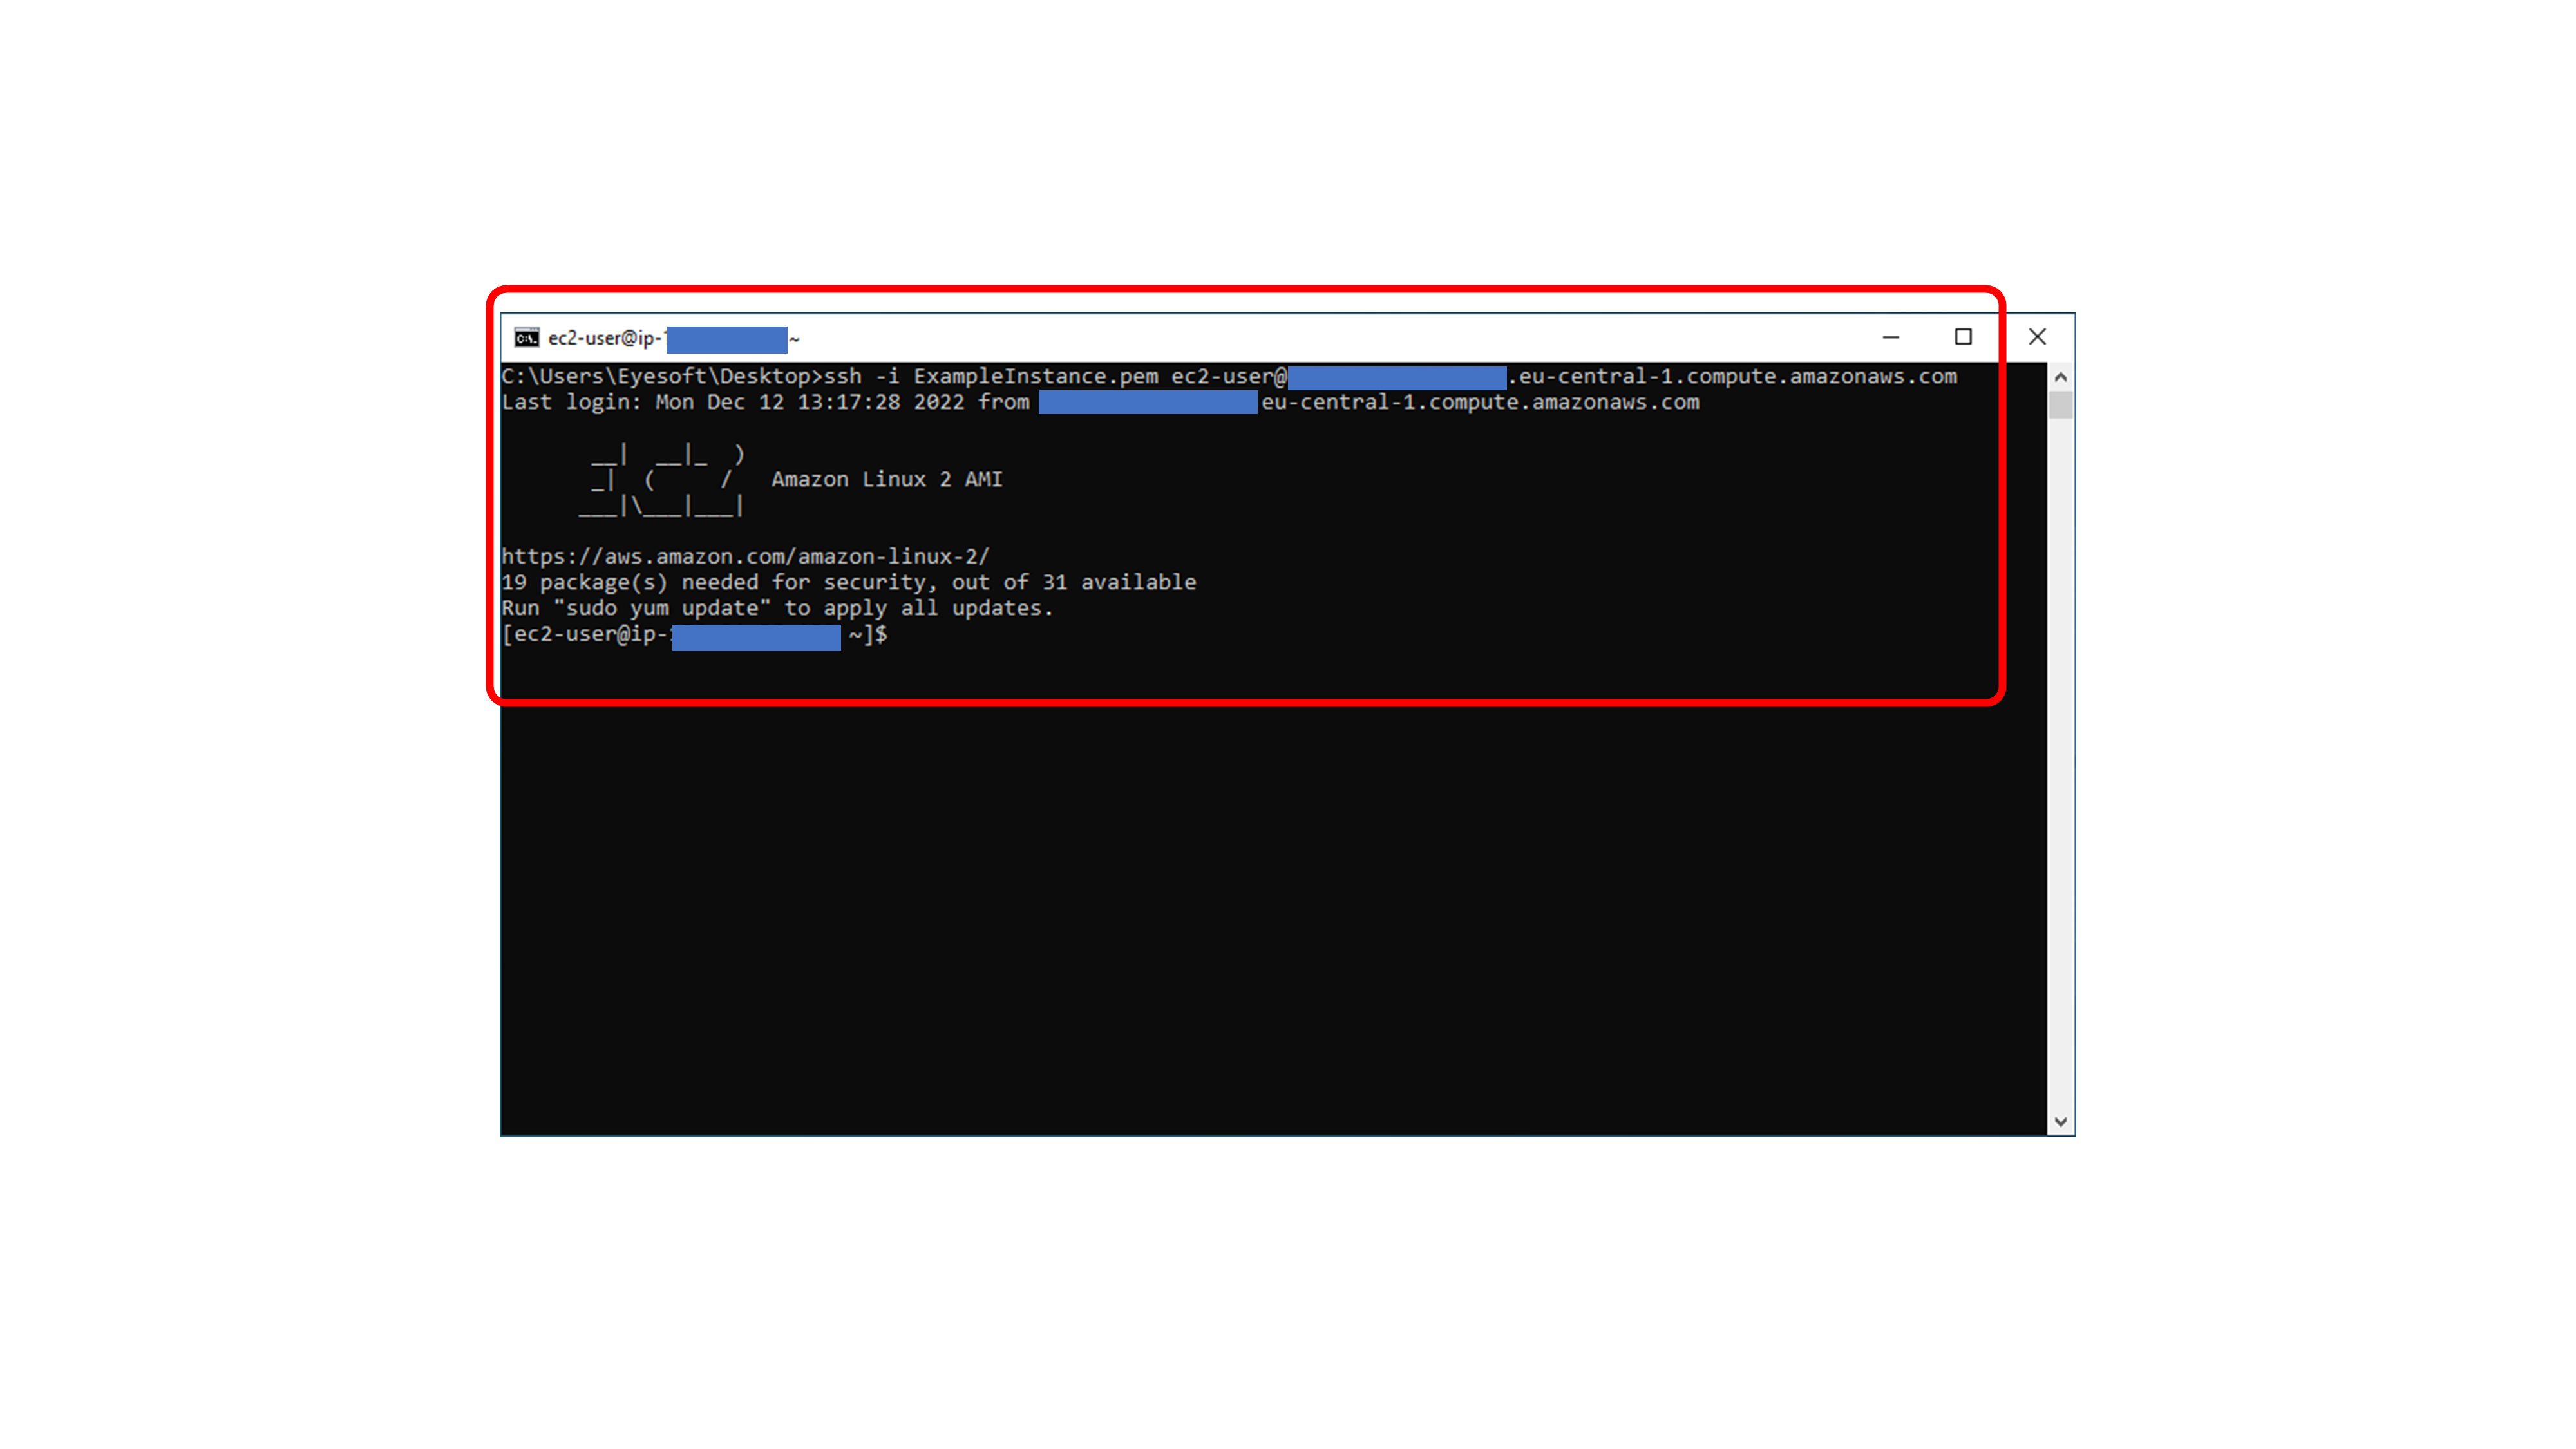
An example command is:
ssh -i ExampleInstance.pem ec2-user@ec2-XX-XX-XXX-XXX.eu-central-1.compute.amazonaws.comAfter running the command, the terminal connects to the EC2 instance.
Fixing PEM File Permission Errors on Windows
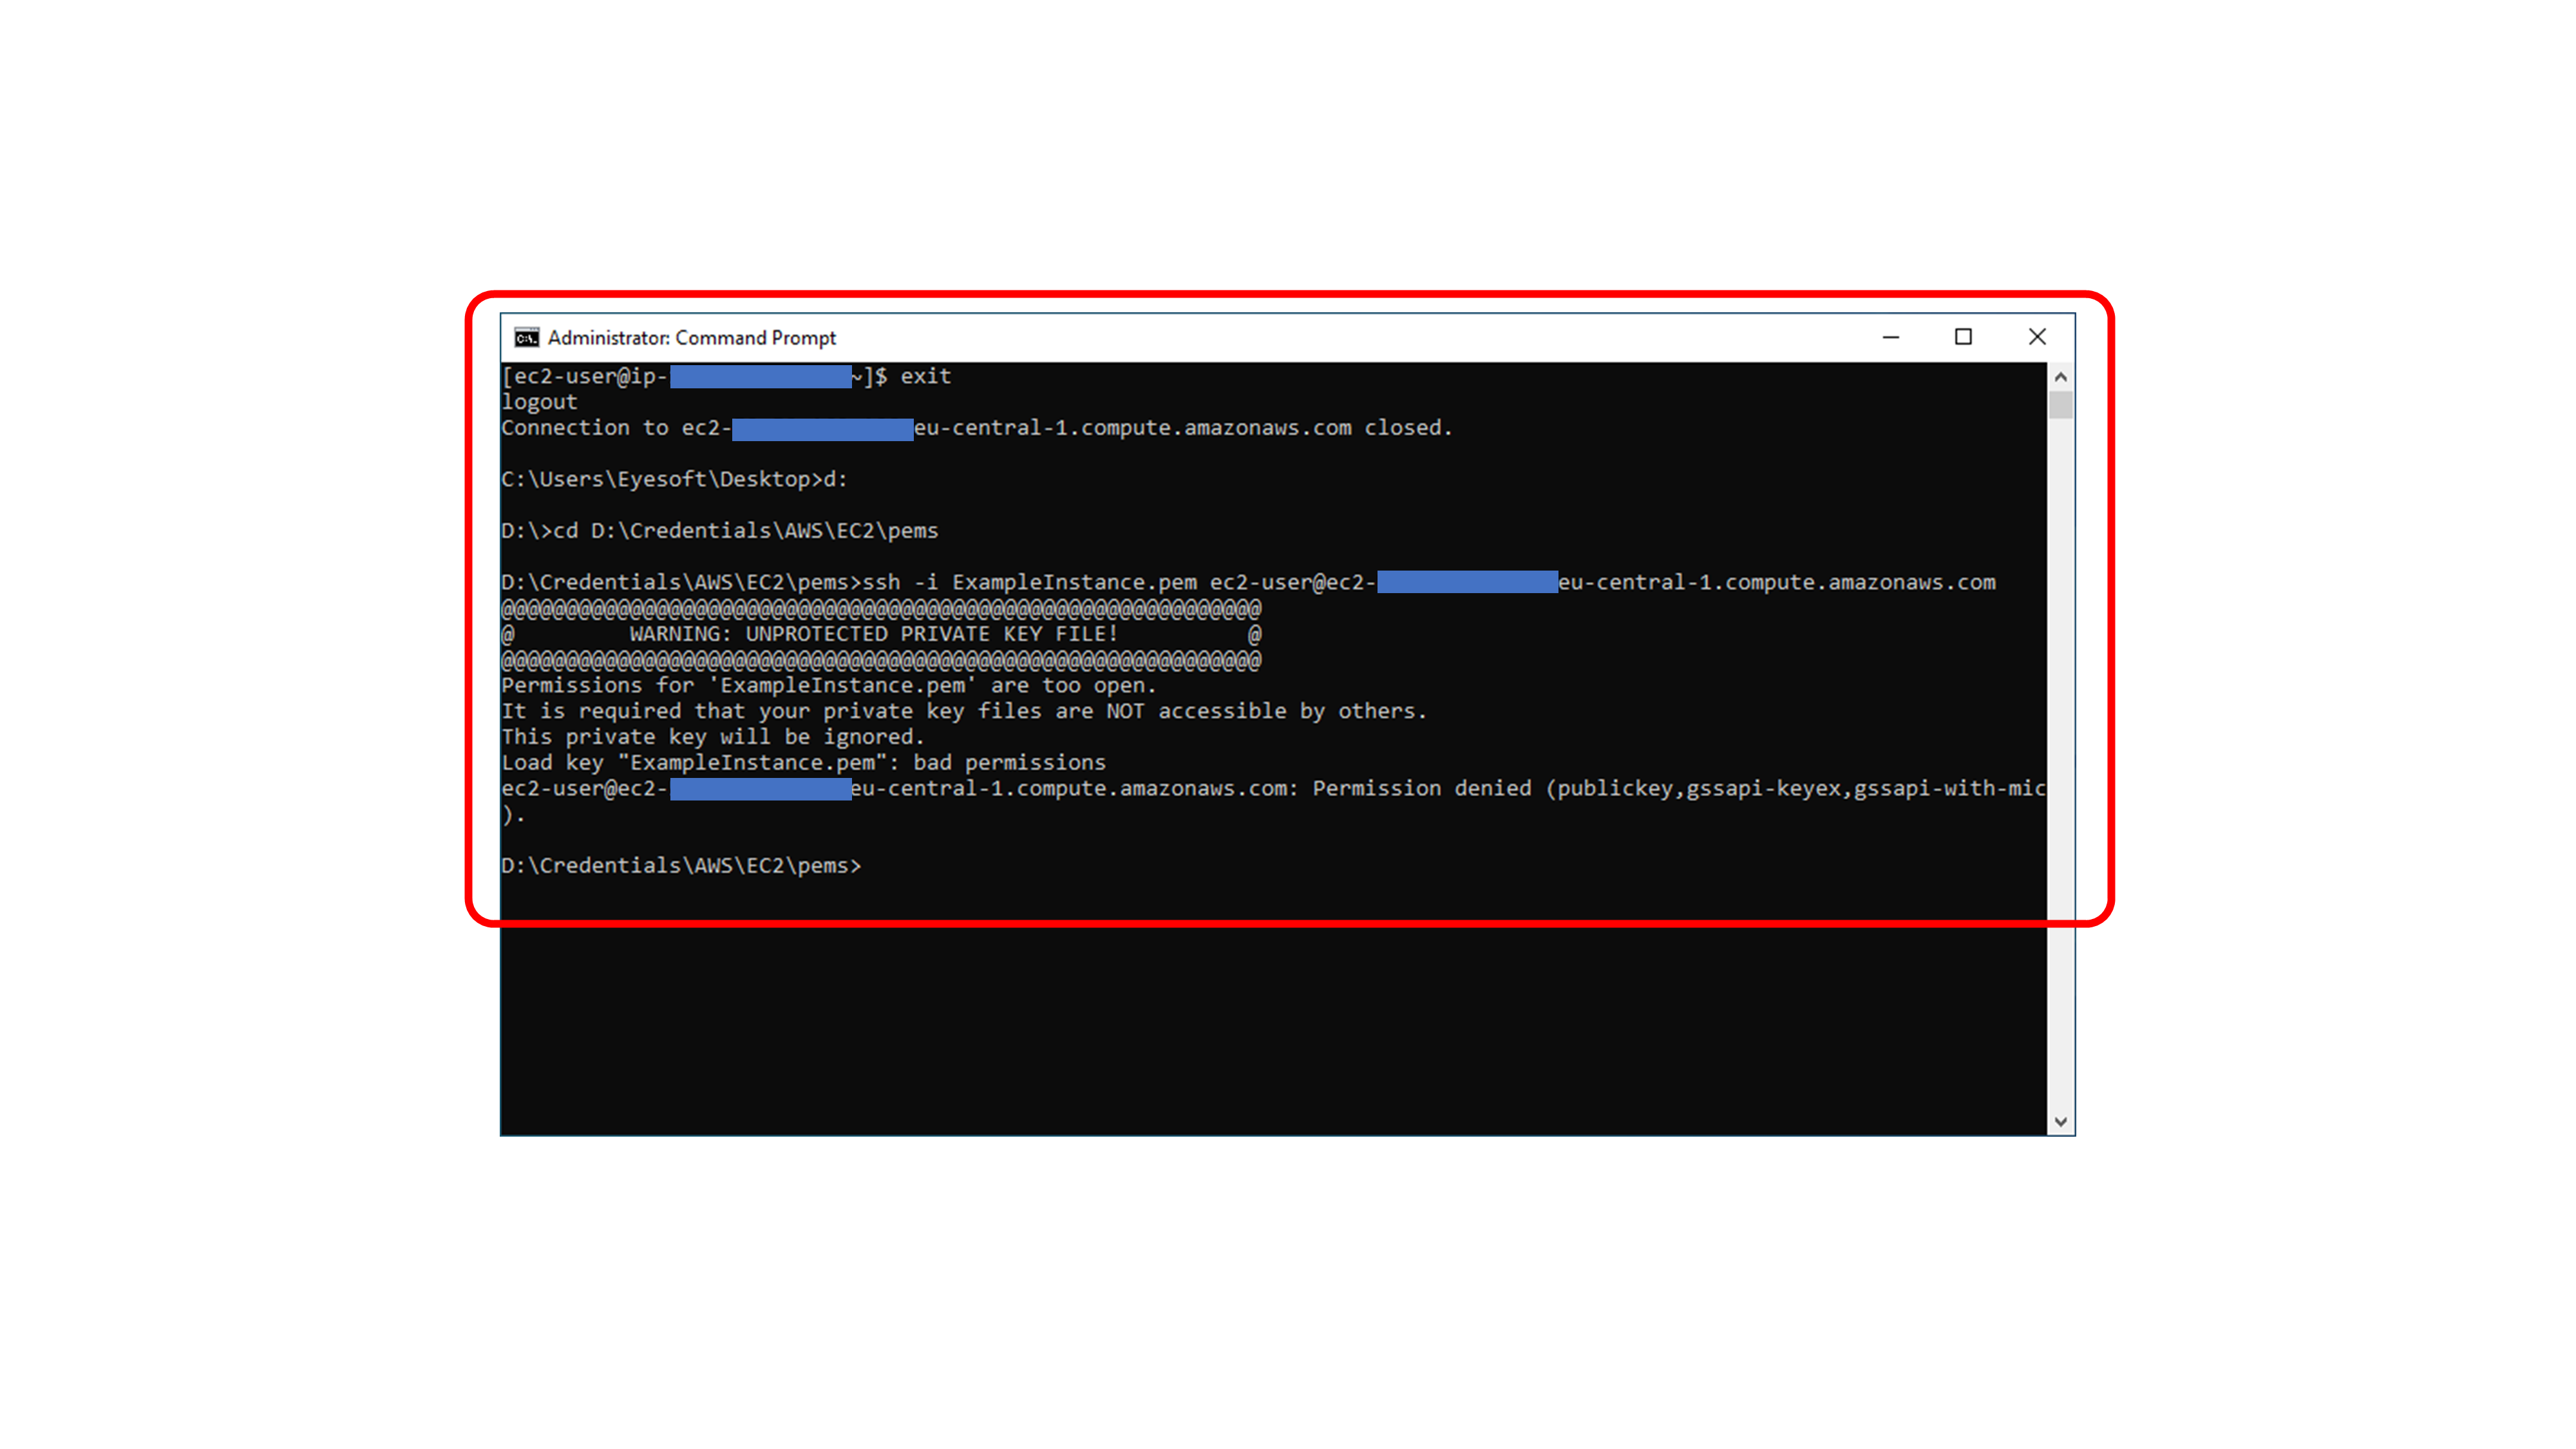
If the PEM file is stored in another folder or has broad inherited permissions, SSH may reject it with an UNPROTECTED PRIVATE KEY FILE warning. In that case, Windows file permissions must be narrowed so only your user can read the key.
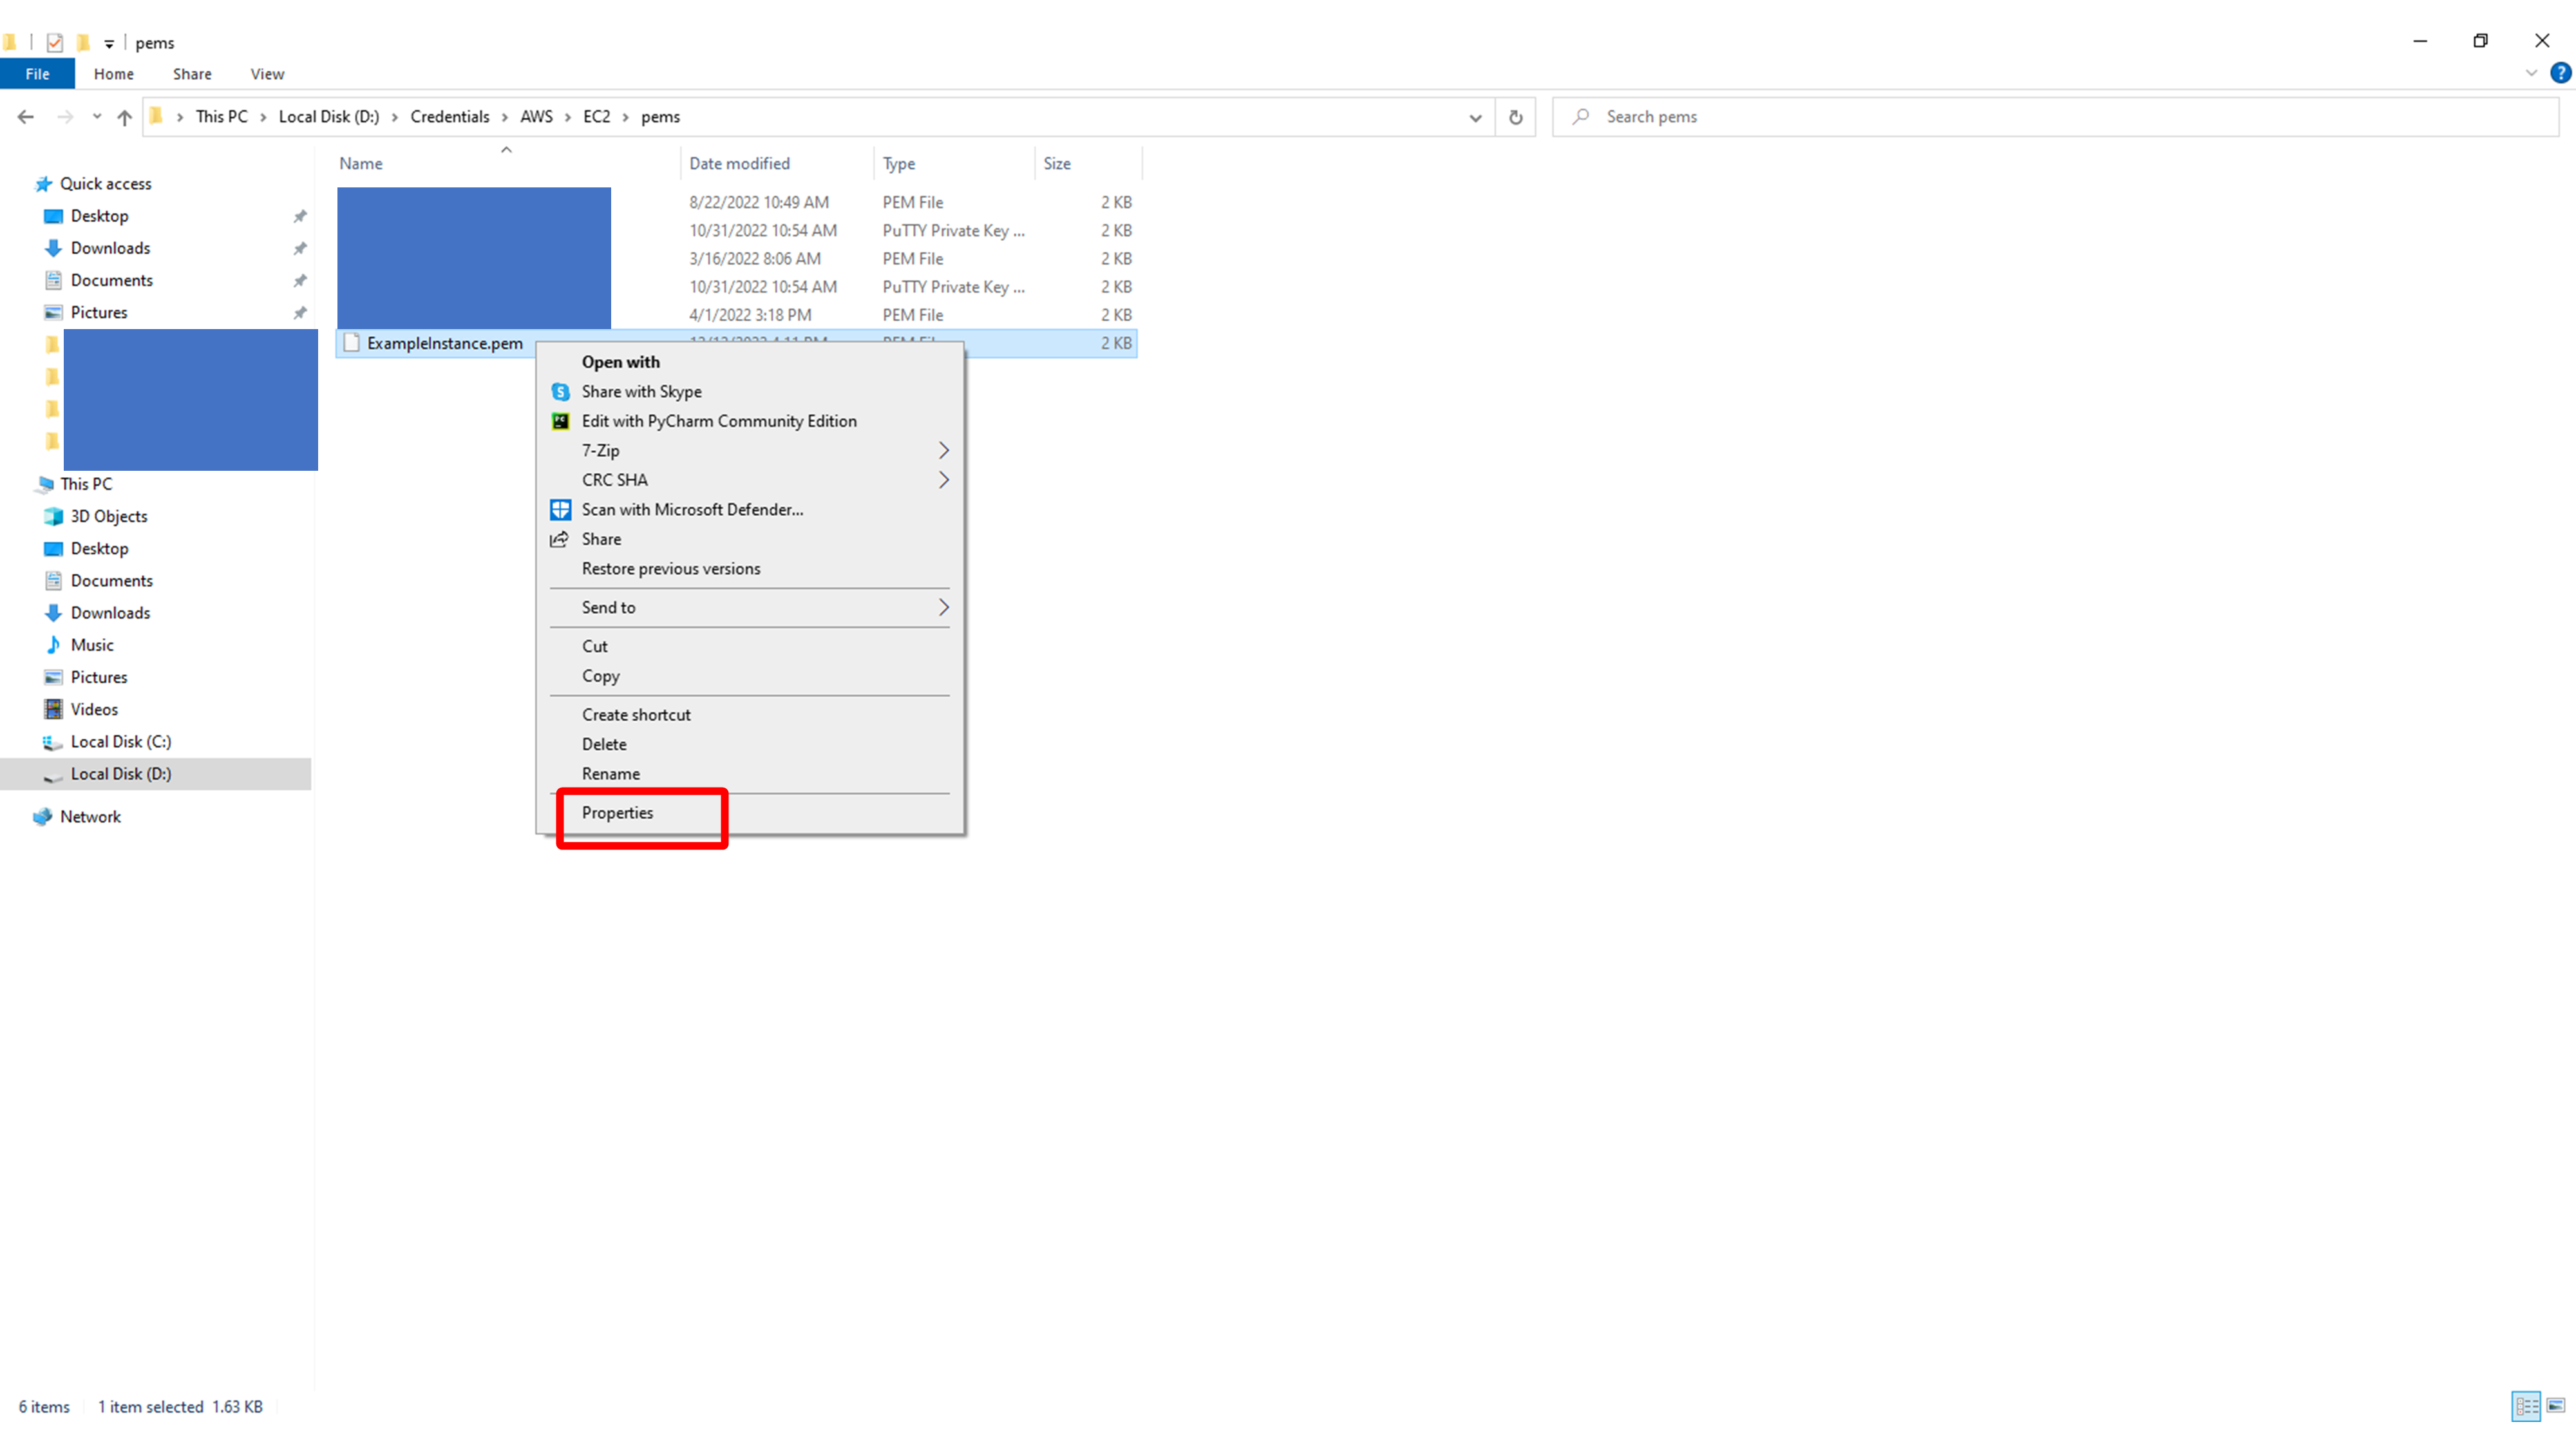
Right-click the PEM file and open Properties.
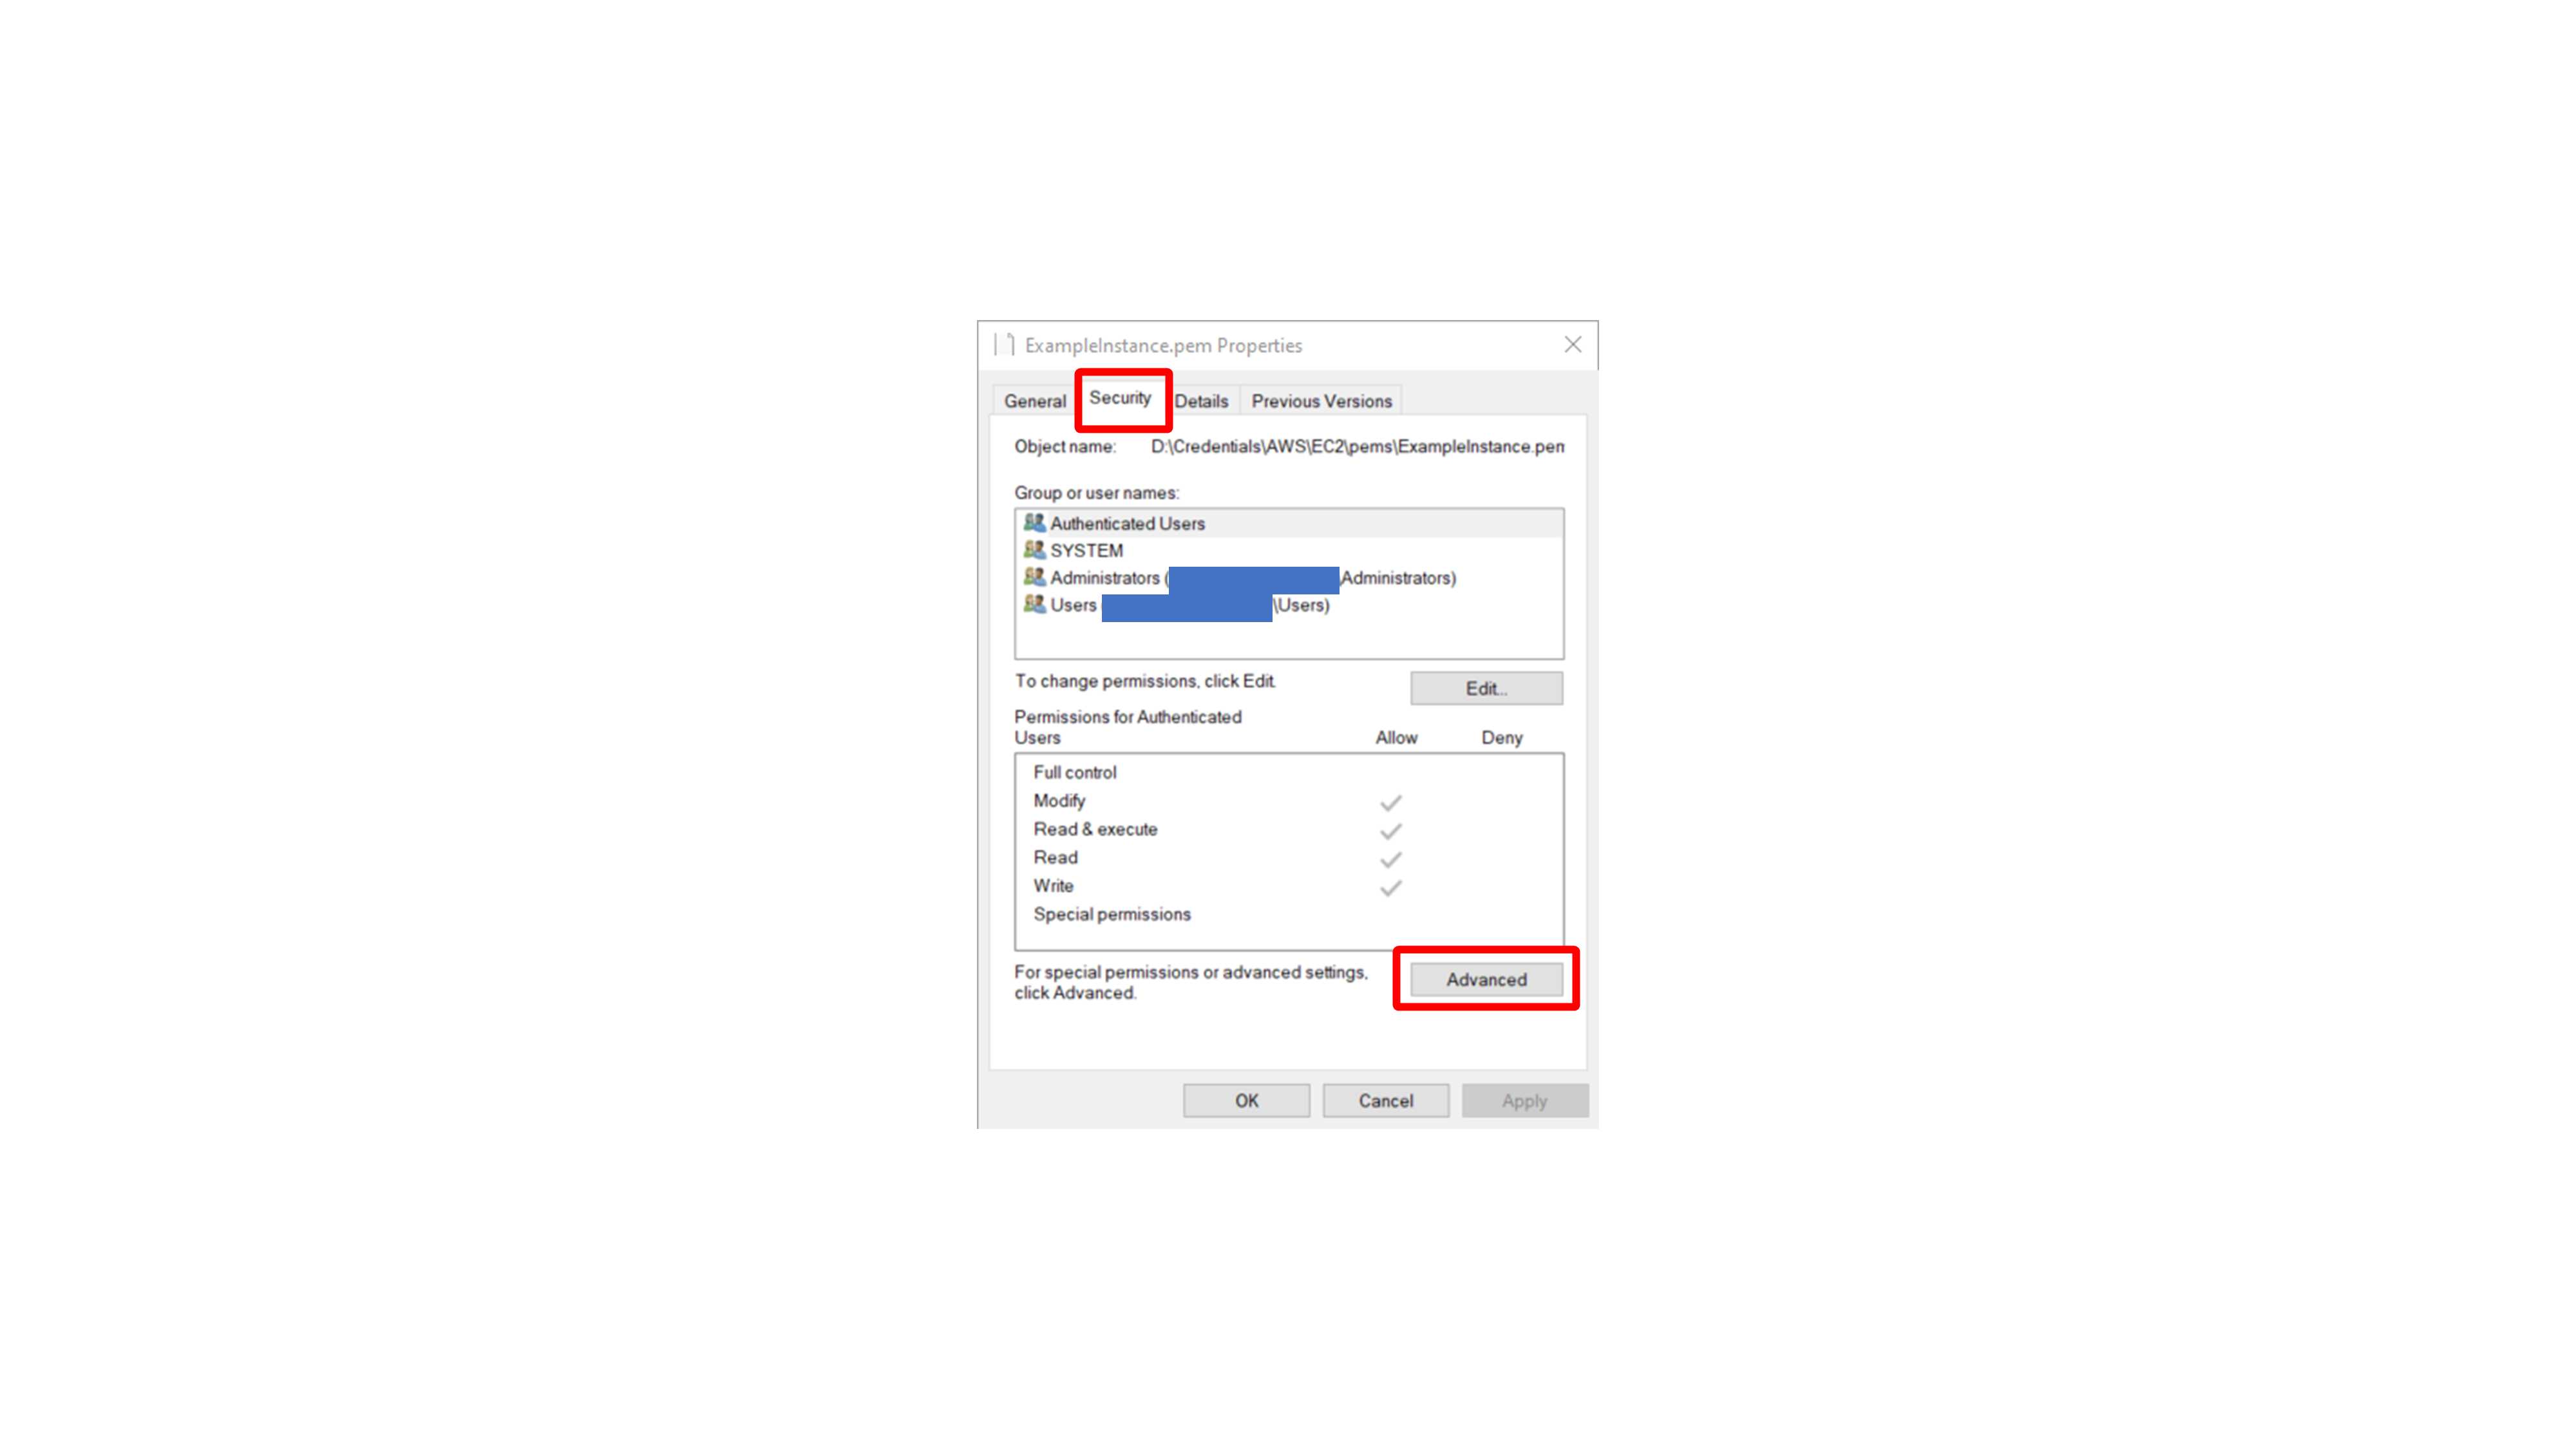
Go to the Security tab and open Advanced.
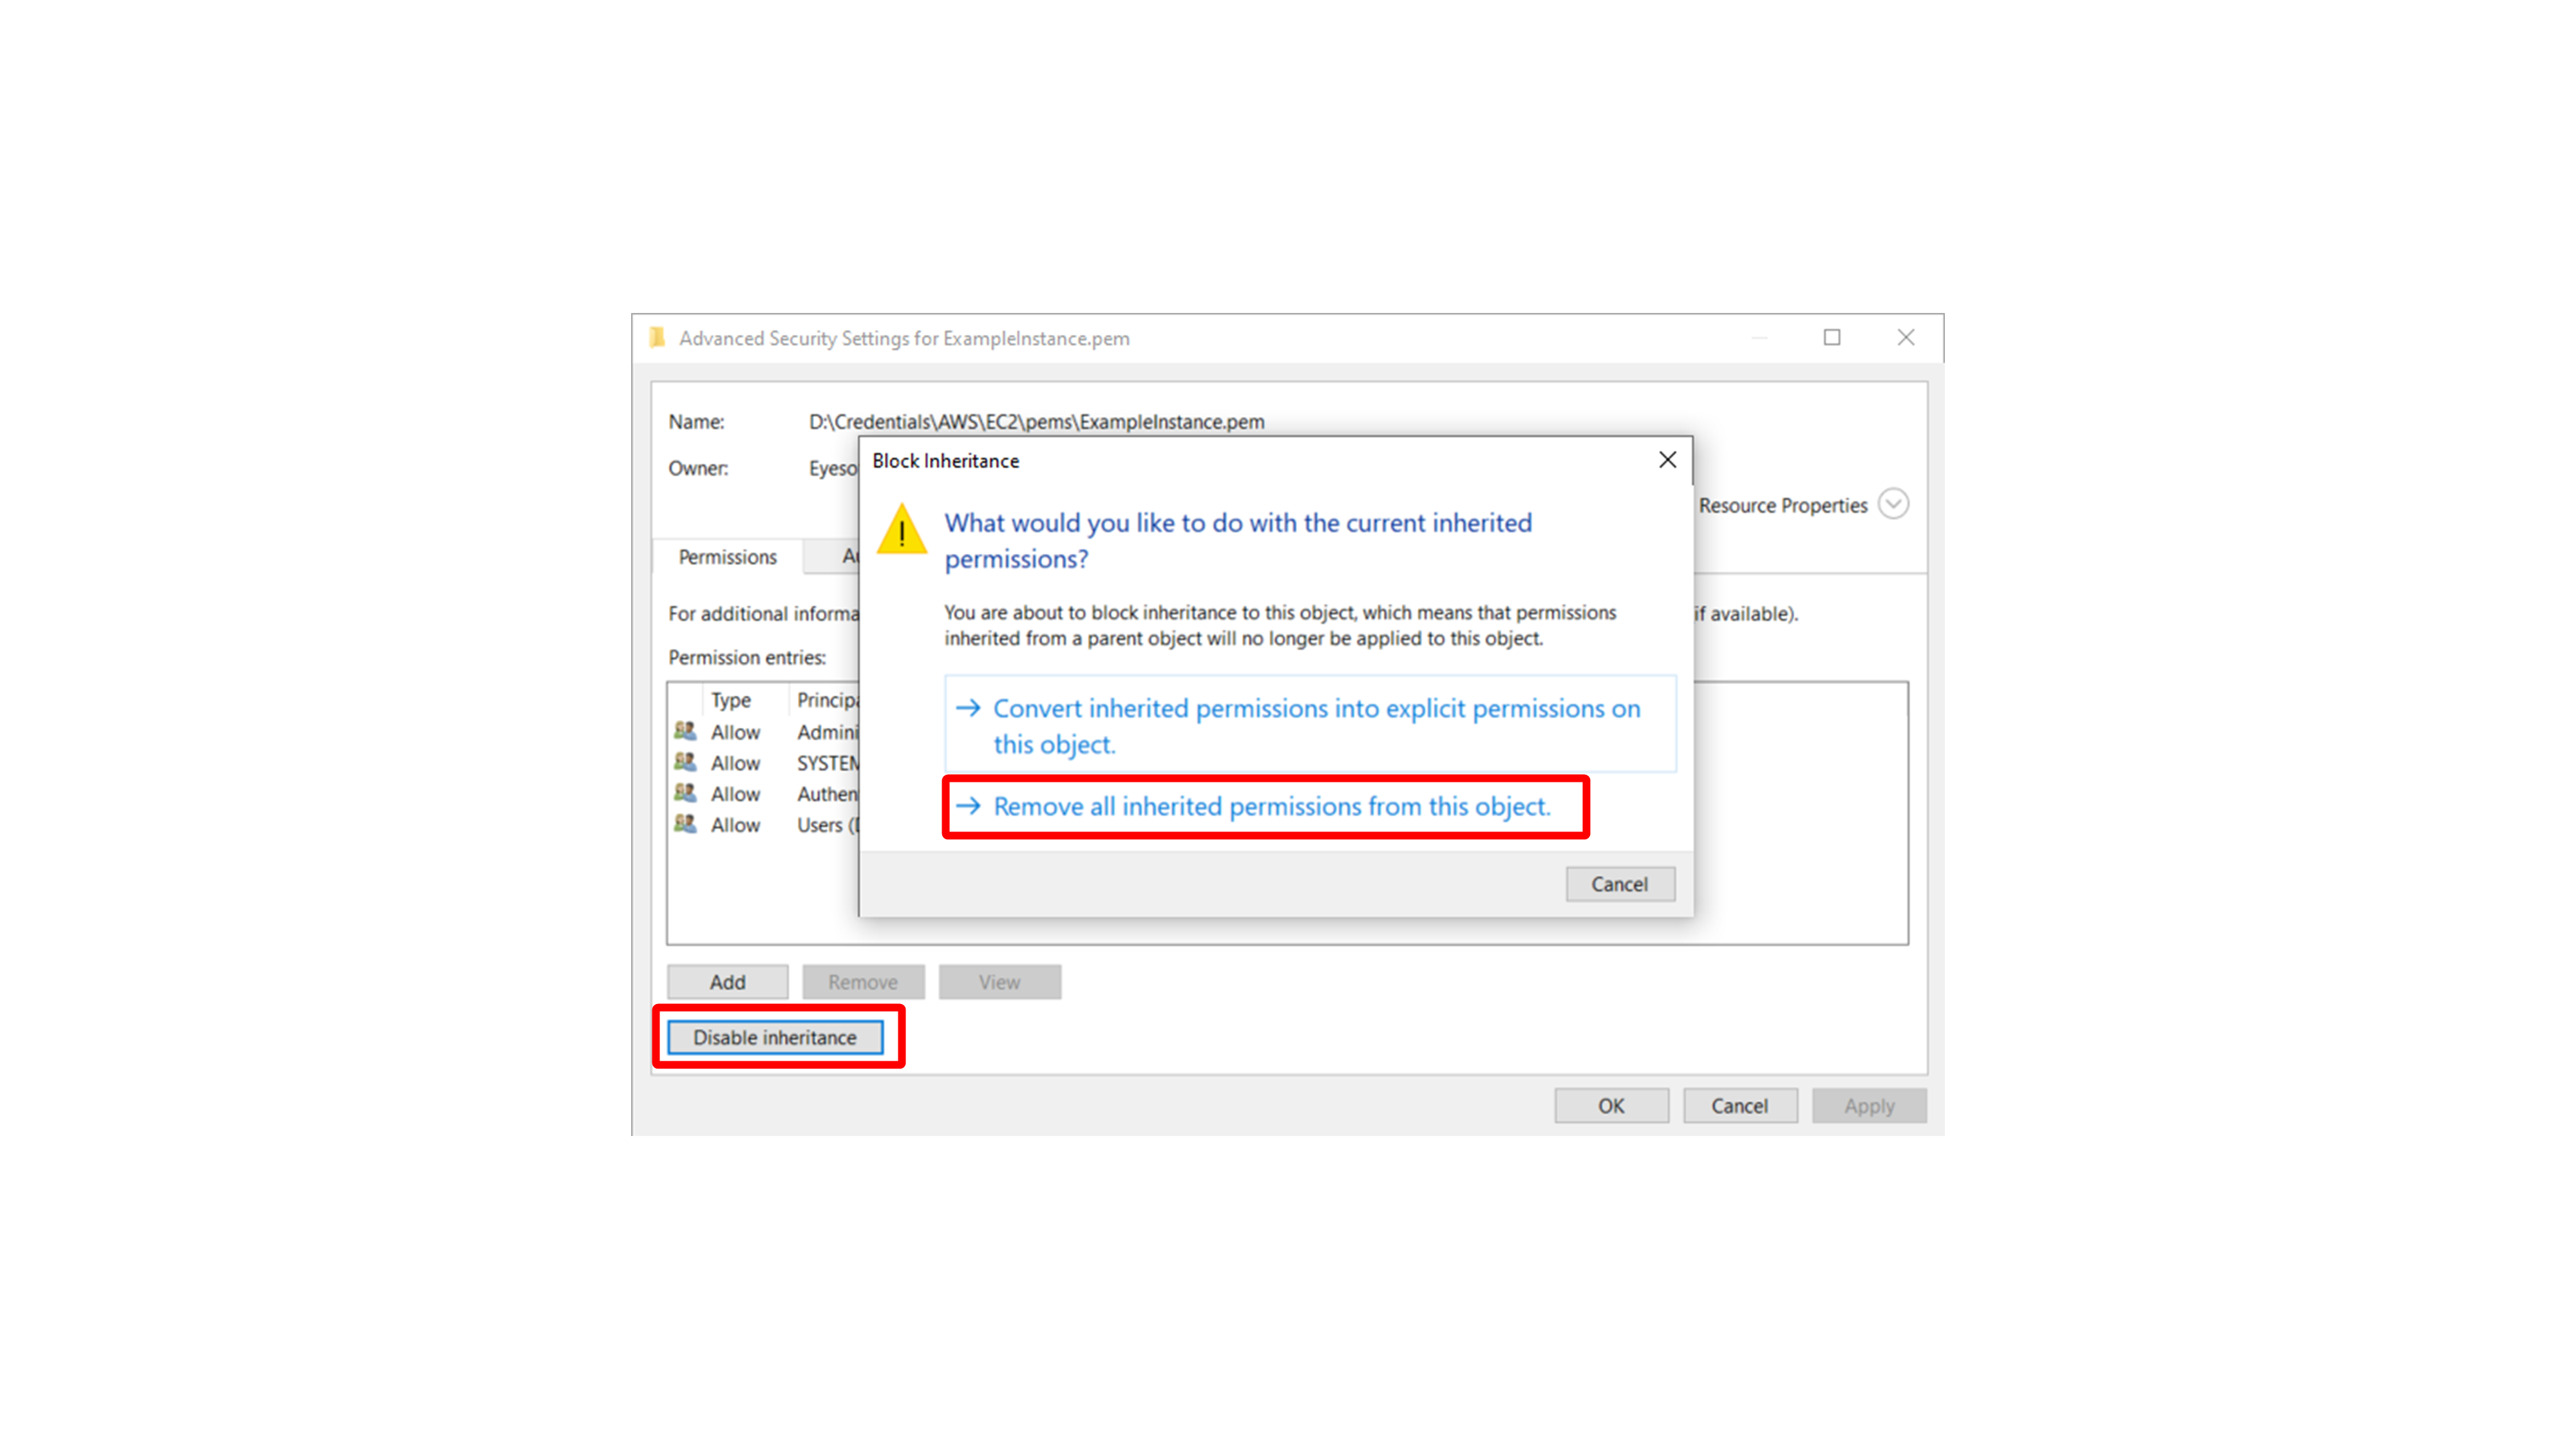
Disable inheritance and choose the option to remove inherited permissions from the file.
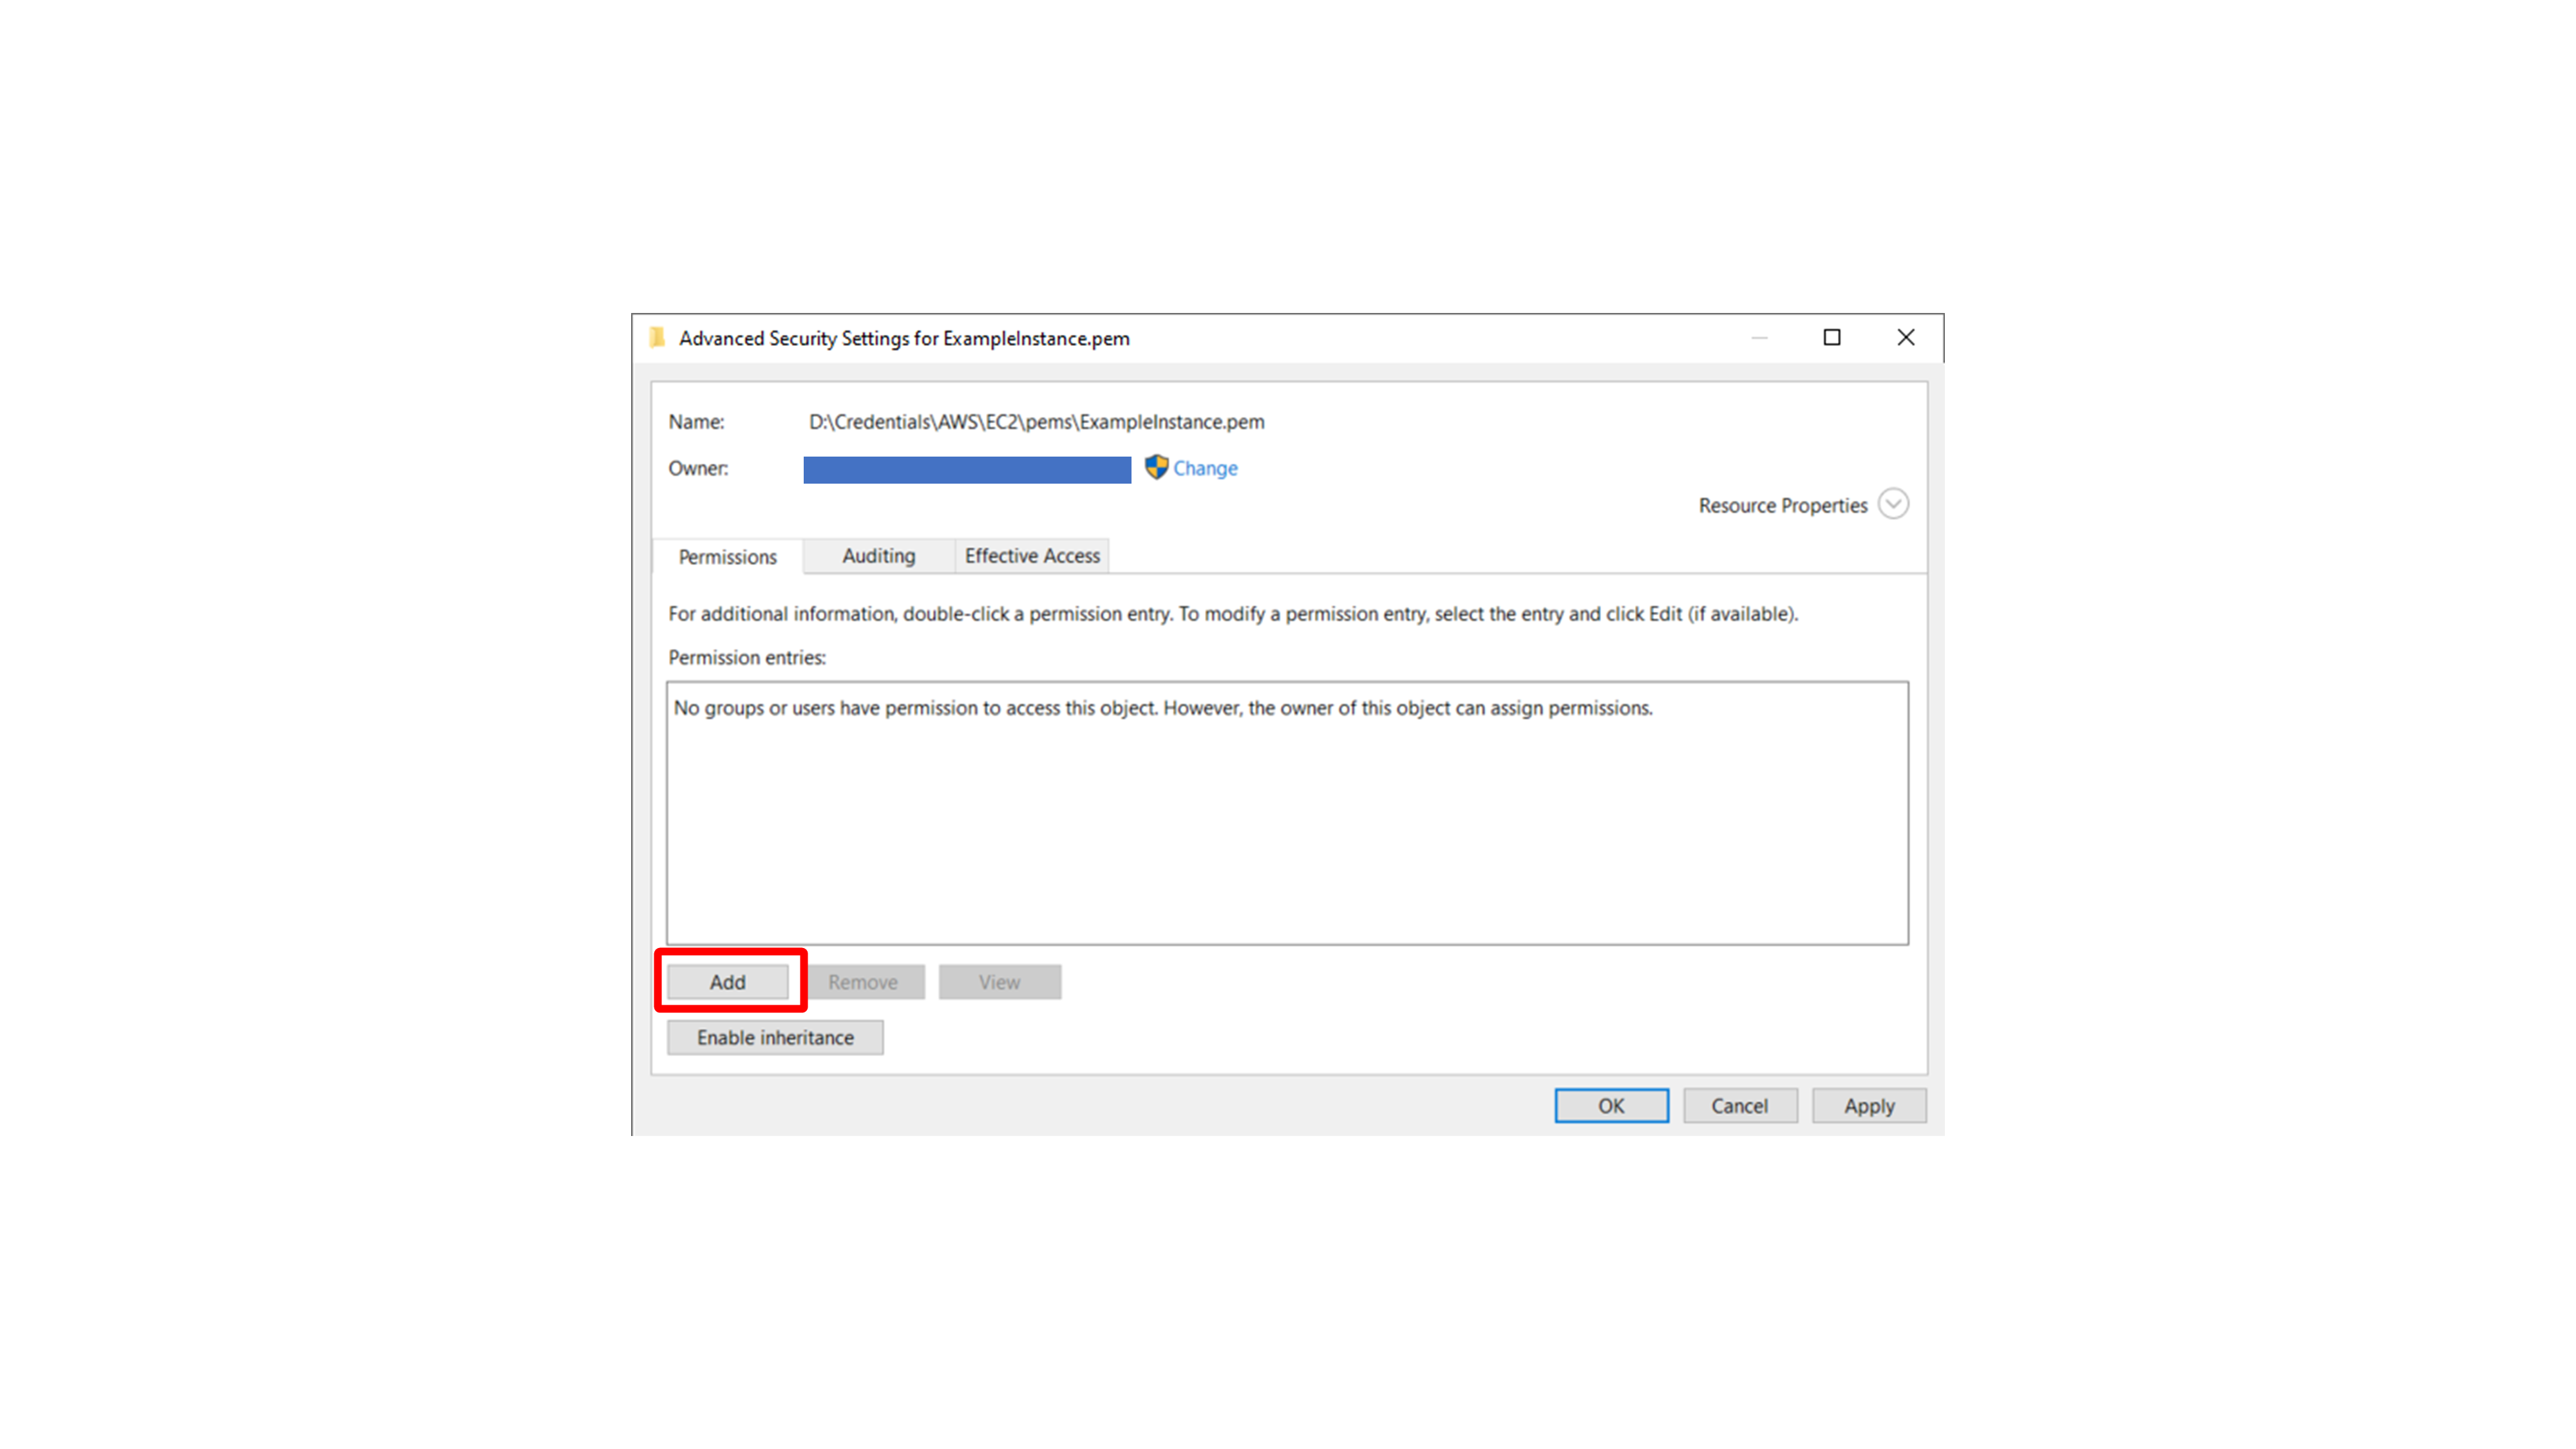
Add a new permission entry for your Windows user.
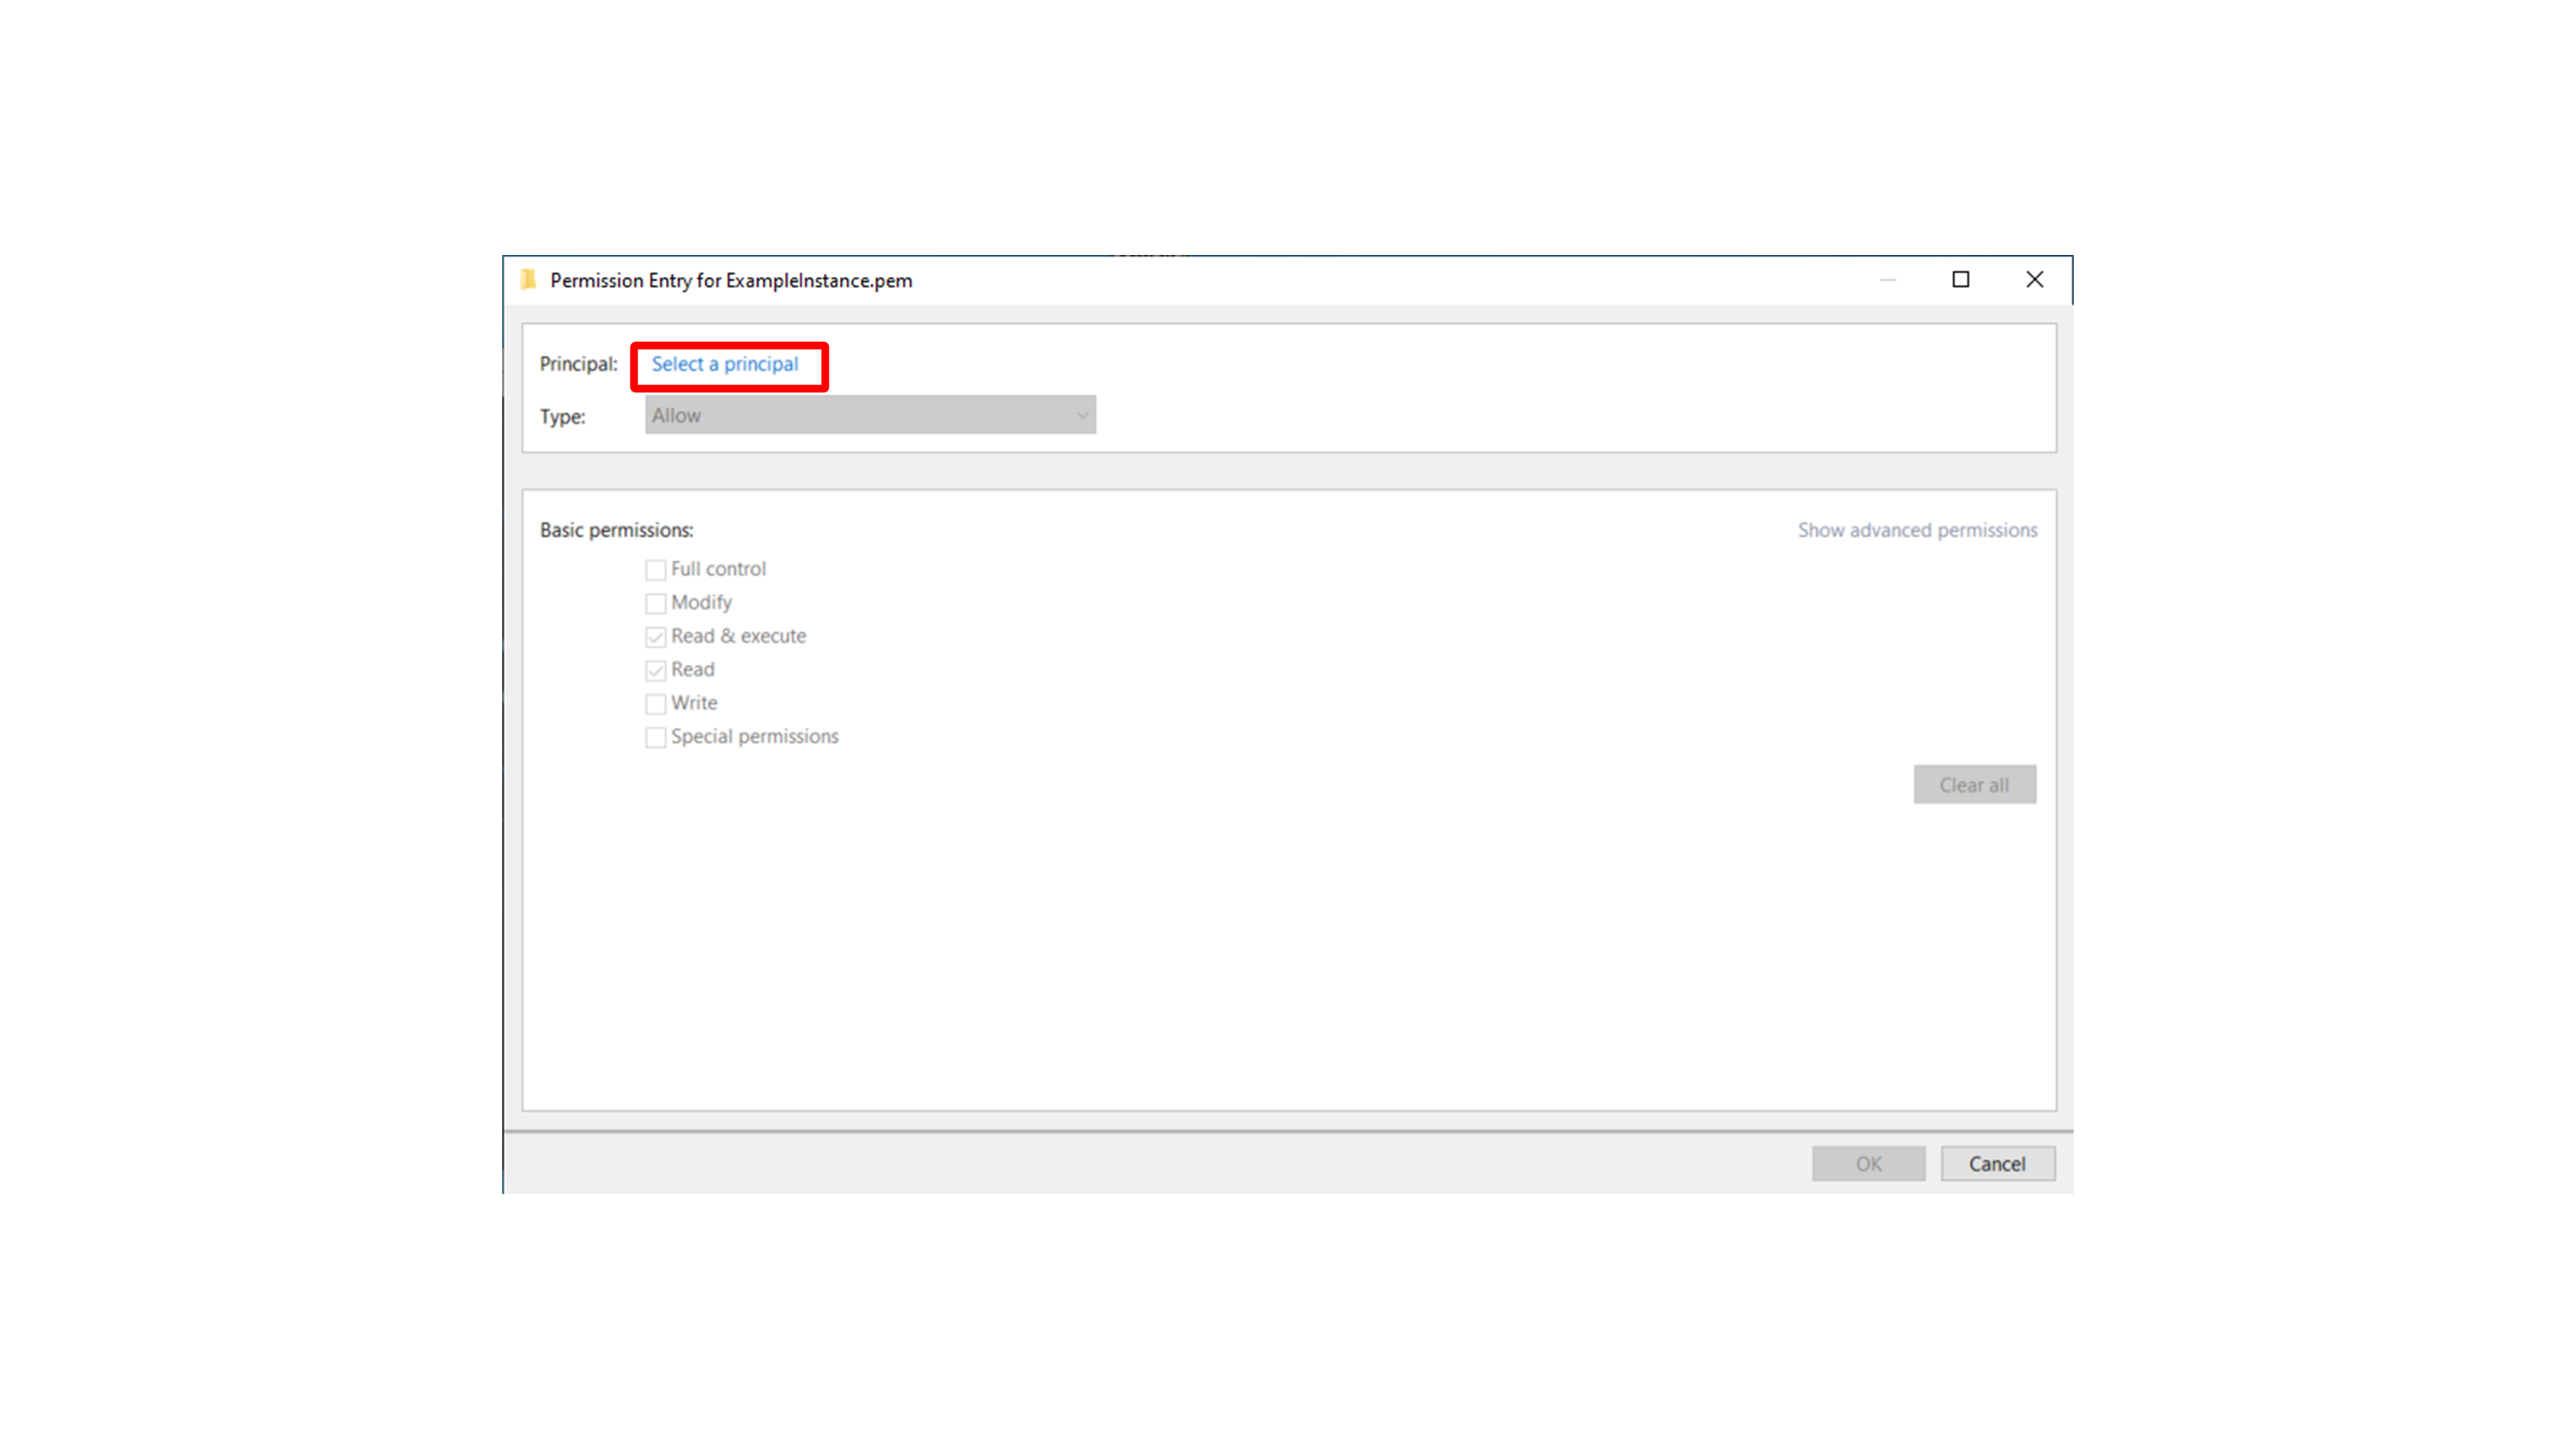
Click Select a principal.
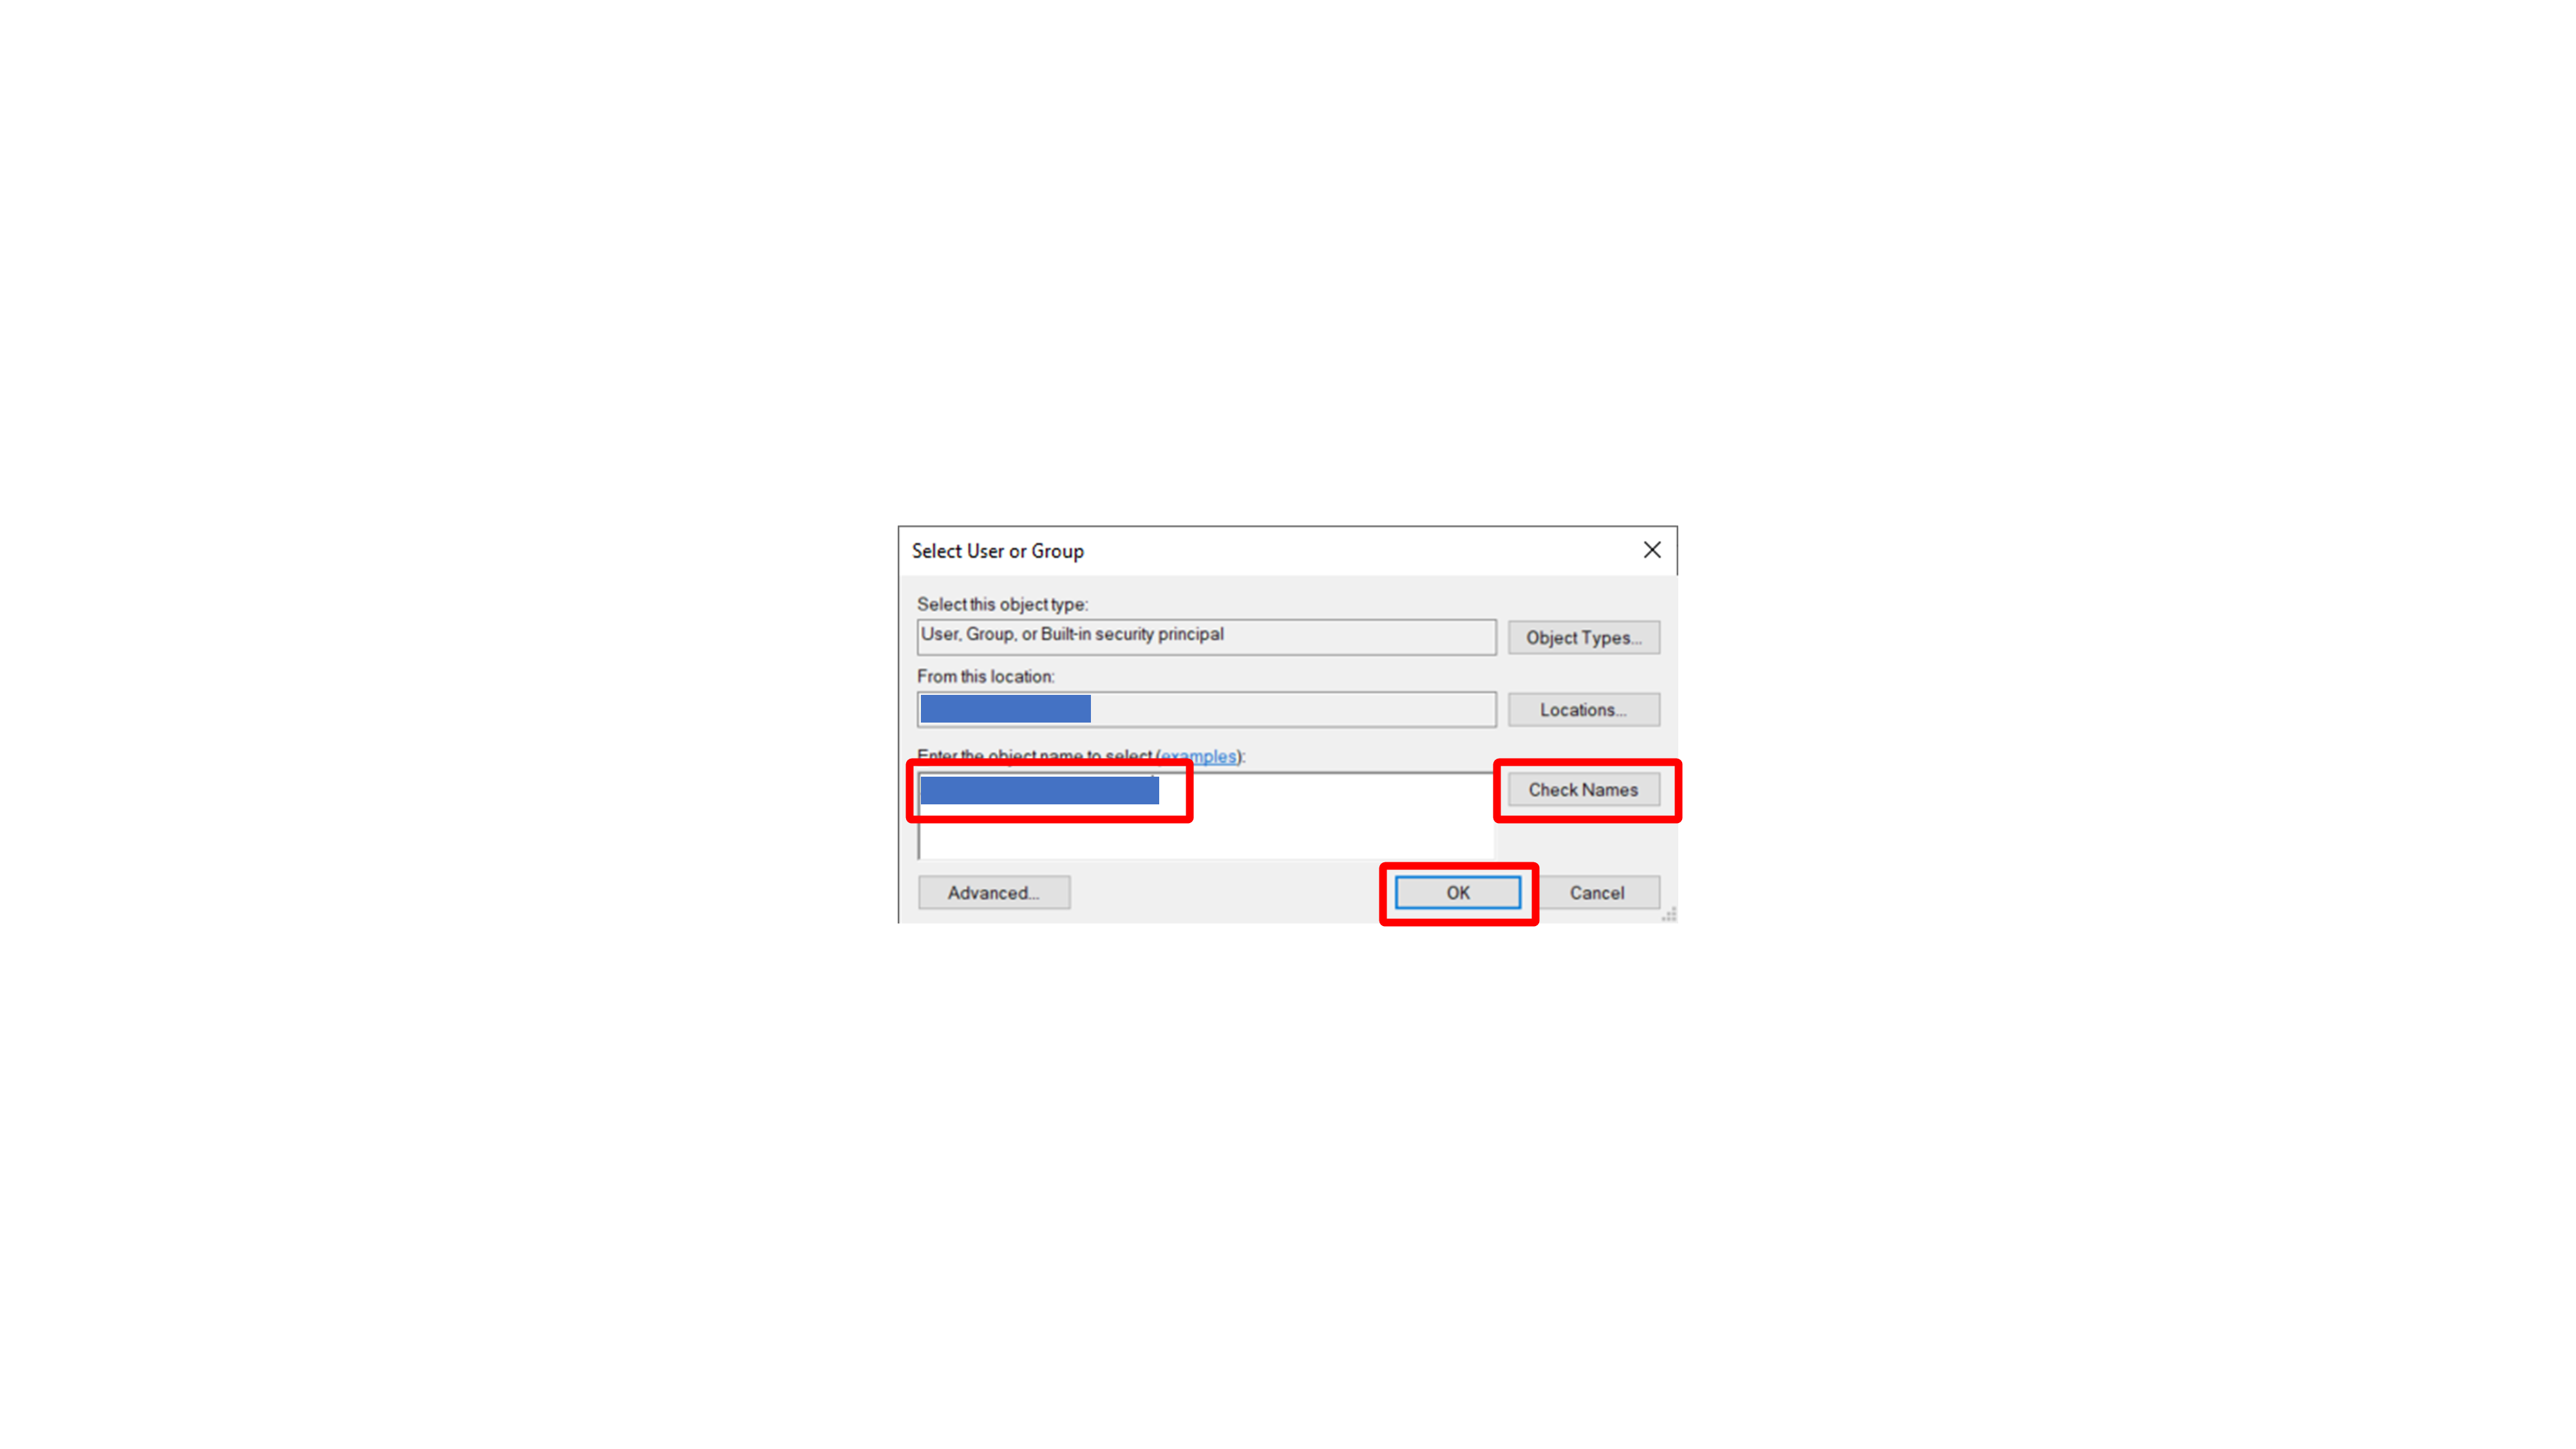
Enter your Windows username and use Check Names. When Windows resolves the name, confirm with OK.
Allow only the required read permissions, such as Read & execute and Read.
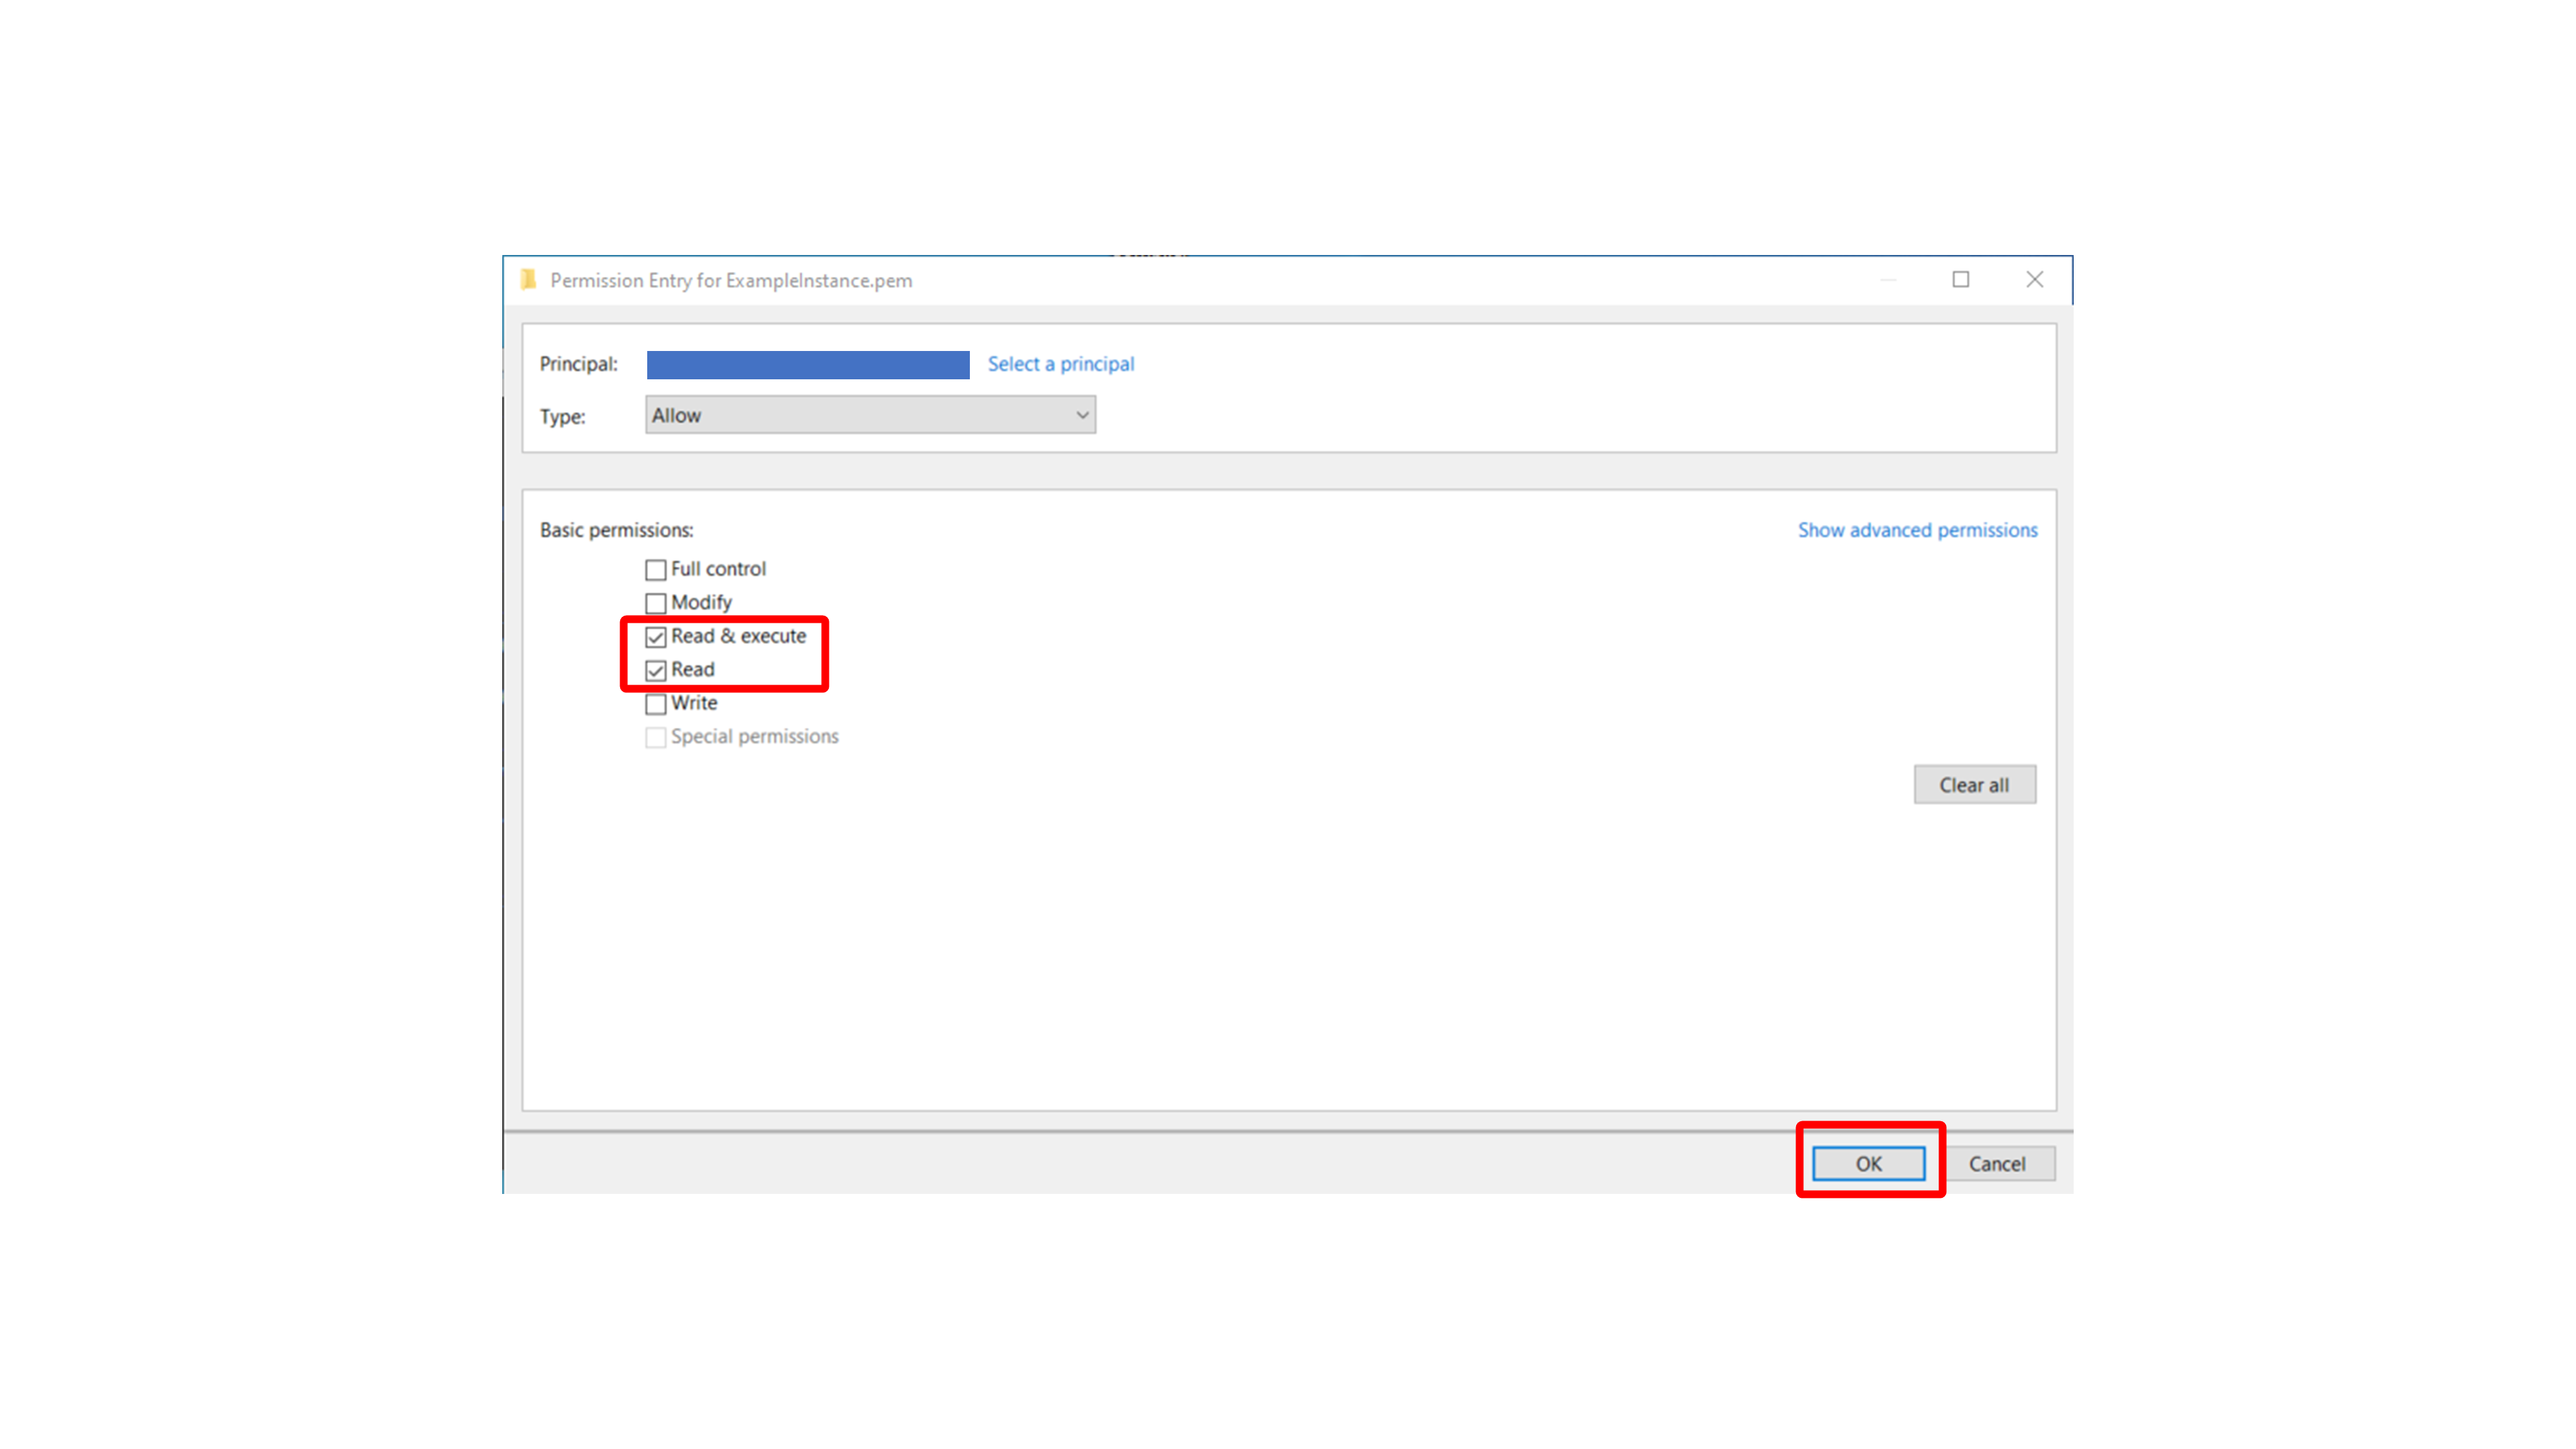
Apply the permission changes and close the dialogs.
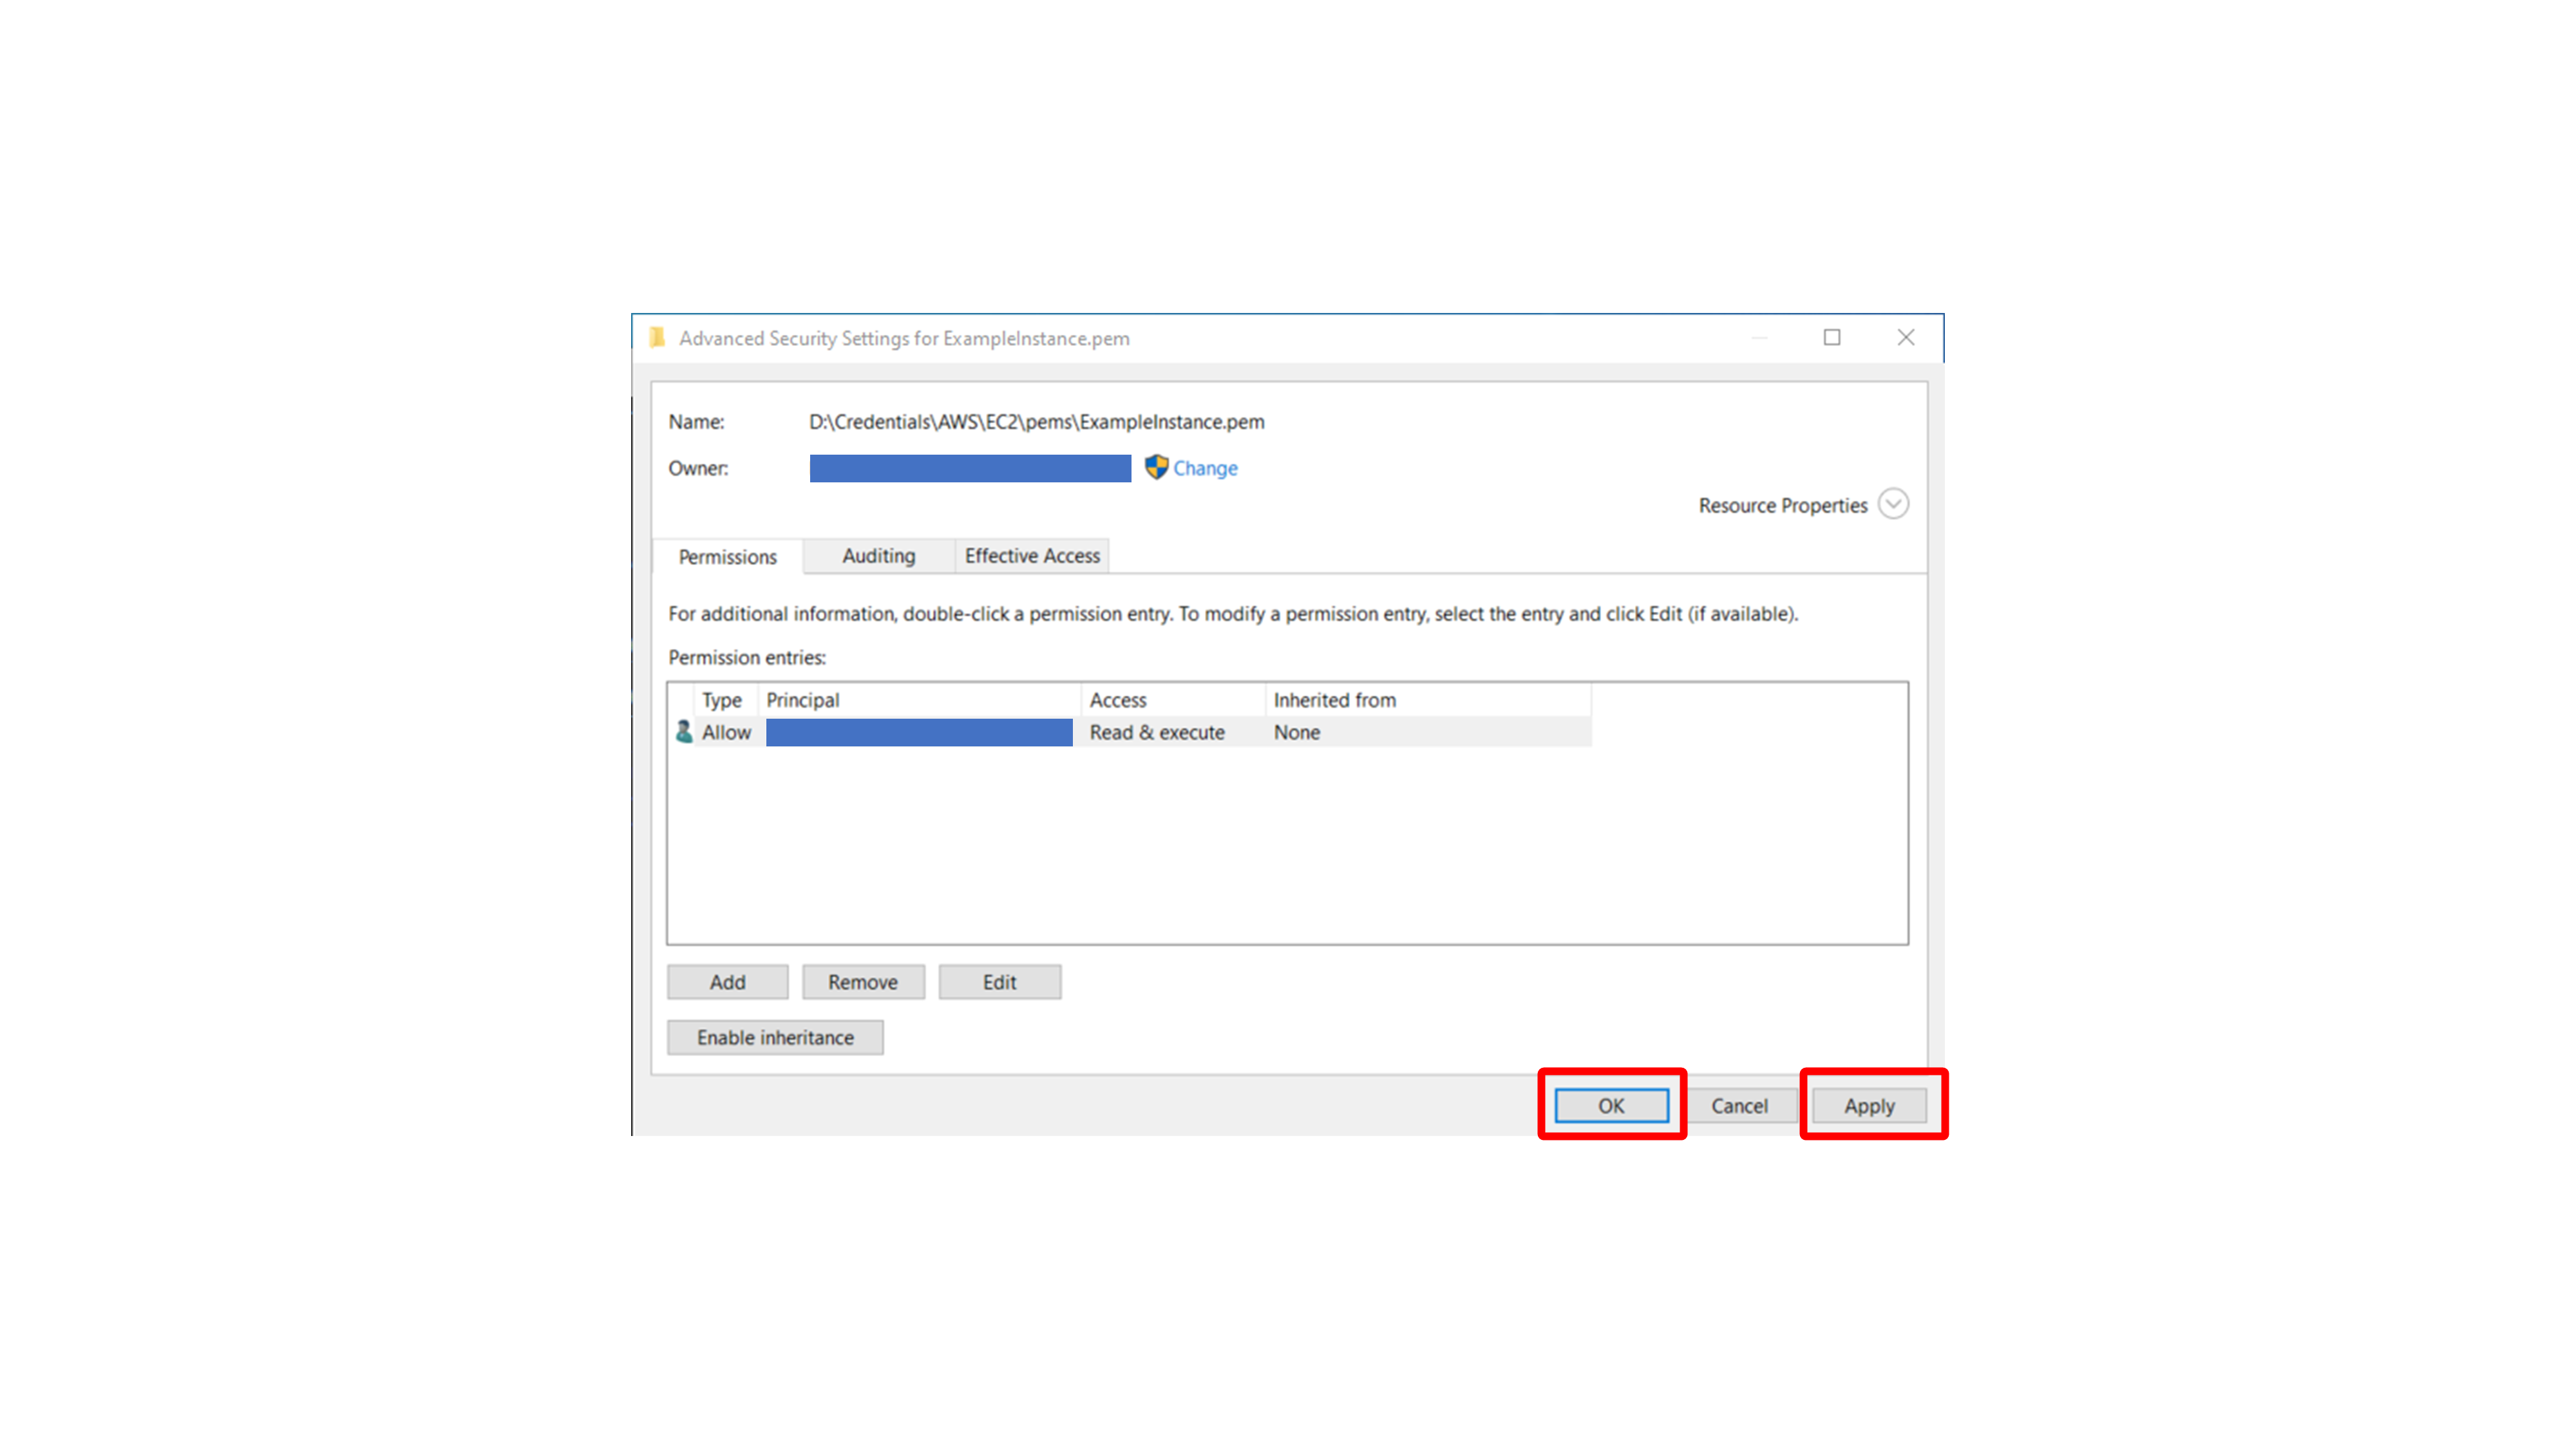
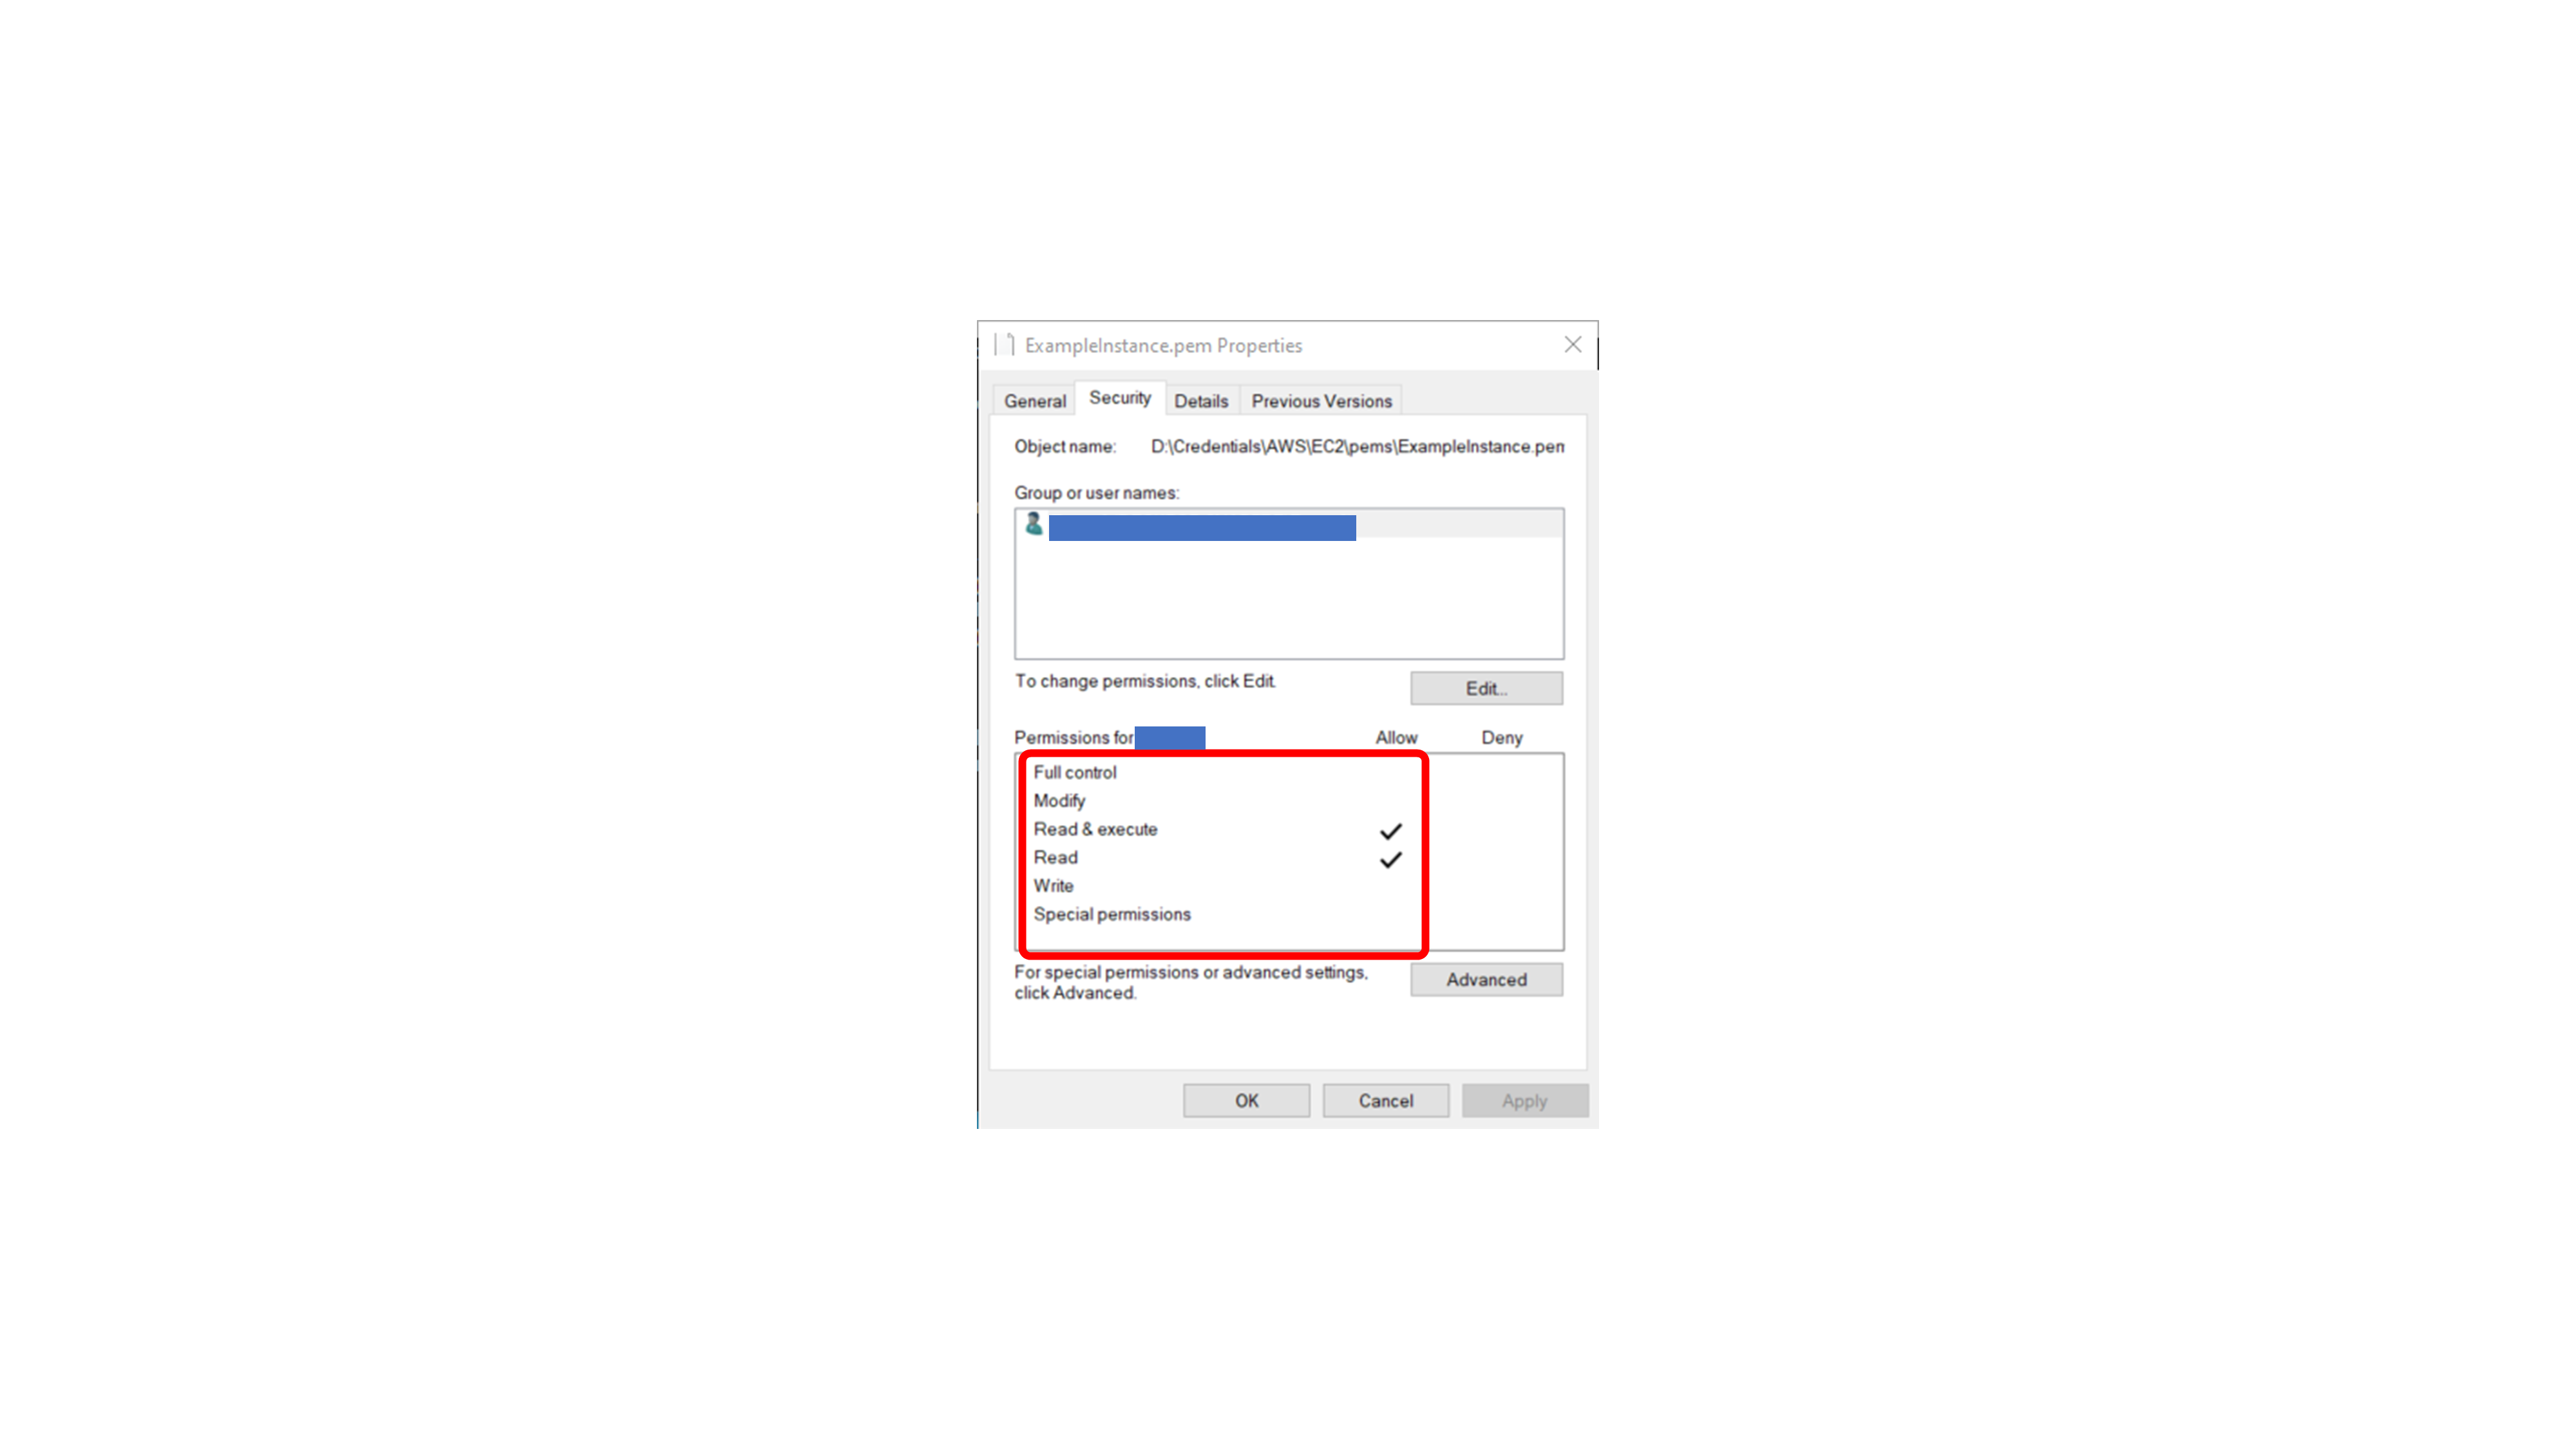
At the end, the PEM file should show only the restricted permission entries you need.
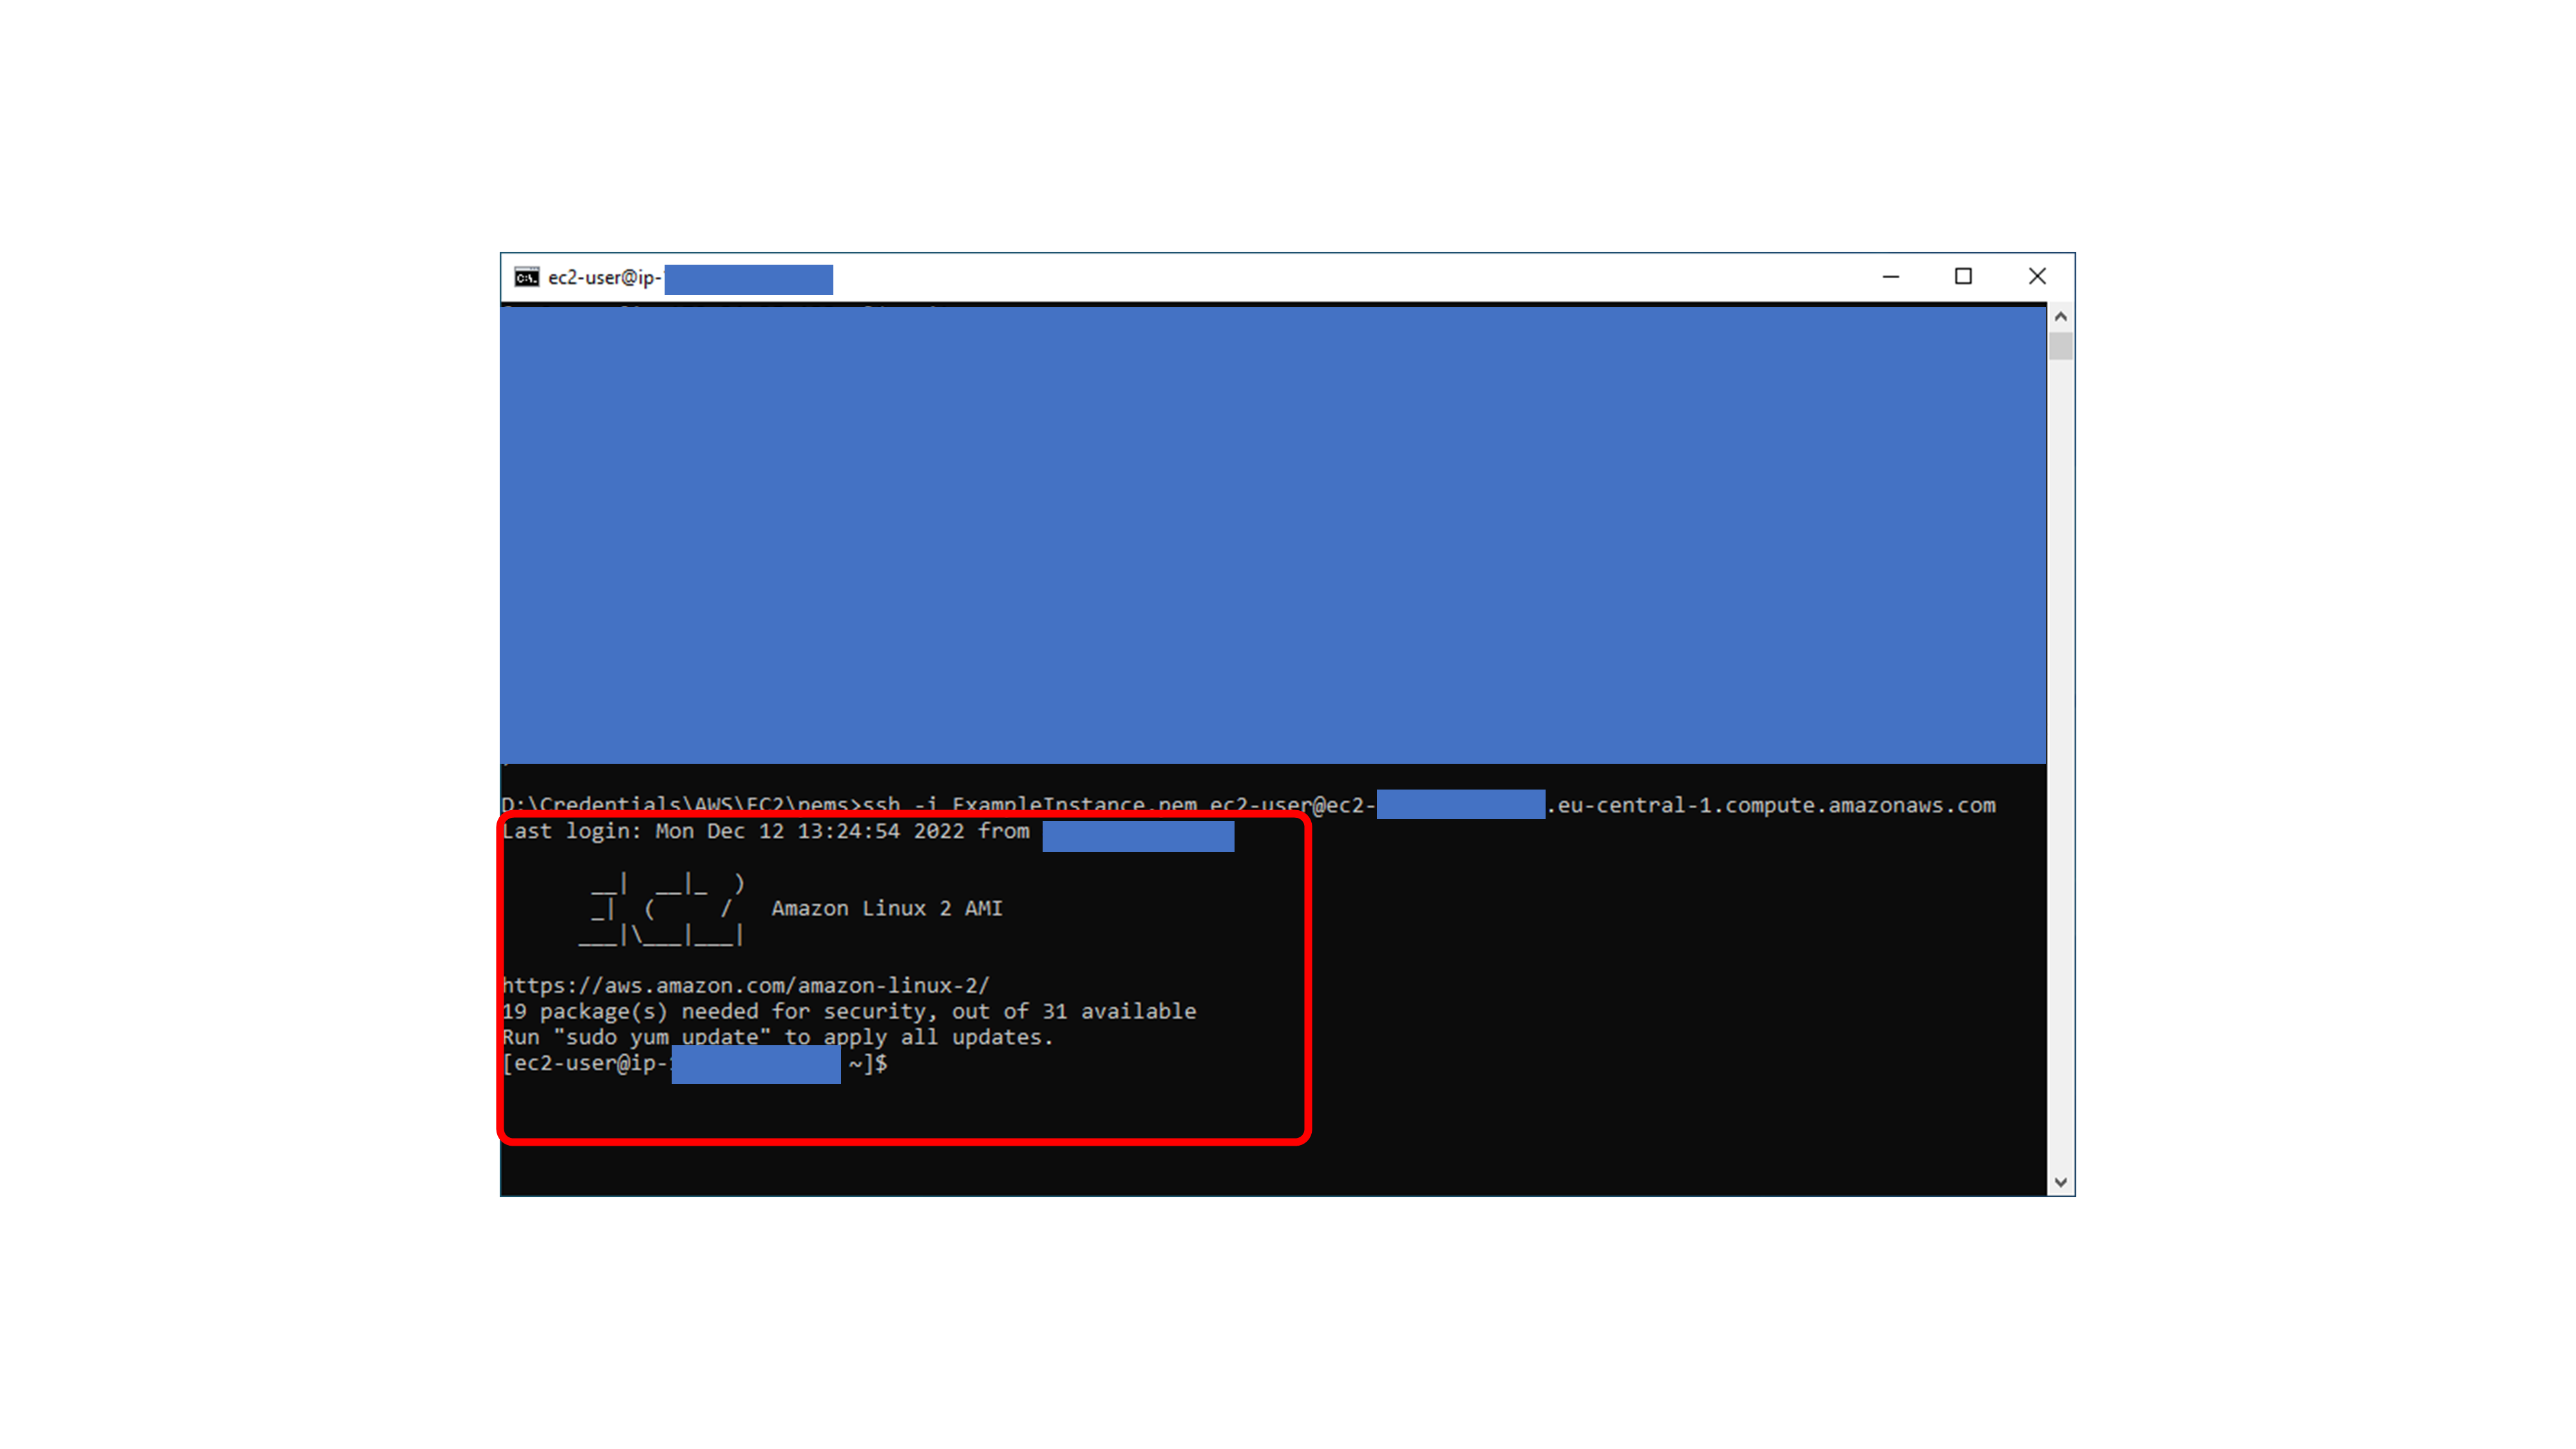
Run the SSH command again from the folder that contains the PEM file. This time, the connection should succeed.
Summary
In this flow, we created an Amazon Linux instance on EC2, generated a PEM key pair, connected to the instance from the browser, and connected again from Windows over SSH. We also fixed the common PEM permission warning by removing inherited permissions and allowing only the current Windows user to read the key file.
When you are finished testing, stop the instance if you will use it later or terminate it if you no longer need it. Leaving EC2 instances running can create unexpected cost.
Comments